Lima Beans with Ham
")
Lima Beans with Ham is an Allred family tradition that we continued this year. Every conference weekend (The Church of Jesus Christ of Latter-Day Saints) my mother-in-law, Anona, would make Lima Bean with Ham. This is one of Ken’s favorites.
1 – 16 oz. bag of small lima beans
Place dry beans in a crock pot (turned off) and cover with water. Soak beans overnight, or at least 8 – 12 hours. Make sure there is enough water to allow for the beans to triple in size.
")
2 ham hocks
2 tsp. onion salt
2 tsp. seasoned salt
1 tsp. pepper
1 T. garlic granules
1 tsp. non-salt seasoning
In the morning, add the ham hocks and seasonings to the beans.
")
Cook on high for about 5-6 hours.
Recipe Source: Ken Allred
FULL RECIPE WITHOUT PICTURES —
1 – 16 oz. bag of small lima beans
2 ham hocks
2 tsp. onion salt
2 tsp. seasoned salt
1 tsp. pepper
1 T. garlic granules
1 tsp. non-salt seasoning
Place dry beans in a crock pot (turned off) and cover with water. Soak beans overnight, or at least 8 – 12 hours. Make sure there is enough water to allow for the beans to triple in size.
In the morning, add the ham hocks and seasonings to the beans.
Cook on high for about 5-6 hours.
Salsa
")
This is the easiest salsa you will ever make! I was so excited when my friend Anita introduced me to this amazing bag of goodness! We love homemade salsa but chopping all those peppers and onions is too much work. After trying this salsa, you will never make the other kind again. Mrs. Wages salsa mix can be found with the canning supplies, or in the produce department during canning season.
Tomatoes
1/2 cup vinegar, apple cider or white
1 bag of Mrs. Wages Salsa mix
Prepare your tomatoes as you would for canning. (Instructions in this blog are listed under Vegetables — Tomatoes – Canning).
")
If you like your salsa chunky, cut you tomatoes even bigger than shown above. I found it best to squeeze as much of the juice out of them before starting to cook them. This cuts down your cooking time. The bag says to use 6 pounds of tomatoes. I weighed them after I squeezed the juice out. I have used between 7 pounds and 11 pounds of tomatoes and it doesn’t really make a difference. The 11 pound batch is a bit more mild than the 7 pound batch. I just used what I had at the time.
Put tomatoes in a big pot.
")
Add 1/2 cup of vinegar, either apple cider or white. I tried both and it really did not make any difference in the flavor.
")
Add Mrs. Wages seasoning bag.
")
Simmer down until you come to the consistency that you prefer. (On the back of the bag it says to cook it for 10 minutes. That was way too runny for our liking. I ended up cooking it for about 1 1/2 hours.)

Place in clean pint bottles and process 40 mins. (Instructions in this blog are listed under Vegetables – – Tomatoes – Canning).
")
Let bottles sit until they seal. Mark with date.
ENJOY !!!!
Creamy Chicken Enchiladas
")

2 cans 98% fat-free chicken soup
1 cup fat-free sour cream
1 tsp. garlic granules
dash of pepper
1 tsp. chili powder
Mix above ingredients and set aside.
")
1/2 cup onion, chopped
2 – 4 oz. cans chopped green chilies
2 T. cilantro, finely chopped
1/2 – 1 cup finely chopped fresh mushrooms (optional)

In a large non-stick frying pan, saute onion, green chilies and mushrooms over medium heat until onion is translucent.
")
4 cups diced, cooked chicken, torn in bite-size pieces
Add chicken and about 1/2 – 3/4 cup of soup mixture to pan. (Just make sure that the mixture is to the consistency that you prefer)
")
")
")
12 tortillas (do not use the thick tortillas – they get too mushy!)
cooking spray
Divide chicken mixture between the 12 tortillas, spreading along the center. Roll up and place seam side down in a sprayed 9 x 13 pan.
")

Flour tortillas
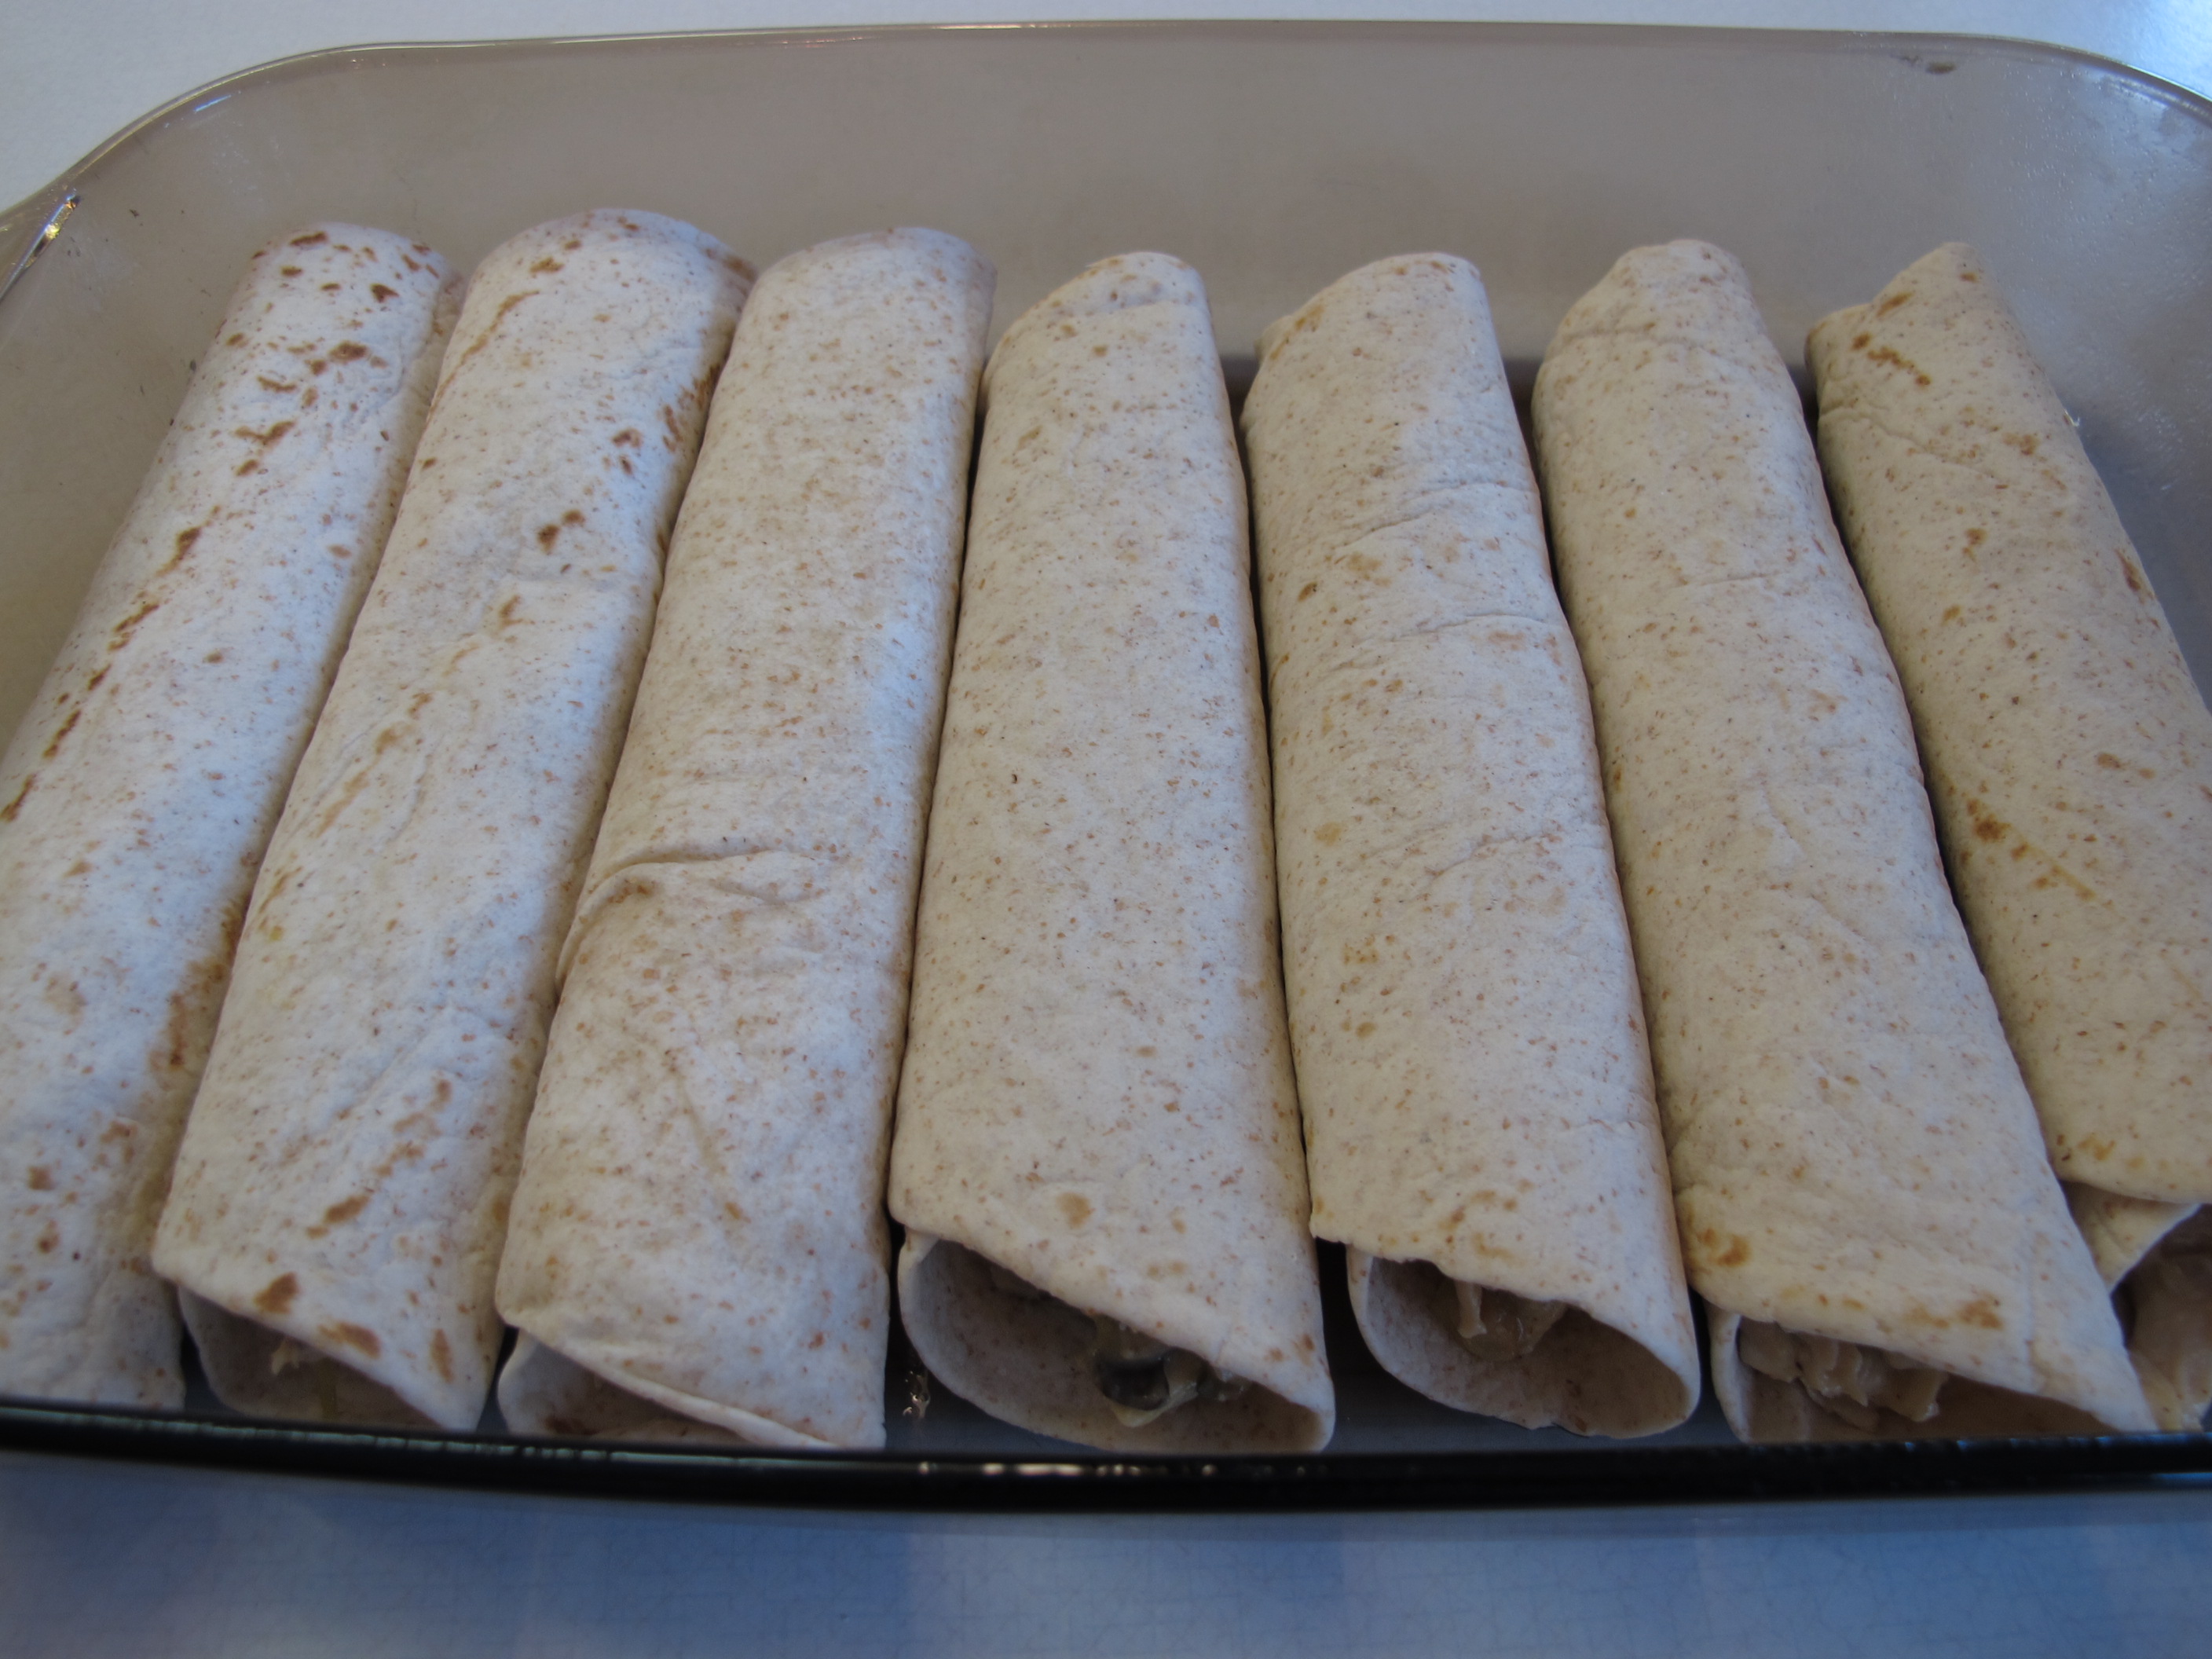
Wheat tortillas
Spread remaining soup mixture over enchiladas.

Cover with foil and bake at 375 degrees for 20 minutes.
2 cups shredded cheese
Remove foil, sprinkle with cheese. Return to oven and bake an additional 10 minutes or until cheese is melted and enchiladas are hot and bubbly.
")
Top with salsa. ENJOY !!!
")
Enchiladas can be frozen before baking.

Recipe without pictures:
CREAMY CHICKEN ENCHILADAS
2 cans 98% fat-free chicken soup
1 cup fat-free sour cream
1 tsp. garlic granules
dash of pepper – optional
2 T. cilantro, finely chopped
1 tsp. chili powder
Mix above ingredients and set aside.
1/2 cup onion, chopped
2 – 4 oz. cans chopped green chilies
1/2 – 1 cup finely chopped fresh mushrooms (optional)
In a large non-stick frying pan, saute onion, green chilies and mushrooms over medium heat until onion is translucent.
4 cups diced, cooked chicken, torn in bite-size pieces
Add chicken and about 1/2 to 3/4 cup of soup mixture to pan. (Just make sure that the mixture is to the consistency that you prefer)
12 tortillas (do not use the thick tortillas – they get too mushy!)
cooking spray
Divide chicken mixture between the 12 tortillas, spreading along the center. Roll up and place seam side down in a sprayed 9 x 13 pan.
Spread remaining soup mixture over enchiladas.
Cover with foil and bake at 375 degrees for 20 minutes.
2 cups shredded cheese
Remove foil, sprinkle with cheese. Return to oven and bake an additional 10 minutes or until cheese is melted and enchiladas are hot and bubbly.
Top with salsa.
Pistachio Salad
")
1 ( 3.4 oz.) package instant pistachio pudding
2 (8 oz.) fat-free Cool Whip
1 (8 oz.) cans crushed pineapple
2 cups mini marshmallows
Mix pudding with crushed pineapple until pudding is dissolved.
")
Add Cool Whip and then marshmallows.
Chill.
Makes approximately 4 1/2 cups
Recipe without pictures:
PISTACHIO SALAD
1 ( 3.4 oz.) package instant pistachio pudding
2 (8 oz.) fat-free Cool Whip
1 (8 oz.) cans crushed pineapple
2 cups mini marshmallows
Mix pudding with crushed pineapple until pudding is dissolved.
Add Cool Whip and then marshmallows.
Chill.
Makes approximately 4 1/2 cups
Tomatoes – Canning

I love it when our garden does well and I can bottle tomatoes to use during the year for spaghetti sauce, chili, soups and anything that requires tomatoes.
Wash tomatoes to remove any garden dirt.

Bring a large pot of water to boiling. Add whole tomatoes. Blanch for about 30 seconds.

Remove tomatoes to a sink full of cold water.


Blanching will help remove the skins very easily. After skinning, remove the core with a knife.

I like to skin all the tomatoes first, and then cut them up.

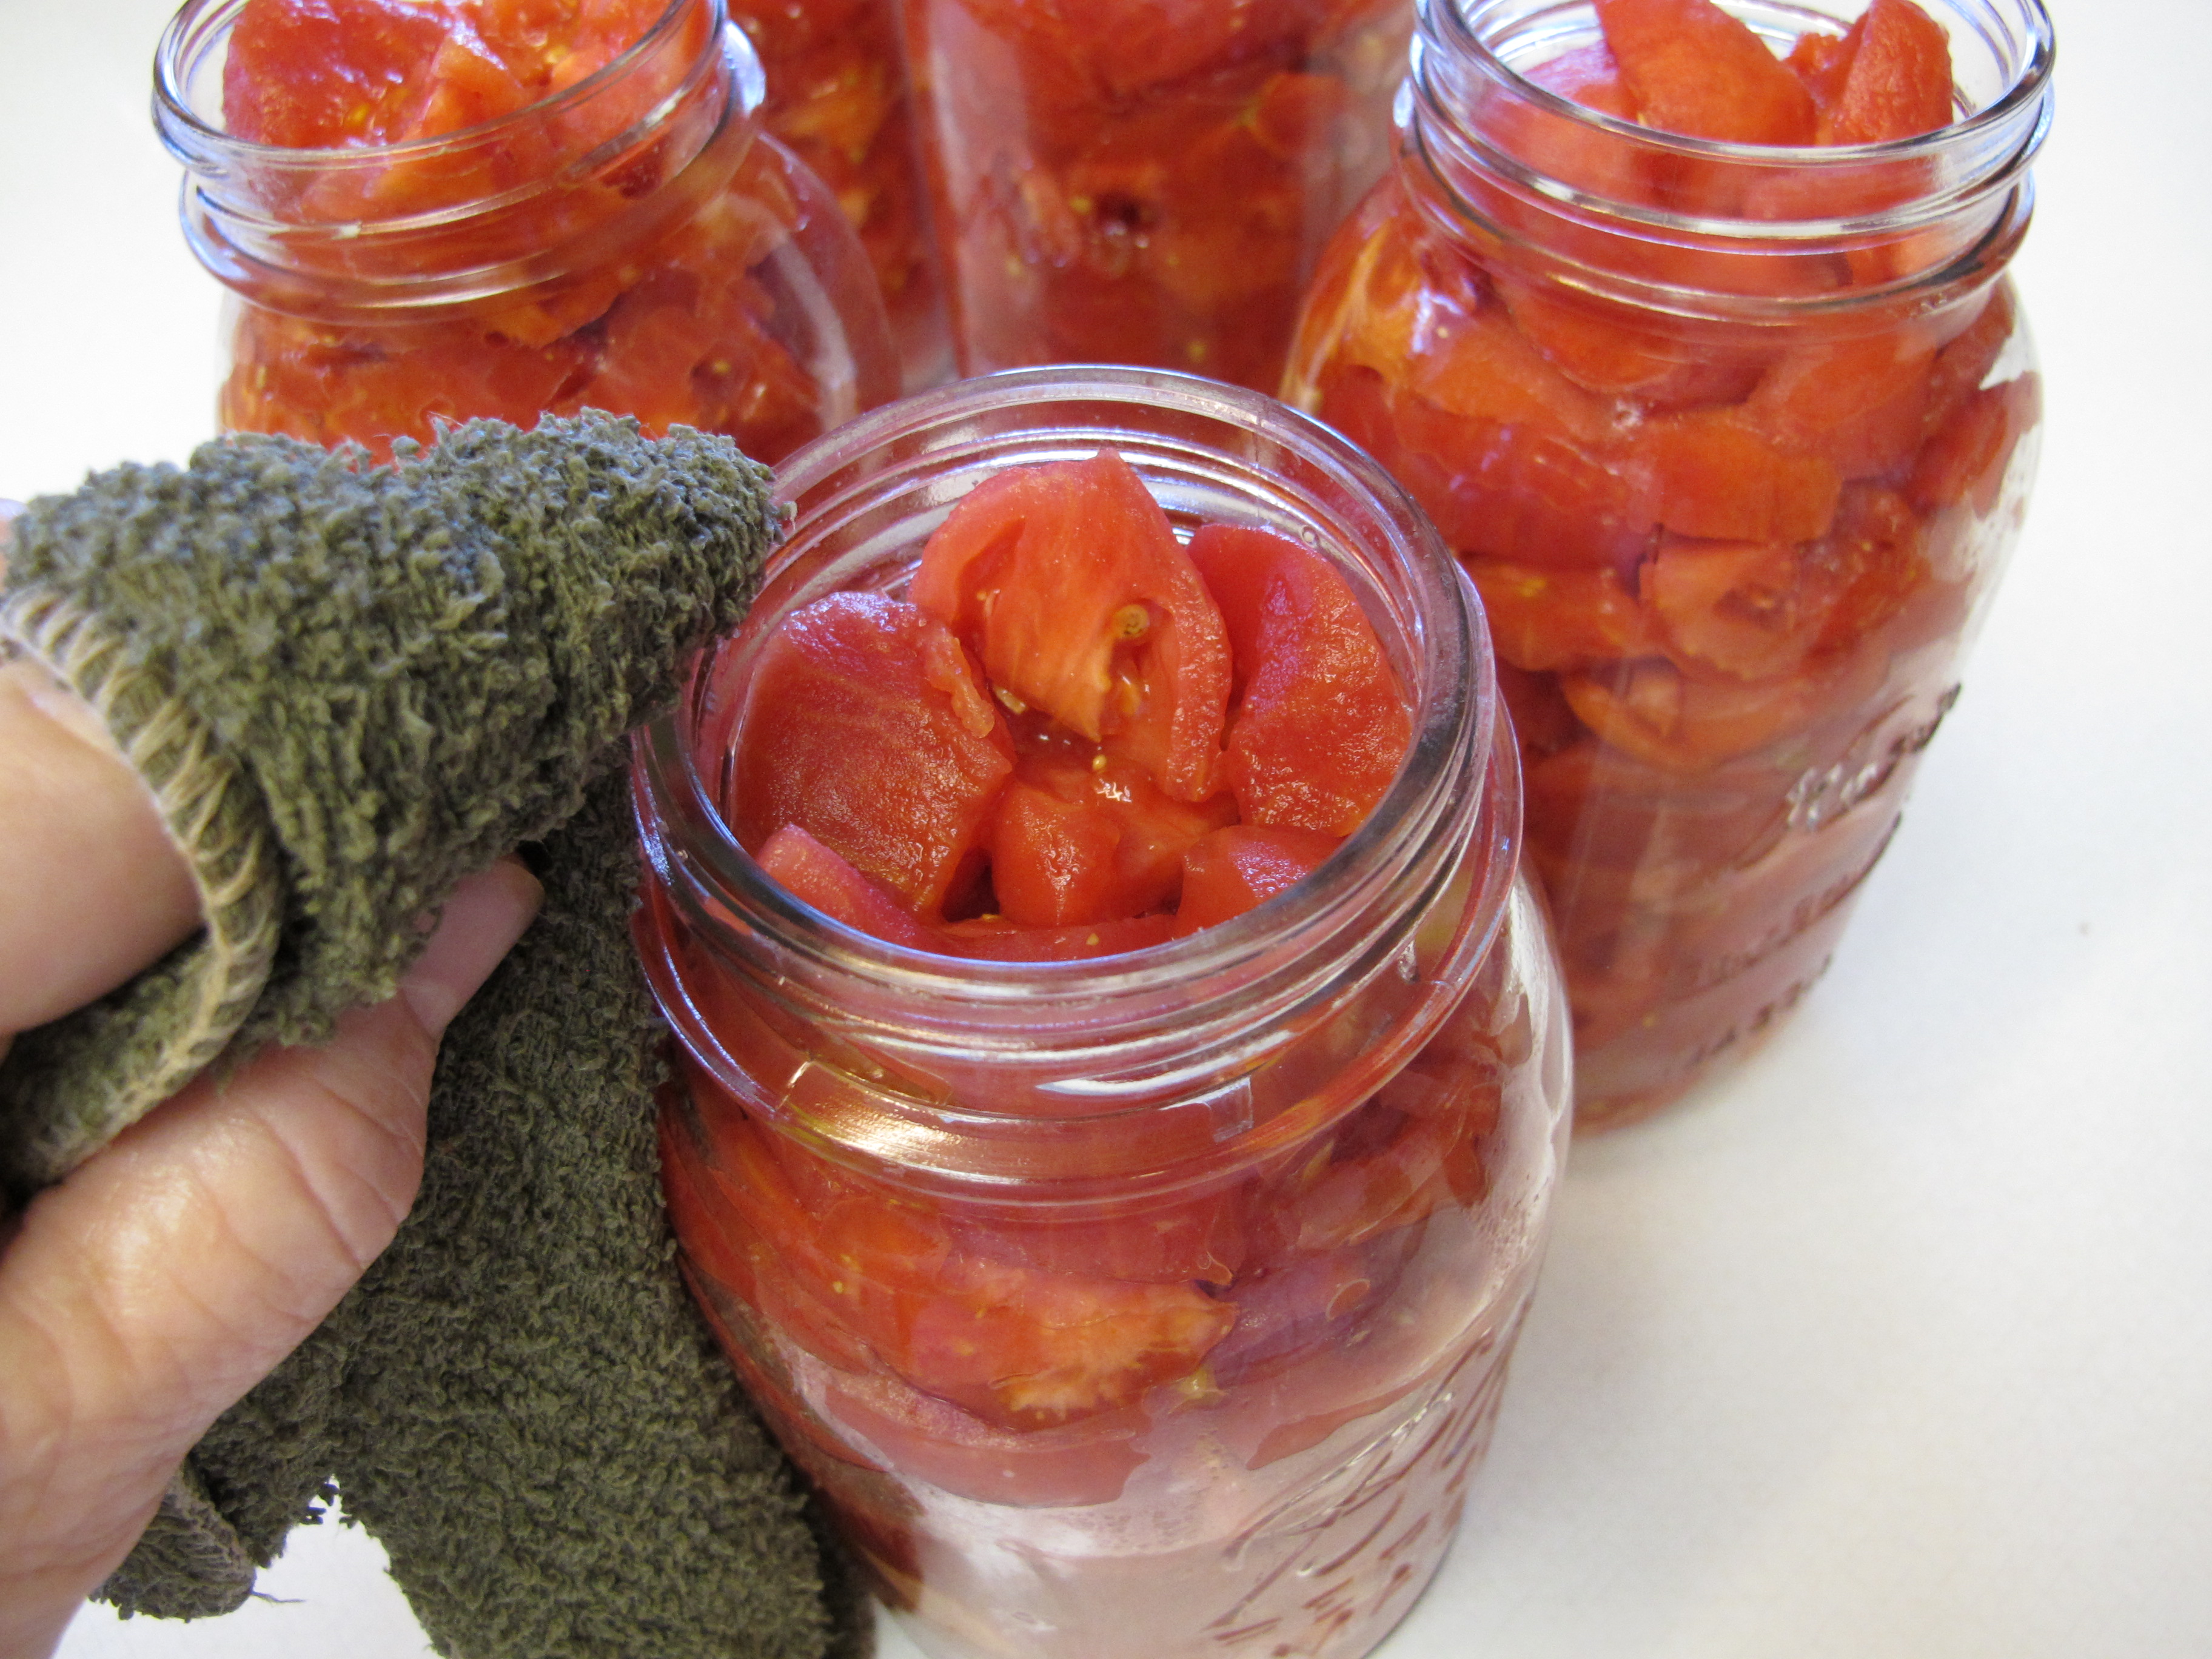
After washing your jars in the dishwasher, add 2 T. of lemon and 1 tsp. of salt to each jar.


Add diced tomatoes.

Boil the lids in a small pan of water.
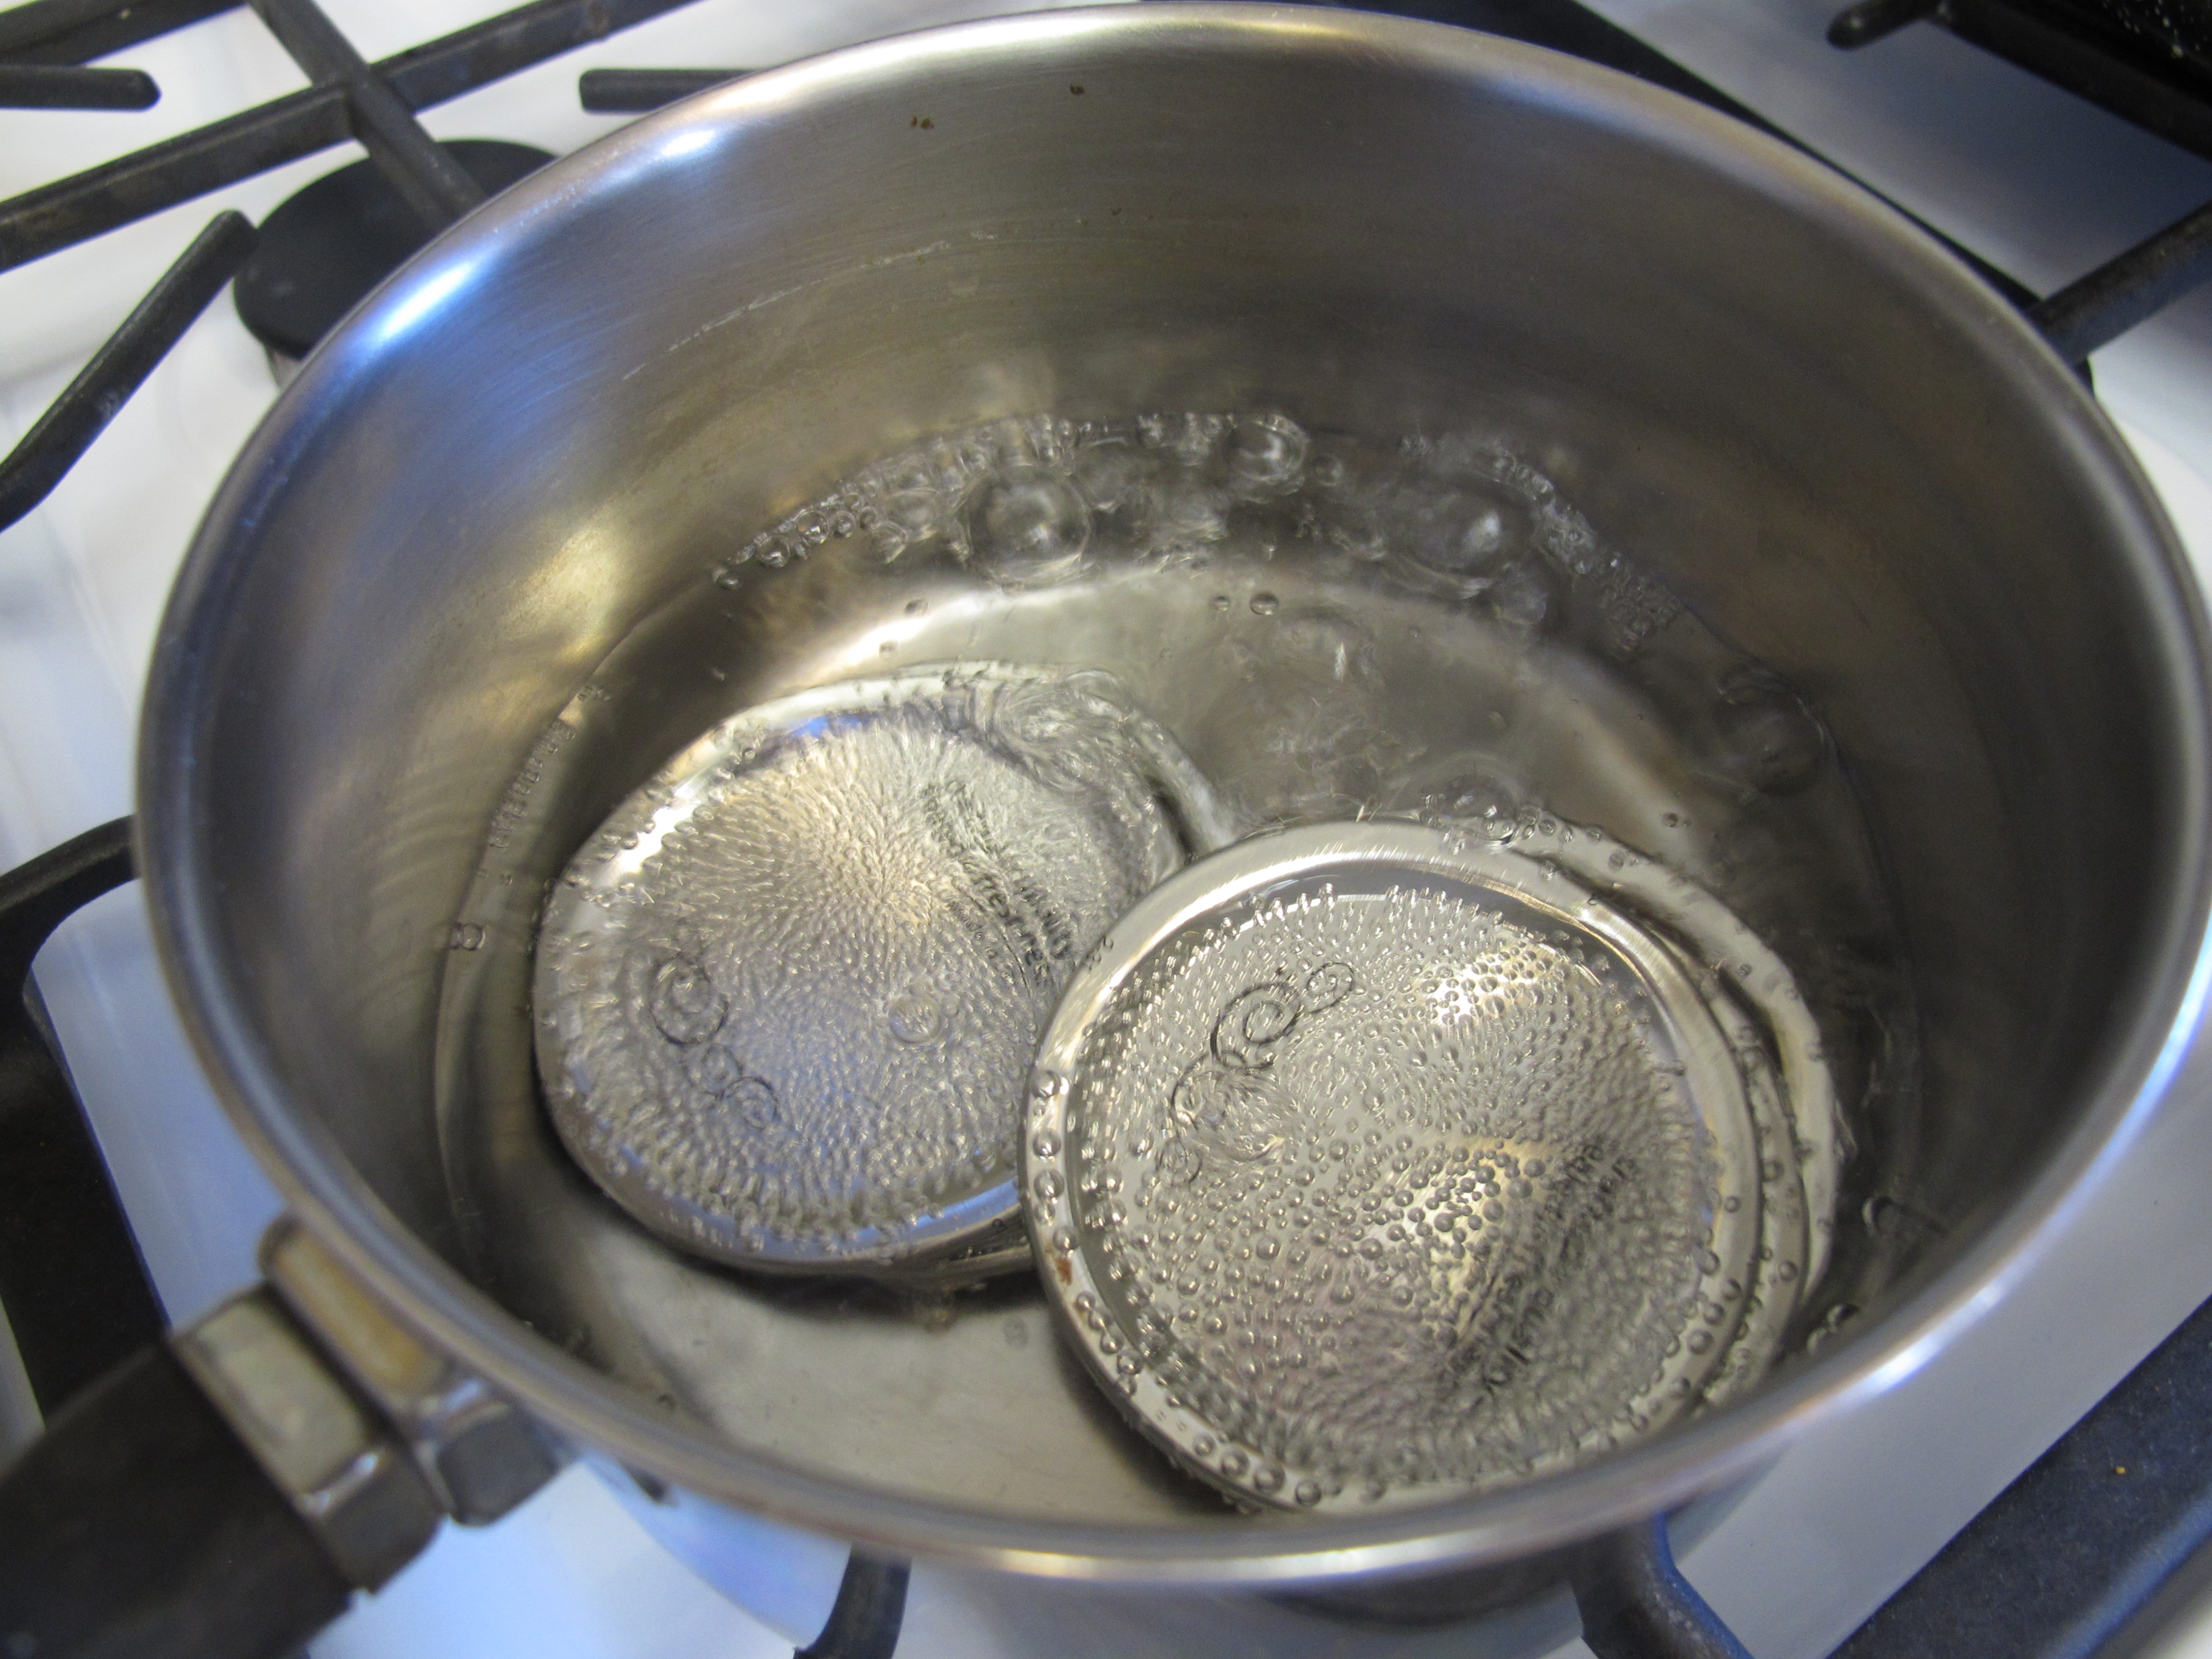
Wipe edge of jar with a hot towel.
Place lid on jar. Secure the ring.

WATER BATH CANNER – Fill half way with water and bring to a boil. Lower jars into the rack, making sure that the water covers the jars. Return to a boil, and keep it a boil for 95 minutes.
STEAM CANNER – Fill lower pan with water. Place jars on rack. Bring water to a boil and start timing when steam comes out the hole at least 8 inches. Since there is only a few inches of water in the pan, replace with boiling water as needed. Steam for 95 minutes.

Place jars on a thick towel to allow them to cool. Once they are cool, remove the bands, wash the jars and mark with the year.

Corn on the Cob – Freezing
")
Nothing tastes better than sweet corn in the middle of the winter – especially if you grew that corn in your own backyard. Freezing corn is very simple and worth the little time that it takes. You will thank yourself in the middle of the winter. This corn will taste much better than anything you’ve ever had from a store.
NOTE: Read all instructions before starting so you can have everything ready.
Start with fresh corn on the cob – as fresh as you can get. Harvest corn in the early morning, especially if the weather is hot. Harvest the corn at its peak maturity. Immature corn is watery when cooked and over-ripe corn is chewy and doughy. If there is a delay between harvesting and freezing, put it in the refrigerator or put it on ice. The sugars break down quickly at room temperature.
")
Use a large pot, filled 3/4 full with hot water, put it on your largest burner. Bring water to a full rolling boil. I add about a teaspoon of sugar to the water to retain the sweetness of the corn.
All fruits and vegetables contain enzymes that, over time, break down and destroy nutrients – changing the color, flavor and texture of food during frozen storage. Corn requires blanching to destroy the enzymes before freezing.
Begin counting the blanching time as soon as you place the corn in the boiling water. The water should return to a boil in a minute or less. If it takes several minutes or more to return to a boil, you are using too small a pot or adding too much corn at one time.
I put about 6 corn cobs in the pot at one time, cover the pot and cook corn for 4 minutes.
Get a large bowl filled with ice and cold water. After the corn is blanched, immediately put it in the cold ice water to prevent it from overcooking. Keep adding more ice each time, to keep the water very cold. Cool corn for the same amount of time as blanching (4 minutes). Since corn on the cob floats, stir it around so the top can cool off too.
")
If your bag of ice has a large chunk in it, use this. It lasts a lot longer than the smaller pieces.
")
Using a bundt pan when cutting the corn off the cob is a genius idea. Put the pointed end of the ear into the hole in the middle of the bundt pan. As you cut the corn off of the cob, it will fall into the pan. I found it easiest to just cut it off with a sharp knife. Some people like using an electric knife.
")
I bought one of these gadgets at Bed, Bath and Beyond but found it very hard to use. It took a lot of muscle and it kind of chewed up the corn. Glad I only paid $2.99 for it.
")
I had two bowls on the counter – one to put the cooled corn in and one for the cut corn.
")
Close up, the corn comes off in strips. As you put these in the bags, they will easily separate into separate kernels.
")
Fresh corn is very juicy, which makes it hard to seal in freezer bags using a FoodSaver. When the air is being sucked out, the juice also comes out, preventing the bag from sealing. I put the corn in larger zip lock bags and put it in the freezer to freeze the kernels before bagging it in individual bags. It is VERY IMPORTANT that you shake the bags every couple of hours, otherwise you will end up with one big block of corn. (I know this from personal experience and it wasn’t pretty!) If you are going to eat the corn within three months, it is just fine to leave the corn in these larger bags. Leaving it like this for an extended period of time will cause freezer burn to the kernels.
")
Once the corn is frozen, measure and divide into individual bags and seal in your FoodSaver.
")
When you are ready to serve the corn, it just takes about 3 – 4 minutes in the microwave, from frozen. It doesn’t need to be cooked, just heated up.

Banana Chocolate Chip Bread
")
This banana bread can be made in just a few minutes and is SO good! It is a great thing to do with those bananas that go ripe too fast. And – only 3 -4 ingredients! Put your bananas in the freezer, peel and all, until you have enough bananas to make this recipe. You will never want to throw old bananas away again…. or, you will purposely let them go bad just so you can make this delicious bread!
3 – 4 over ripe bananas
2 eggs
1 yellow cake mix
1 cup chocolate chips – I like using the mini chocolate chips but the regular ones work fine too.

1) Beat bananas
2) Add eggs
3) Add cake mix
")
4) Add chocolate chips
")
5) Grease and flour a large loaf pan or spray with a baking spray with flour.
")
")
6) Bake at 350 degrees for 55 – 60 minutes or longer. It is very important to insert a toothpick in the middle of the loaf, in several places, to check to make sure it is done. If it is at all sticky or even damp, continue baking for a few more minutes. If you take it out too early, it will sink and be gooey in the middle.
")
This batter can also be made into cupcakes. I baked them at 350 degrees for 17 minutes.

Or, this can be made into 4 small loaves.
Loaf and cupcakes freeze well.
Recipe Source: Artsy Fartsy Mama (found on Pinterest)
FULL RECIPE WITHOUT PICTURES —
BANANA CHOCOLATE CHIP BREAD
3 – 4 over ripe bananas
2 eggs
1 yellow cake mix
1 cup chocolate chips – I like using the mini chocolate chips but the regular ones work fine too.
1) Beat bananas
2) Add eggs
3) Add cake mix
4) Add chocolate chips
5) Grease and flour a large loaf pan or spray with a baking spray with flour.
6) Bake at 350 degrees for 40 – 45 minutes or longer. It is very important to insert a toothpick in the middle of the loaf, in several places, to check to make sure it is done. If it is at all sticky, continue baking for a few more minutes. If you take it out too early, it will sink in the middle.
This batter can also be made into cupcakes. I baked them at 350 degrees for 15 minutes.
Or, this can be made into 4 small loaves.
Loaf and cupcakes freeze well.
Recipe Source: Artsy Fartsy Mama (found on Pinterest)
Veggie Pizza
")
This was such a great little pizza! I loved it! This really isn’t a “recipe” but just a great idea for a quick meal. Use any veggies that you have in your frig – plus I added a little pineapple. Delicious and very filling!

These are the ingredients that I used – spinach, pineapple, mushrooms, zucchini, and cheese – although I forgot to add the cheese to the picture. I used mozzarella, but any would do.
Preheat oven to 425 degrees.
")
I smeared 2 T. of pizza sauce on a Boboli pizza crust.
")
Then I added my chopped veggies and fruit.
")
Then I sprinkled the cheese on top. Putting the cheese on the top, rather than the bottom, allows the cheese to melt down around the veggies and hold them in place.
Bake at 425 degrees for 8 – 10 minutes.
NOTE: The first time I made this pizza, I baked it on a baking sheet. The result was a more doughy bread-like crust. The next time I made one, I put my pizza on a wire rack. The result was a crispier crust. The instructions on the Boboli package say to just put it on the rack in your oven. My oven has really wide spaces and I was afraid that I would lose my pizza so I used a flat wire rack as shown below. I preferred the crispy crust.
")
Gazpacho
")
Gazpacho is a cold fresh vegetable soup. So delicious on a hot summer day.

All of these ingredients are approximate. You can just throw in whatever you like and whatever you have.
6 – 10 tomatoes – diced
")
1 pkg. Good Seasonings Italian dry dressing mix
Stir seasoning into diced tomatoes.
")
2 large cucumbers – diced
")
4-5 green onions – chopped very small
")
1/2 bunch cilantro – diced very small
")
OPTIONAL:
2 medium green peppers – diced
1 medium red onion – diced
Mix all vegetables together.
Add:
6 T. vinegar
1 tsp. pepper
")
Cover with half tomato juice or V8 juice and half Clamato juice.
We just pour the juice over the vegetables to the desired thickness.
")
Chill for about 4 hours or best to chill overnight for flavors to blend.
For an extra zip, add a few drops of your favorite hot sauce.
")
FULL RECIPE WITHOUT PICTURES
GAZPACHO
6 – 10 tomatoes – diced
2 large cucumbers – diced
4-5 green onions – chopped very small
half bunch cilantro – diced very small
OPTIONAL:
2 medium green peppers – diced
1 medium red onion – diced
Mix all vegetables together.
Add:
6 T. vinegar
1 tsp. pepper
1 pkg. Good Seasonings Italian dry dressing mix
Tomatoe juice *
Clamato juice *
Cover with half tomato juice or V8 juice and half Clamato juice.
We just pour the juice over the vegetables to the desired thickness.
Chill for about 4 hours or best to chill overnight for flavors to blend.
For an extra zip, add a few drops of your favorite hot sauce.
Fruit and Vegetable Bags

Have you ever tried these? I won’t go without them! When these first came out in the store I questioned them and really wondered if they really worked. One day I saw them at the “Dollar” store and figured I would try them. They are wonderful! I have found that fruits and vegetables stored in these bags stay fresh about 3 times longer than in a regular plastic bag. As soon as I get home from the grocery store, I pack the fruit s and vegetables in these bags and I have stopped throwing away old wilted produce – totally worth the dollar I spend on them!
How they work: Always Fresh bags remove ethylene gas to prolong the life and freshness of the produce. Most fruit and vegetables release ethylene gas after harvest. Exposure to the gas accelerates aging in fruits and vegetables. Unlike ordinary plastic bags, Always Fresh bags breathe so that damaging gases produced by the fresh produce are removed. Bags minimize moisture formation and inhibit bacteria growth, maintain fruits and vegetables at their peak.
I buy this brand because they are available st our Dollar store. I am sure any brand of this type of product would work the same.
