Texas Roadhouse Rolls

Chelsie and Mike joined us for soup night at our house and Chelsie made THE BEST ROLLS EVER!!!!!

In the picture on top, the recipe was divided into 24 small rolls. In the picture on the bottom, the recipe was divided into 12 large rolls. (The darker ones were on the top shelf of the oven and the lighter ones were on the bottom, In the future, I will only cook one pan at a time.)

Set oven to Warm/Hold or set to lowest temperature.
1 cups milk, scalded and cooled to lukewarm
Set stove at medium/low heat and slowly heat milk to 180 degrees. Complete instructions for scalding milk are below.
Scald milk and let cool to lukewarm.
(If using a stand mixer – use the paddle for the next two steps)
1/4 cups warm water
1/2 tsp. sugar
2 tsp. yeast
Mix 1/2 tsp. of sugar into warm water. Add yeast and let stand until frothy – about 5 minutes.

1/4 cup sugar
3 1/2 – 4 cups flour – DIVIDED (I used a total of 3 1/2 cups of flour in the entire recipe)
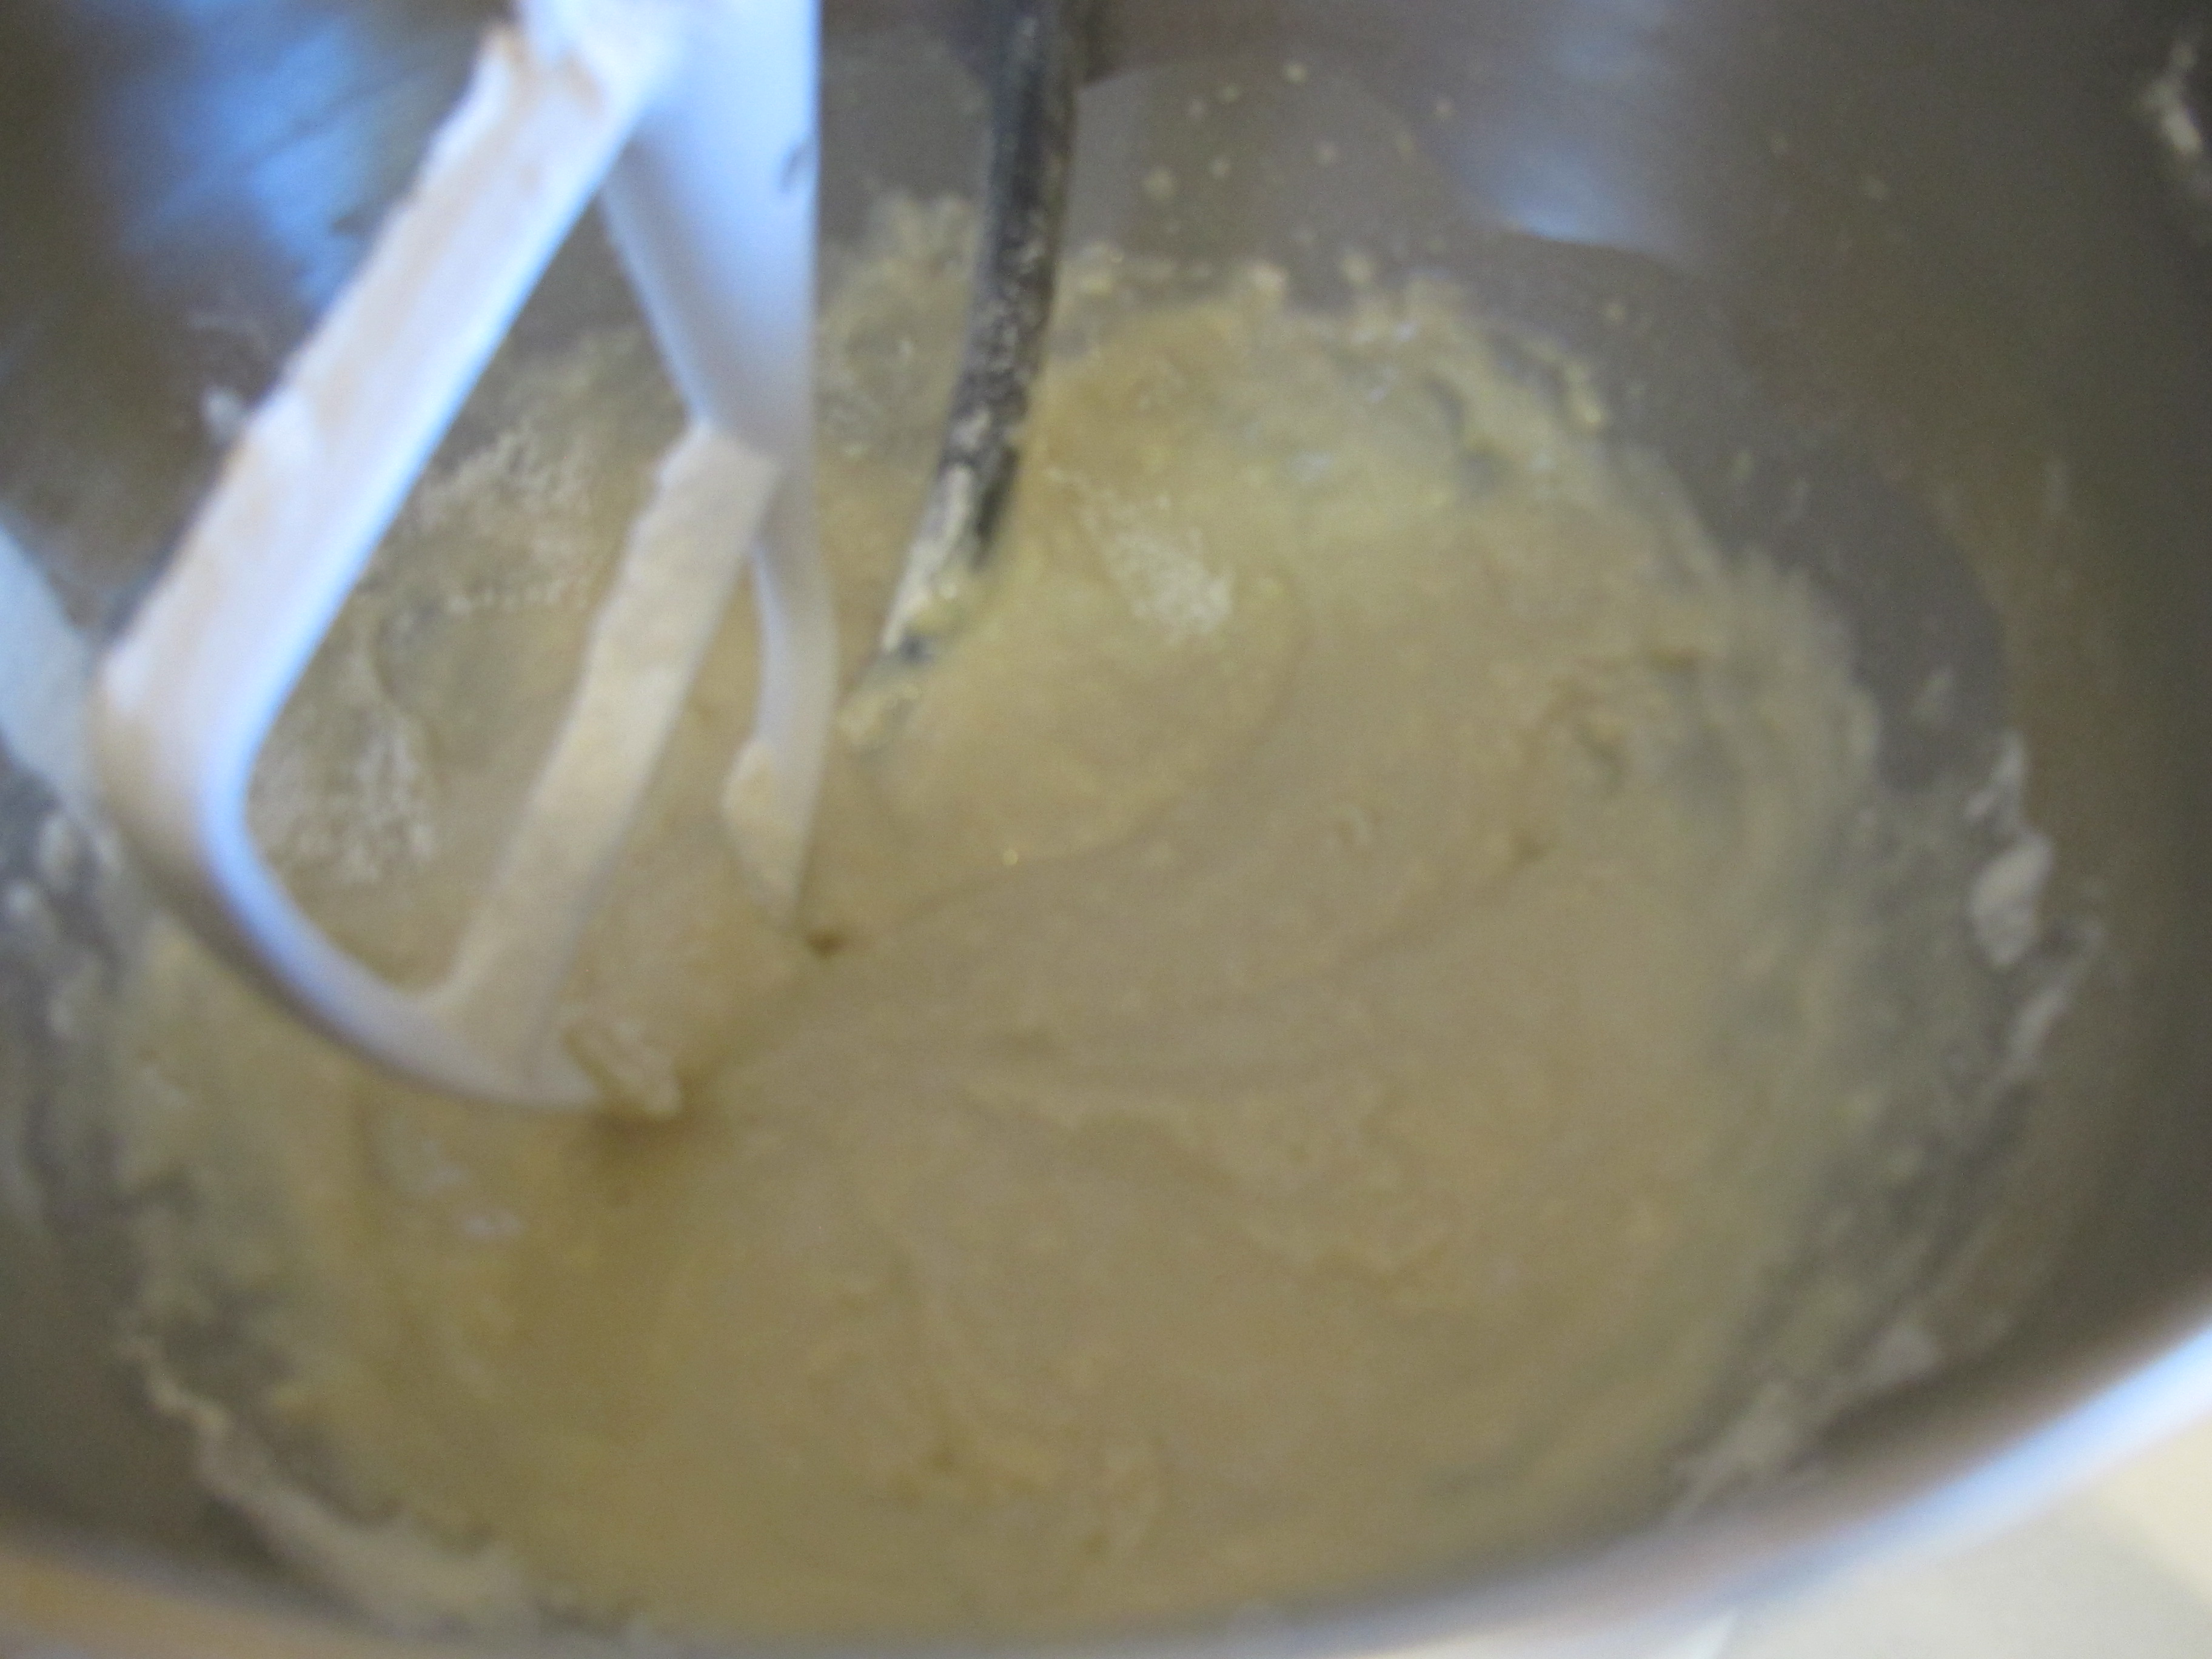
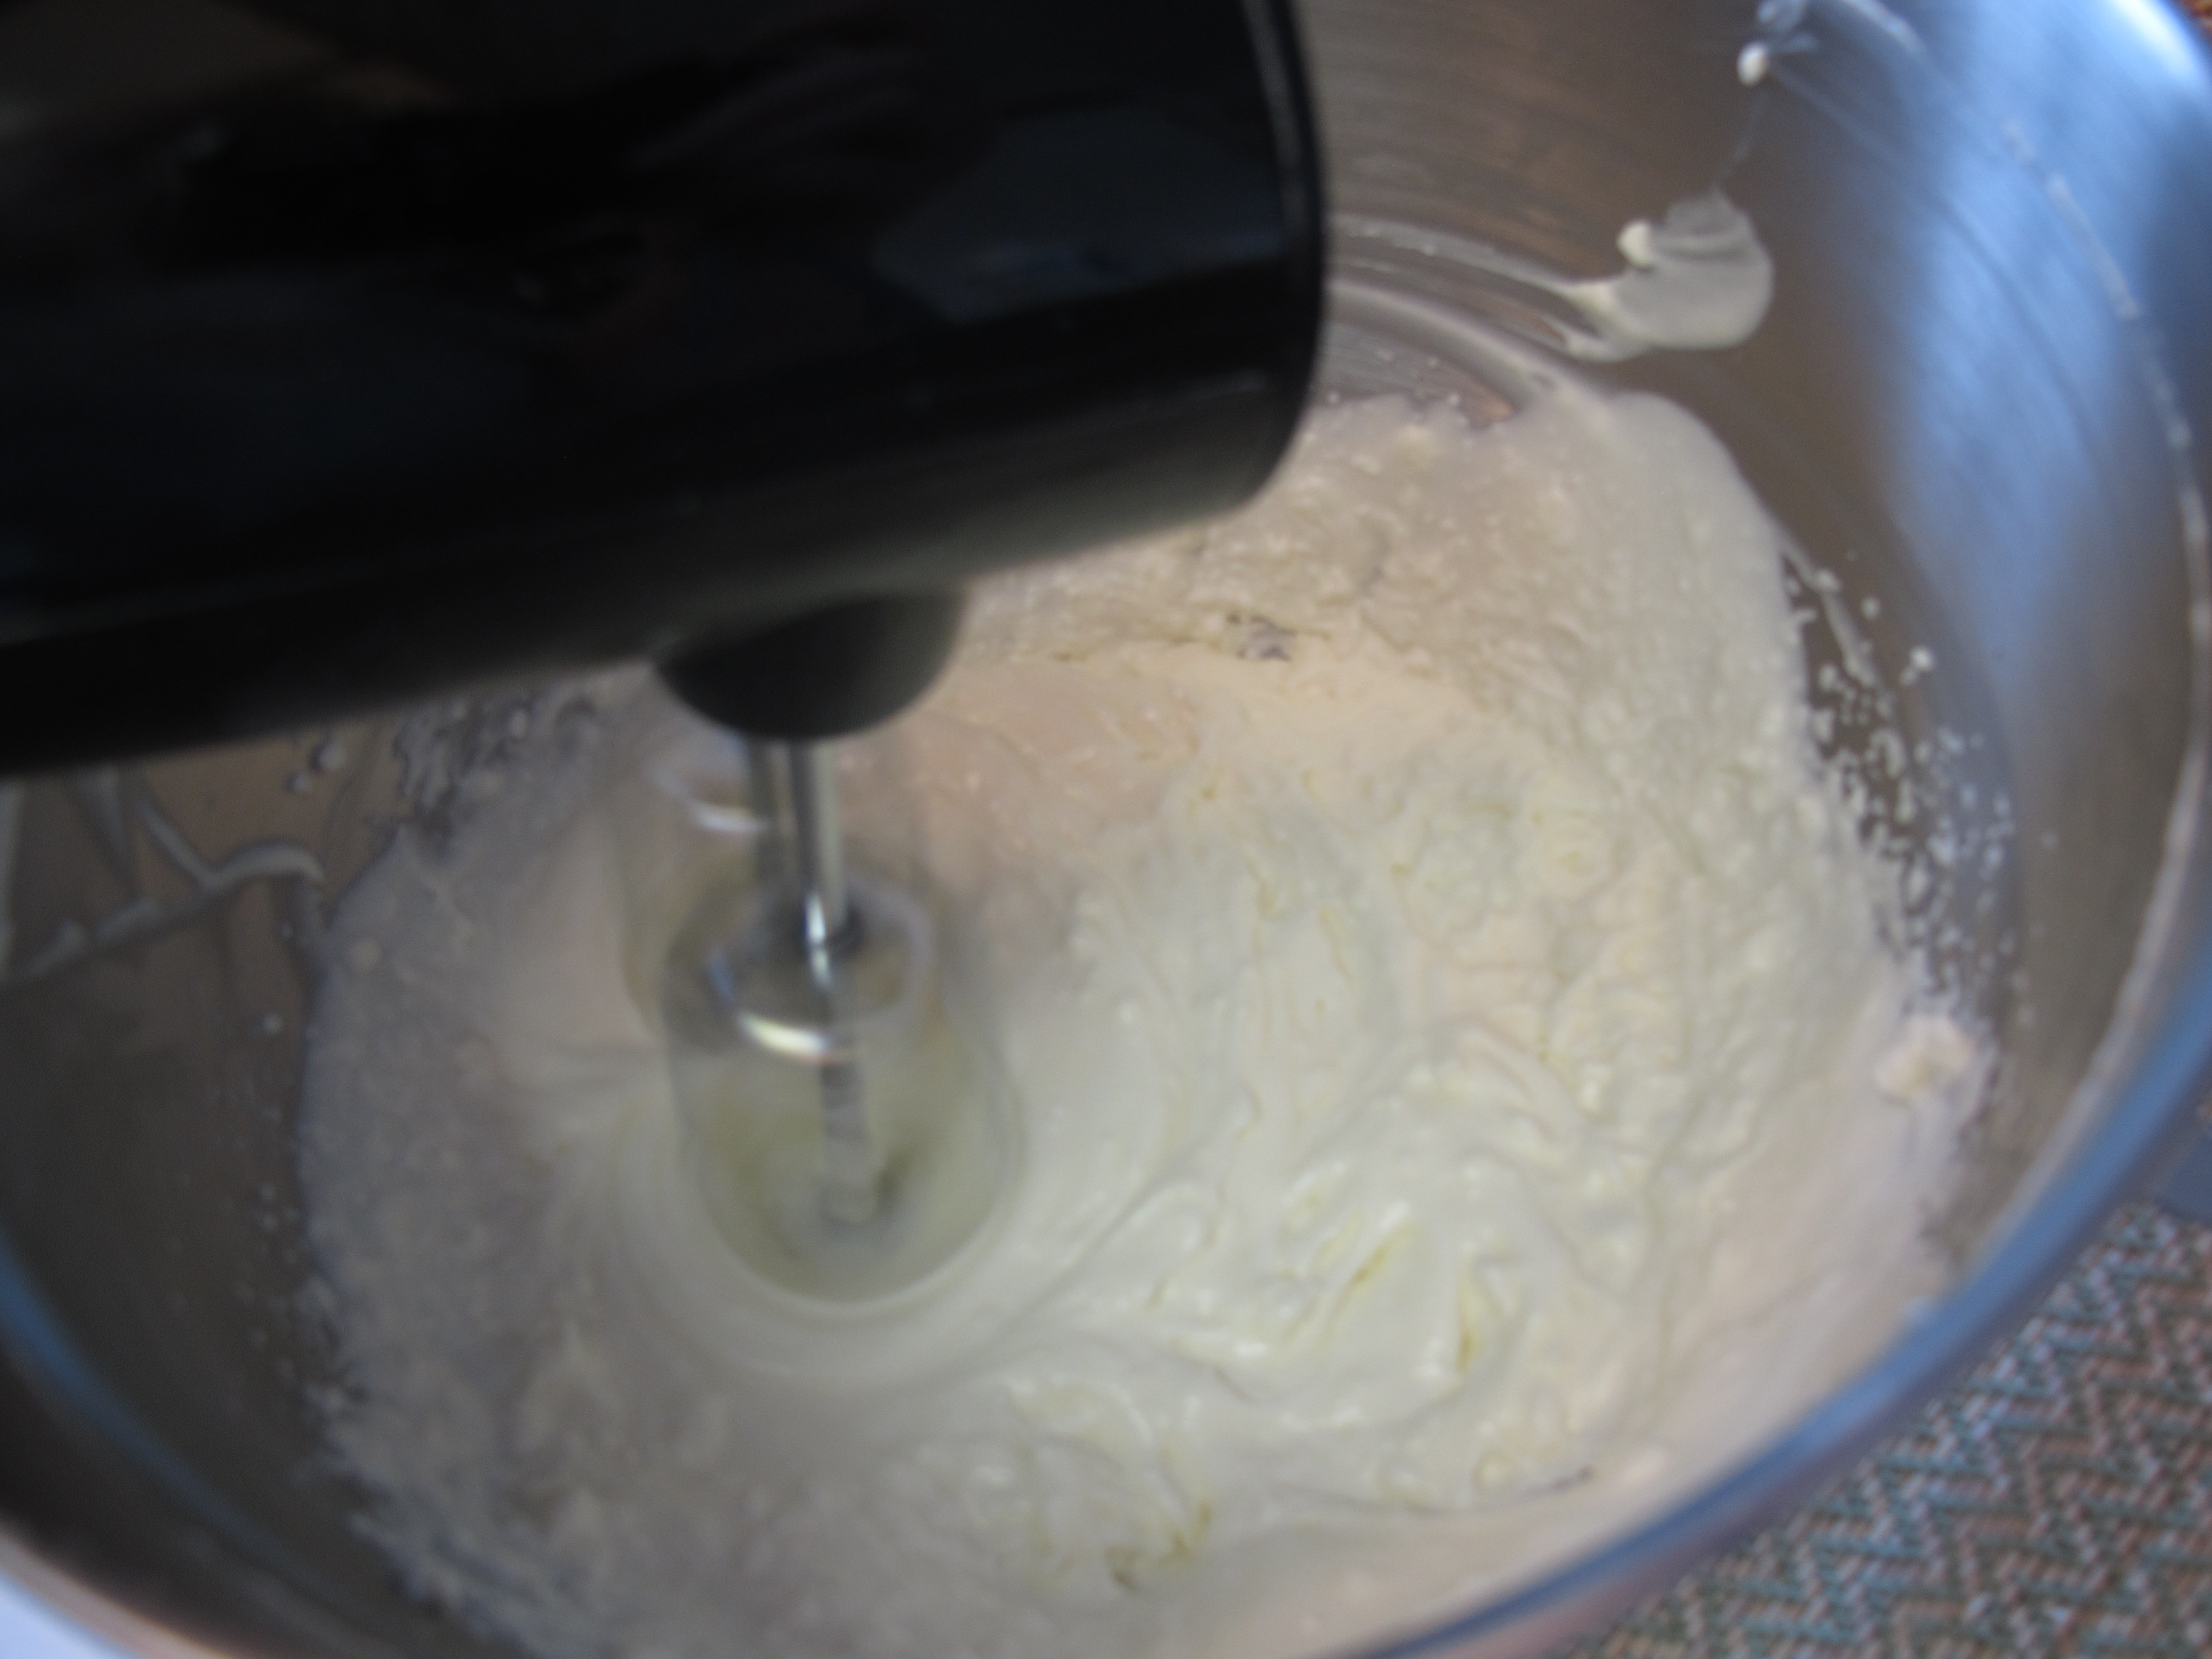
Combine 1/4 cup sugar, milk, yeast mixture, and enough flour (about 1 1/2 cups) to make a medium batter (about the consistency of pancake batter). Beat thoroughly.
1 1/2 T. melted butter, slightly cooled
1 whole egg (room temperature is best)
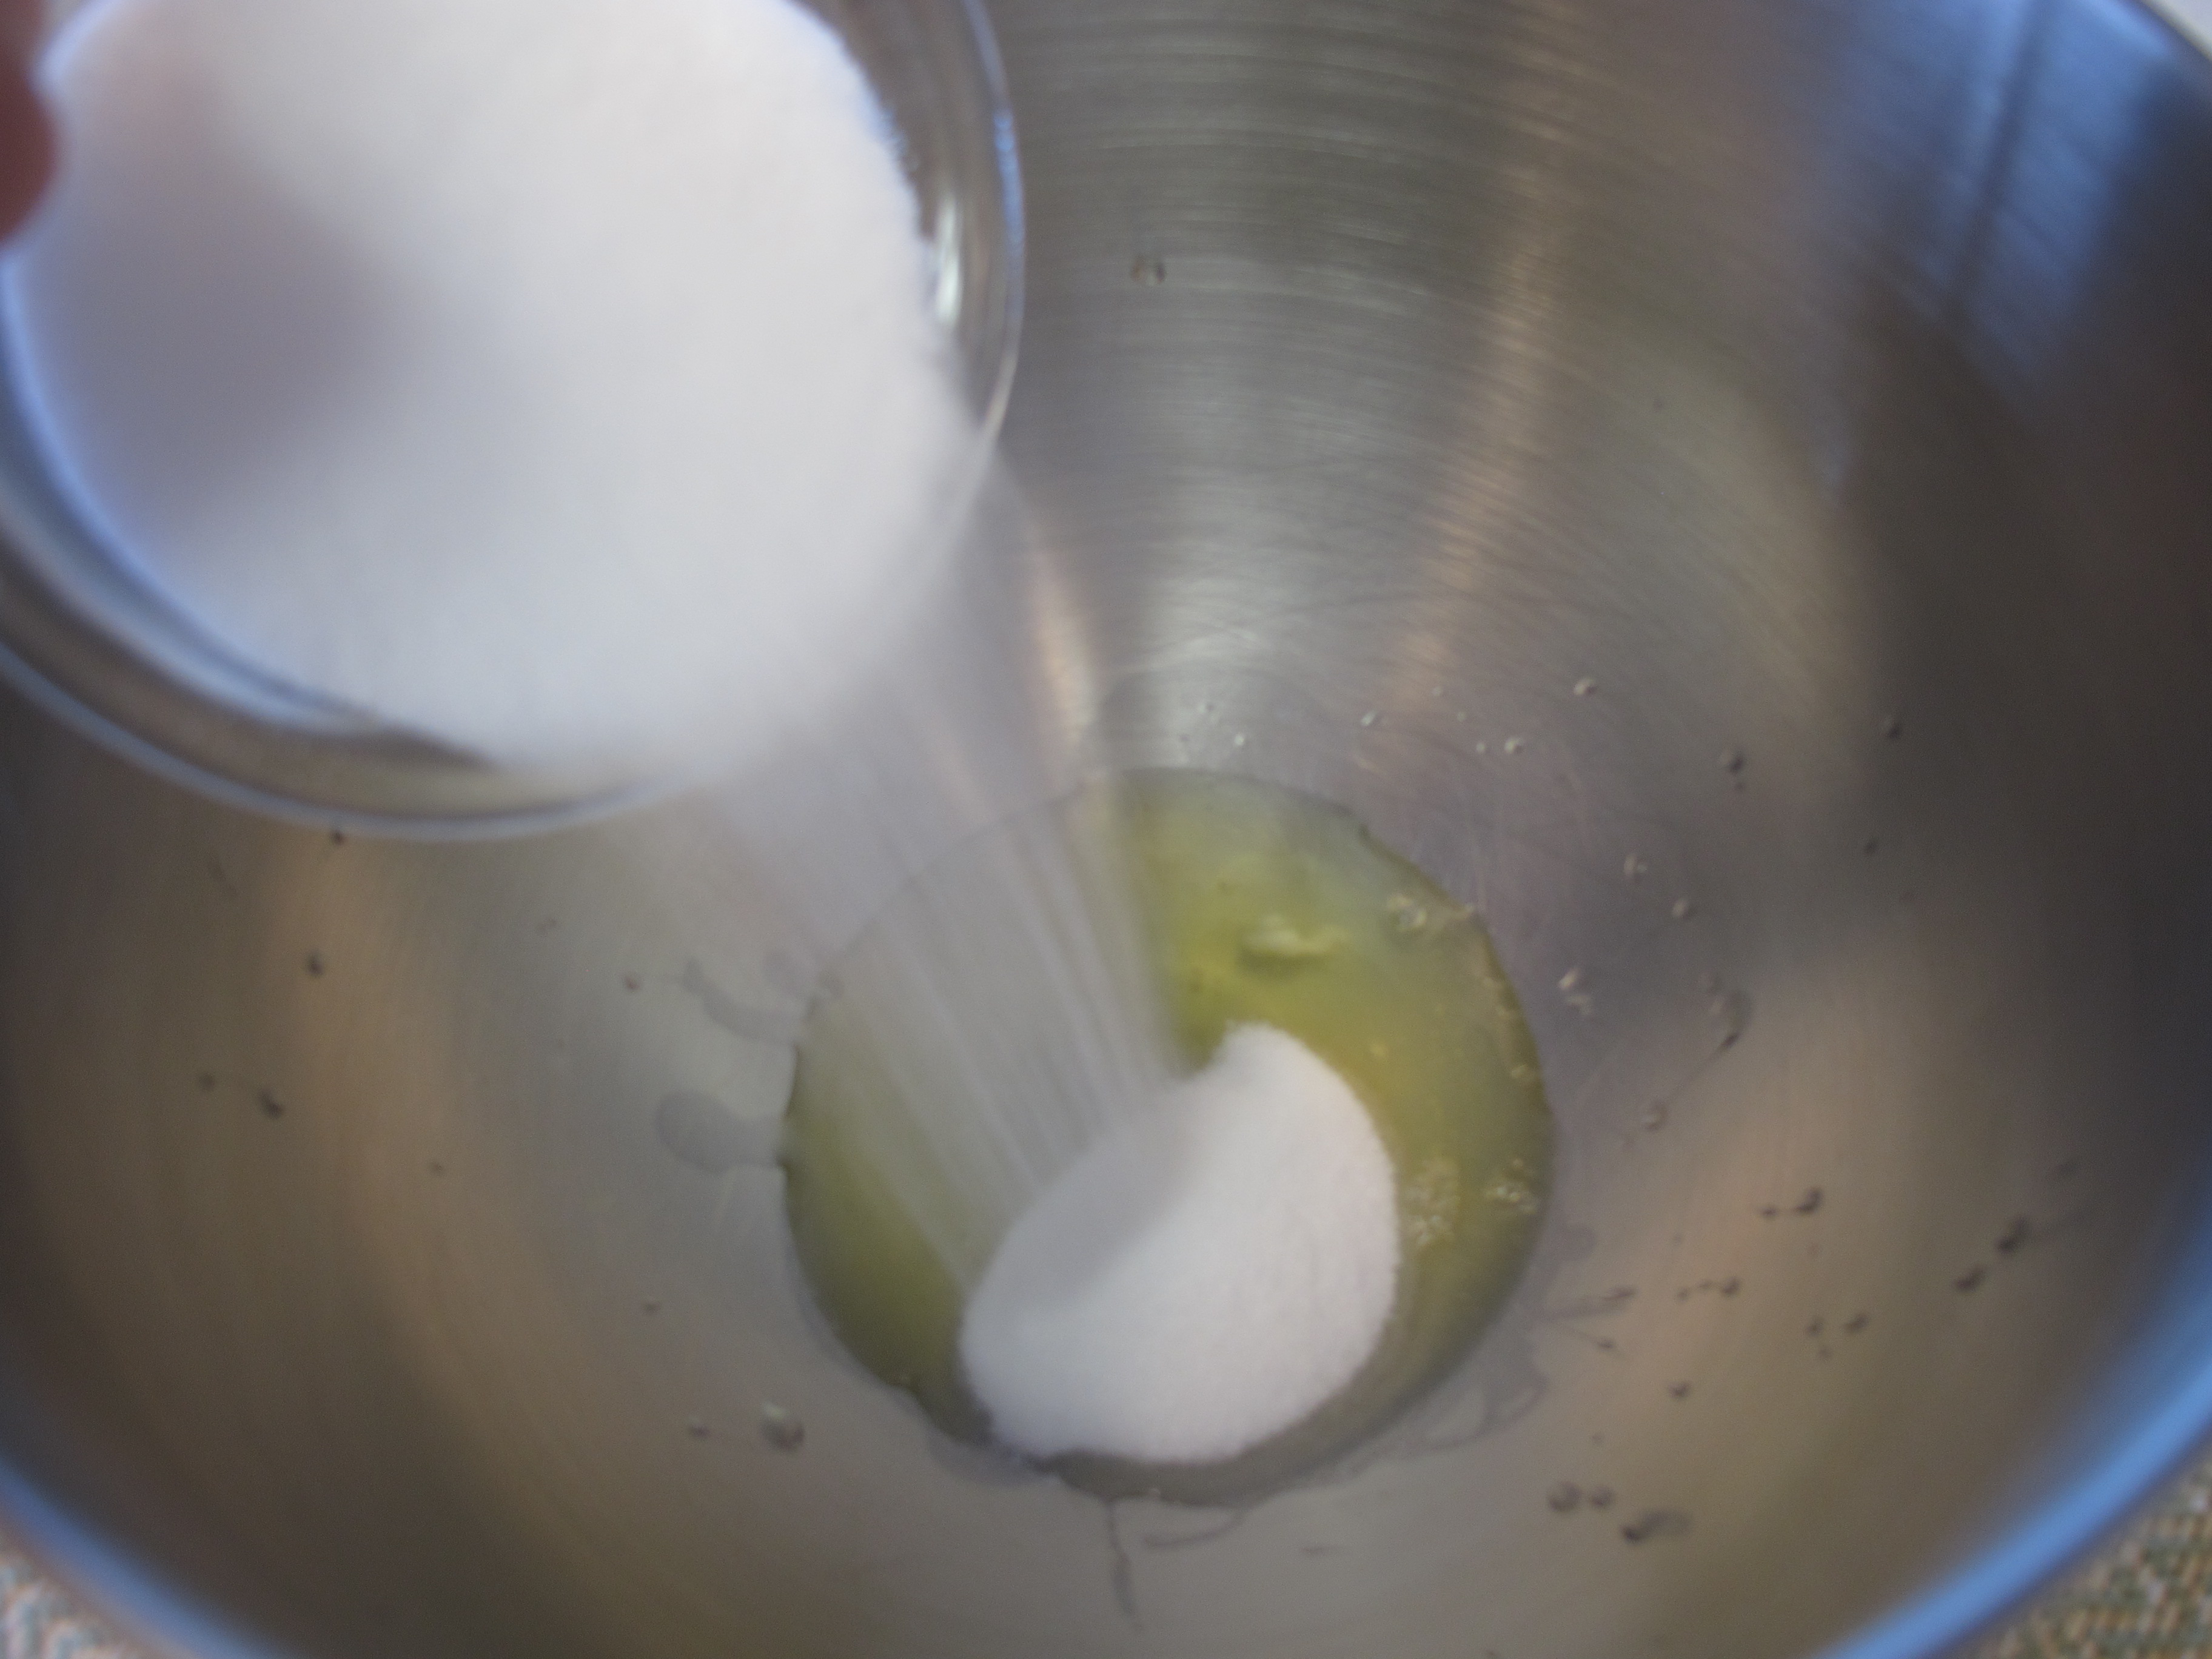
1 tsp. salt
Add melted butter, egg and salt. Beat well.

(Change to your bread hook)
Add enough flour to form a soft dough – about 2 more cups. Once all the flour is incorporated, knead for 4 – 5 minutes.
Meanwhile, grease a large bowl.
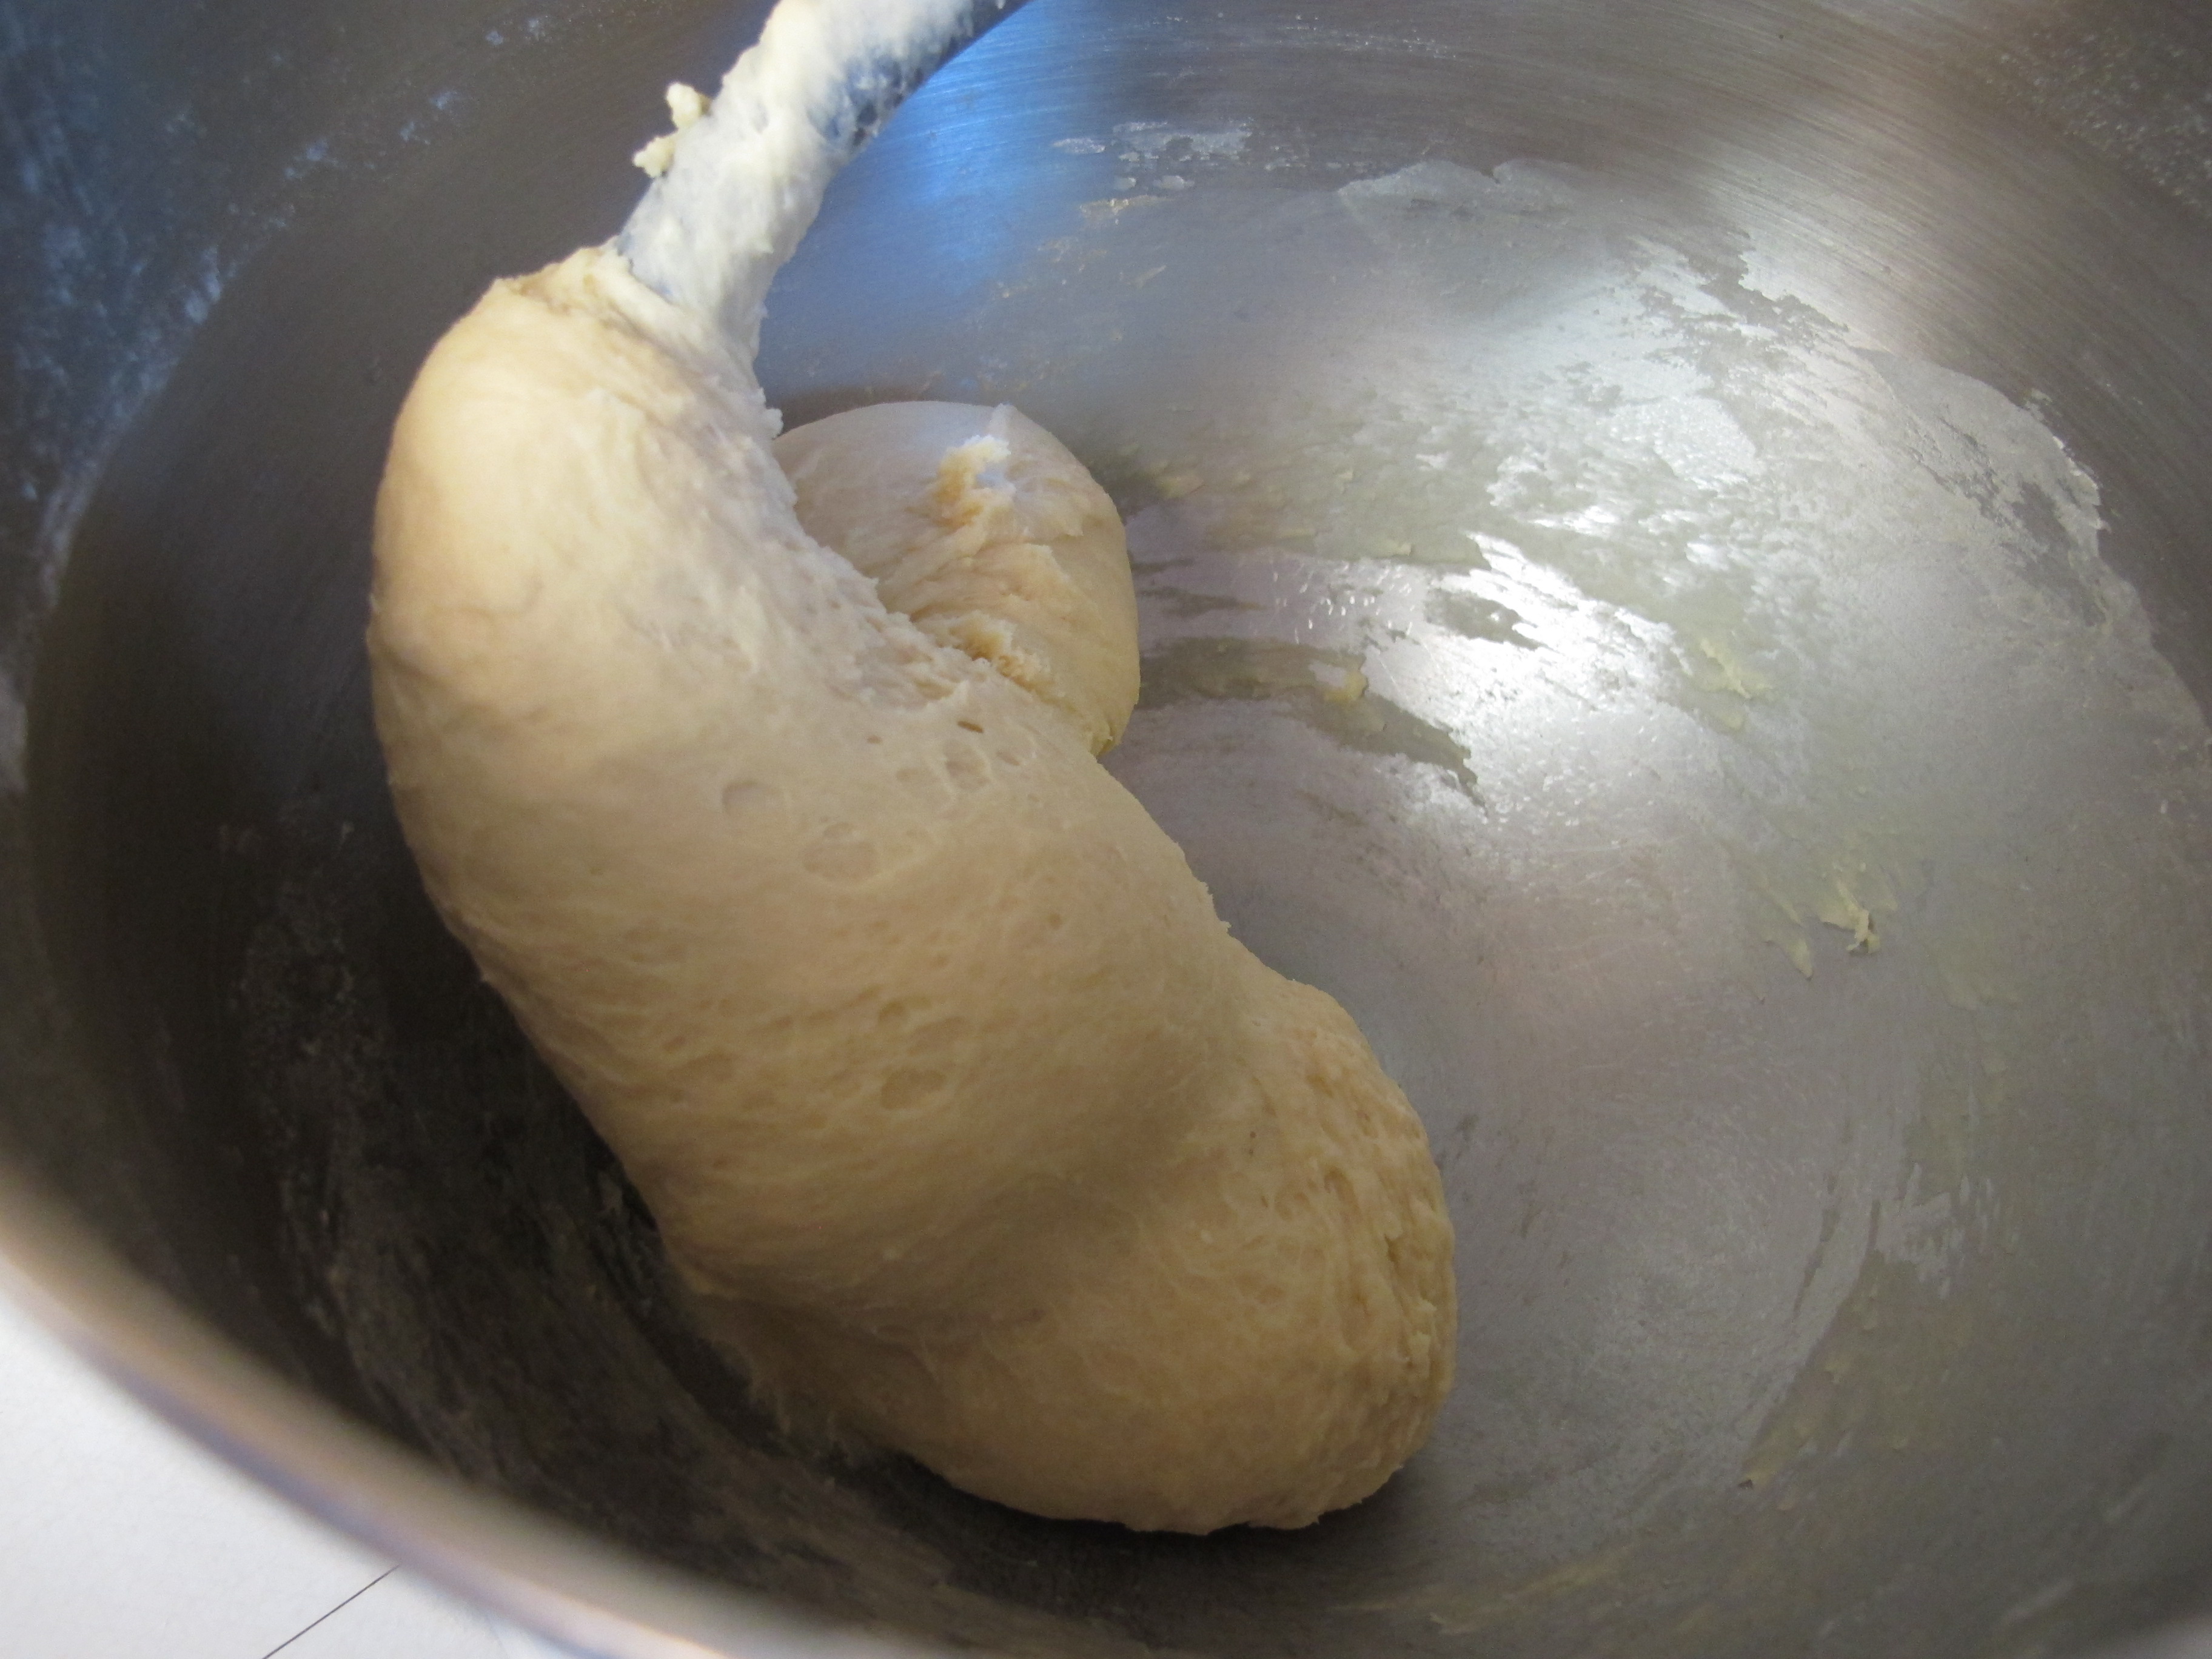
Remove dough from the hook and form into a ball by tucking the edges under.
Place in greased bowl, turn over so both sides have oil on them. Cover.

TURN OVEN OFF!!! Place bowl in oven and let rise until doubled in size. (This takes about an hour.)

Remove bowl from oven and turn your oven back on to warm it back on to raise the rolls.
Punch dough down.
Let rest for 5 minutes before shaping.
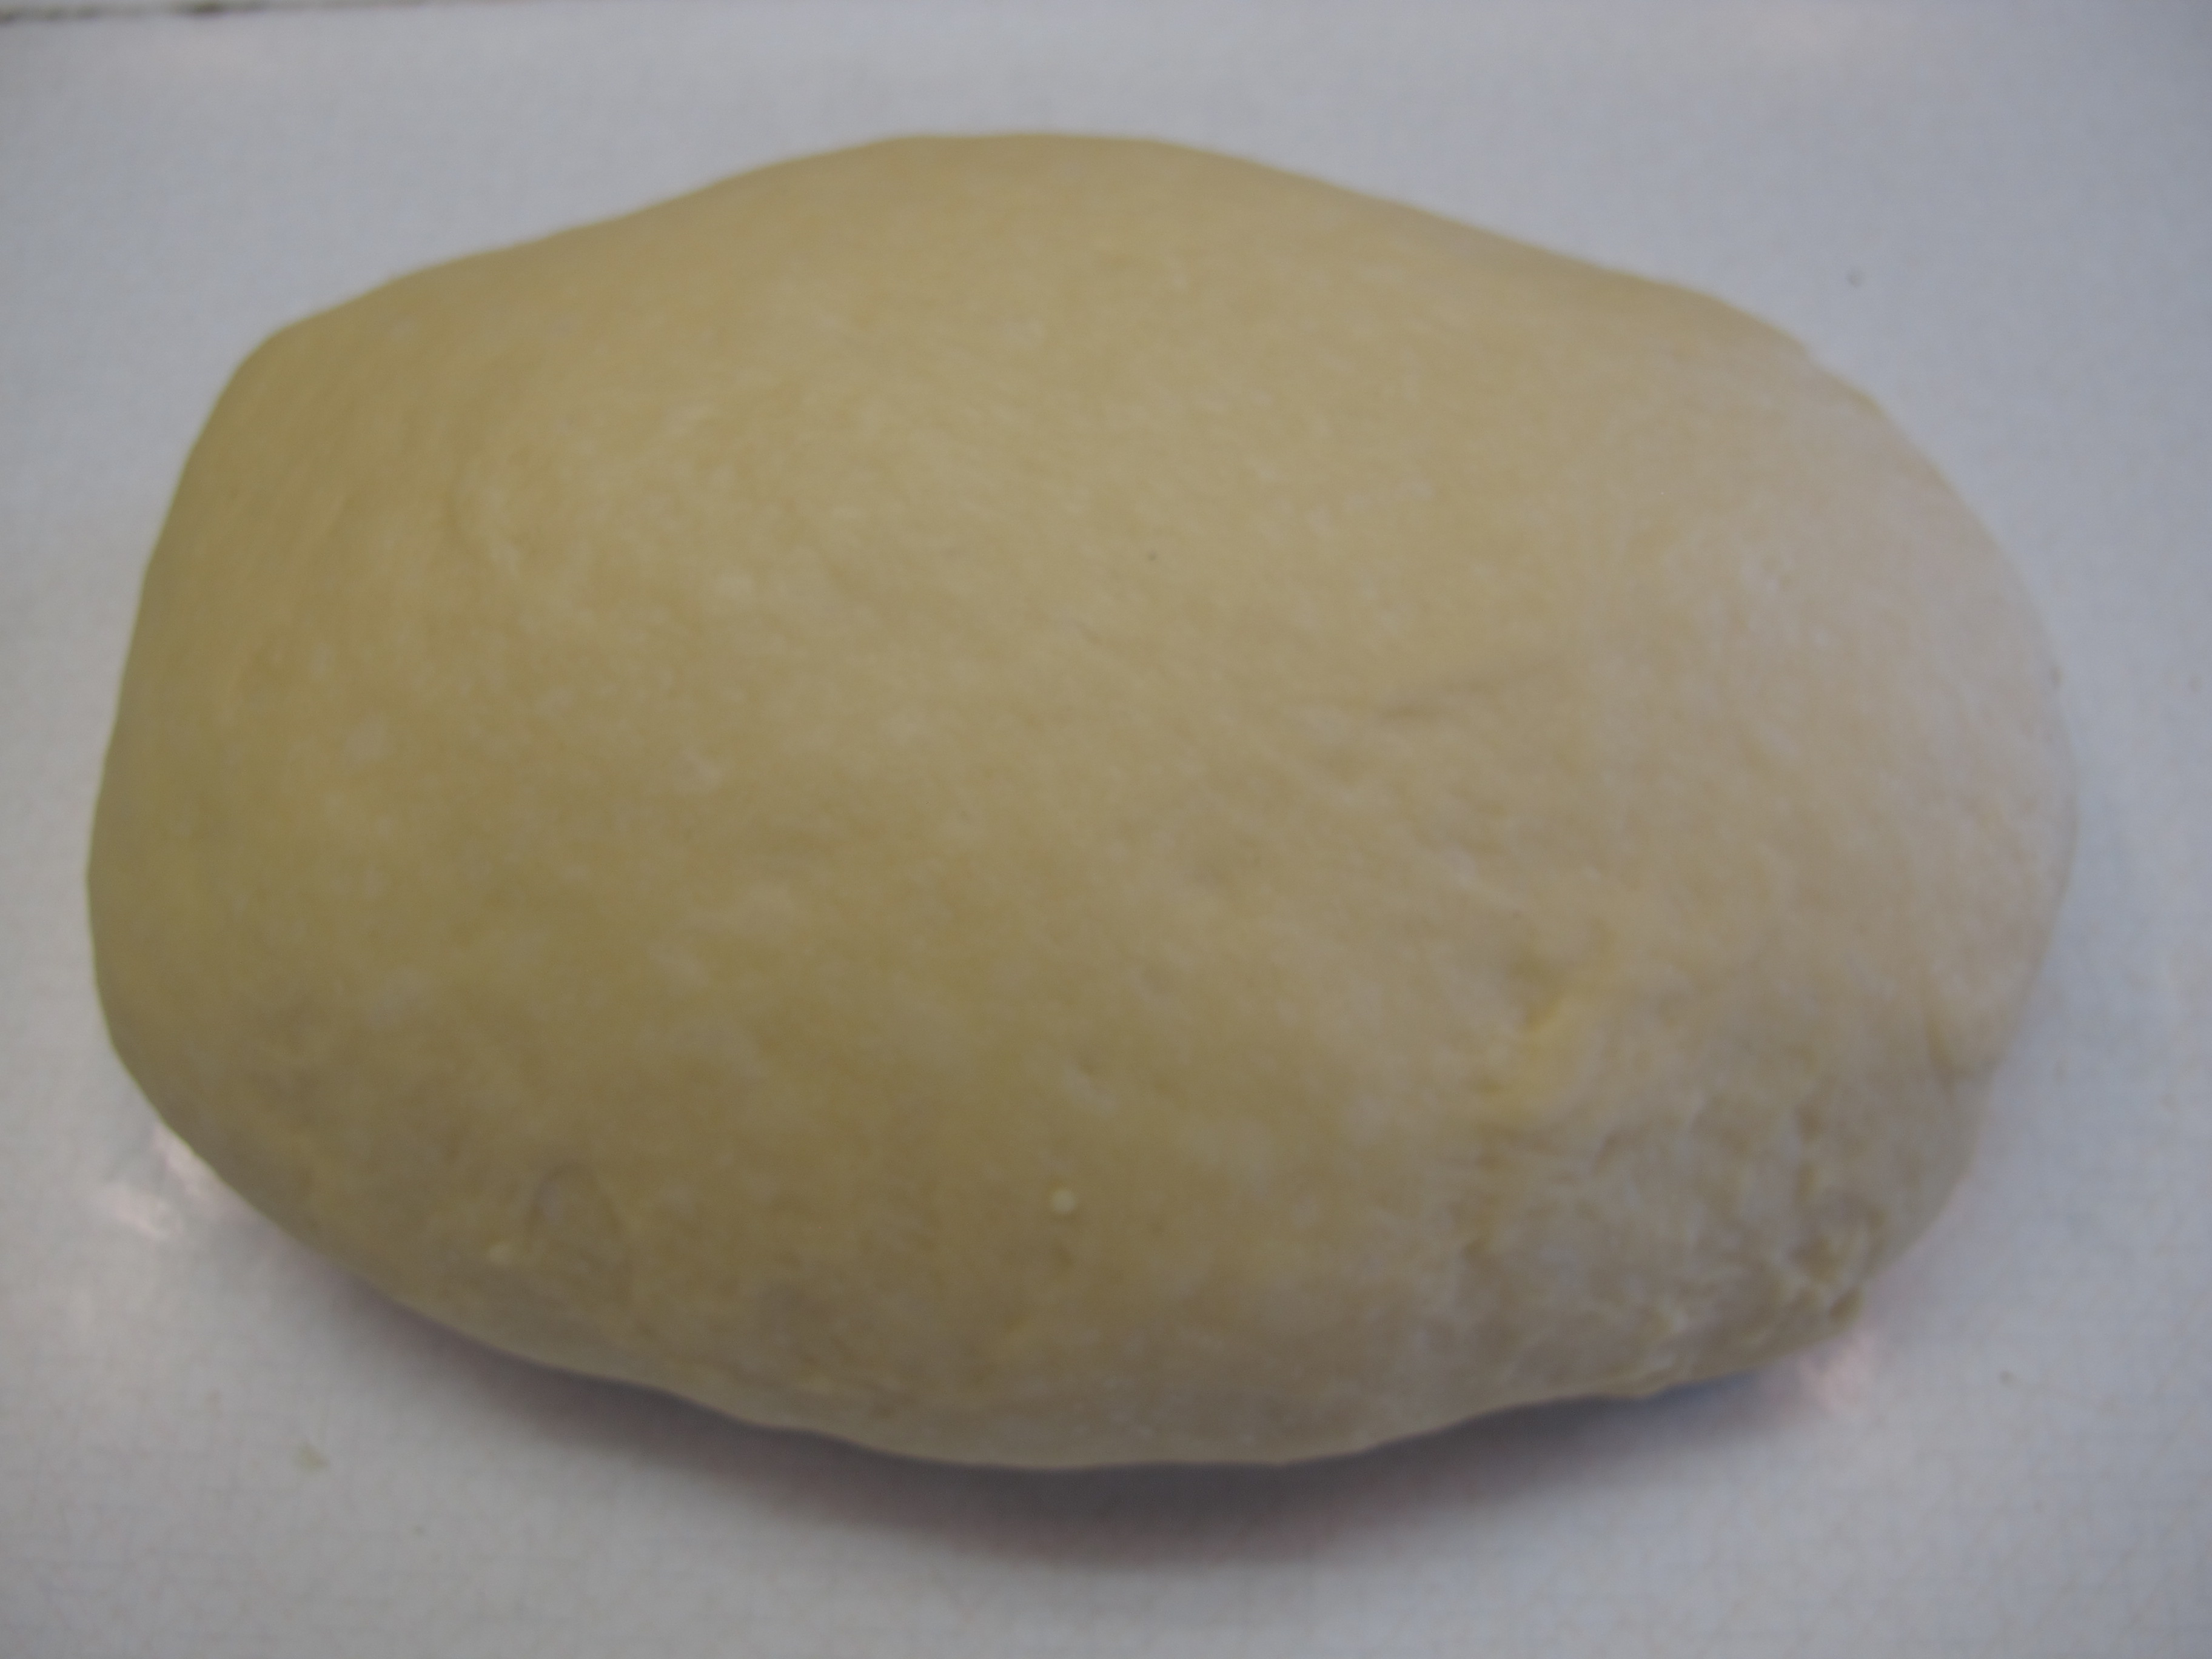
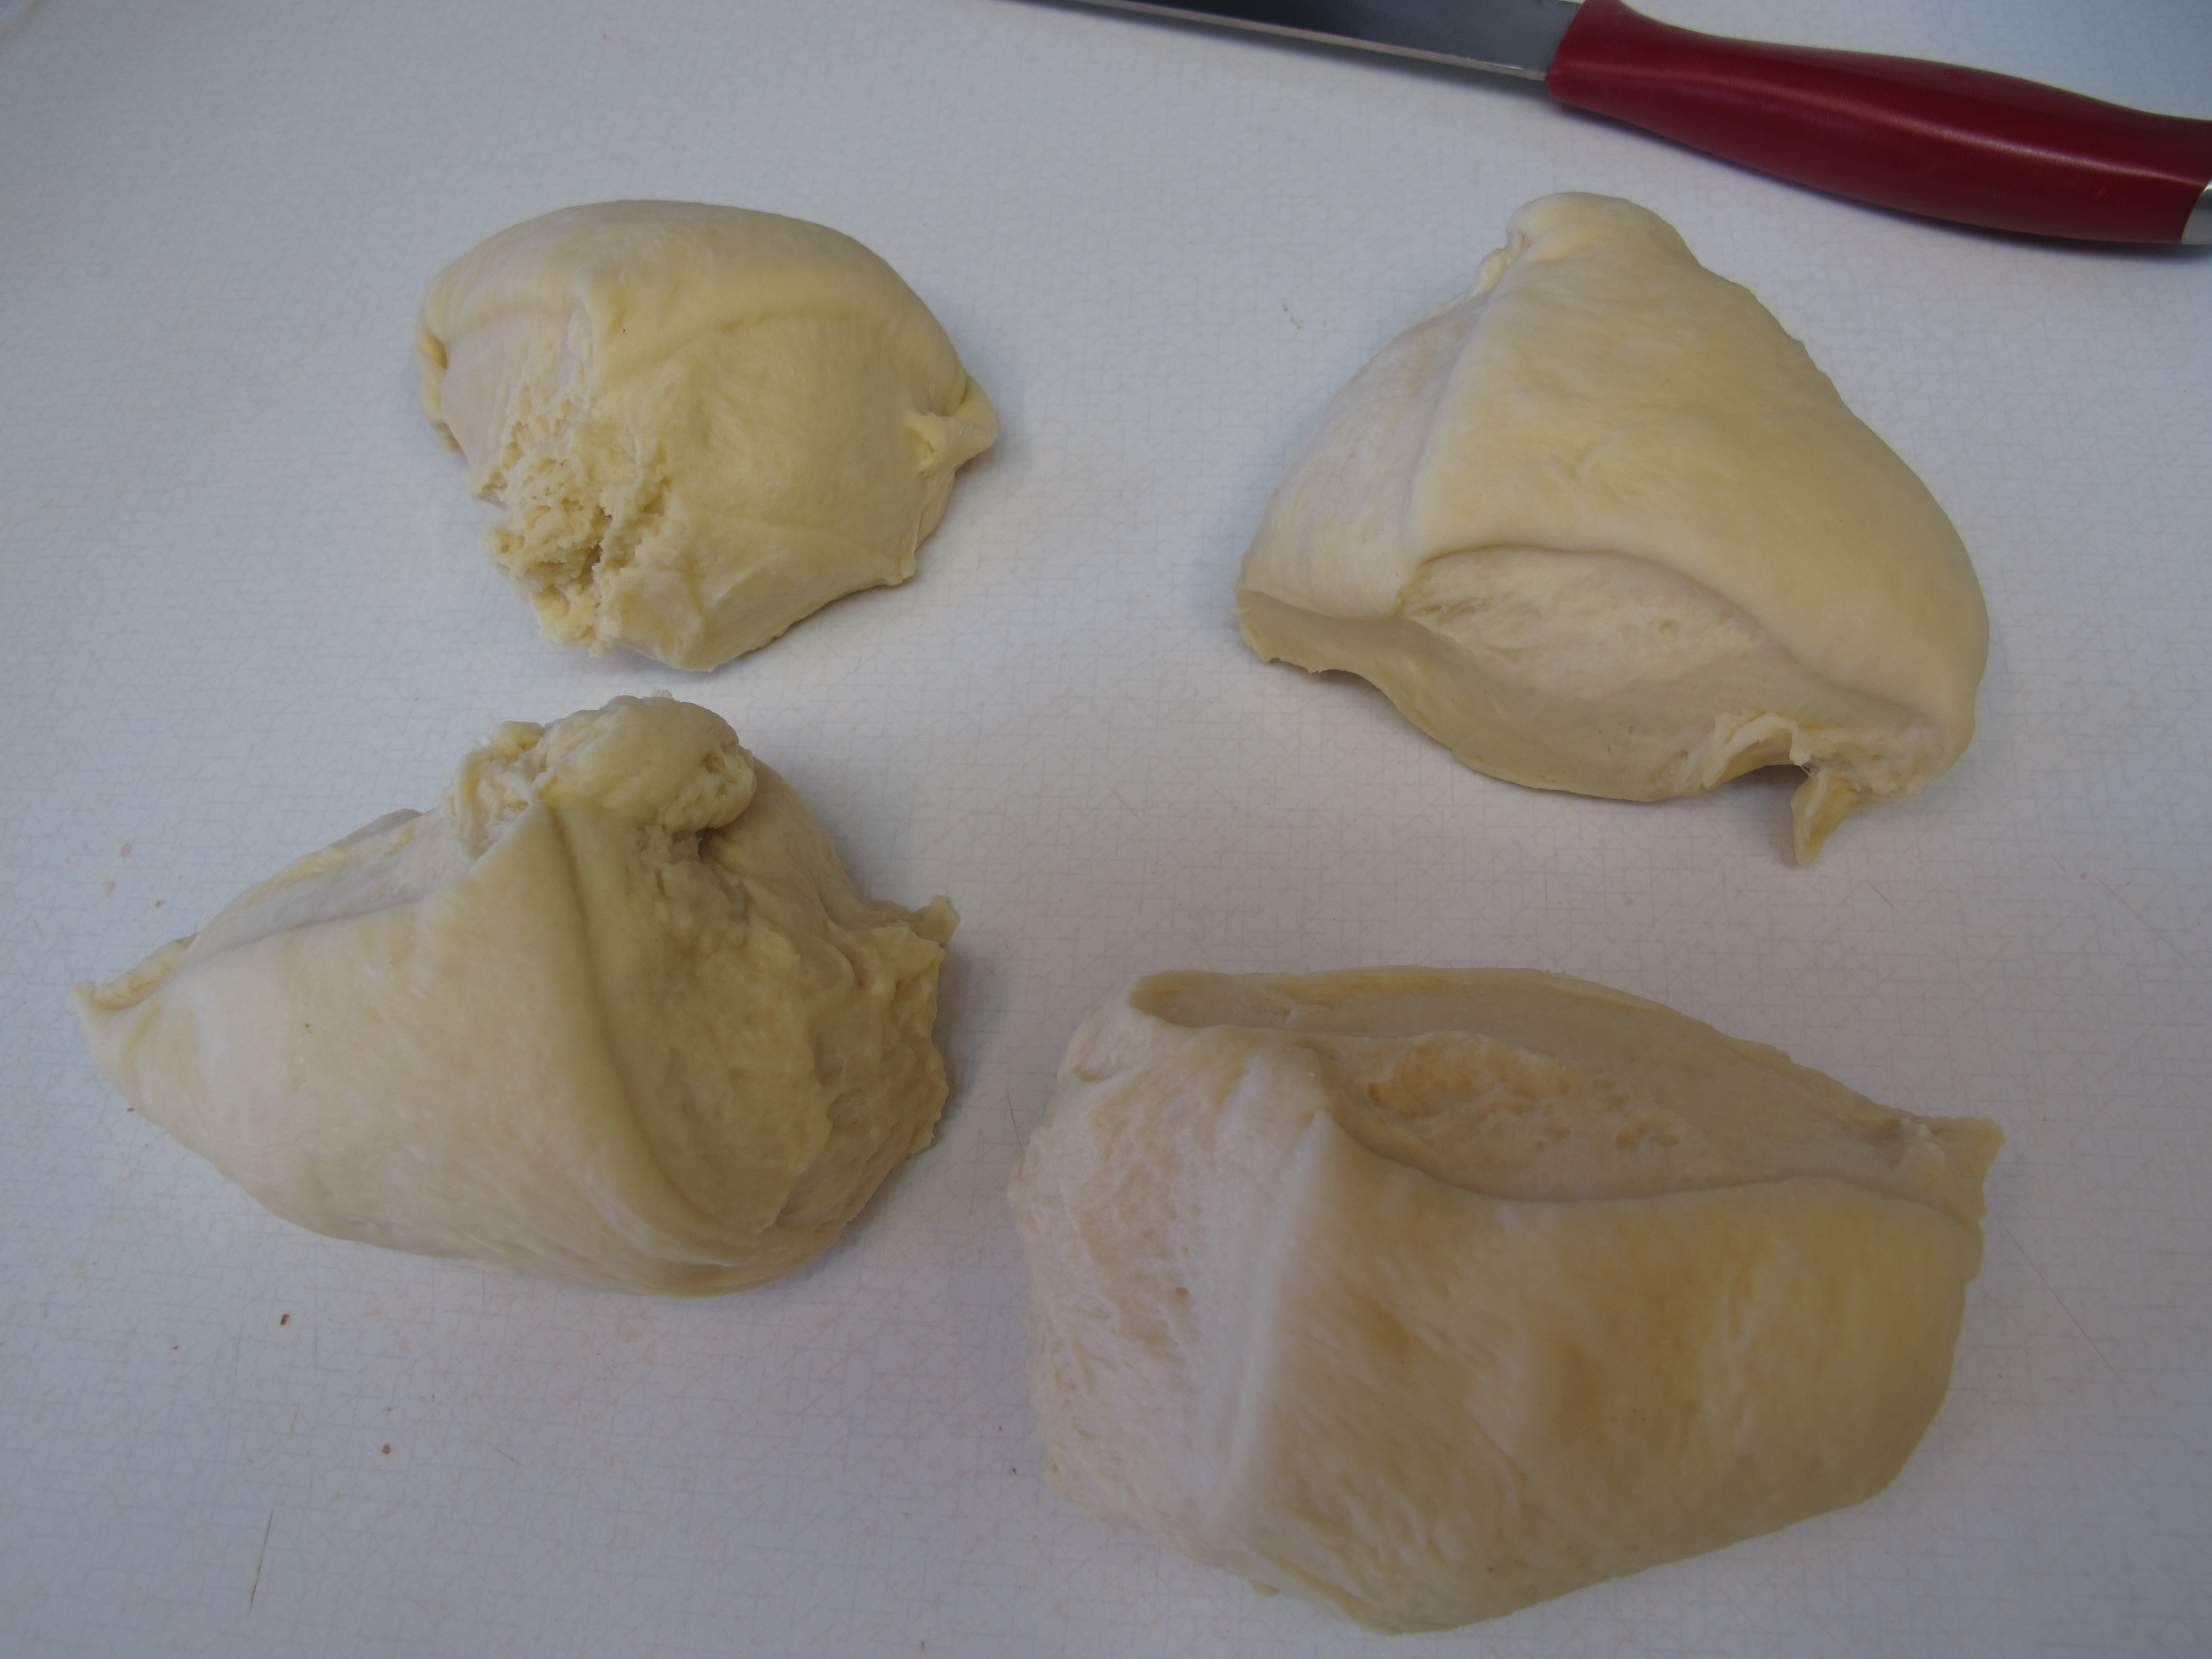
Shape into desired forms.
To make the square rolls: Roll out the dough into a rectangle, about 1/2 inch thick, then fold the rectangle in half, making it about 1″ thick. Use your rolling pin and roll over the dough very gently, just to seal the two halves together. Then cut the rolls into squares or rectangles. This makes 12 big rolls.


To make the round rolls: Divide dough into four even portions, and then divide those into 6 small portions. Fold the edges under to fold a smooth balls. Roll dough ball on the counter to smooth out the ball. This makes 24 small round rolls.


Place rolls on greased baking sheets.
Cover and let rise until doubled.

Bake at 350 degrees for 10 – 15 minutes for large rolls or 8 – 10 minutes for small rolls – or until golden brown.
Baste immediately with butter.
Recipe Source: Chelsie O. (Found on Pinterest)
FULL RECIPE WITHOUT PICTURES:
TEXAS ROADHOUSE ROLLS
1/4 cups warm water
1/2 tsp. sugar
2 tsp. yeast
1 cups milk, scalded and cooled to lukewarm (Instructions for scalding milk are below)
1/4 cup sugar
1 1/2 T. melted butter, slightly cooled
3 1/2 – 4 cups flour (I used 3 1/2 cups of flour)
1 whole eggs
1 tsp. salt
Set oven to Warm/Hold or set to lowest temperature.
Scald milk and let cool to lukewarm. (Instructions for scalding milk are below)
Mix 1/2 tsp. of sugar into warm water. Add yeast and let stand until frothy.
(If using a stand mixer – use the paddle for the next two steps)
Combine yeast mixture, milk, 1/4 cup sugar and enough flour to make a medium batter (about the consistency of pancake batter). Beat thoroughly.
Add melted butter, eggs and salt. Beat well.
(Change to your bread hook)
Add enough flour to form a soft dough. Once all the flour is incorporated, knead for 4 – 5 minutes.
Meanwhile, grease a large bowl.
Remove dough from the hook and form into a ball by tucking the edges under.
Place in greased bowl, turn over so both sides have oil on them. Cover.
TURN OVEN OFF!!! Place bowl in oven and let rise until doubled in size. (This takes about an hour.)
Remove bowl from over and turn your oven back on to warm it back on to raise the rolls.
Punch dough down.
Let rest for 5 minutes before shaping.
Shape into desired forms.
(To make the square ones – roll out the dough into a rectangle, about 1/2 inch thick, then fold the rectangle in half, making it about 1″ thick. Use your rolling pin and roll over the dough very gently, just to seal the two halves together. Then cut the rolls into squares or rectangles. This makes 12 big rolls.)
(To make the round ones, divide dough into four even portions, and then divide those into 6 small portions. Fold the edges under to fold a smooth balls. Roll dough ball on the counter to smooth out the ball. This makes 24 small round rolls.)
Place rolls on greased baking sheets.
Cover and let rise until doubled.
Bake at 350 degrees for 10 – 15 minutes for large rolls or 8 – 10 minutes for small rolls – or until golden brown.
Baste immediately with butter.
Recipe Source: Chelsie O. (Found on Pinterest)
SCALDING MILK ON THE STOVE TOP
-
 1
1Rinse a heavy sauce pan with cold water. By briefly cooling the inside of your pan, you can help regulate the temperature of the milk more carefully, preventing it from heating too quickly on the stove.
-
 2
2Pour the milk into the sauce pan. Measure out the precise amount of milk you need for the recipe, since it will be difficult to add more later. You also should not use more than you need since you should not return scalded milk to the container of un-scalded milk it originally came from.
-
 3
3Slowly heat the pan of milk over medium-low heat. A low heat setting may not provide enough heat to actually warm the pan up, but anything stronger than a medium heat setting will likely bring the temperature up too quickly, causing the milk to boil and burn before you have the chance to stop it. A medium-low heat works best, but a medium heat can also be used as long as you keep a steady watch of it.
-
 4
4Stir the milk continuously. To prevent the milk from thickening or burning and sticking to the bottom of the pan, frequent stirring is vital. Do not allow the milk to rest for more than 30 to 60 seconds at a time as it heats up.
-
 5
5Watch for the formation of steam and bubbles.[2] The milk is heated enough to be considered scalded once small bubbles start to form around the edges of the pan. Do not allow the milk to start boiling, however. Once the milk has started to boil, it has gotten too hot, and a certain protein inside the milk may be destroyed as a result. The destruction of this protein could lead to a loss of volume in baked goods. Additionally, once milk has gotten hot enough to boil, it is nearly impossible to stop it from sticking to the bottom of the pan and creating a burnt film.
-
 6
6Remove the milk and let it cool. Lift the pan off the stovetop and transfer it to a heat-resistant surface. You can transfer the milk to a room temperature container to prevent it from continuing to cook, or you can simply keep stirring it until it stops steaming. Most recipes suggest that you allow the milk to cool to a certain temperature before you use it, so you should check the milk periodically with a thermometer until it reaches this temperature.


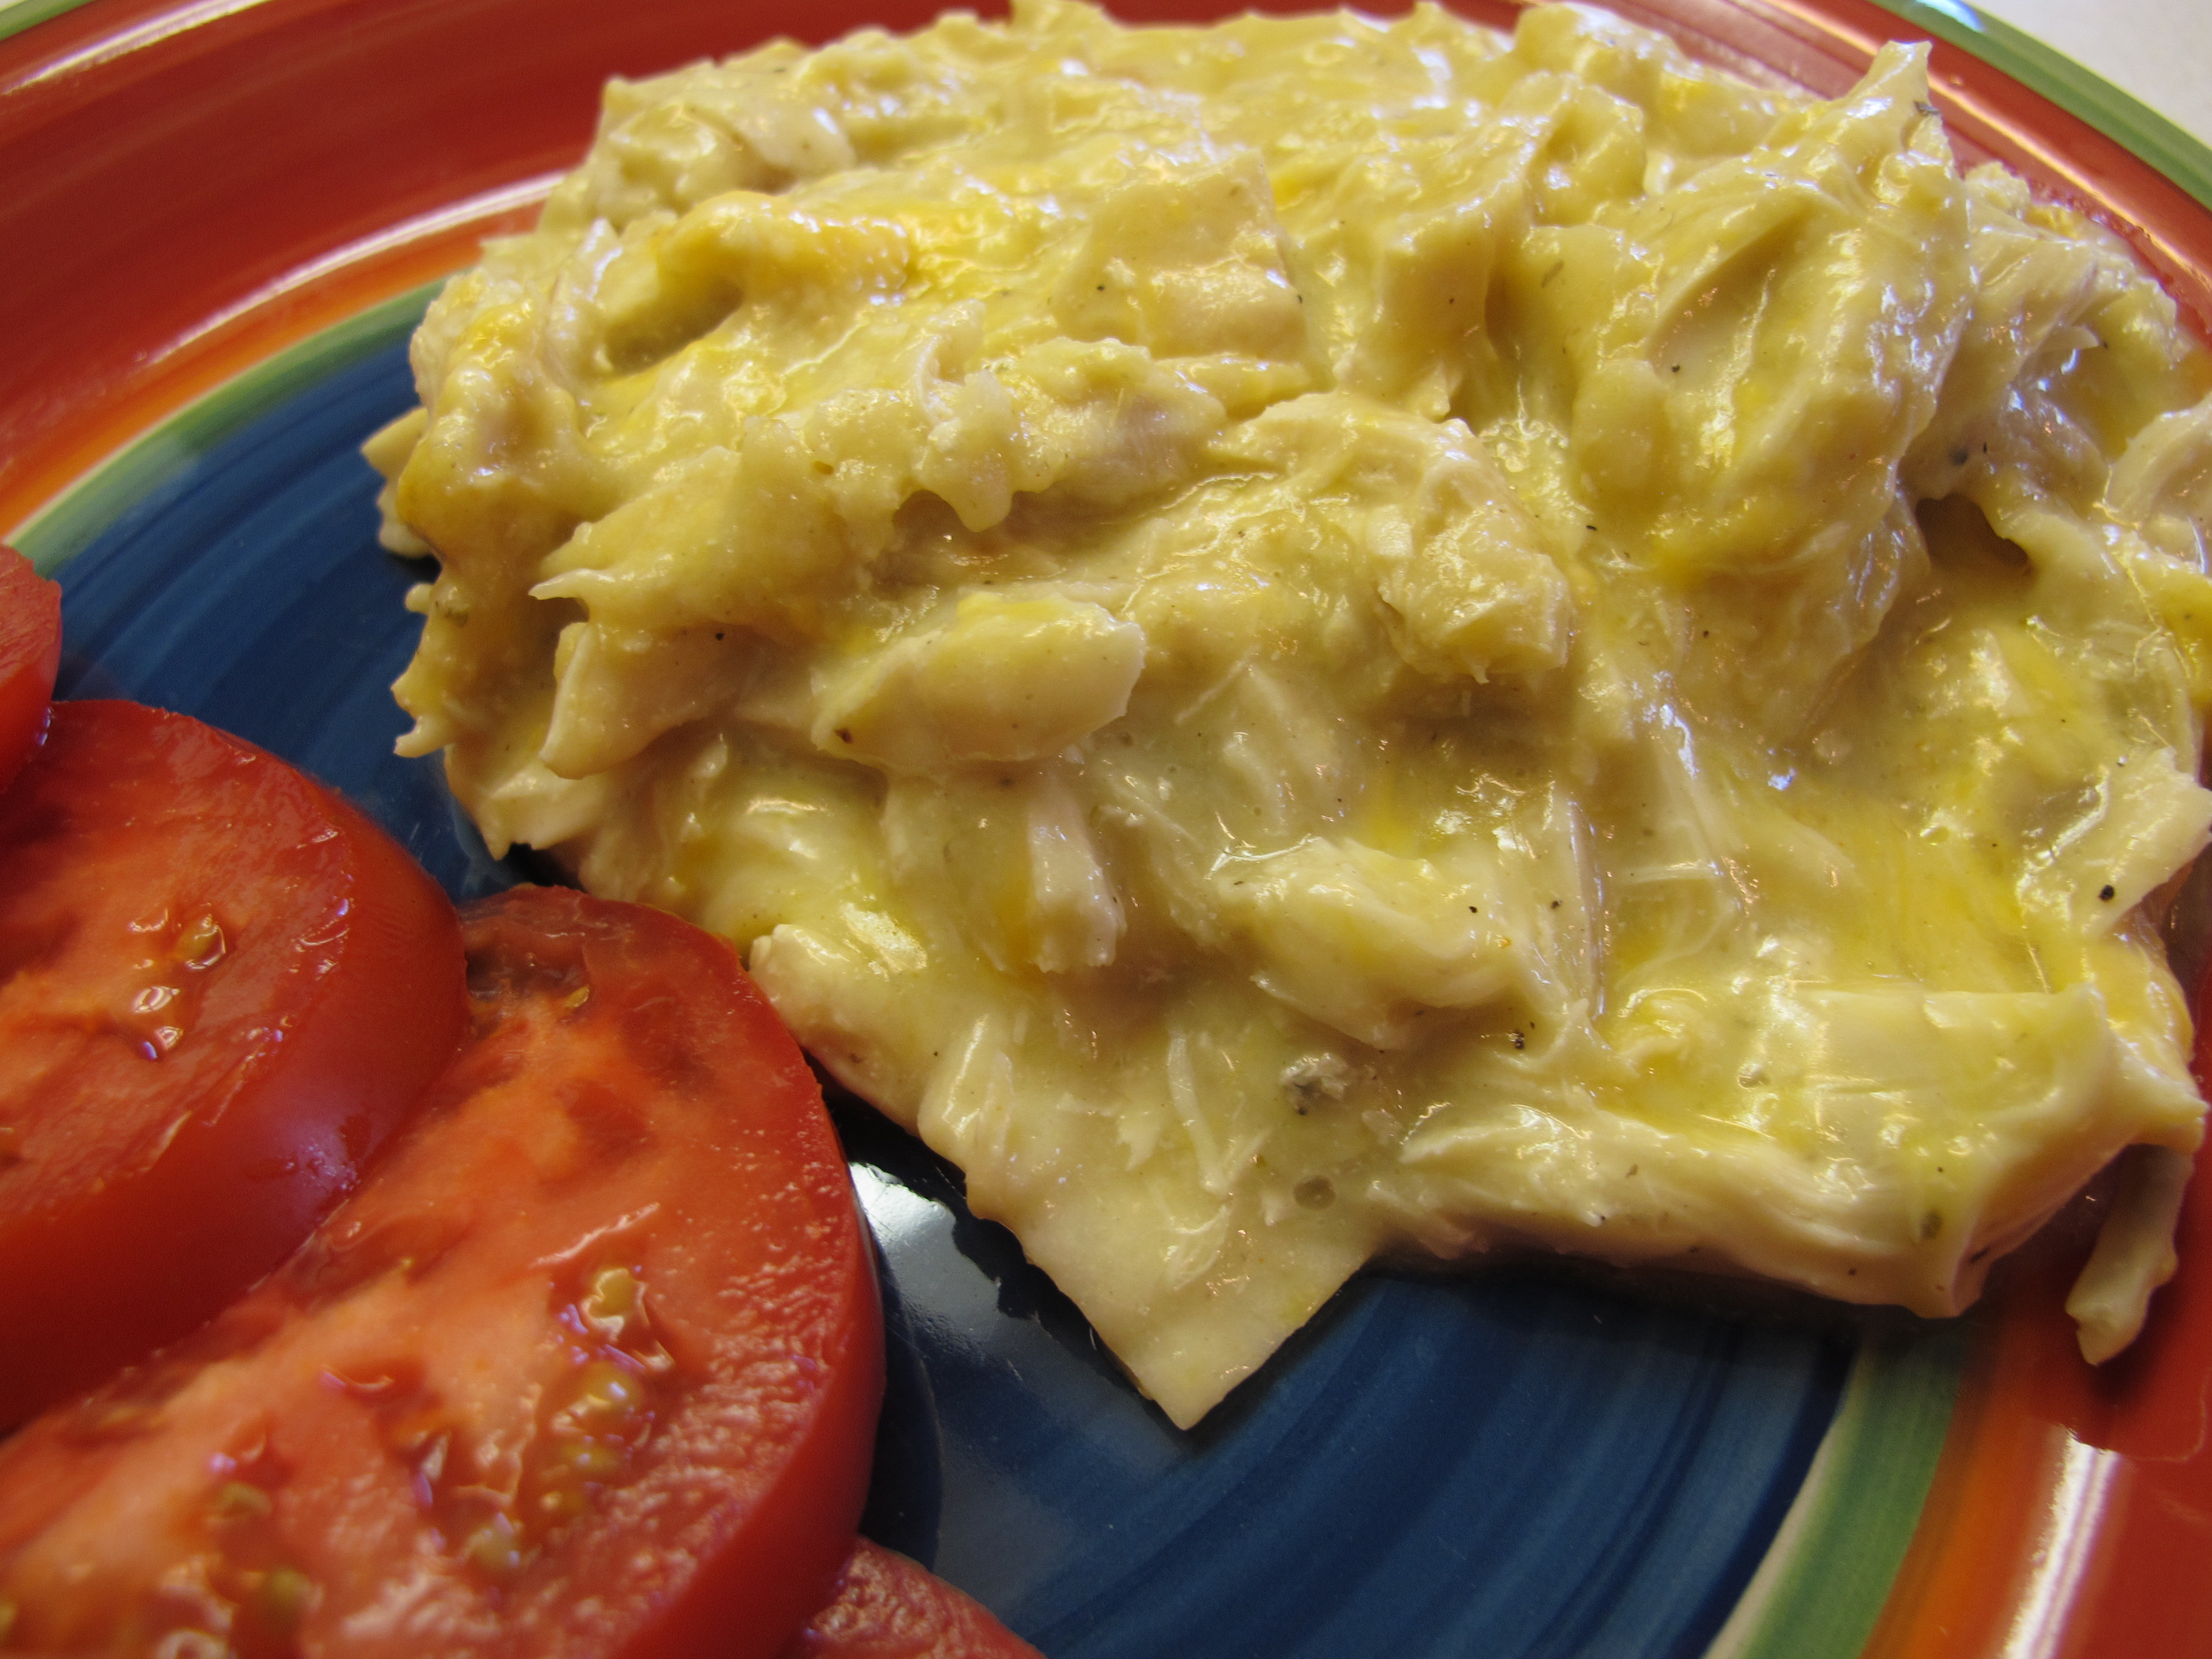
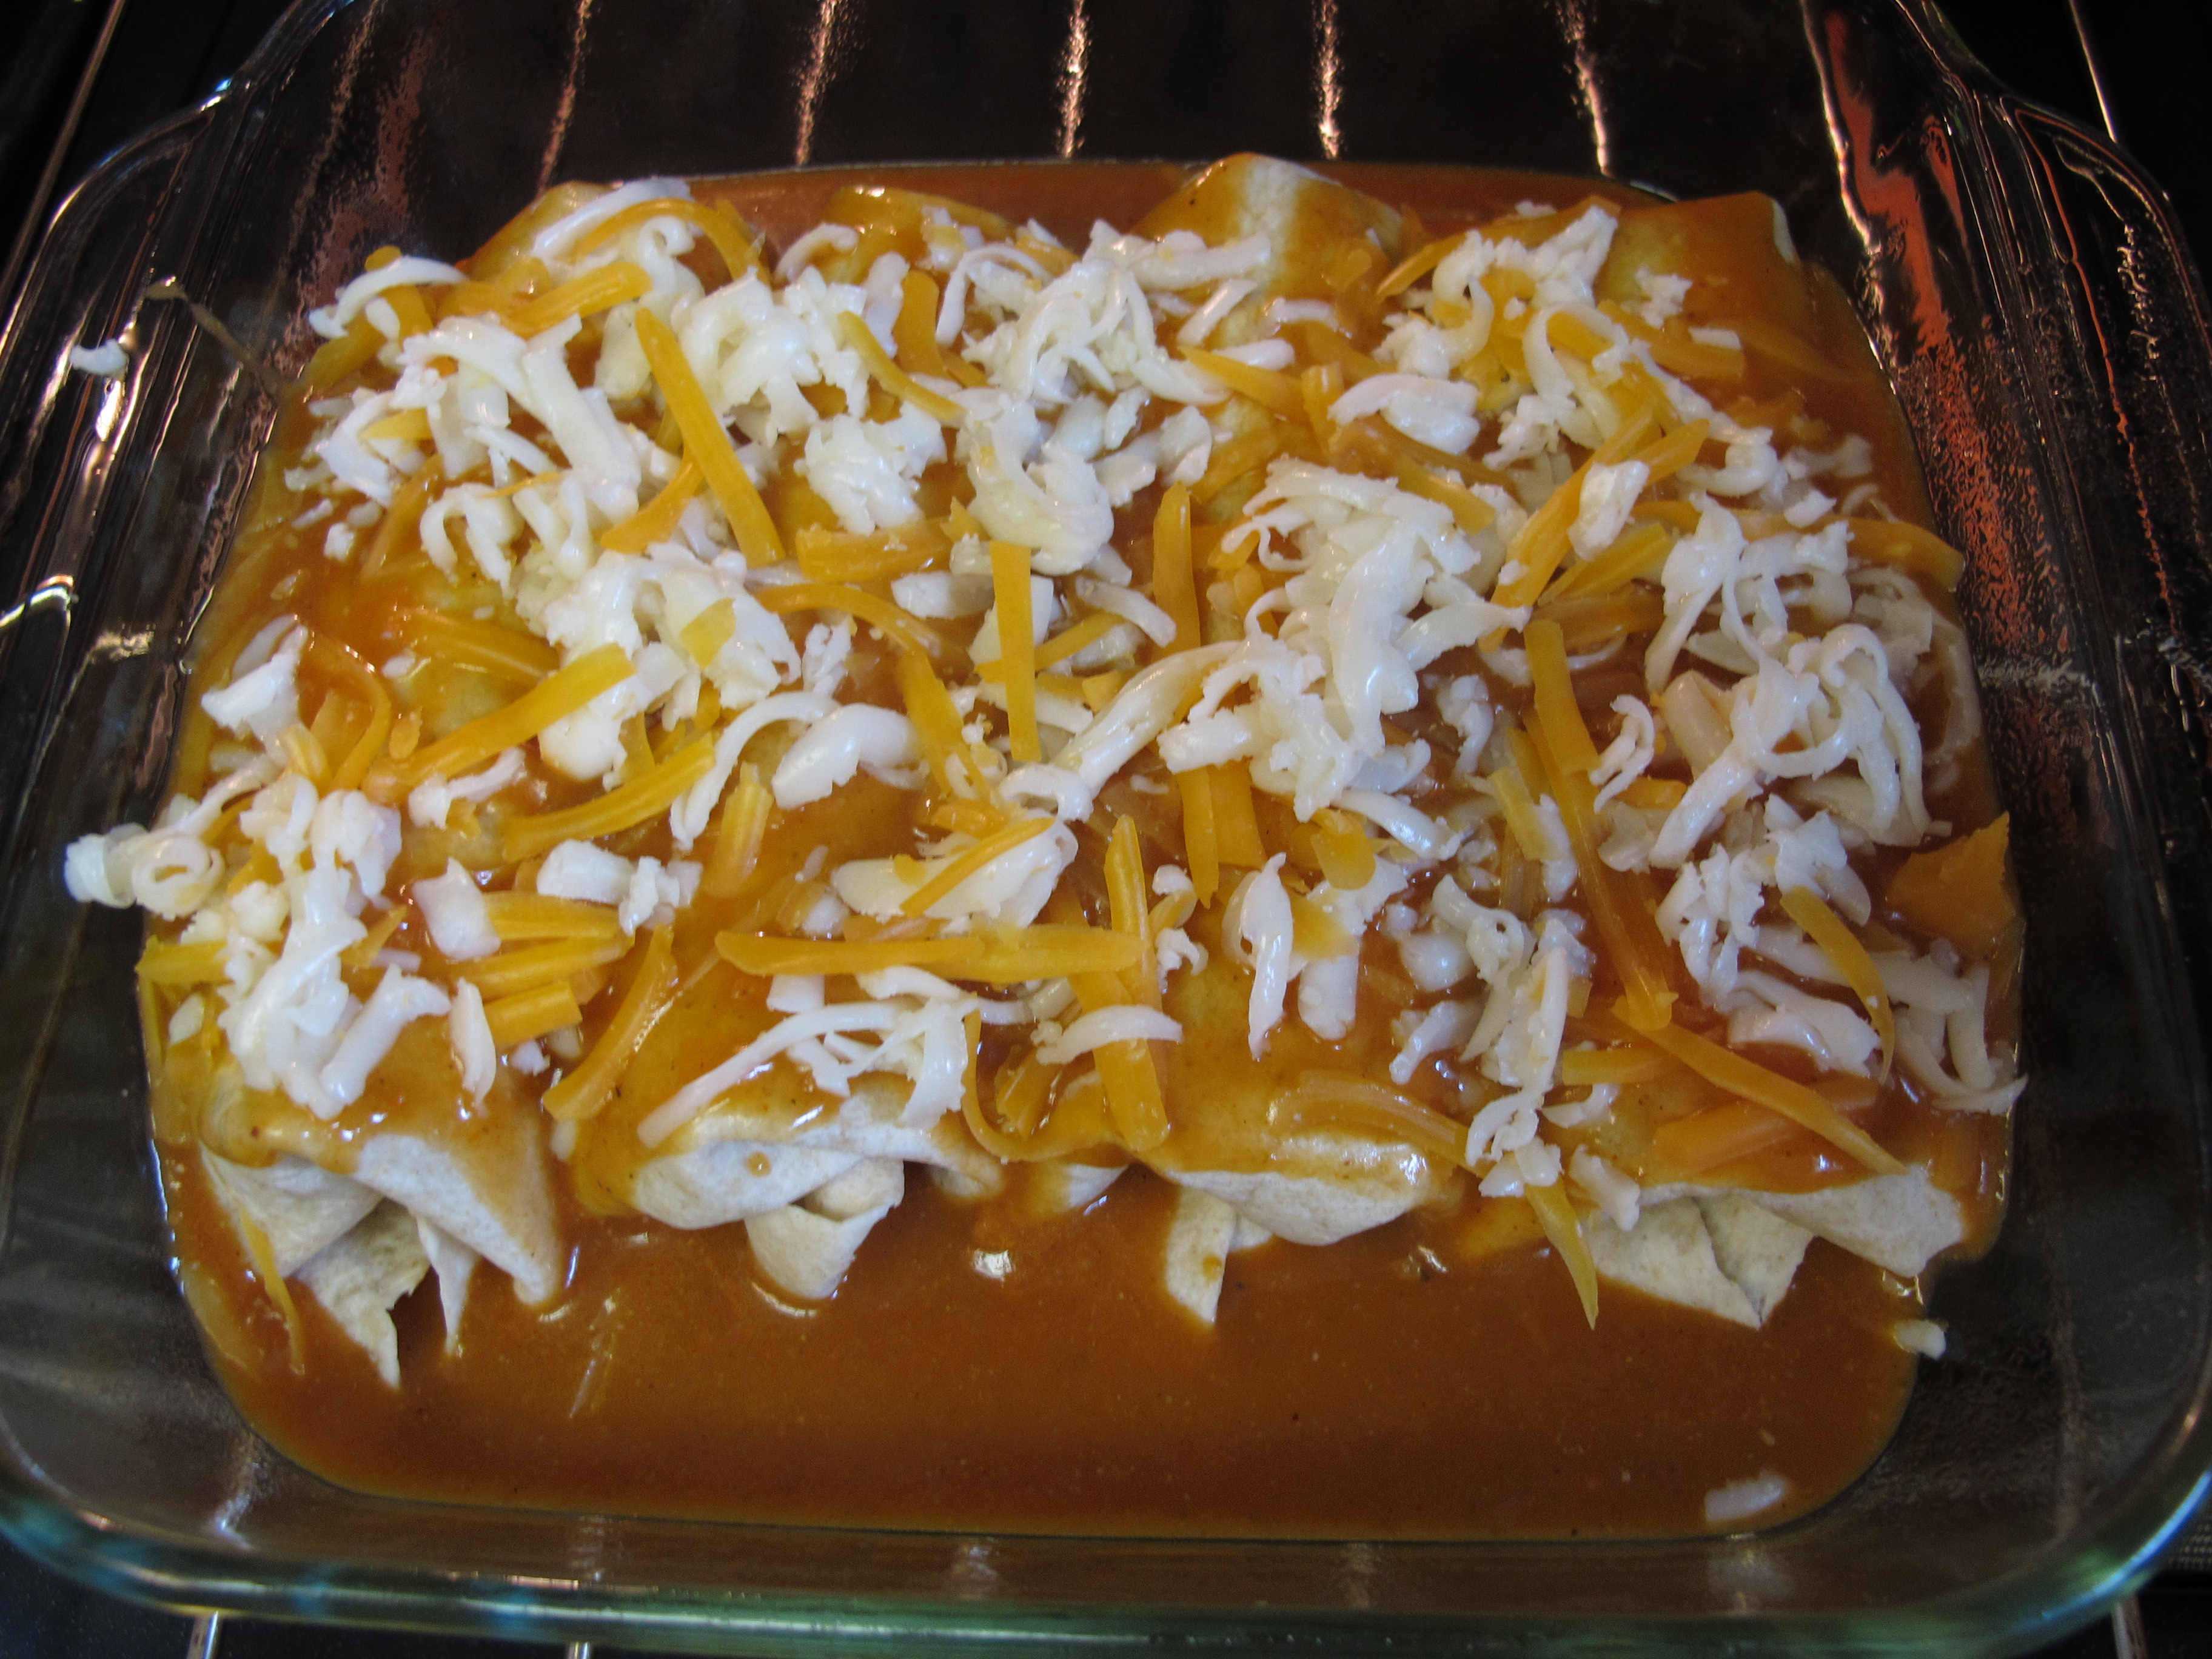
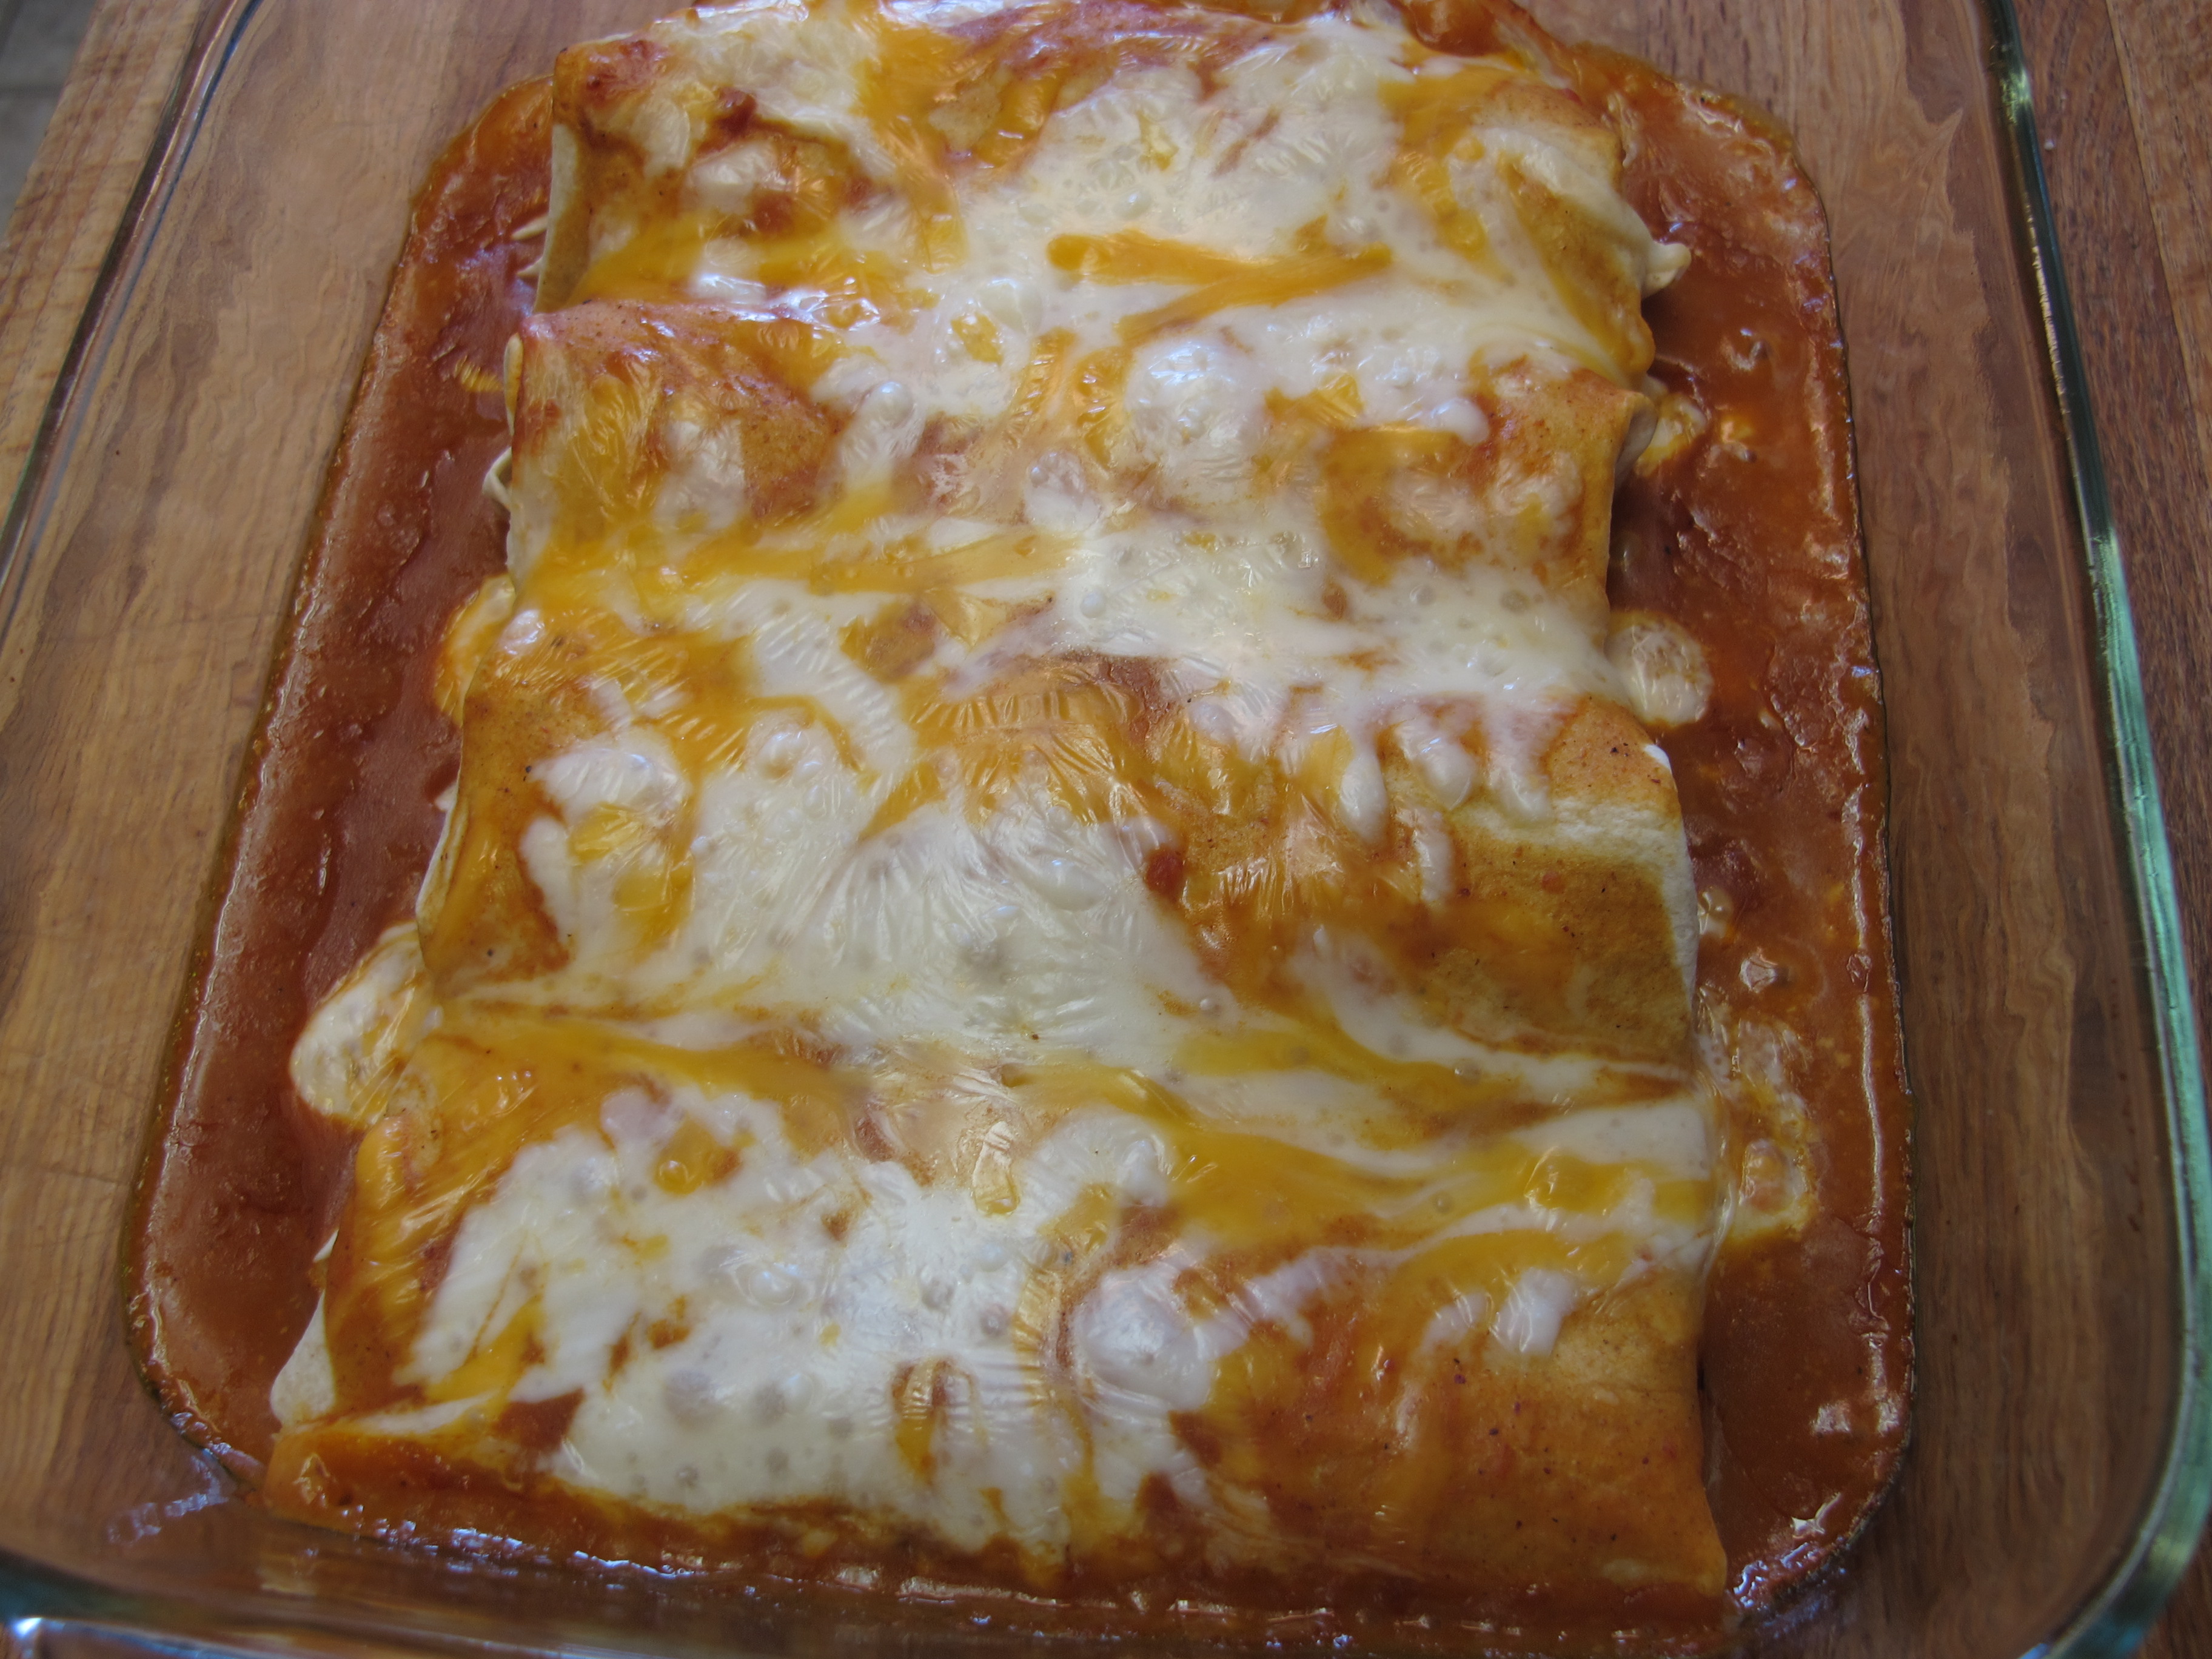
Chicken Tortilla Casserole

This is a simple chicken casserole recipe that is great for using up leftover chicken. In these pictures it looks a bit runny – and it was – but still had great flavor! I didn’t put enough chicken in it, but I have adjusted the ingredients listed. Also, the ingredients listed are for the full recipe, pictures only show half the recipe.
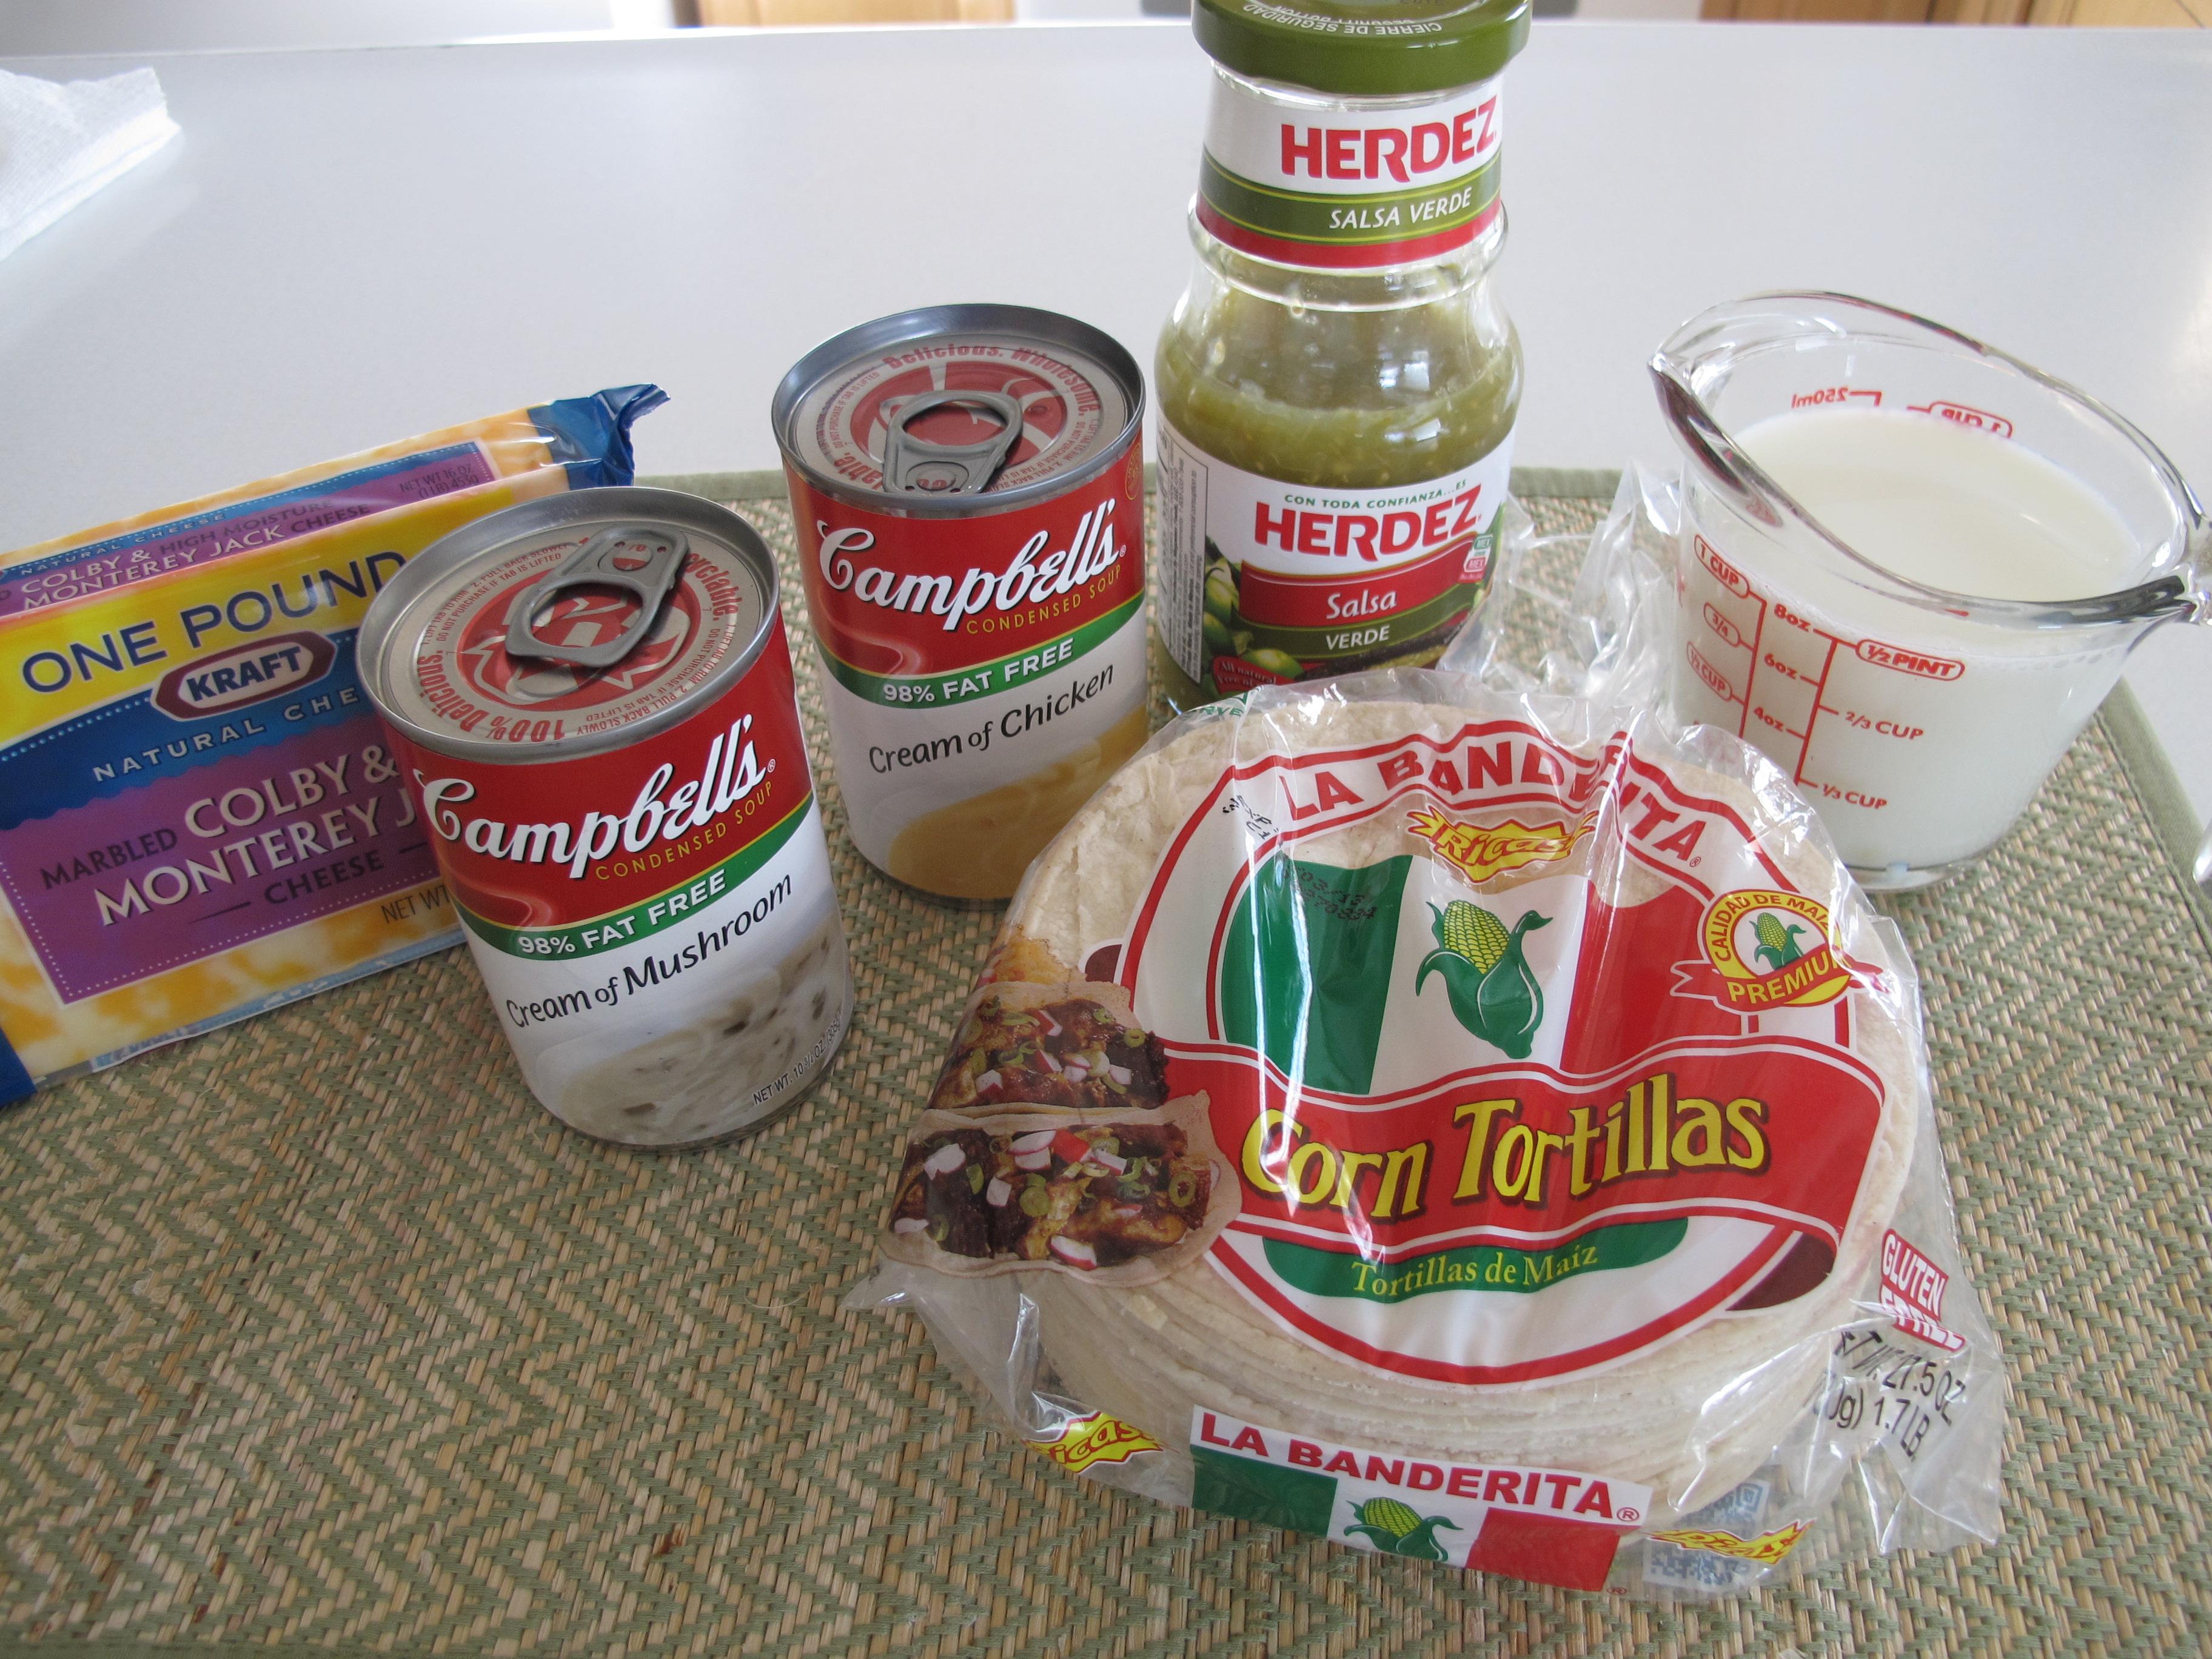
1 (10 3/4 oz.) can 98% fat-free cream of mushroom soup
1 (10 3/4 oz.) can 98% fat-free cream of chicken soup
1 cup milk
7 oz. green chili salsa
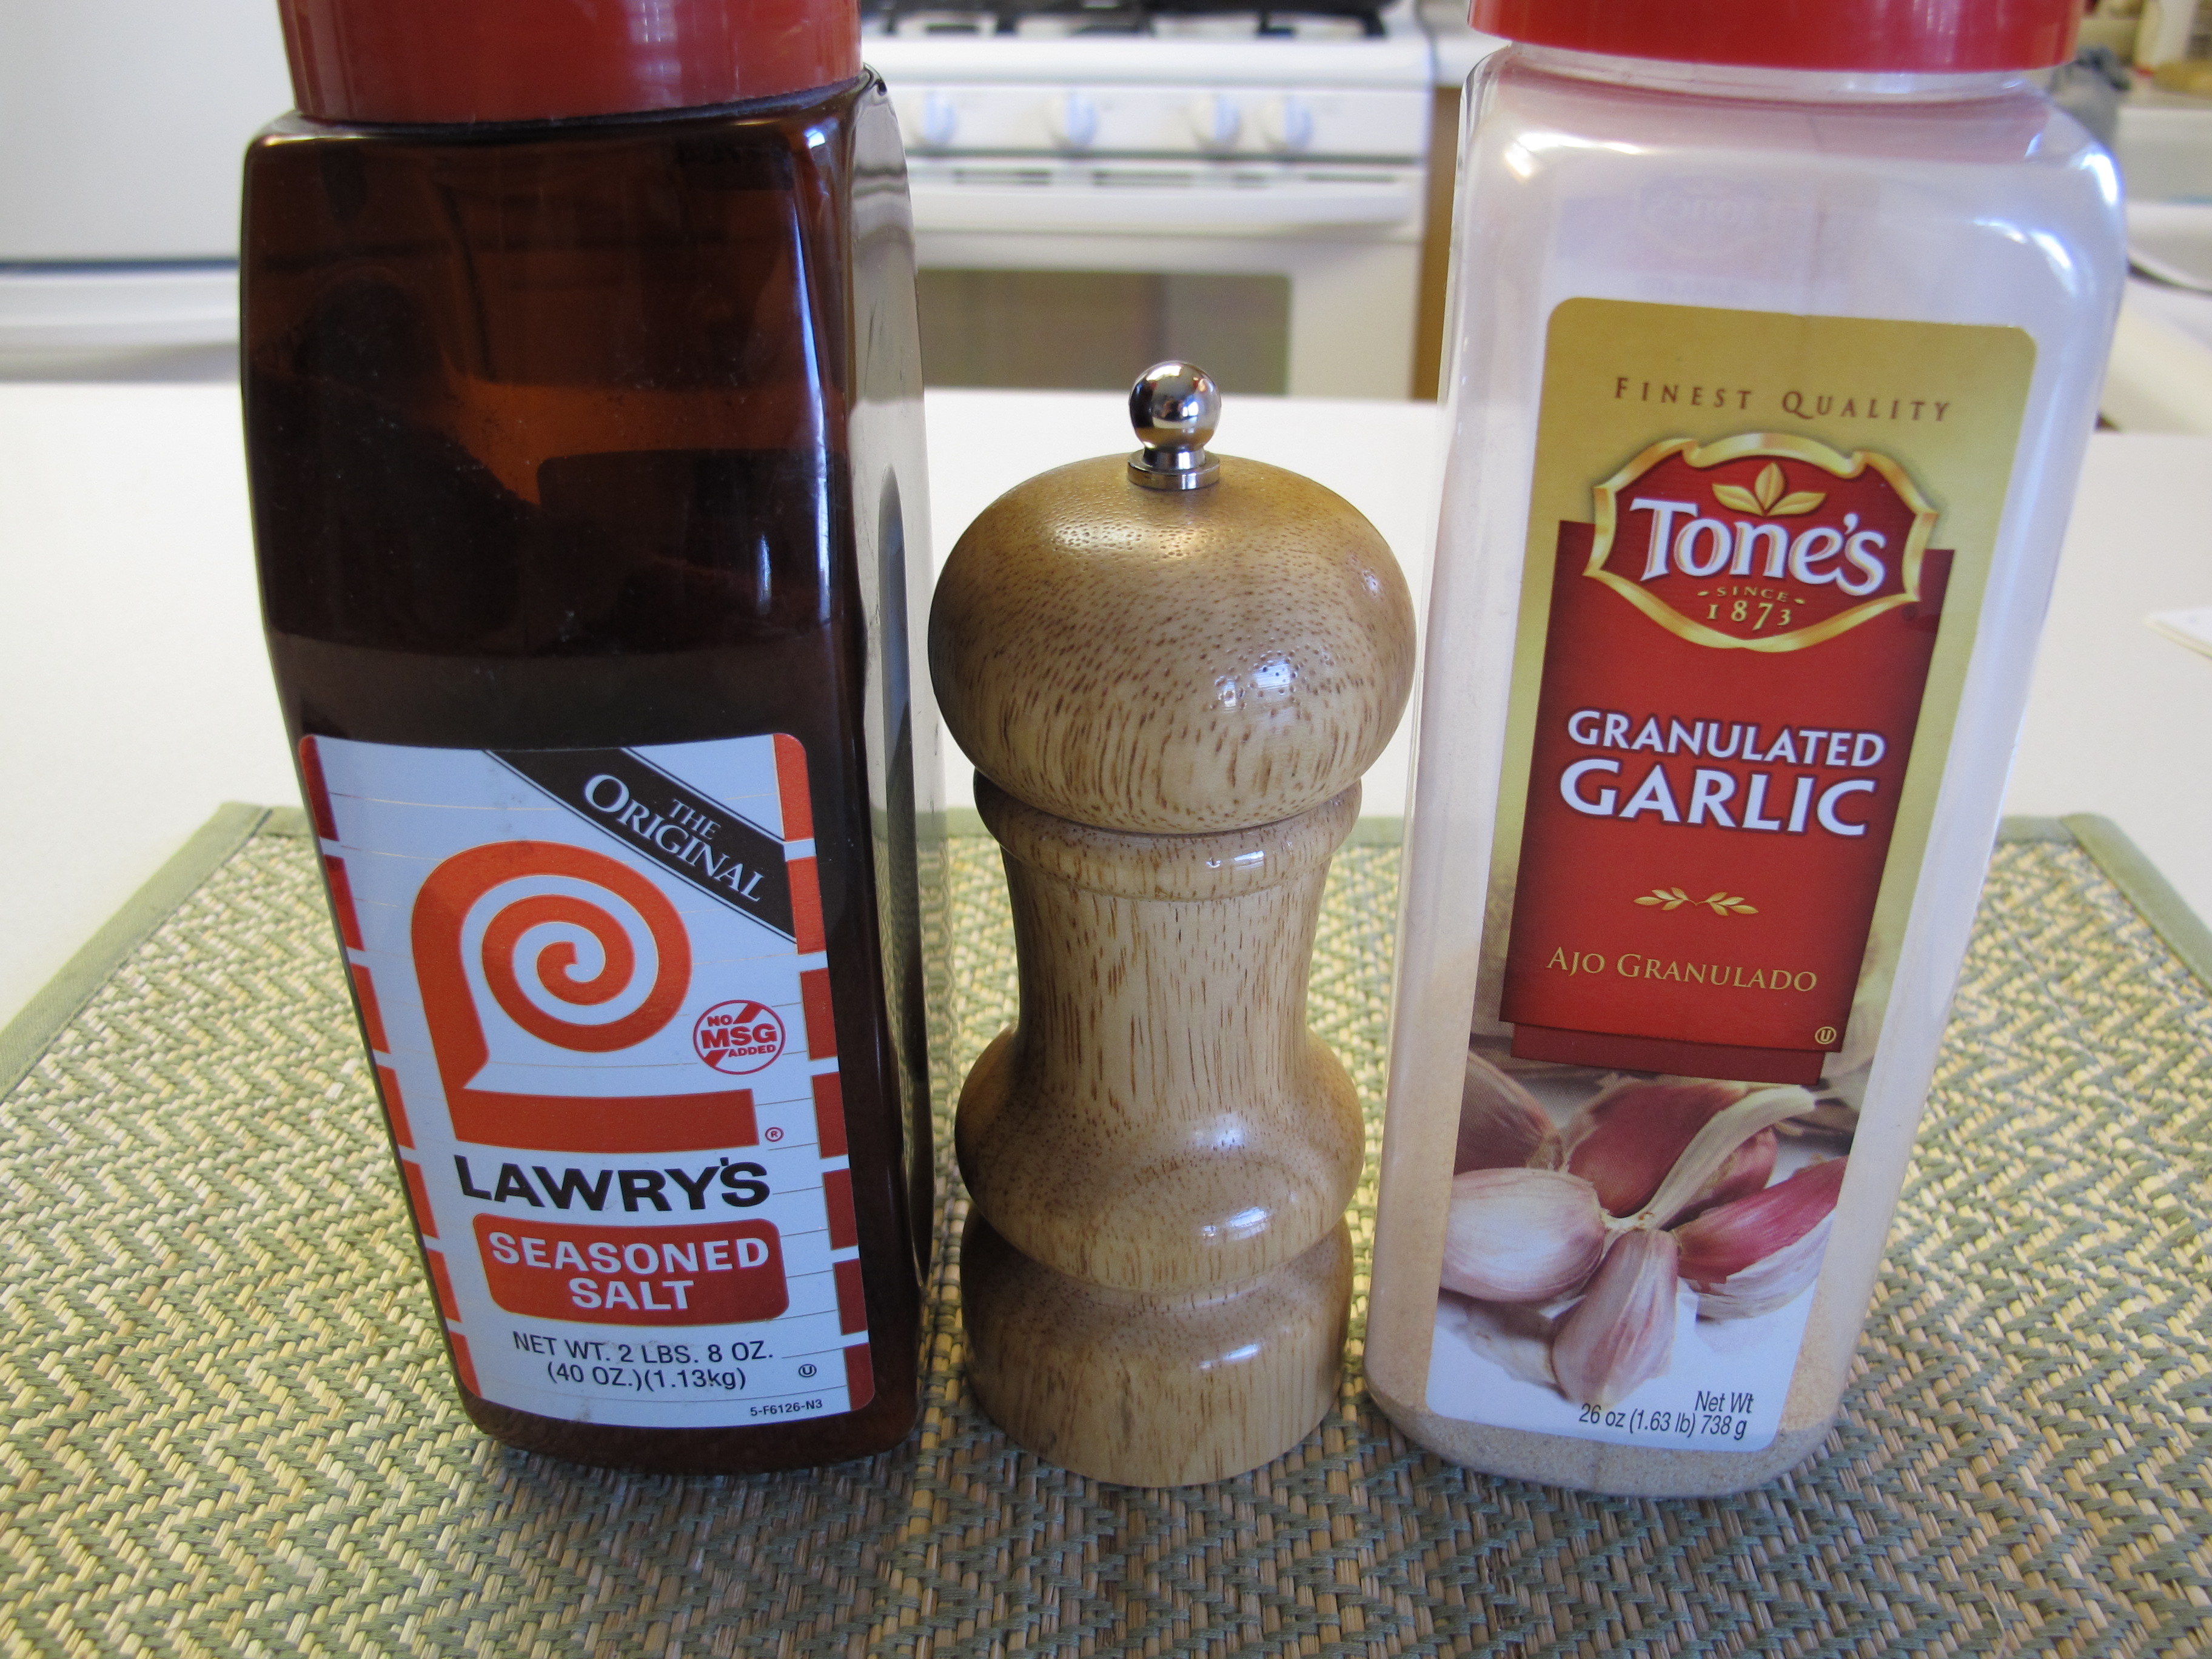
1/2 tsp. seasoned salt
1/2 tsp. garlic granules
1/4 tsp. pepper
Blend soups, milk, green chili salsa and seasonings together.
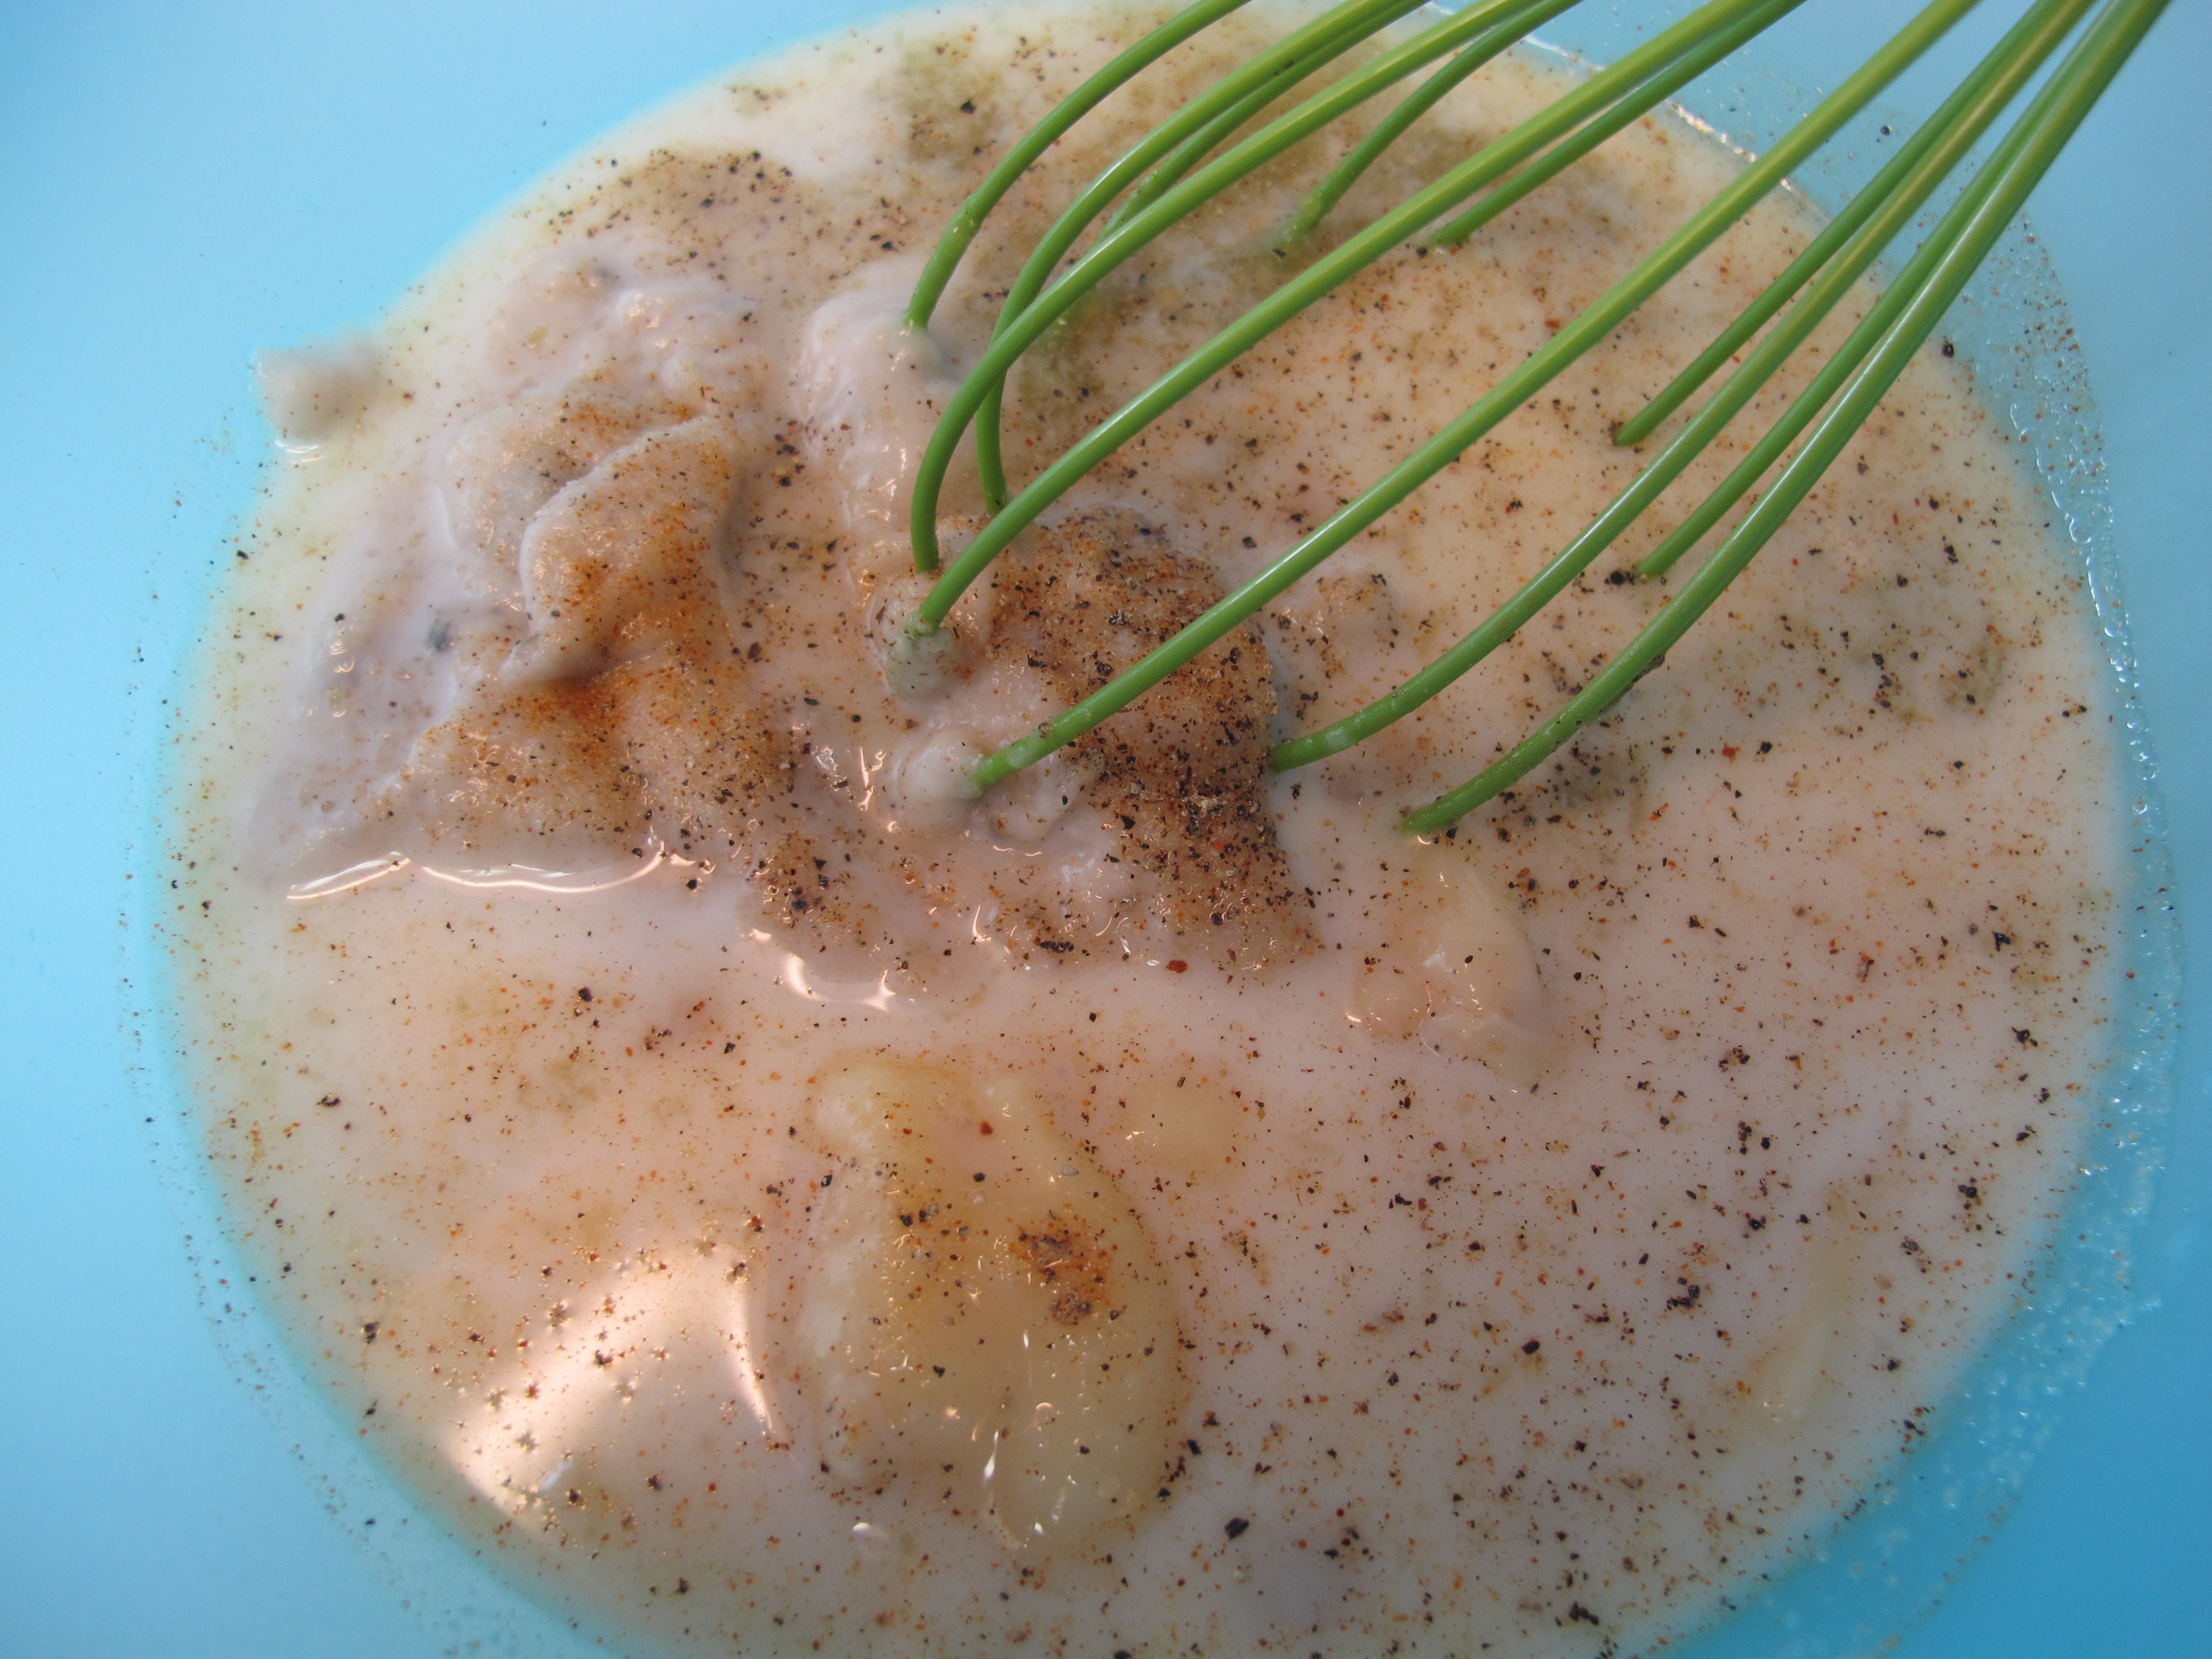
½ pound cheese, grated
6 chicken breasts (about 8 cups), cooked and cut into bite size pieces
Add chicken and grated cheese. Save a little bit of cheese to put on the top.

8 corn tortillas, cut into 1” squares

Spray a 3 qt. casserole dish. Alternate layers of tortillas and then the chicken mixture – about 3 layers. Top with cheese.


Cover with foil and bake 45 mins. at 300 degrees.
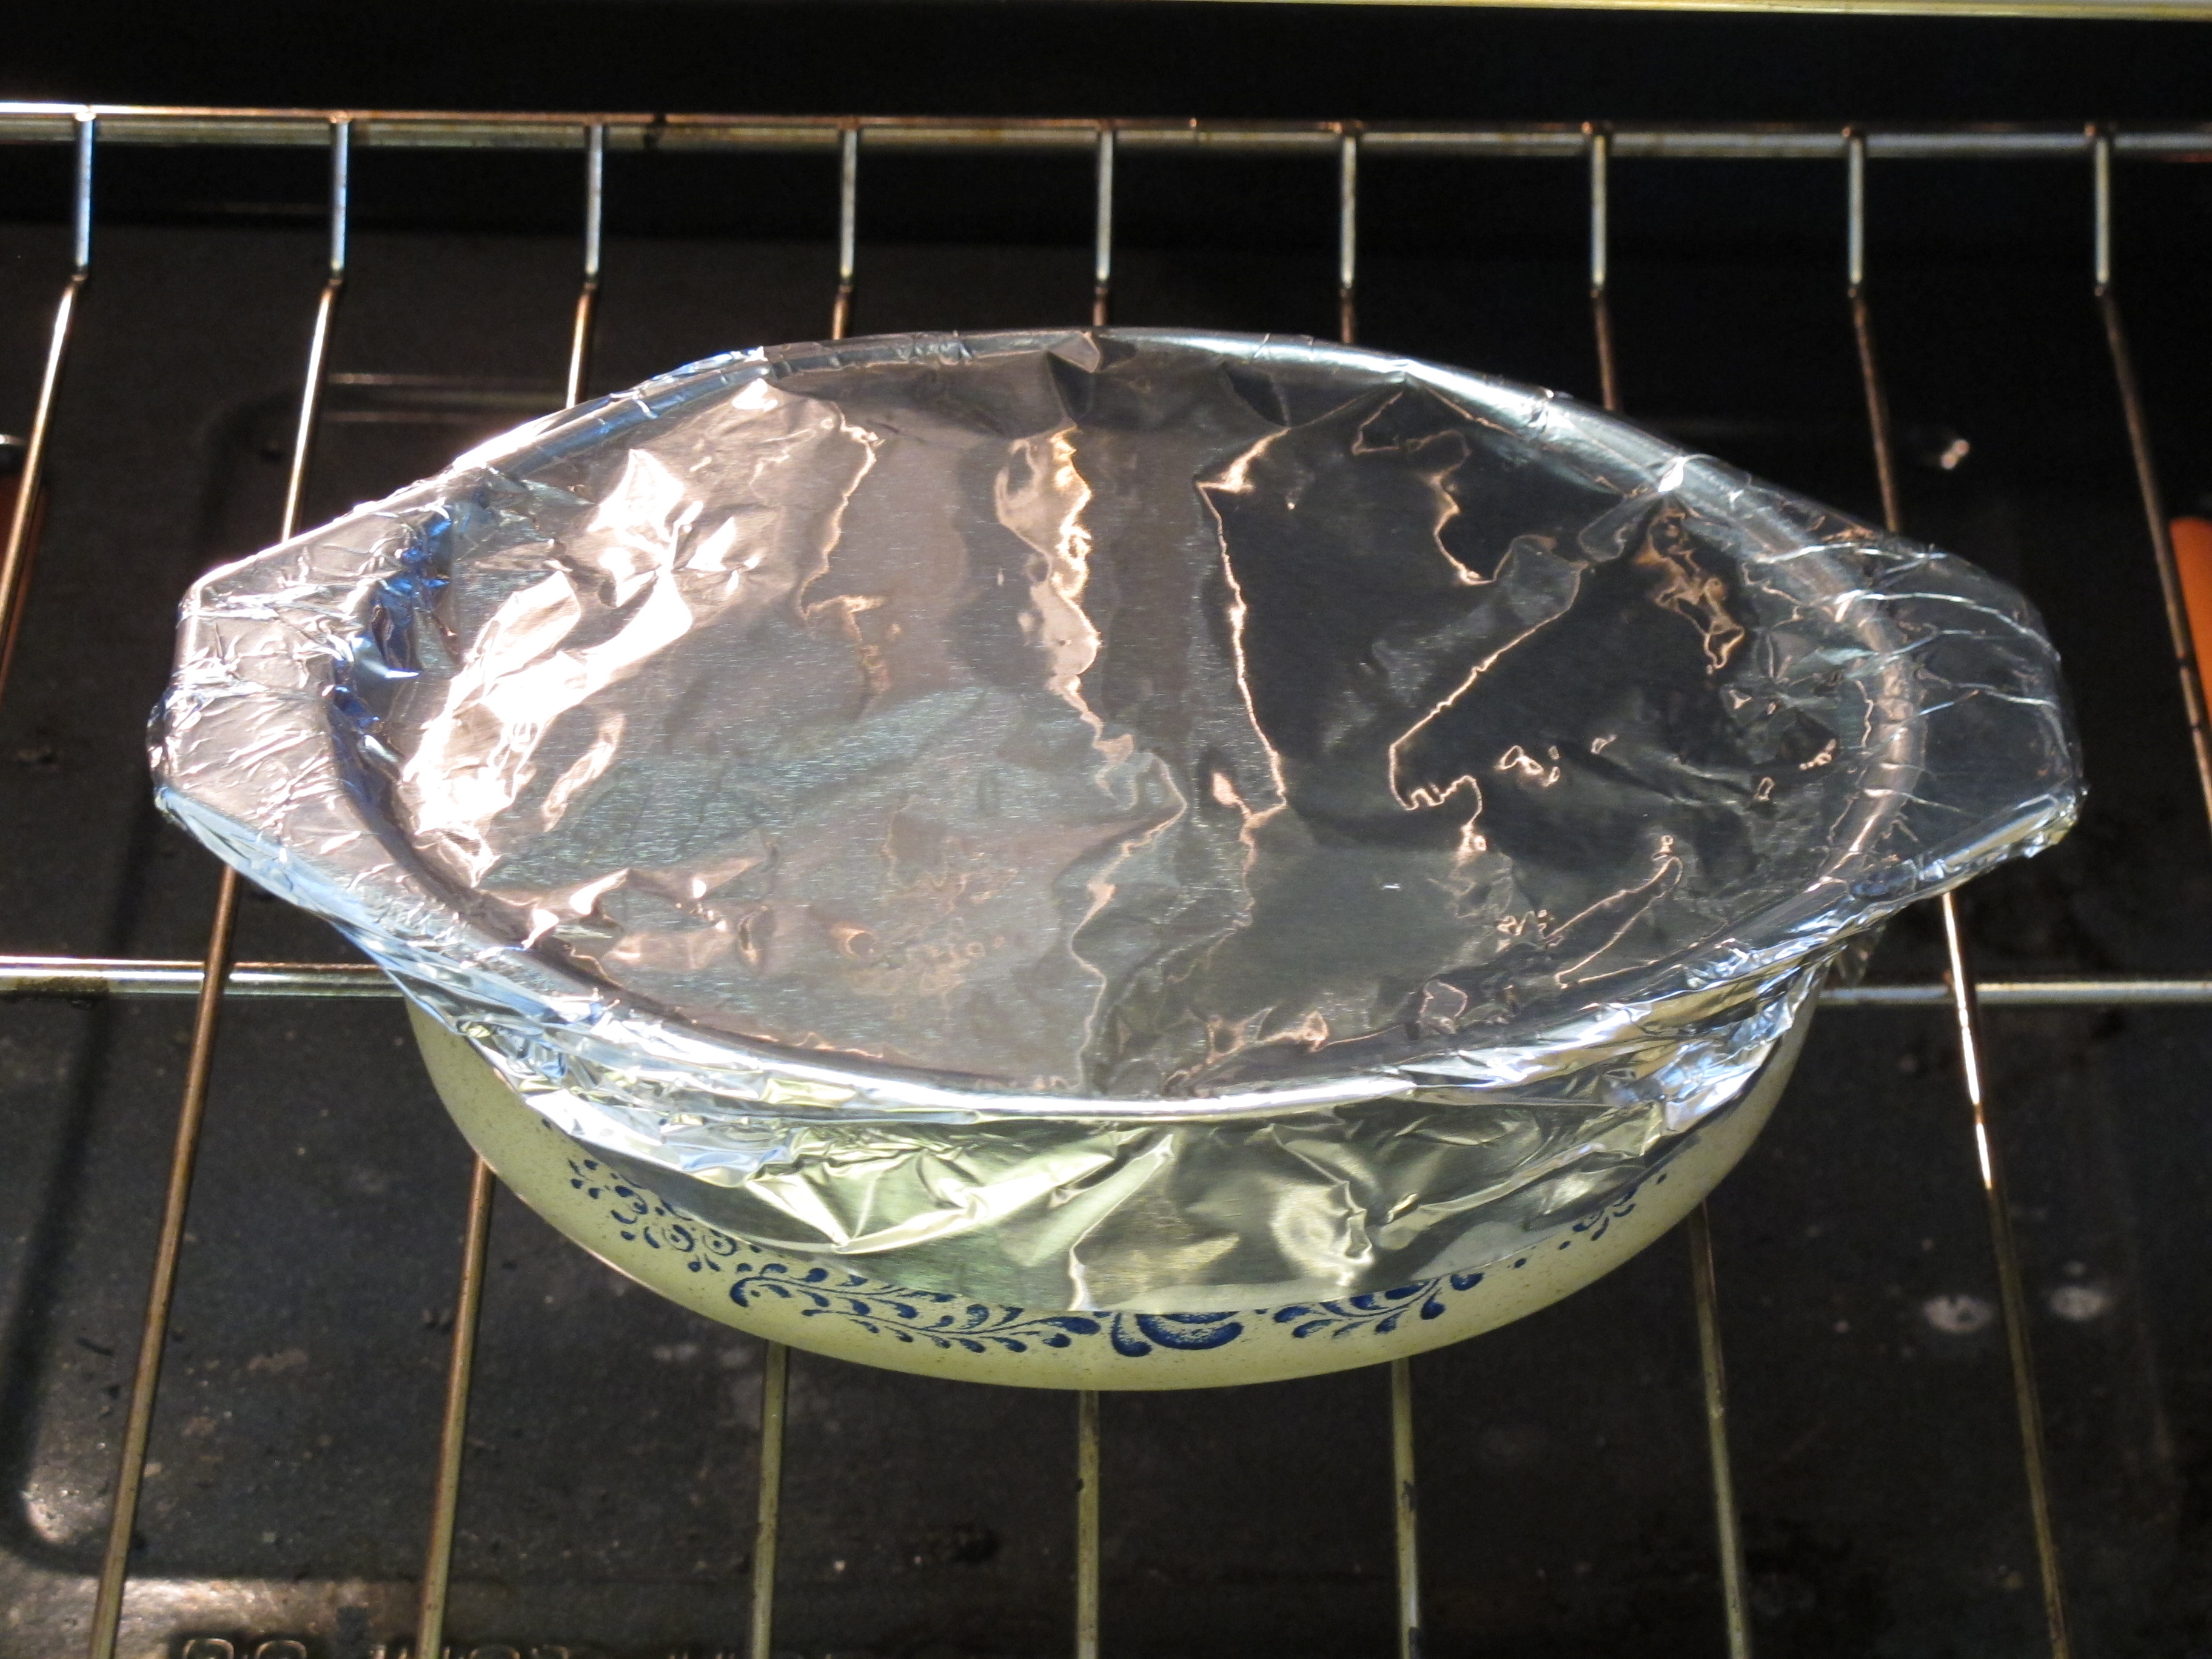
Remove foil and bake an additional 15 minutes.
Makes 6 servings
Weight Watchers: 9 PointsPlus per serving
FULL RECIPE WITHOUT PICTURES —
CHICKEN TORTILLA CASSEROLE
1 (10 3/4 oz.) can 98% fat-free cream of mushroom soup
1 (10 3/4 oz.) can 98% fat-free cream of chicken soup
1 cup milk
7 oz. green chili salsa
½ pound cheese, grated
6 chicken breasts (about 8 cups), cooked and cut into bite size pieces
8 corn tortillas, cut into 1” squares
Blend soups, milk and chili salsa together.
Add chicken and grated cheese. Save a little bit of cheese to put on the top.
Spray a 3 qt. casserole dish. Alternate layers of tortillas and then the chicken mixture – about 3 layers. Top with cheese.
Cover with foil and bake 45 mins. at 300 degrees.
Remove foil and bake an additional 15 minutes.
Makes 6 servings
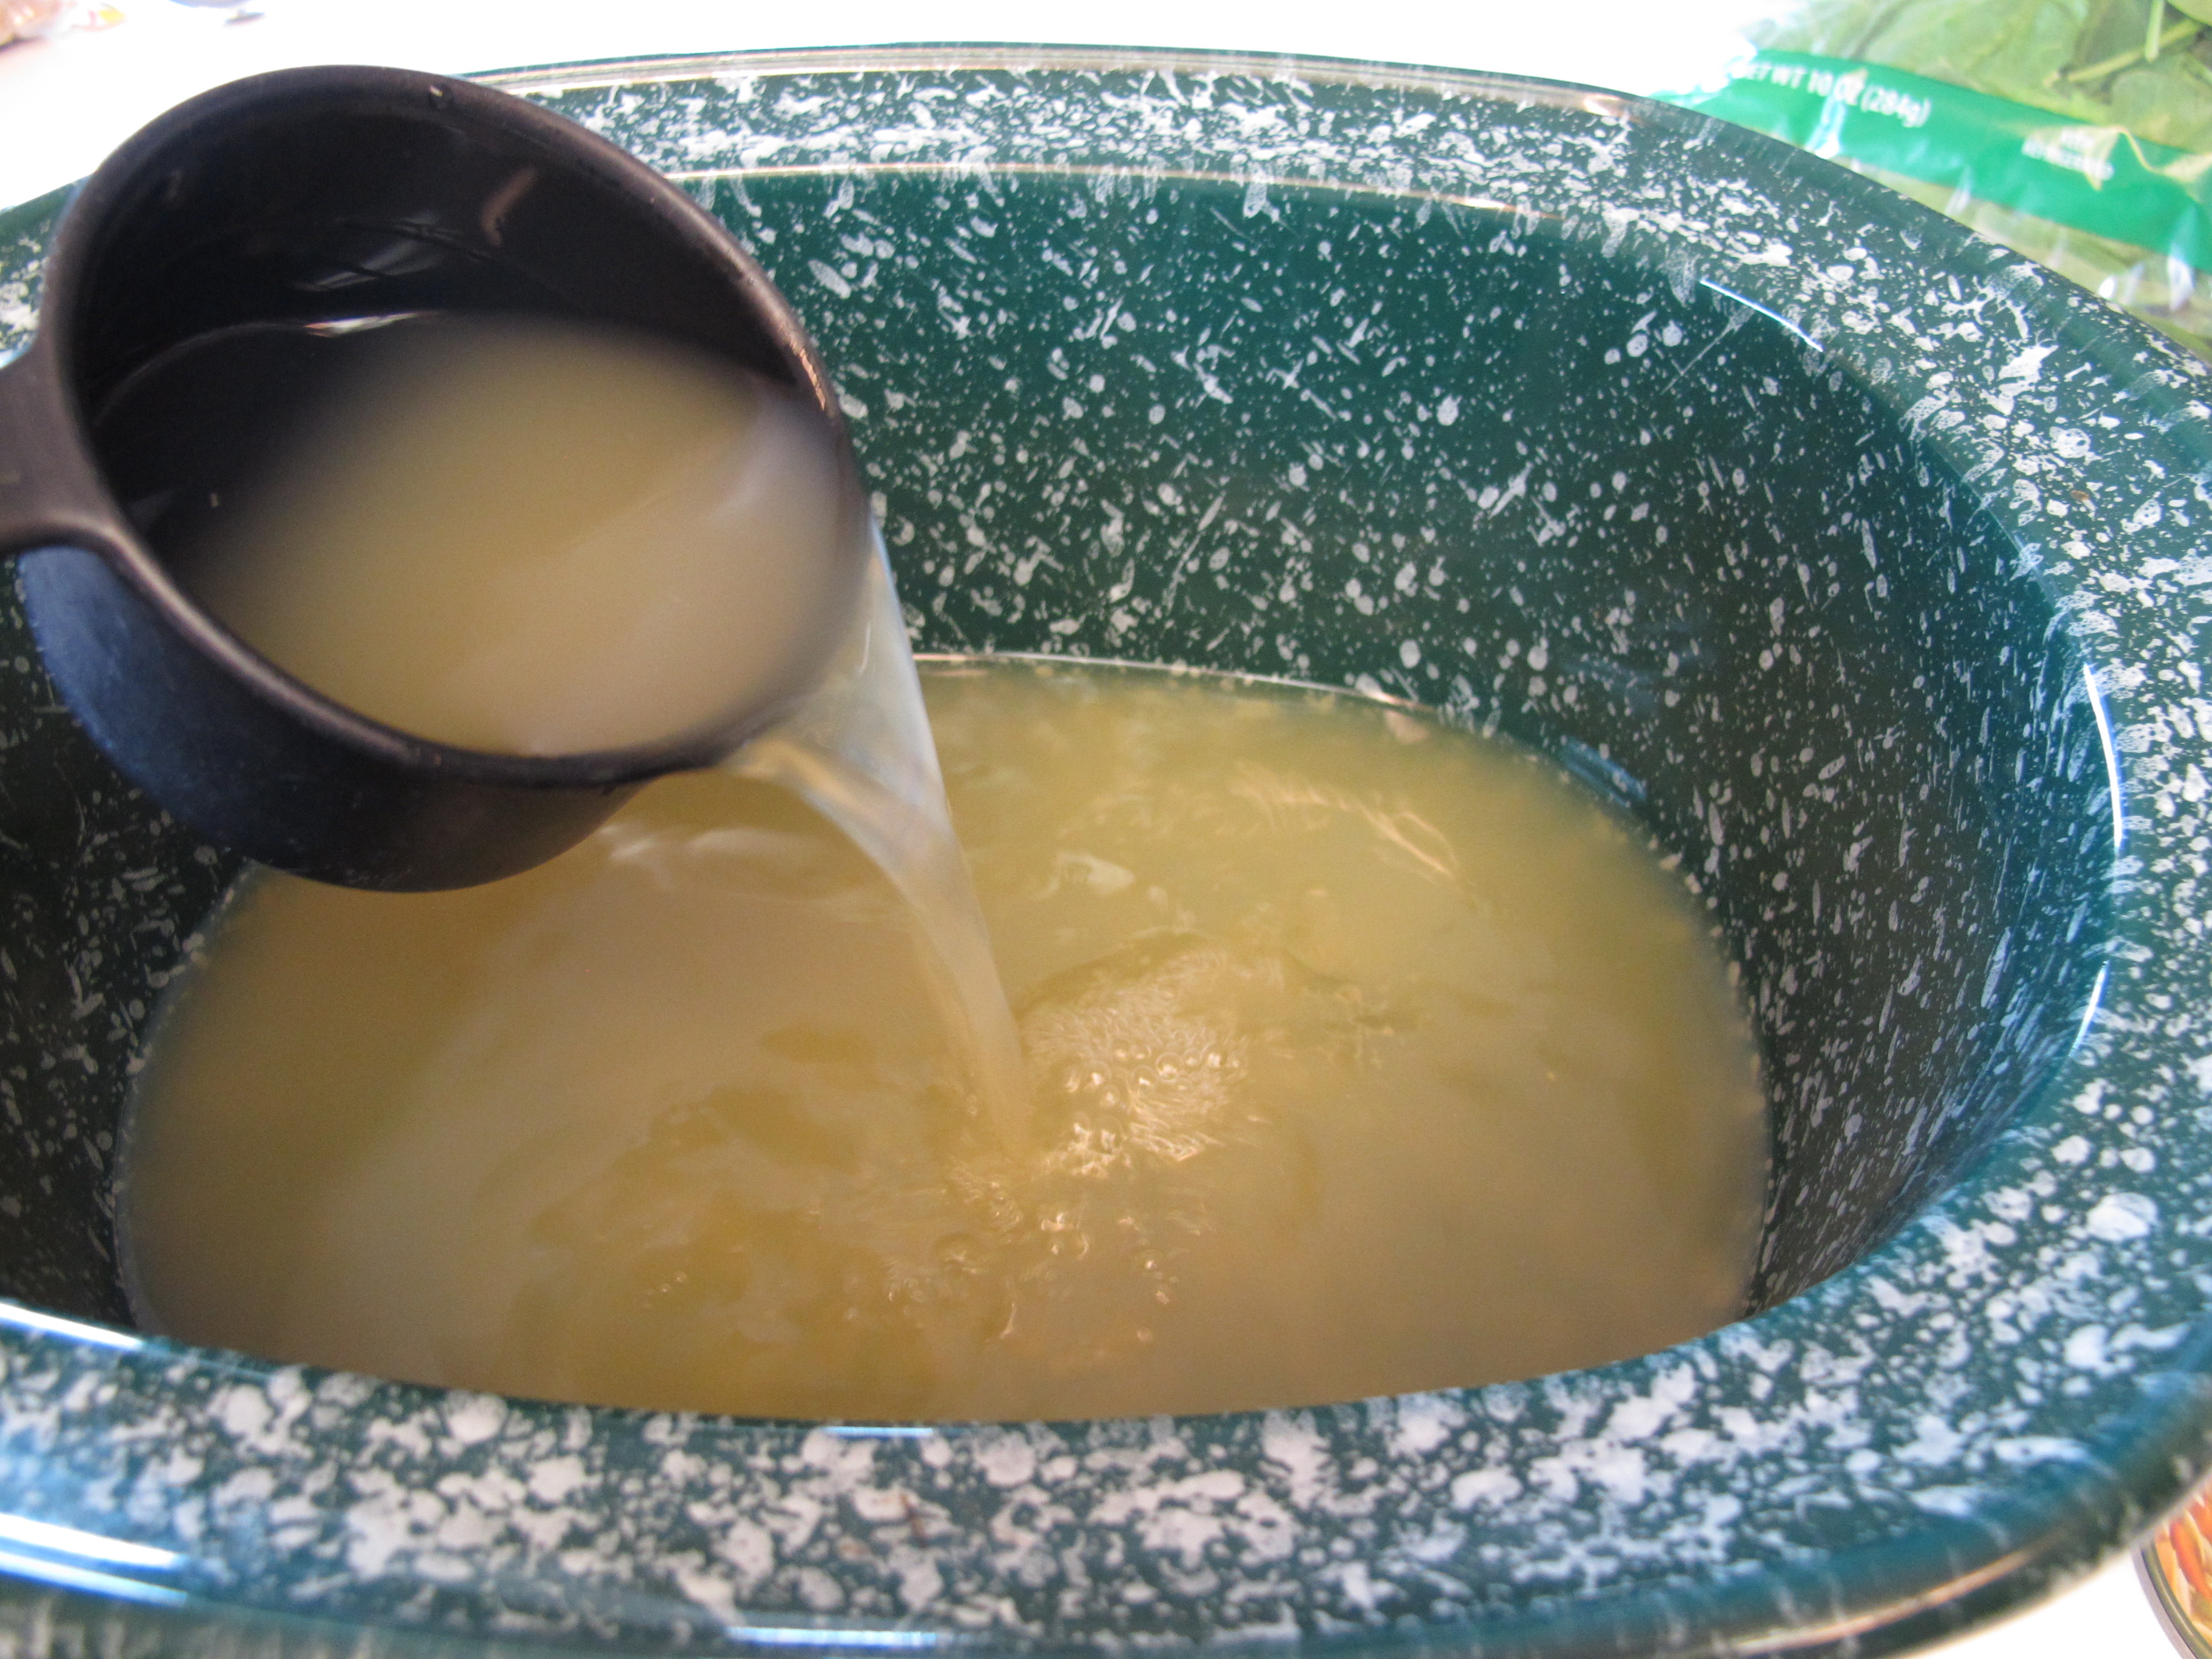
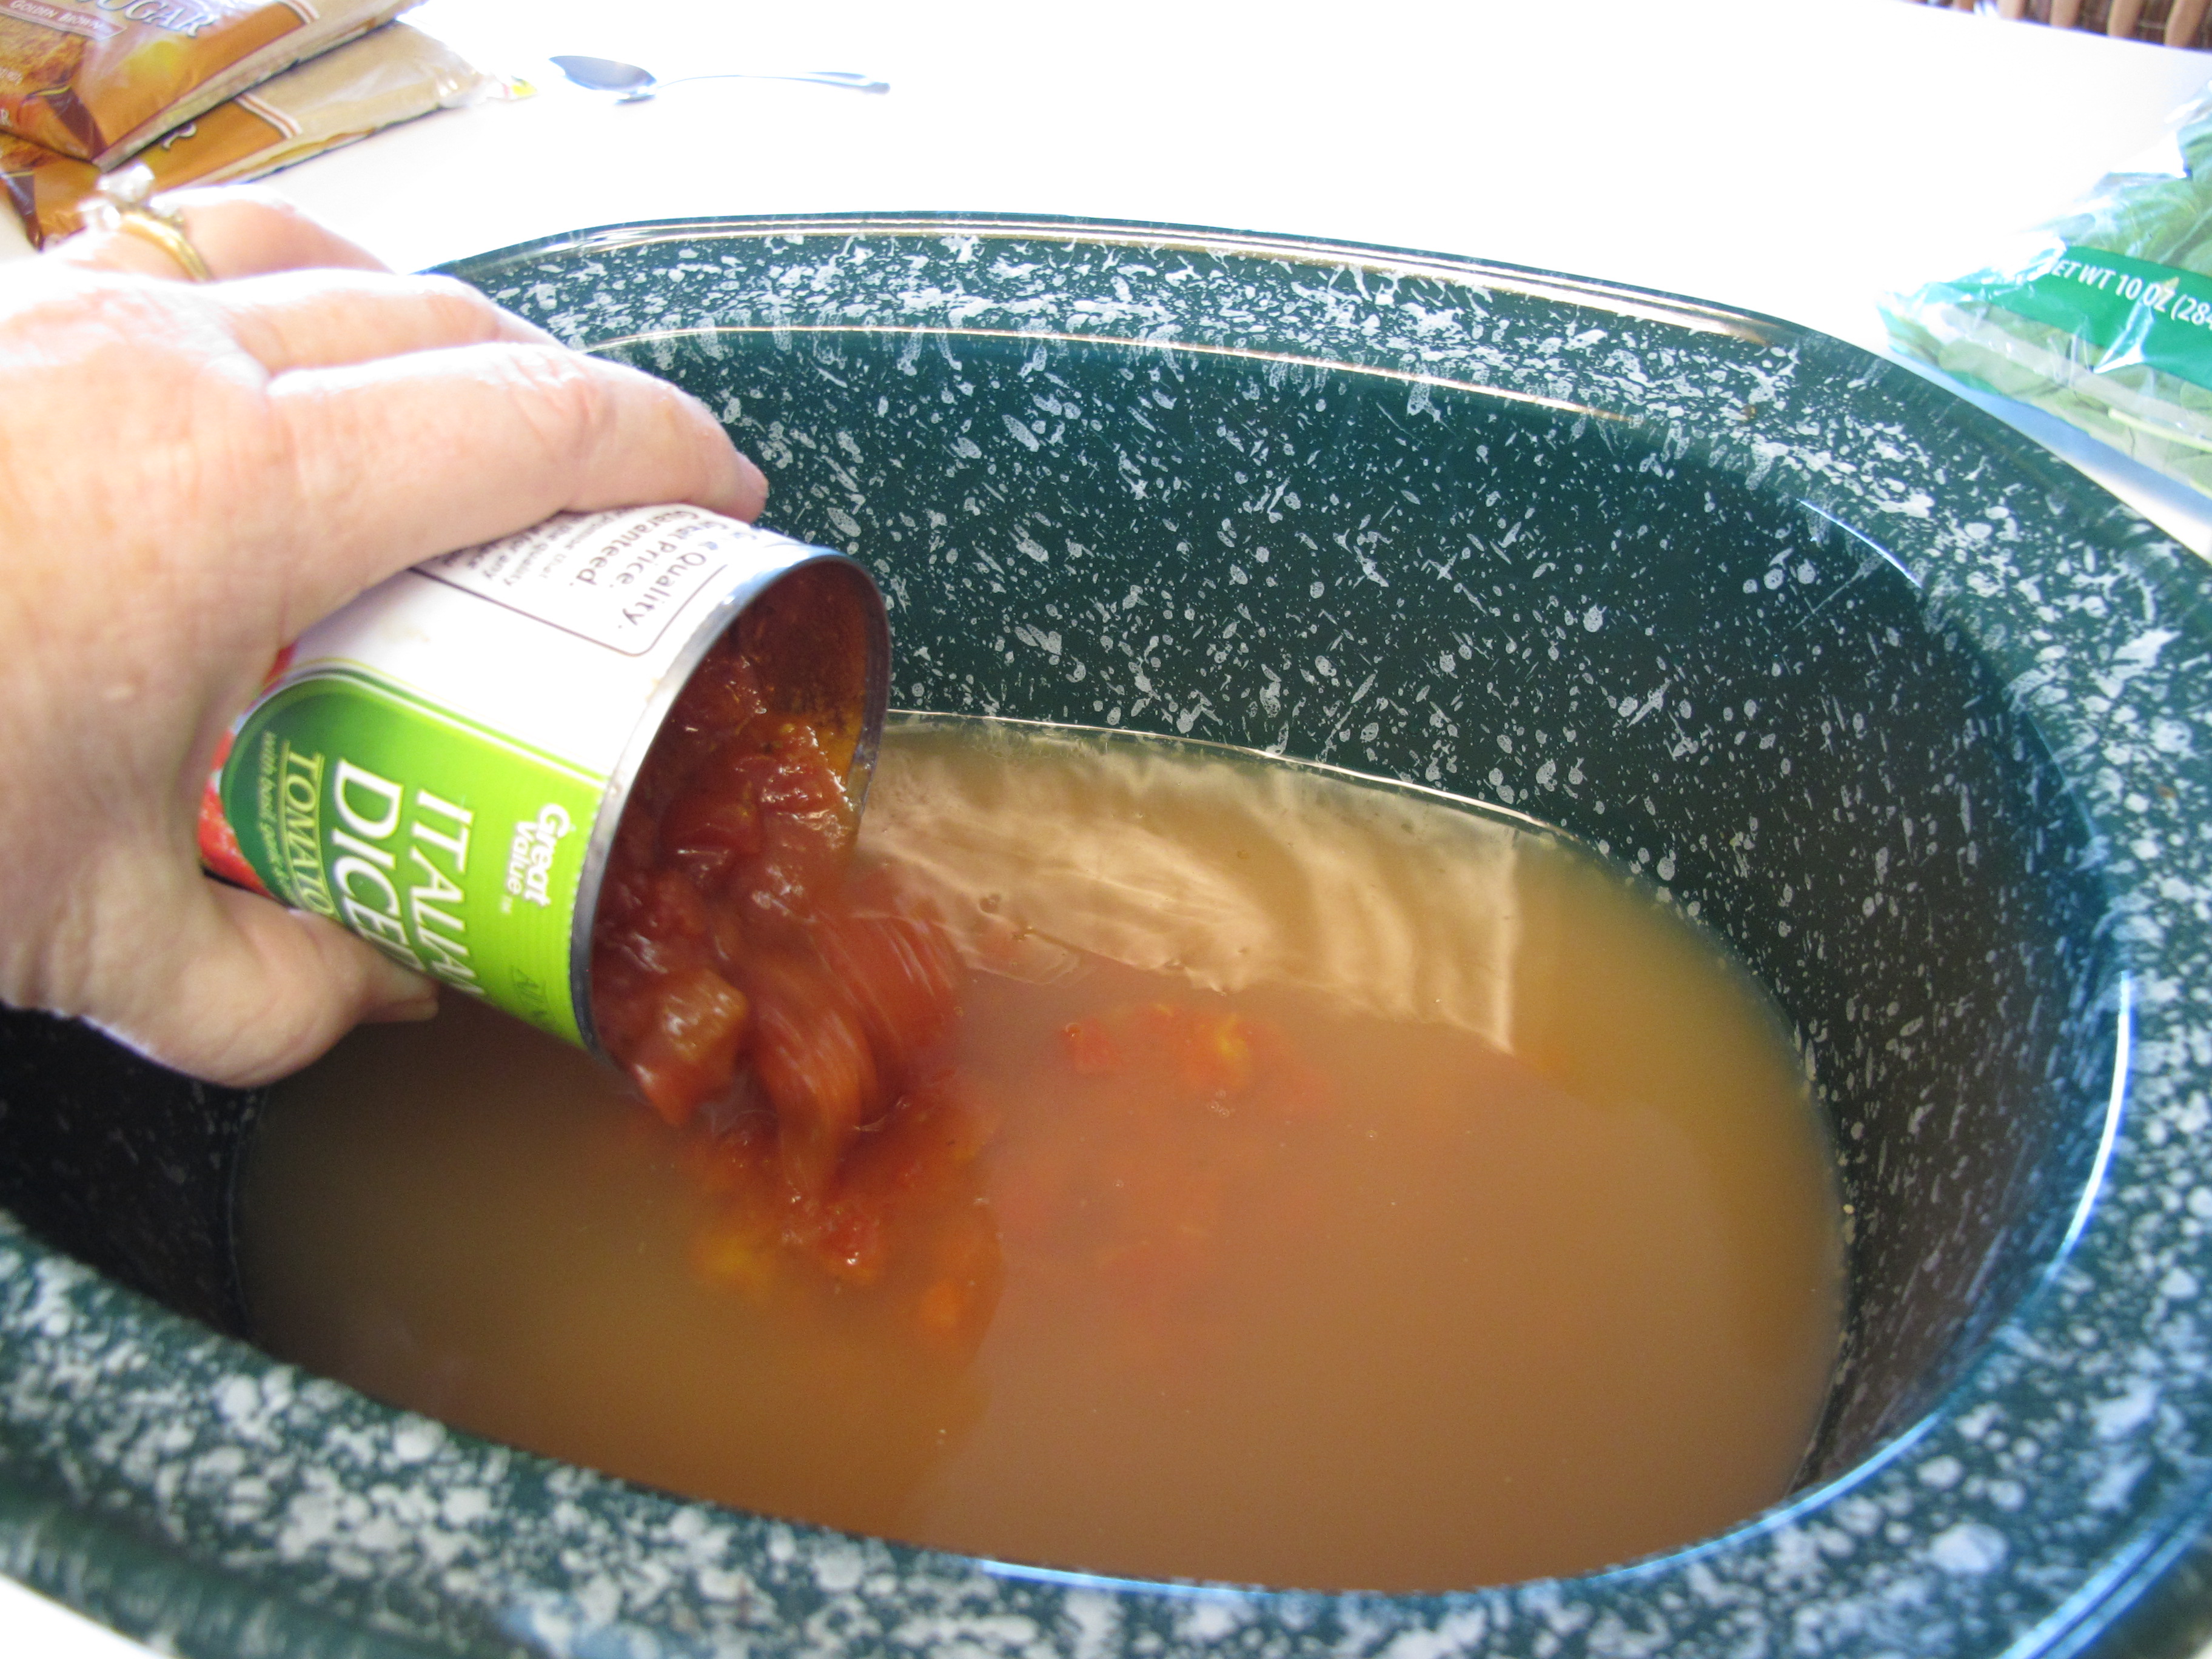
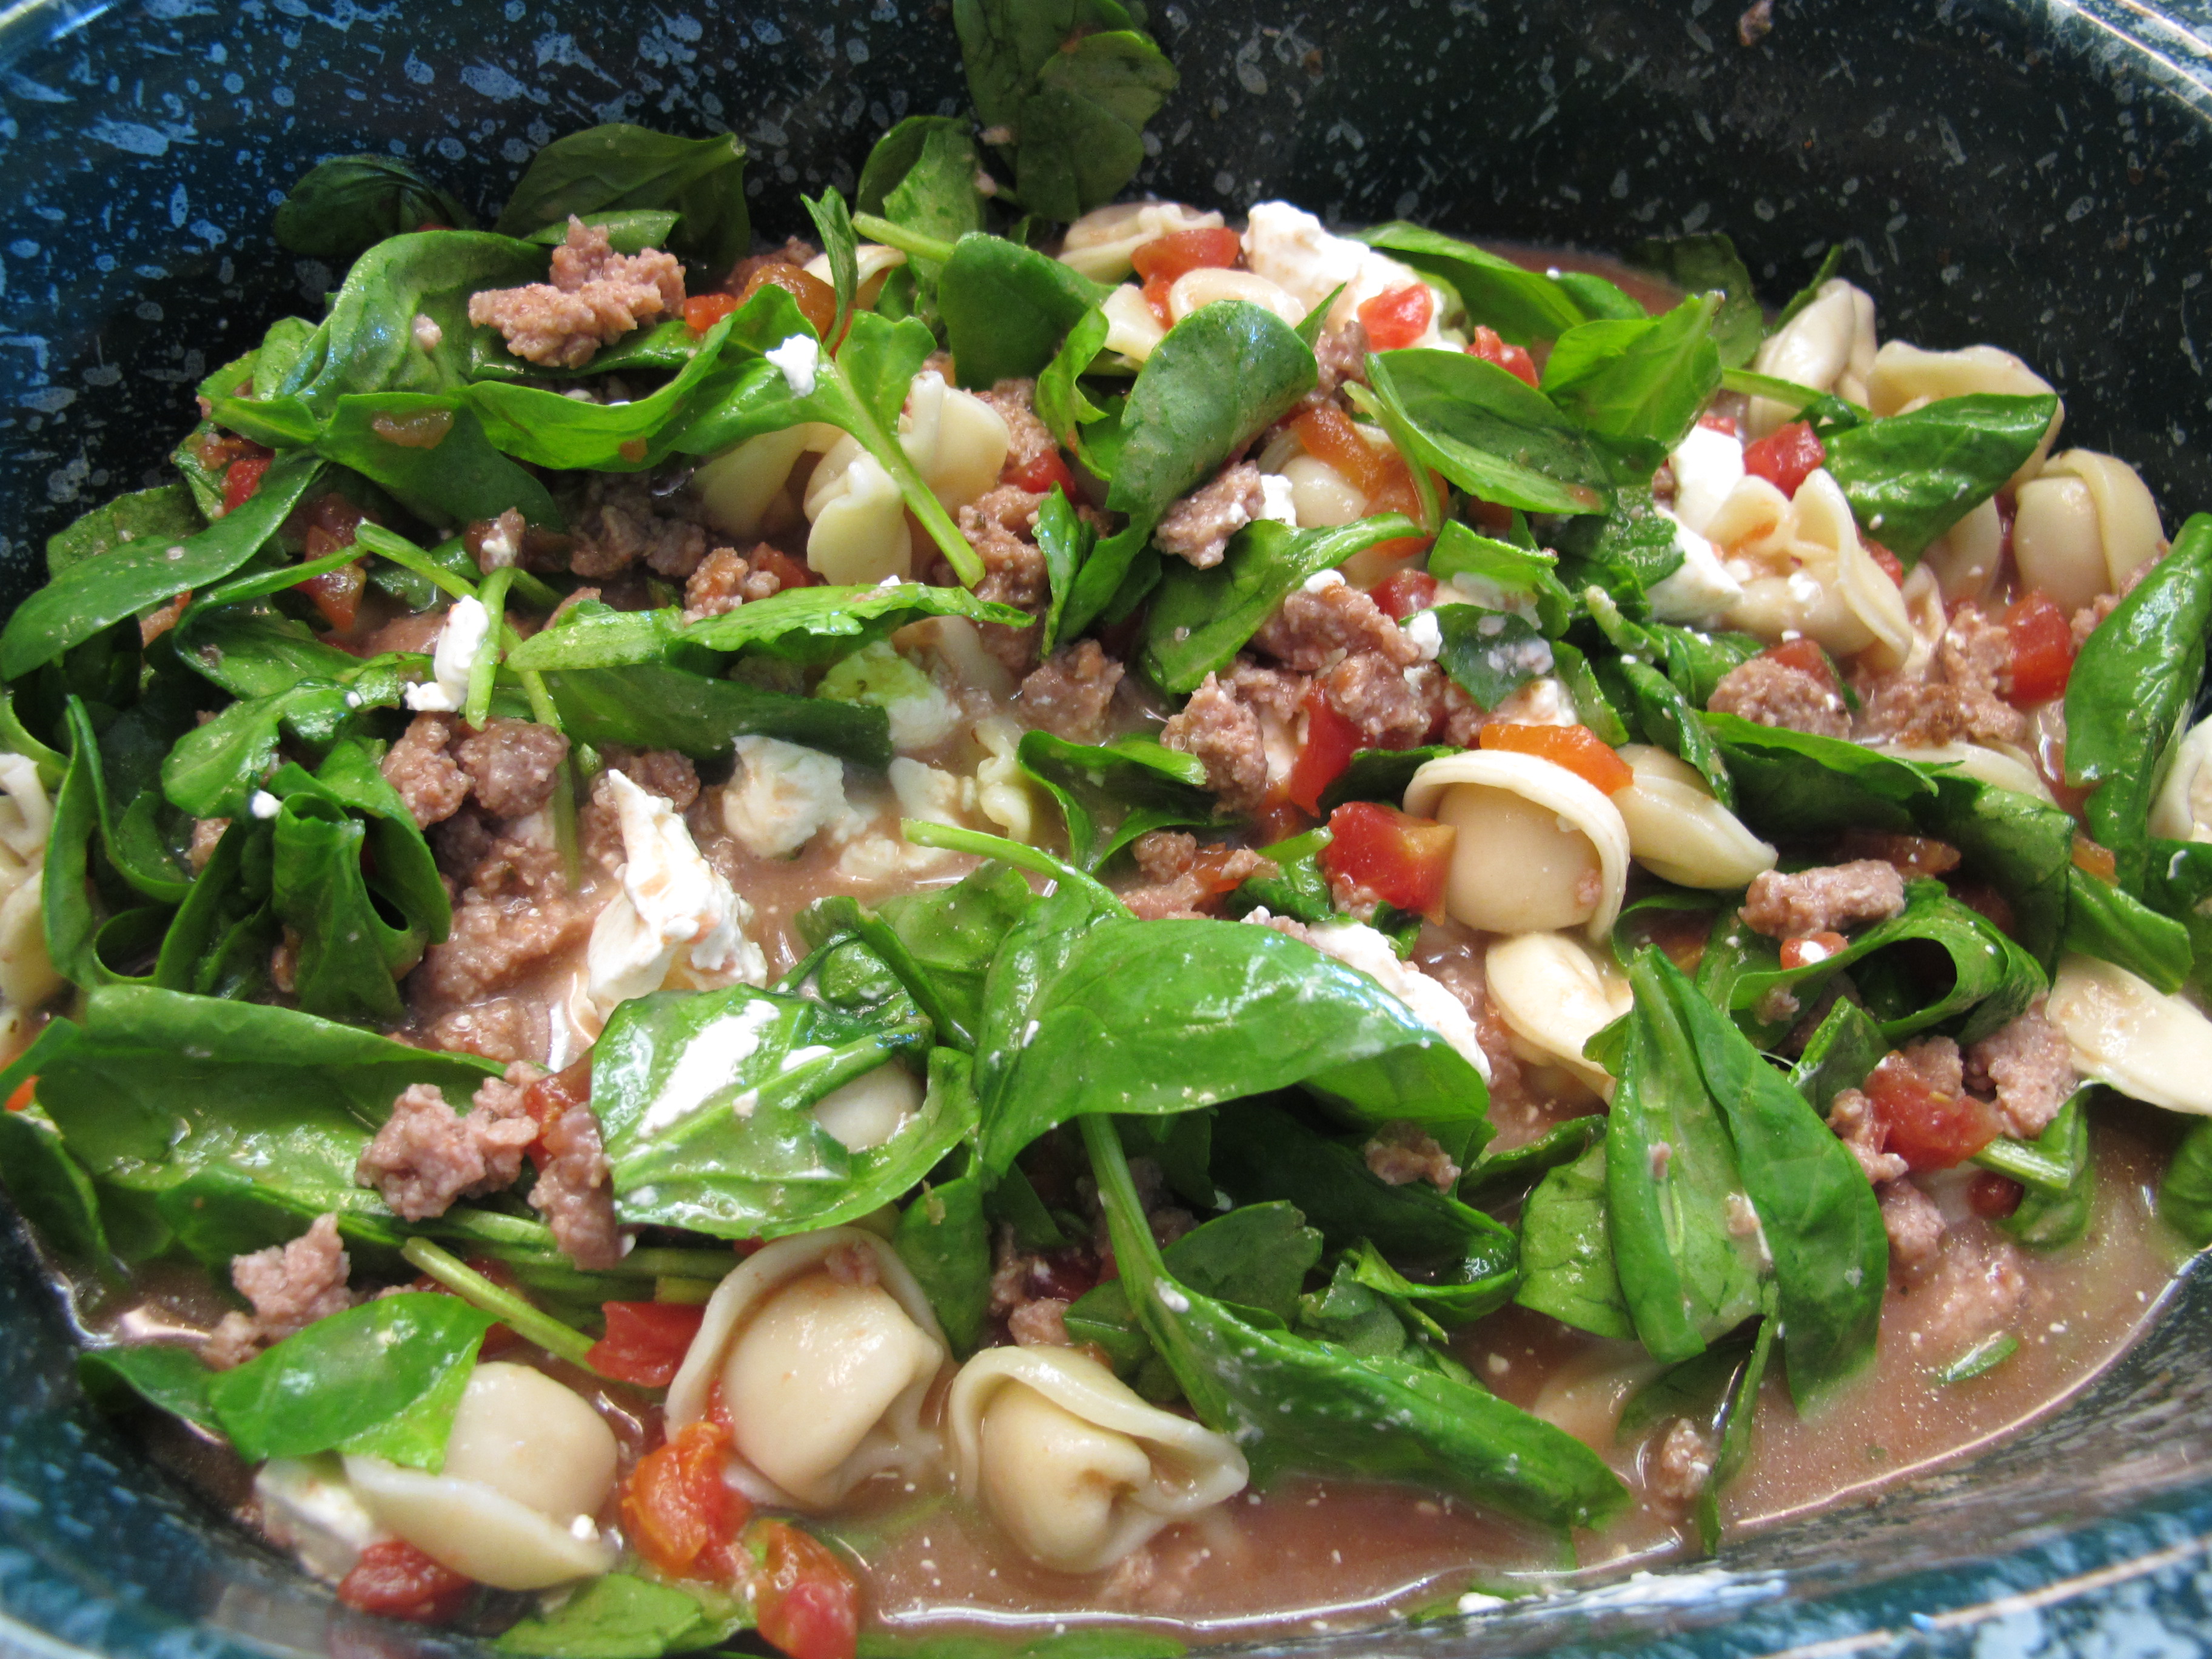
Cheese Tortellini Soup


NOTE: 3 cans of soup are shown in the picture – only use 2)
1 lb. ground turkey sausage
Brown the sausage.

Add the following to a large crock pot:
2 – 14.5 cans chicken broth
2 – 14.5 cans Italian stewed tomatoes, drained
DO NOT use store brand tomatoes (as you see in the picture). They are chopped way too small and are too much of a “tomato sauce” consistency. I now buy a name brand italian stewed tomato, drain them, and roughly chop them. So much better!
1 – 19 oz. bag of frozen cheese tortellini

6 oz. (approx.) fresh spinach (1 small bag)
If you don’t like bigger pieces of spinach, I give them a rough chop. It looks like a lot of spinach, but it wilts down.

8 oz. block cream cheese or Neufchatel, chunked

Add browned sausage.
1/2 tsp. garlic granules (not pictured)
pepper and salt to taste
Stir all ingredients together.
Cook on high for 1 hour and then turn to low for 3 – 4 hours OR low for 4 – 6 hours. Be careful not to over cook it – the tortellini will get mushy. Take the lid off the last hour if you want it thicker.
For vegetarian version: omit the sausage and use vegetable broth.
RECIPE SOURCE: littlefellows.blogspot.com
FULL RECIPE WITHOUT PICTURES —
CHEESE TORTELLINI SOUP
1 lb. ground turkey sausage
2 – 14.5 cans chicken broth
1 – 19 oz. bag of frozen cheese tortellini
5 oz. (approx.) fresh spinach
2 – 14.5 cans Italian stewed tomatoes, drained and chopped
8 oz. block cream cheese or Neufchatel, chunked
1/2 tsp. garlic granules (not pictured)
salt and pepper to taste
Brown the sausage.
Stir all ingredients together.
Add ingredients to a crock pot.
Cook on high for 1 hour and then turn to low for 3 – 4 hours or low for 4 – 6 hours. Be careful not to over cook it – the tortellini will get mushy. Take the lid off the last hour if you want it thicker.
For vegetarian version: omit the sausage and use vegetable broth.
RECIPE SOURCE: littlefellows.blogspot.com
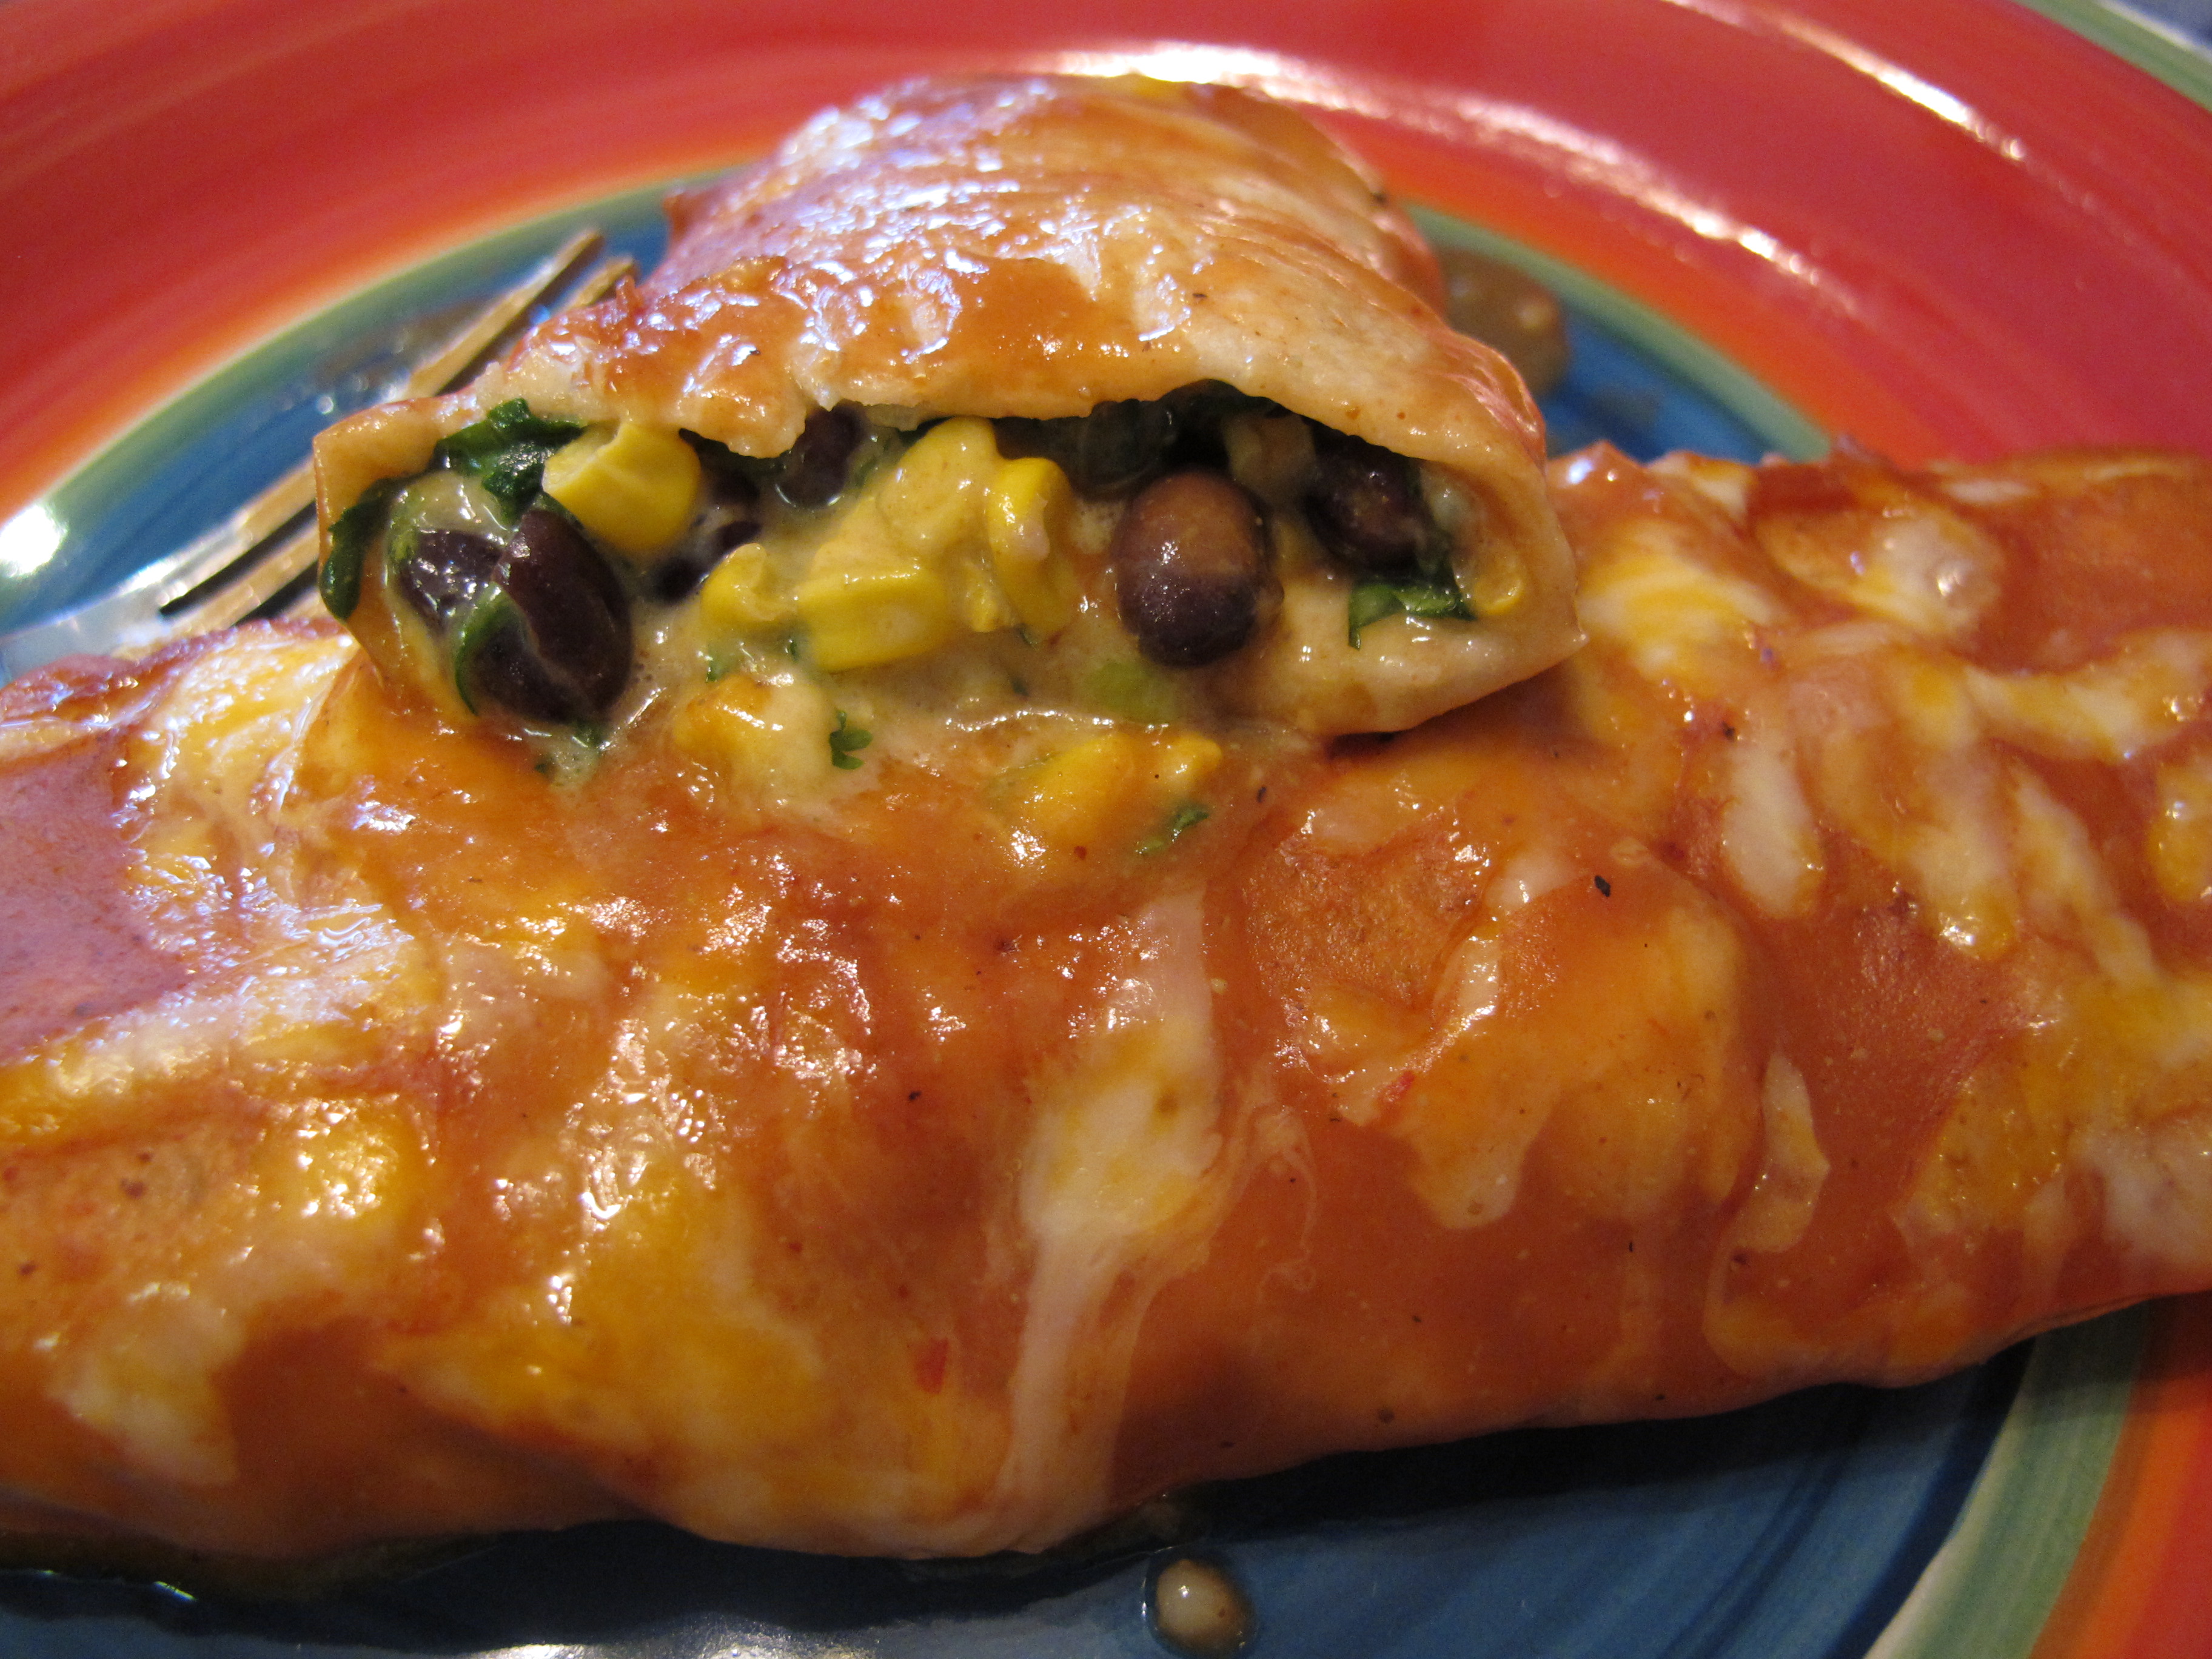
Black Bean Spinach Enchiladas
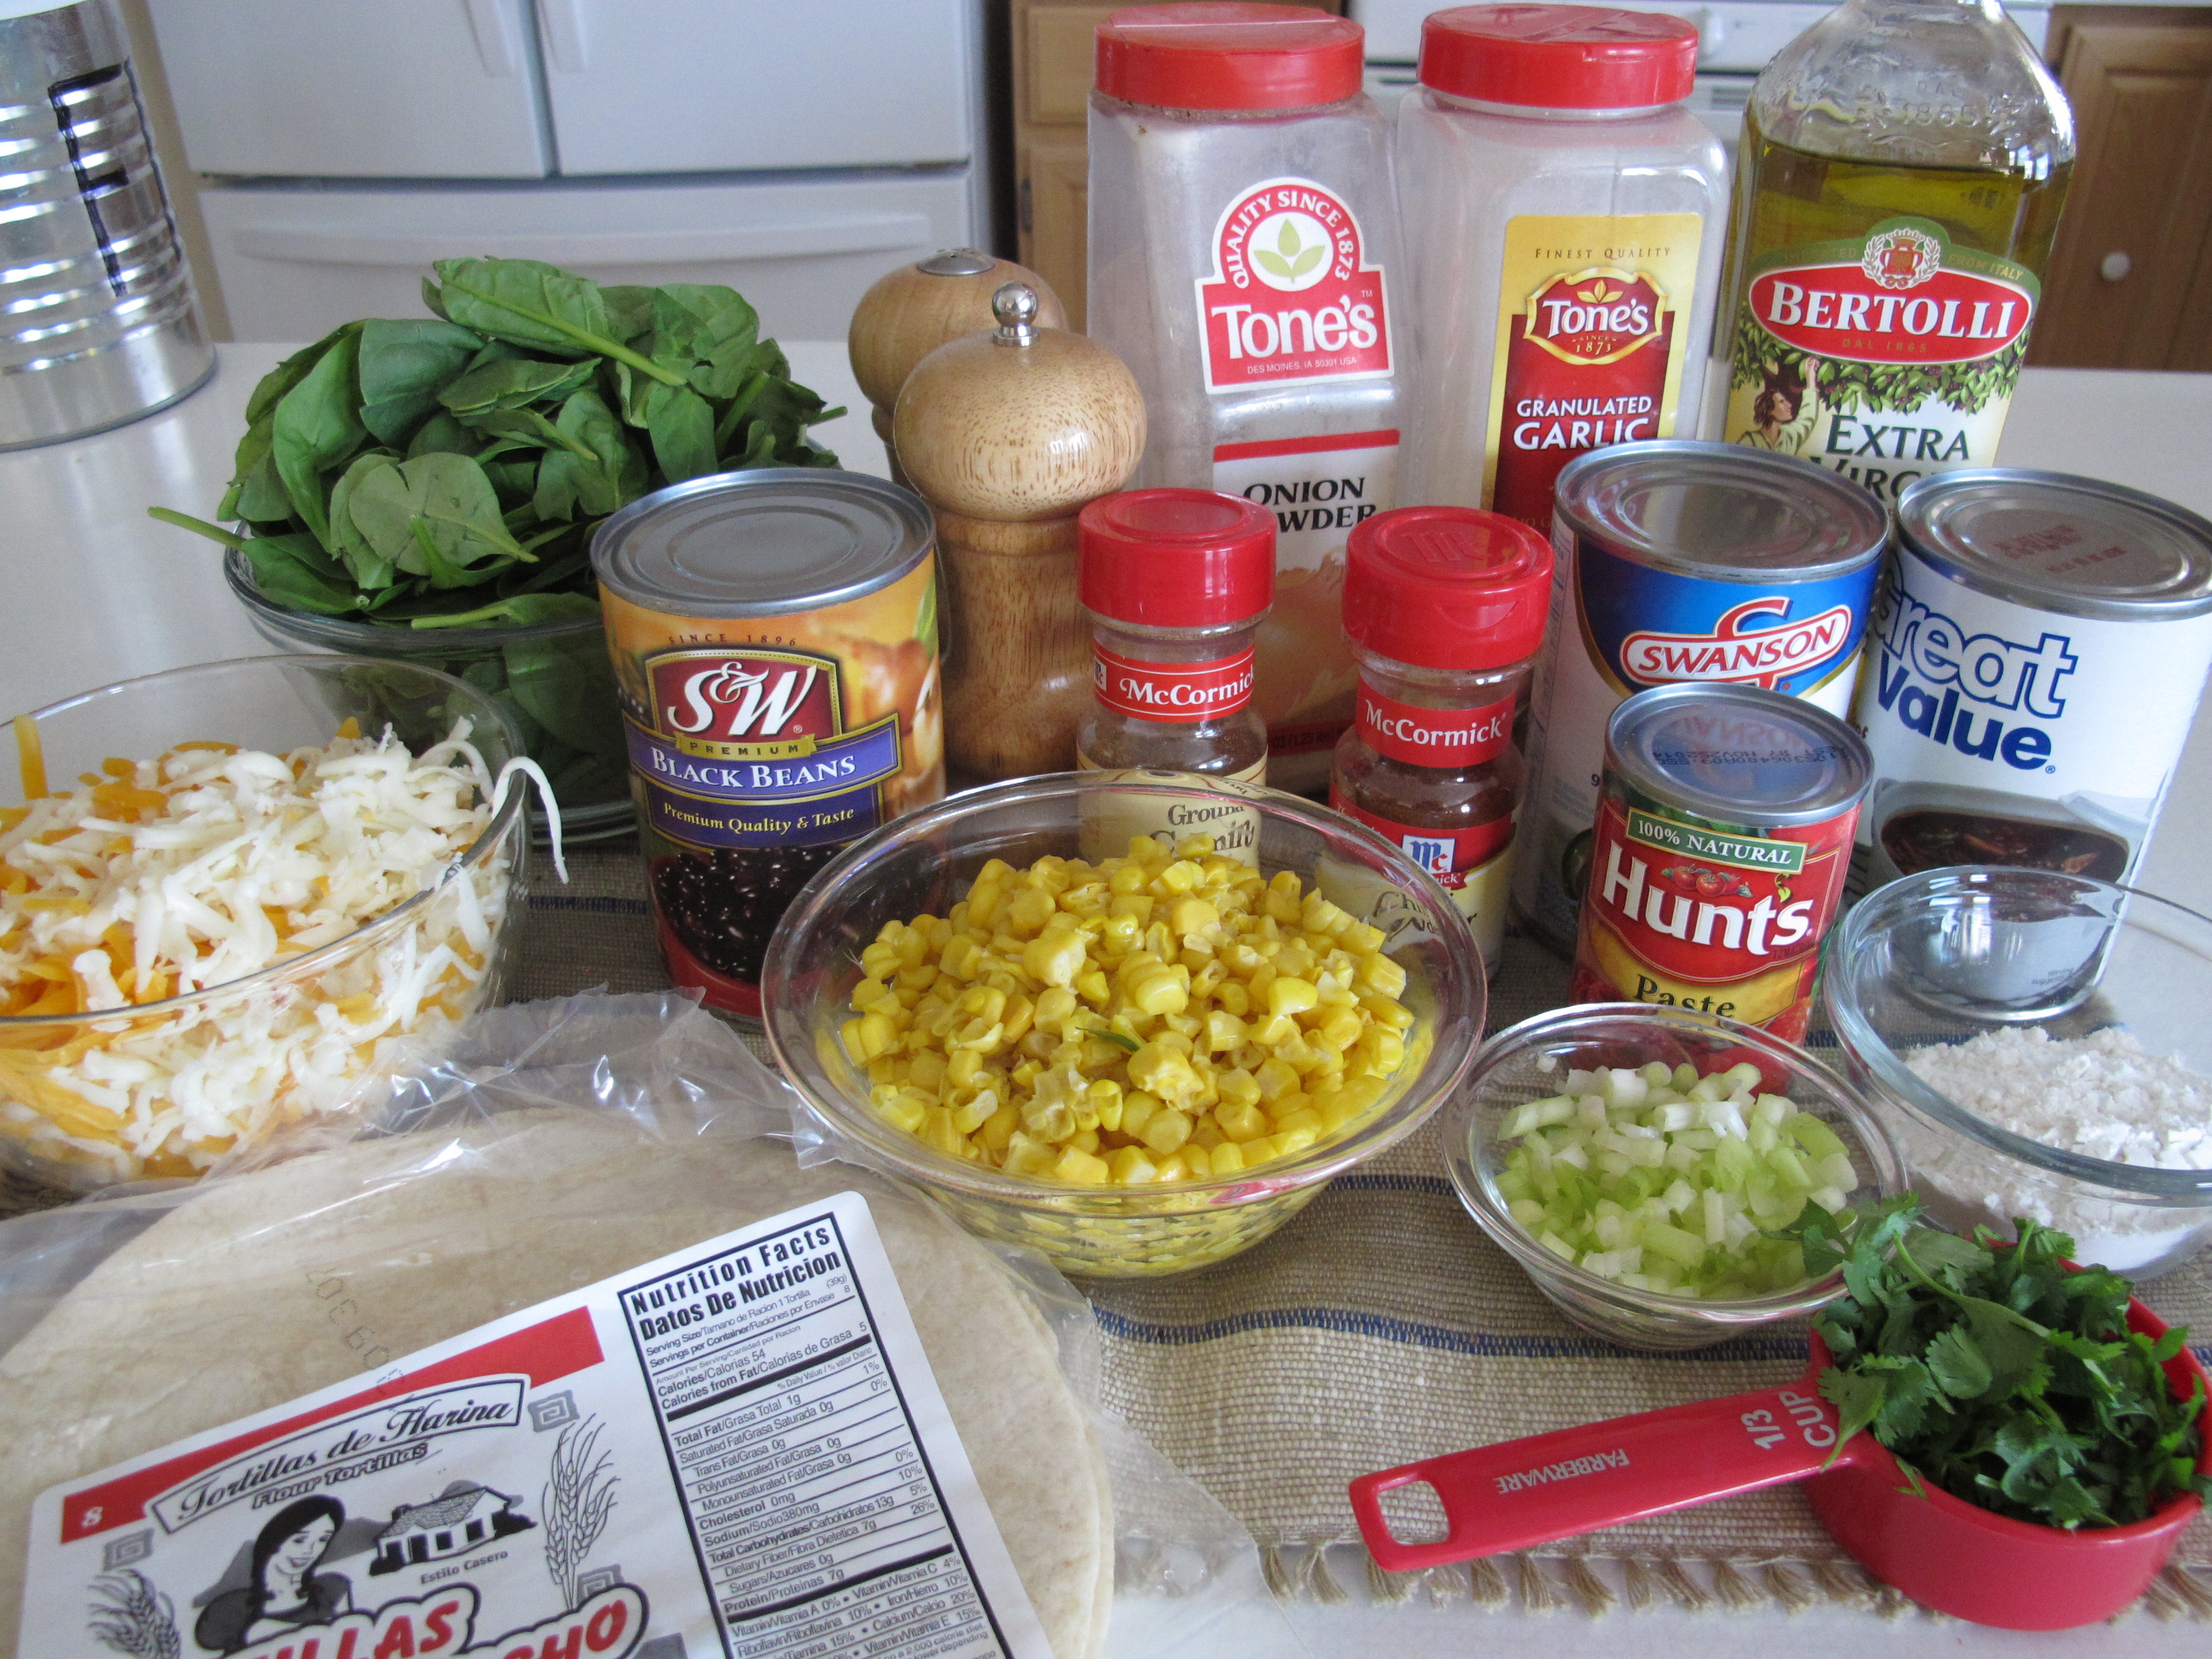
SAUCE
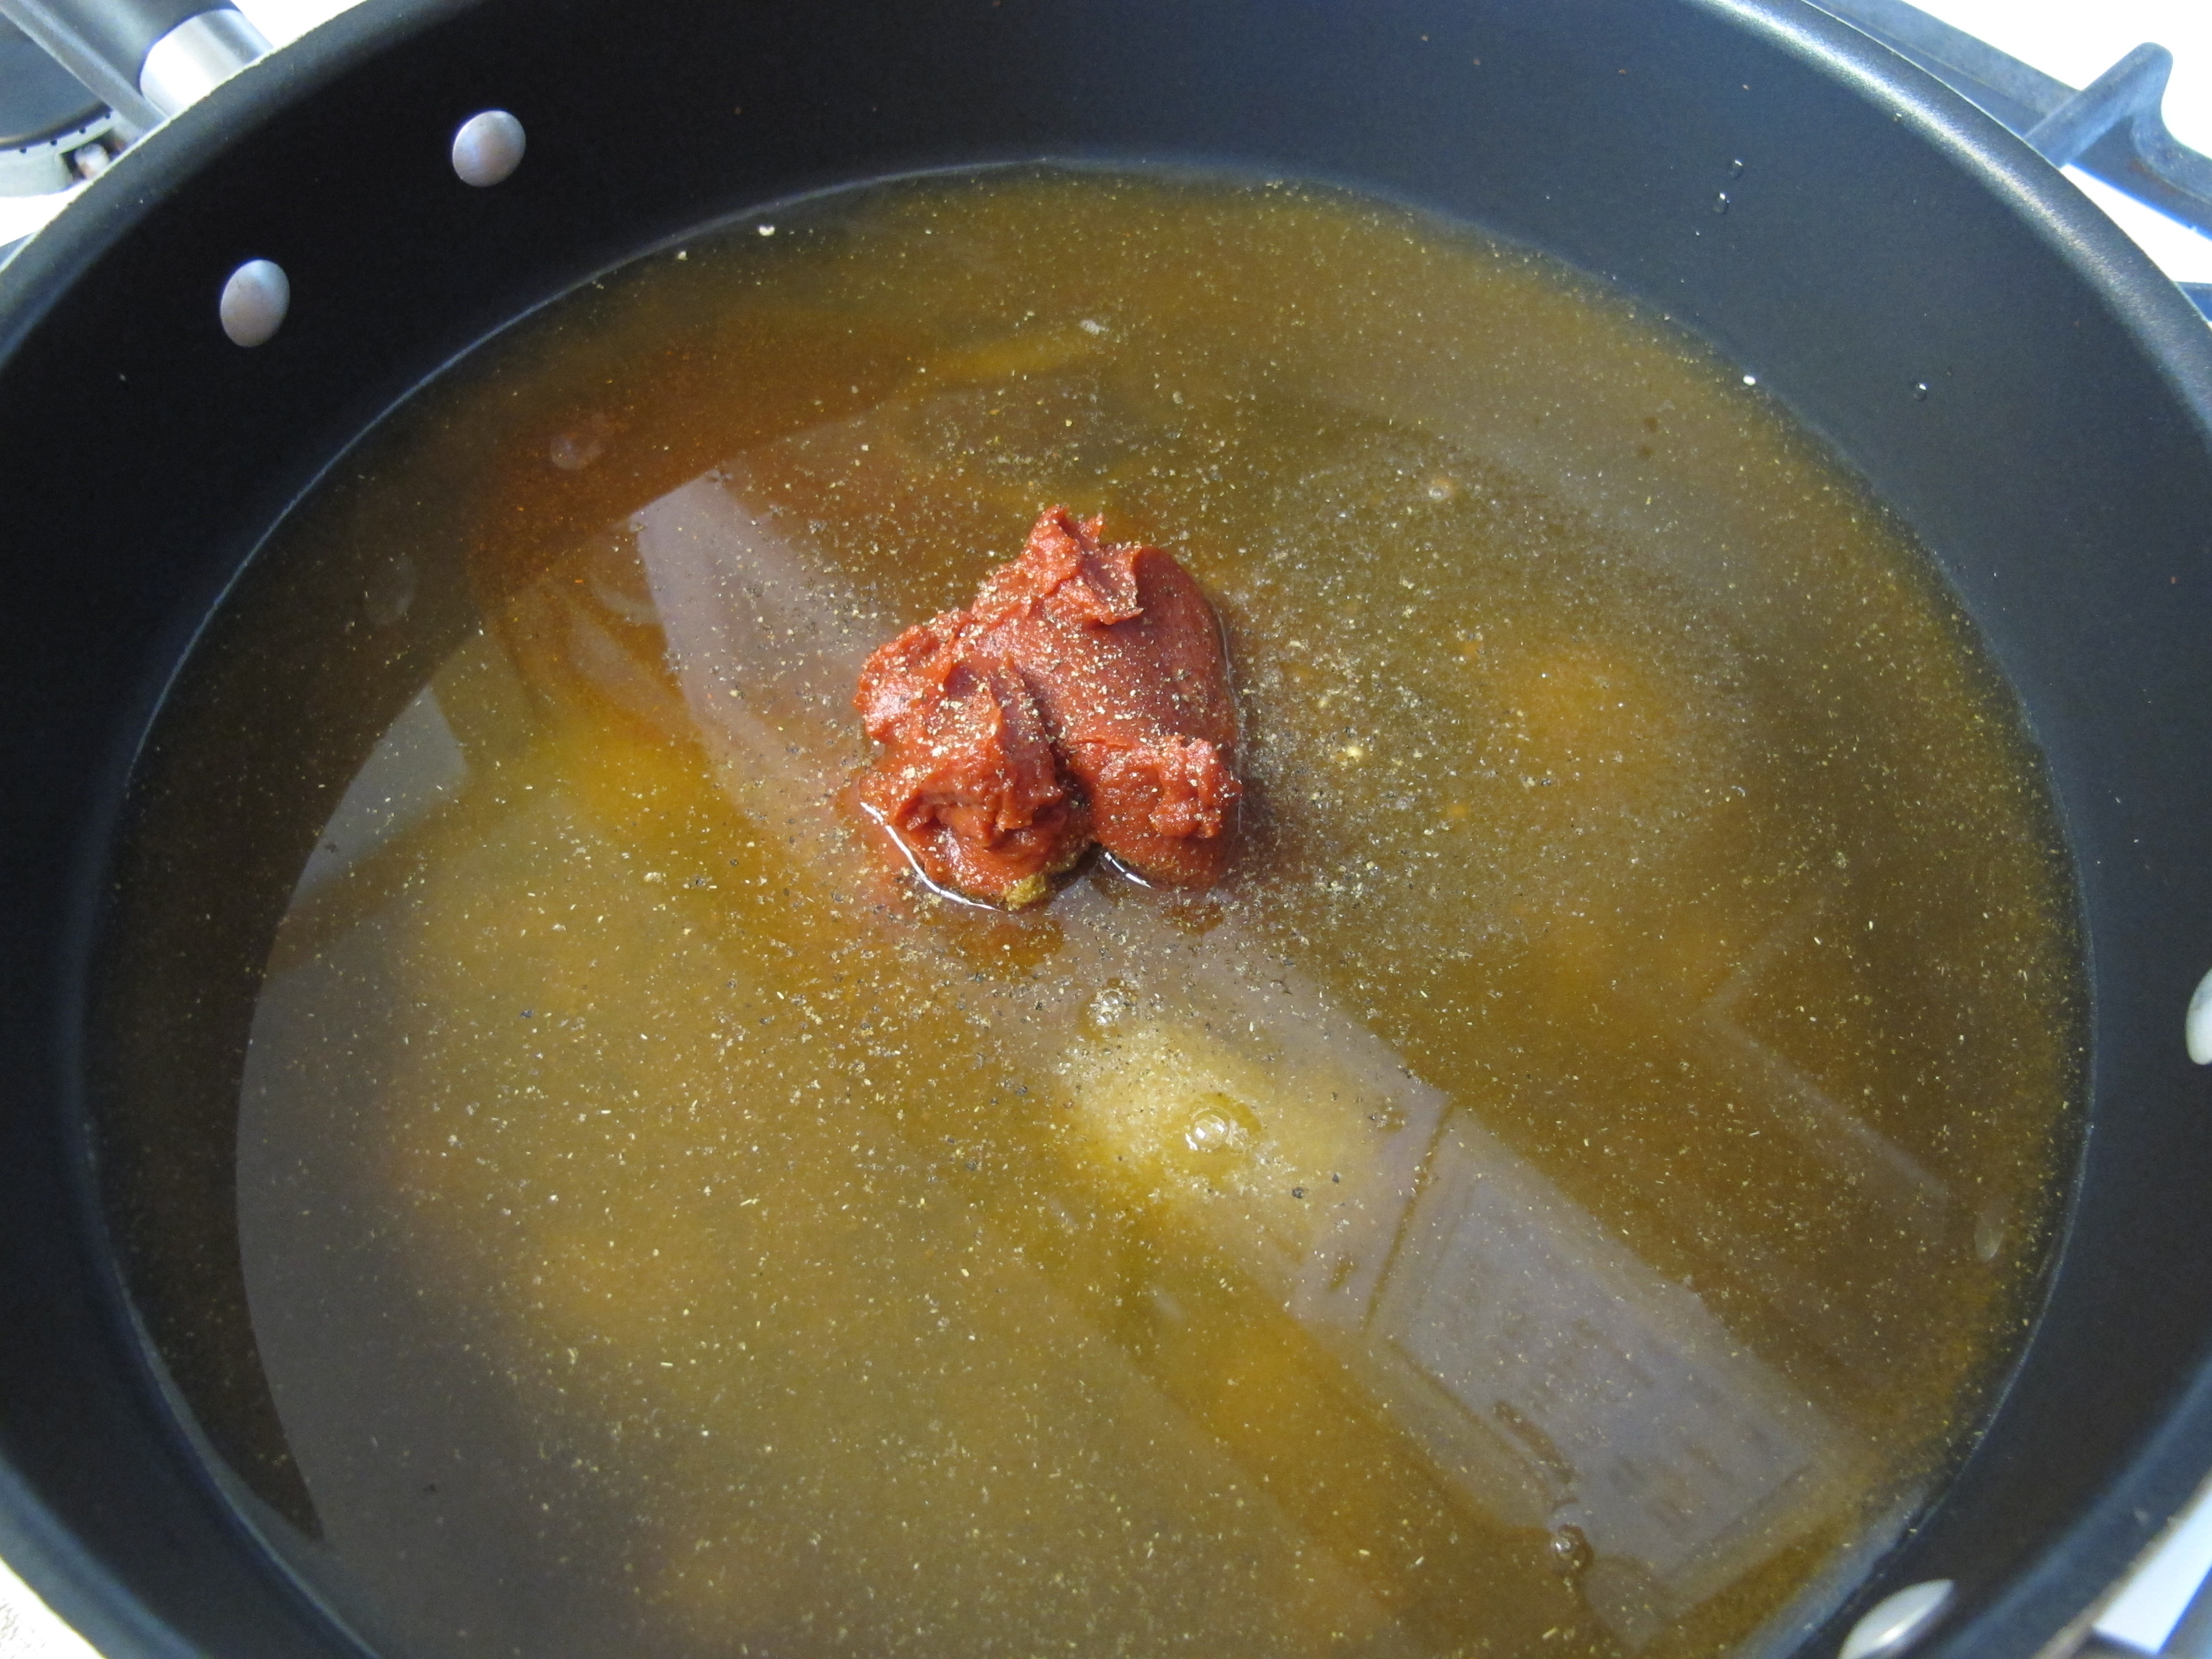
1 can chicken broth, divided
1/4 cup flour
Mix 1/2 cup of chicken broth with the flour until all the lumps are gone (like you would when making gravy). Set aside.

1 can beef broth
1/4 cup tomato paste
2 tsp. cumin
1/4 tsp. garlic granules
1/4 tsp. onion powder
1/4 tsp. chili powder
1/4 tsp. salt
1/4 tsp. pepper
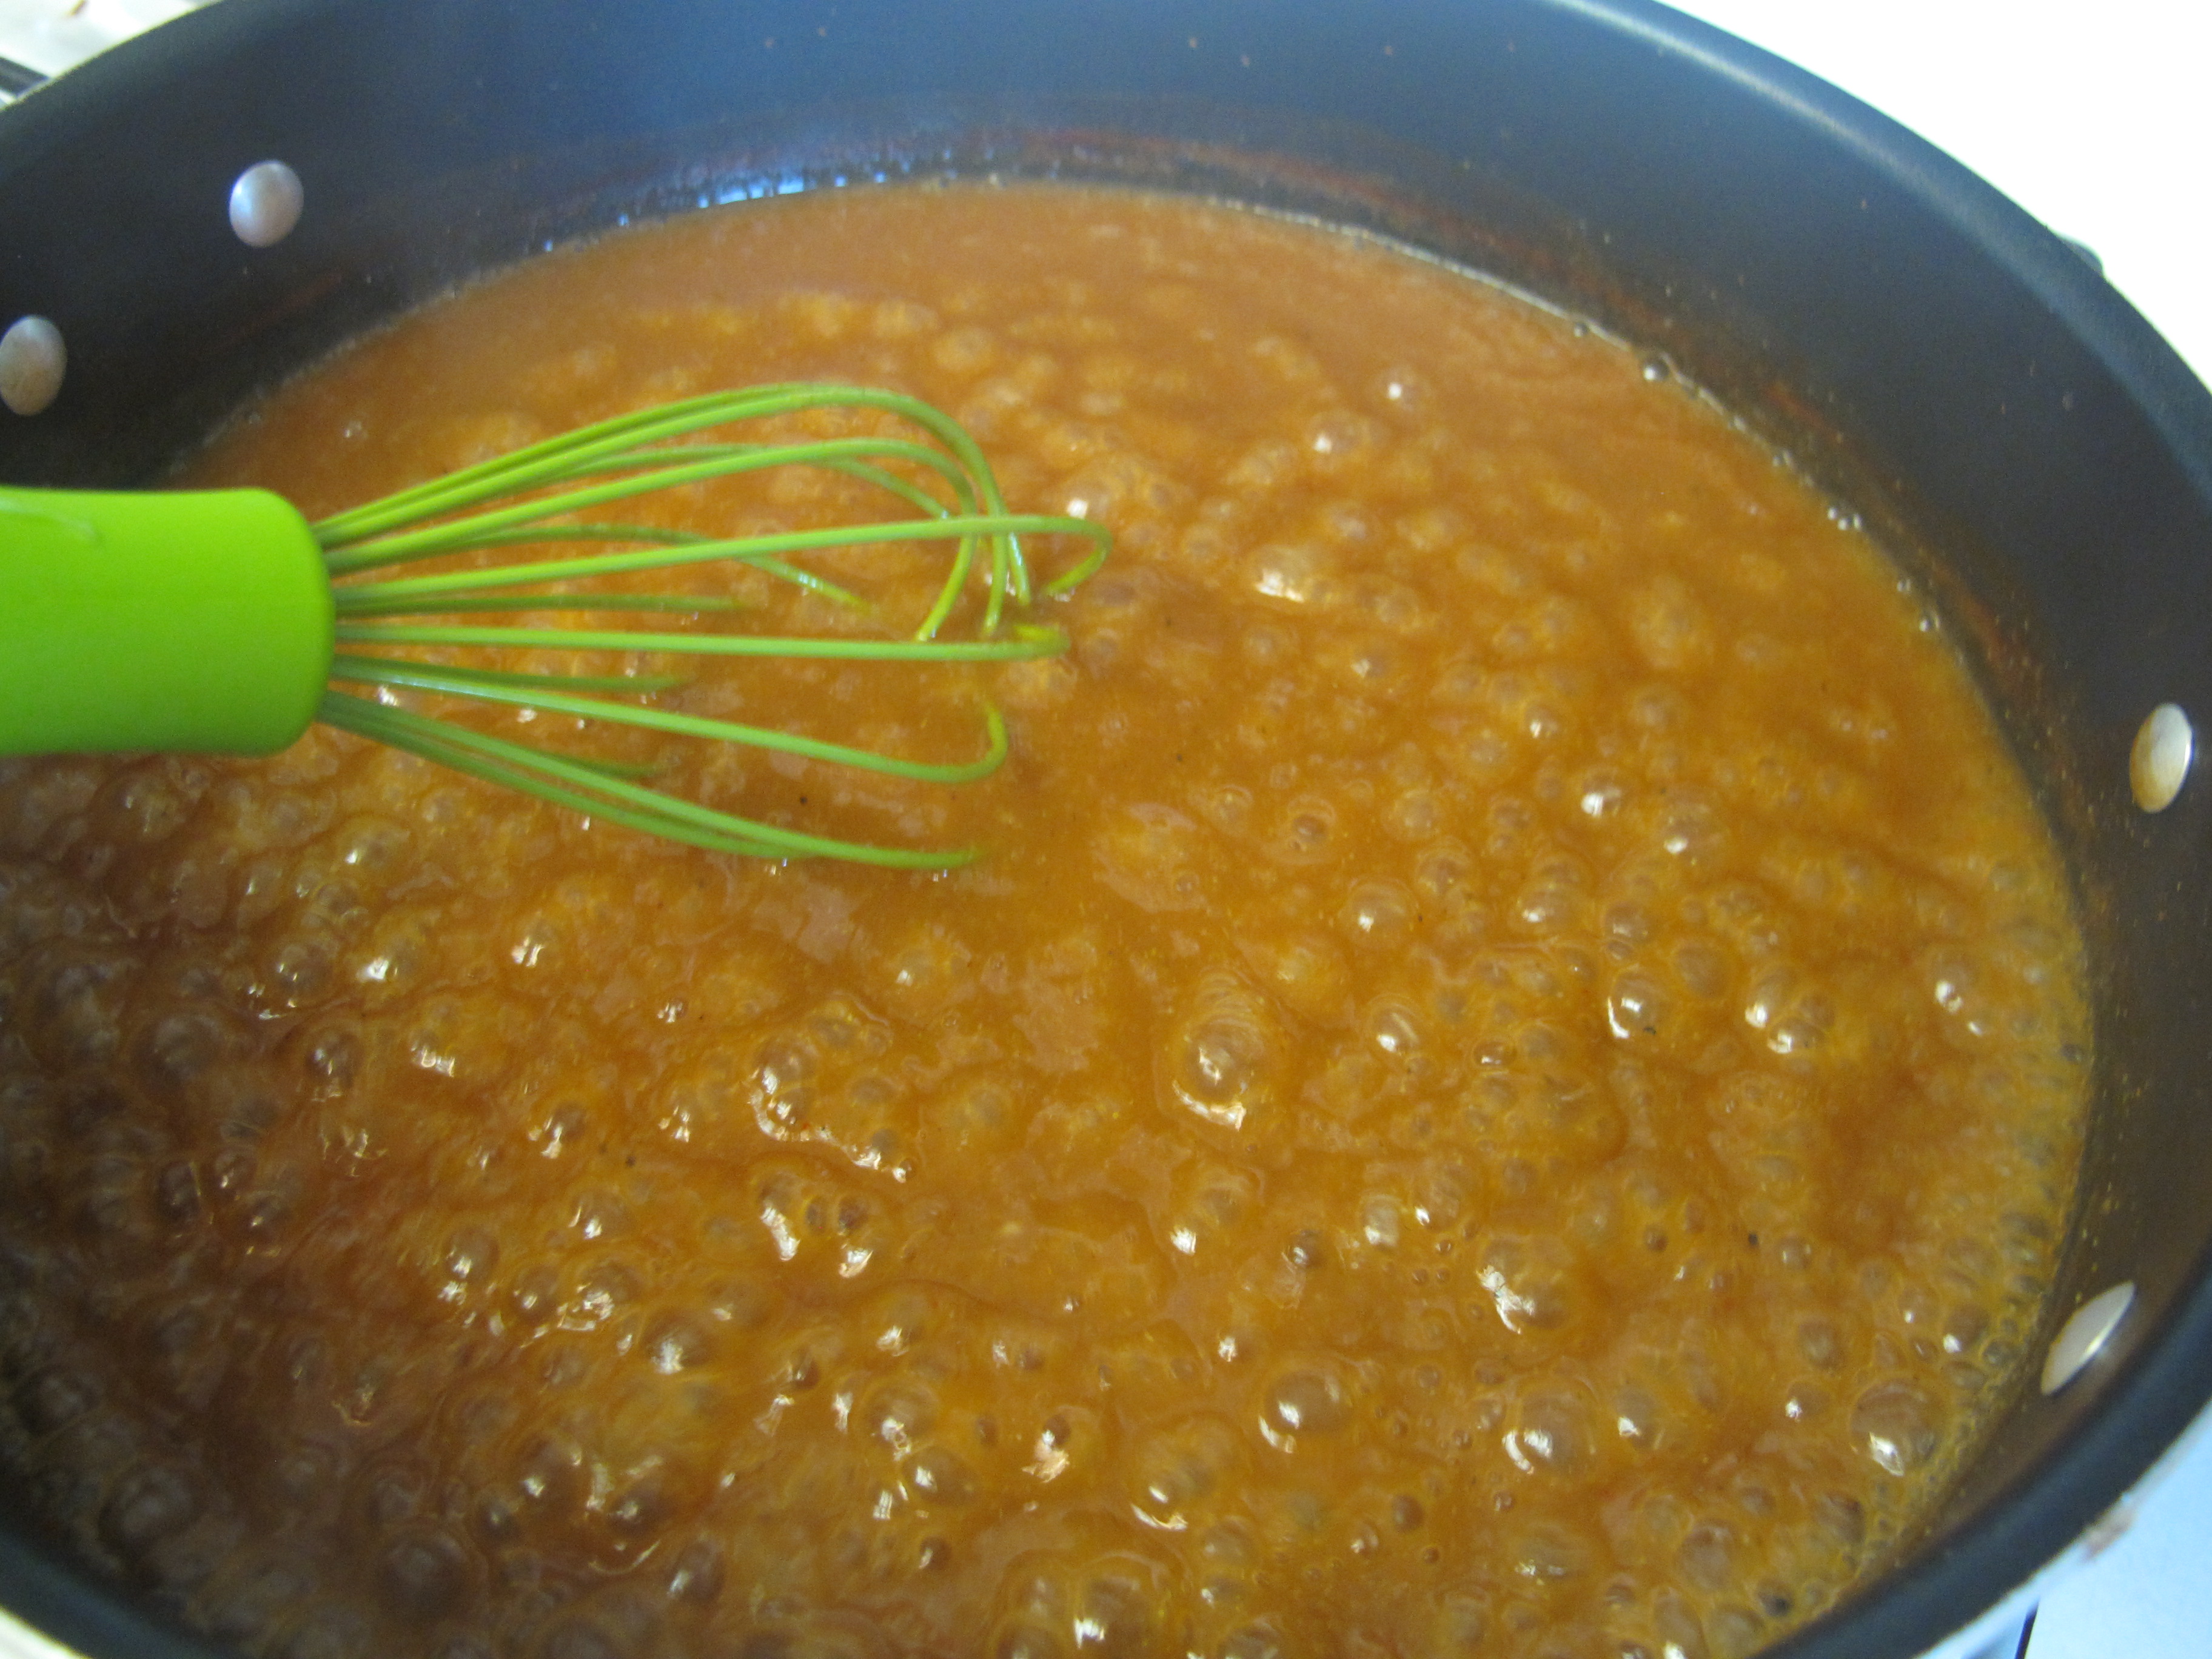
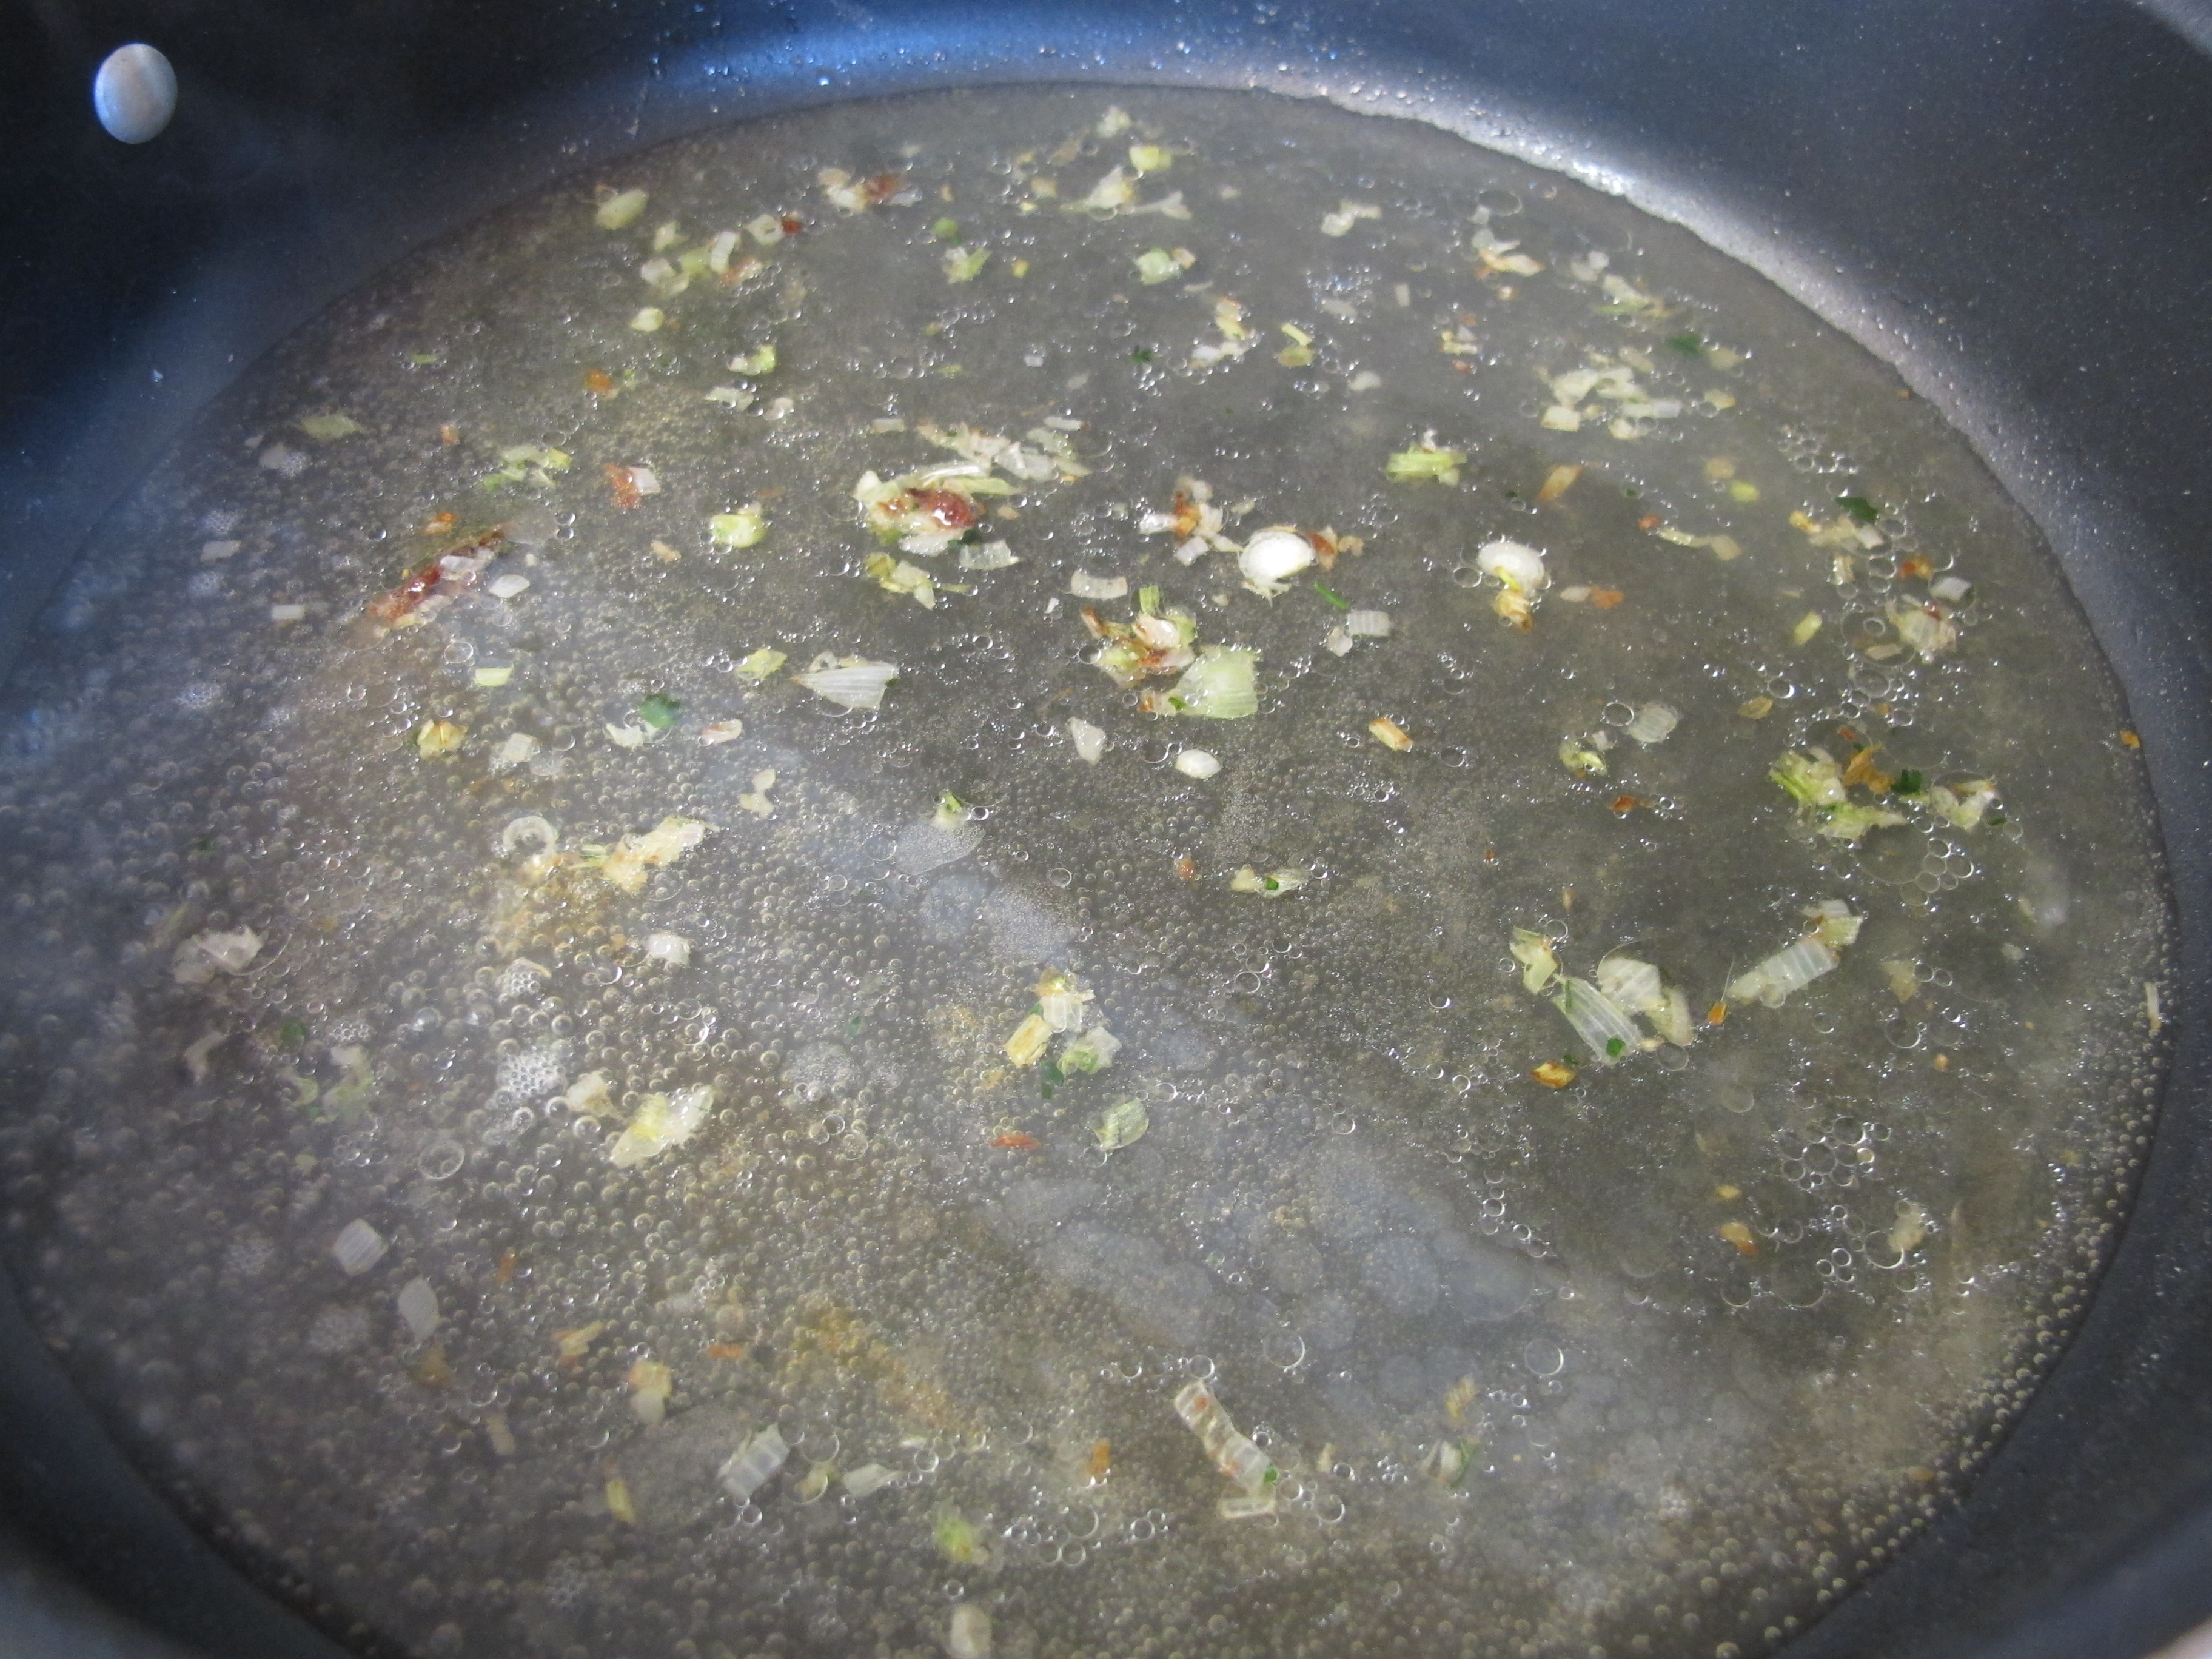
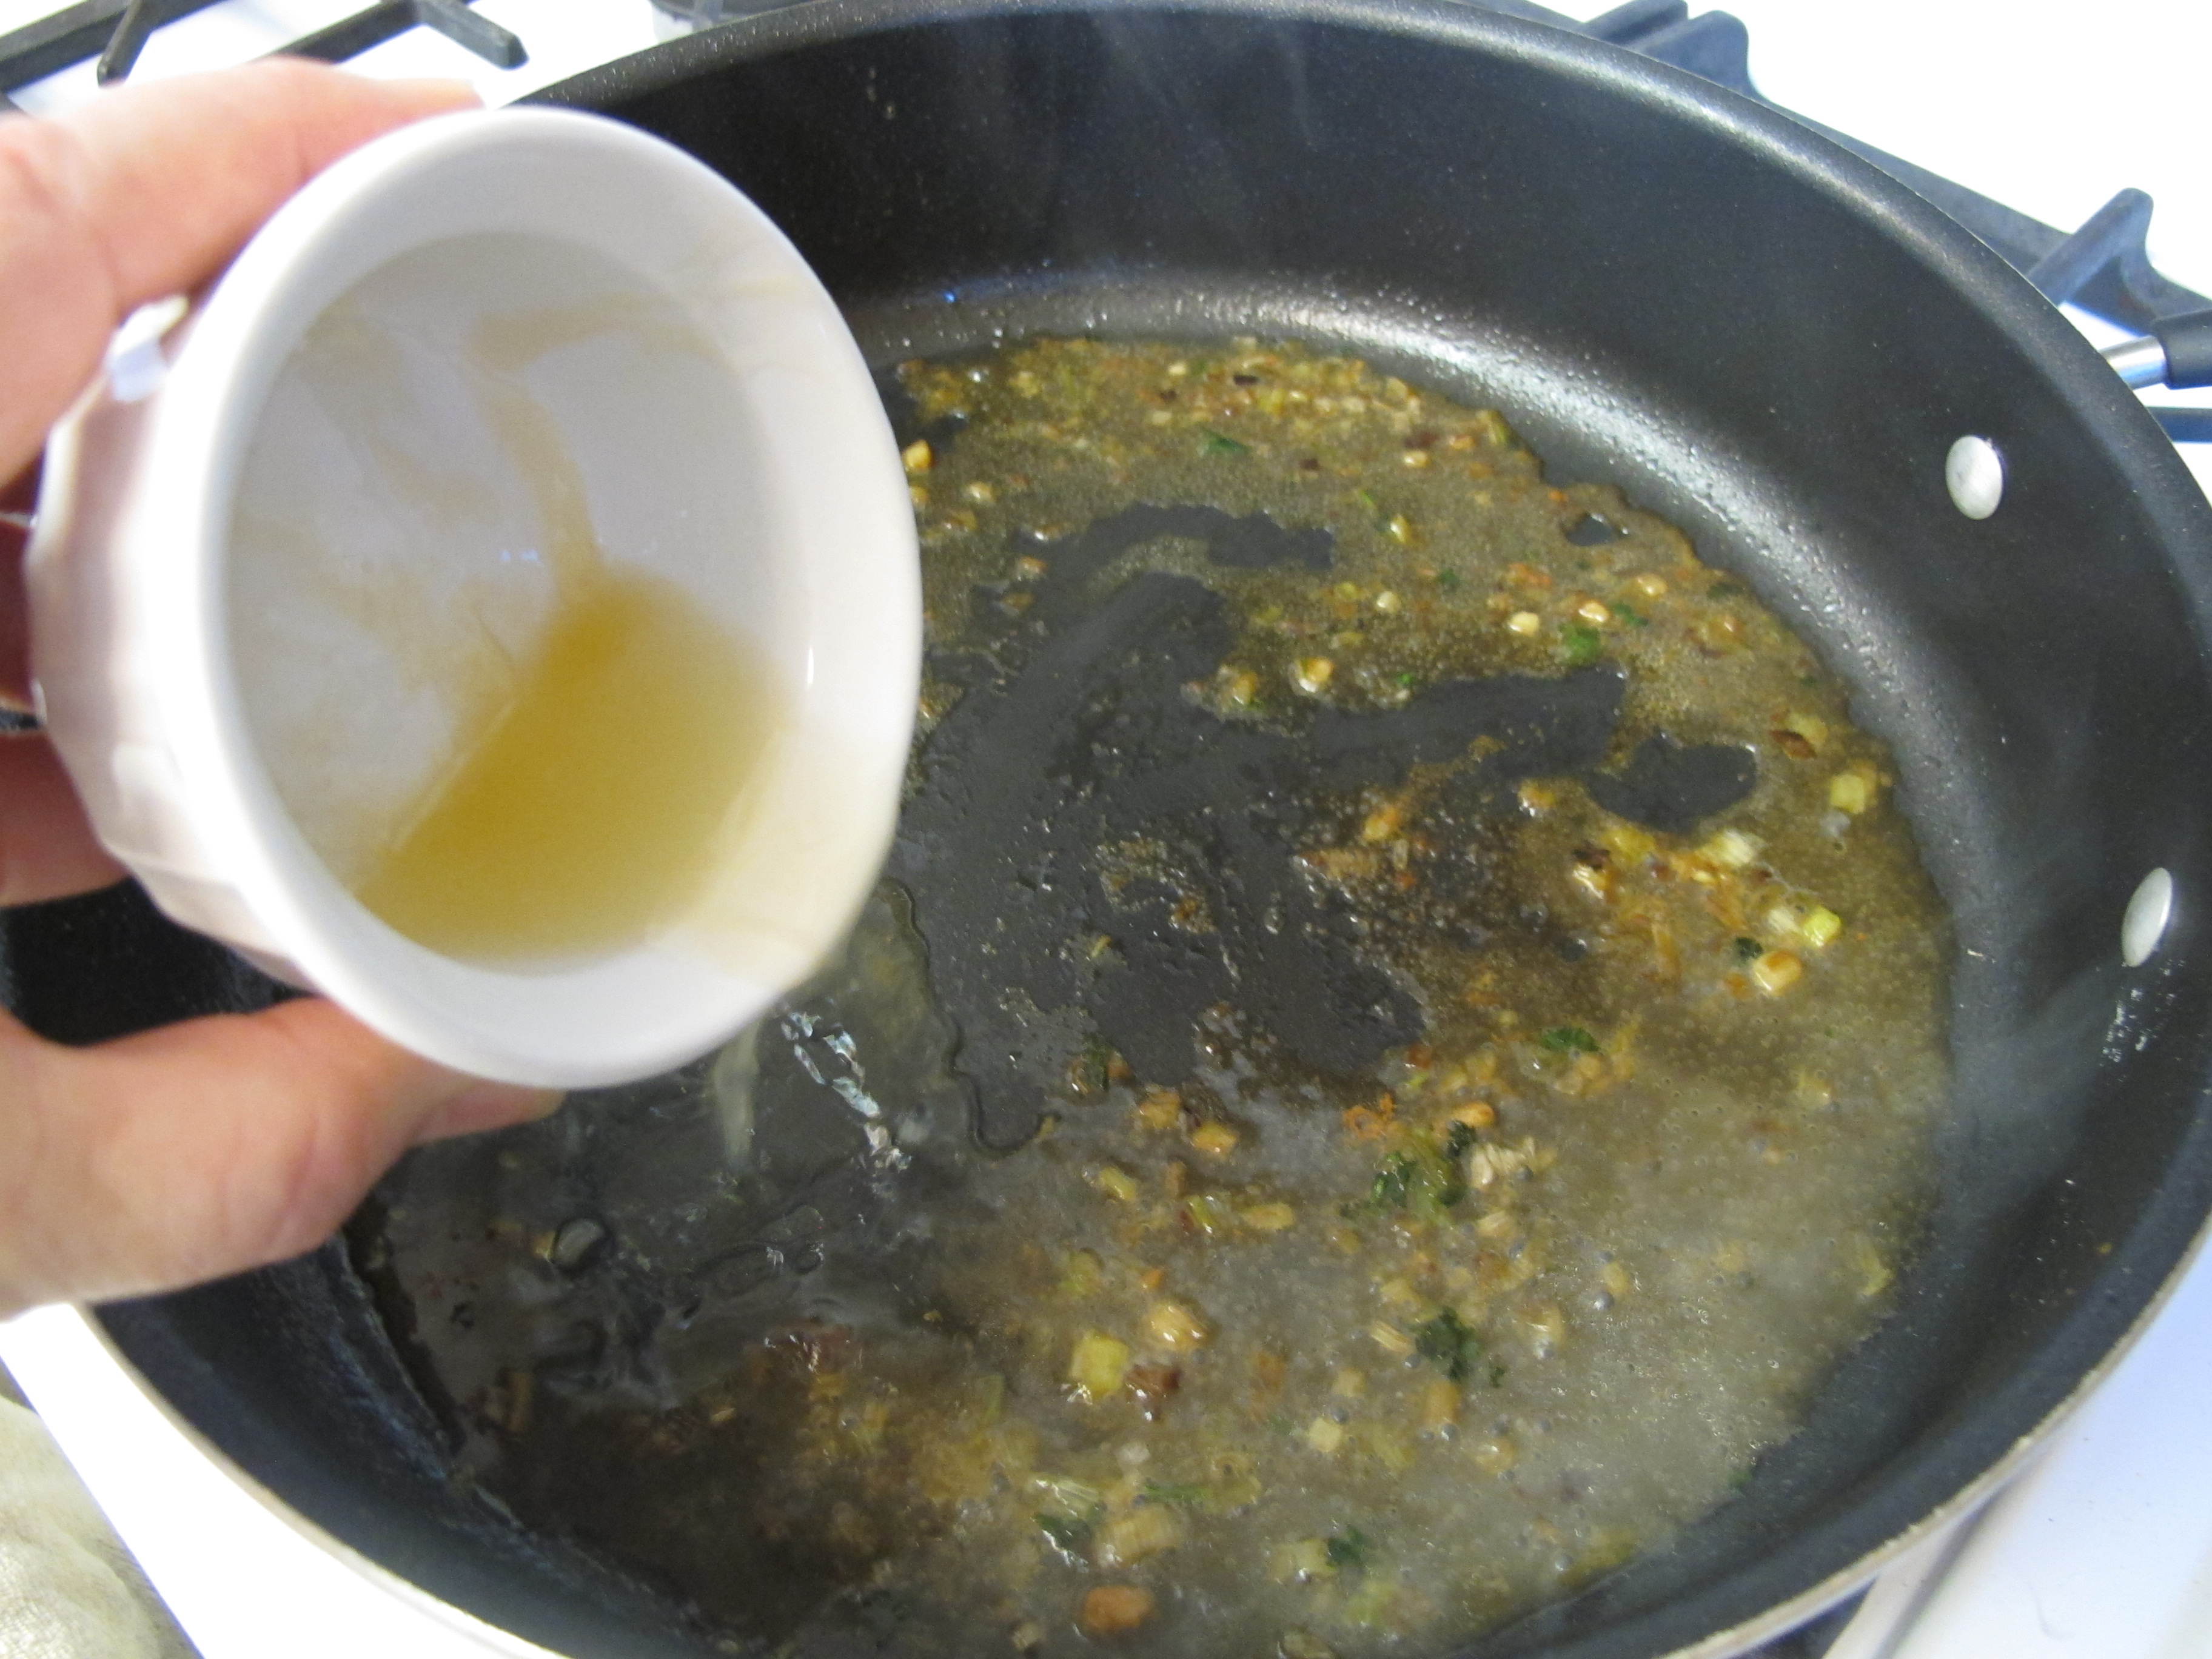
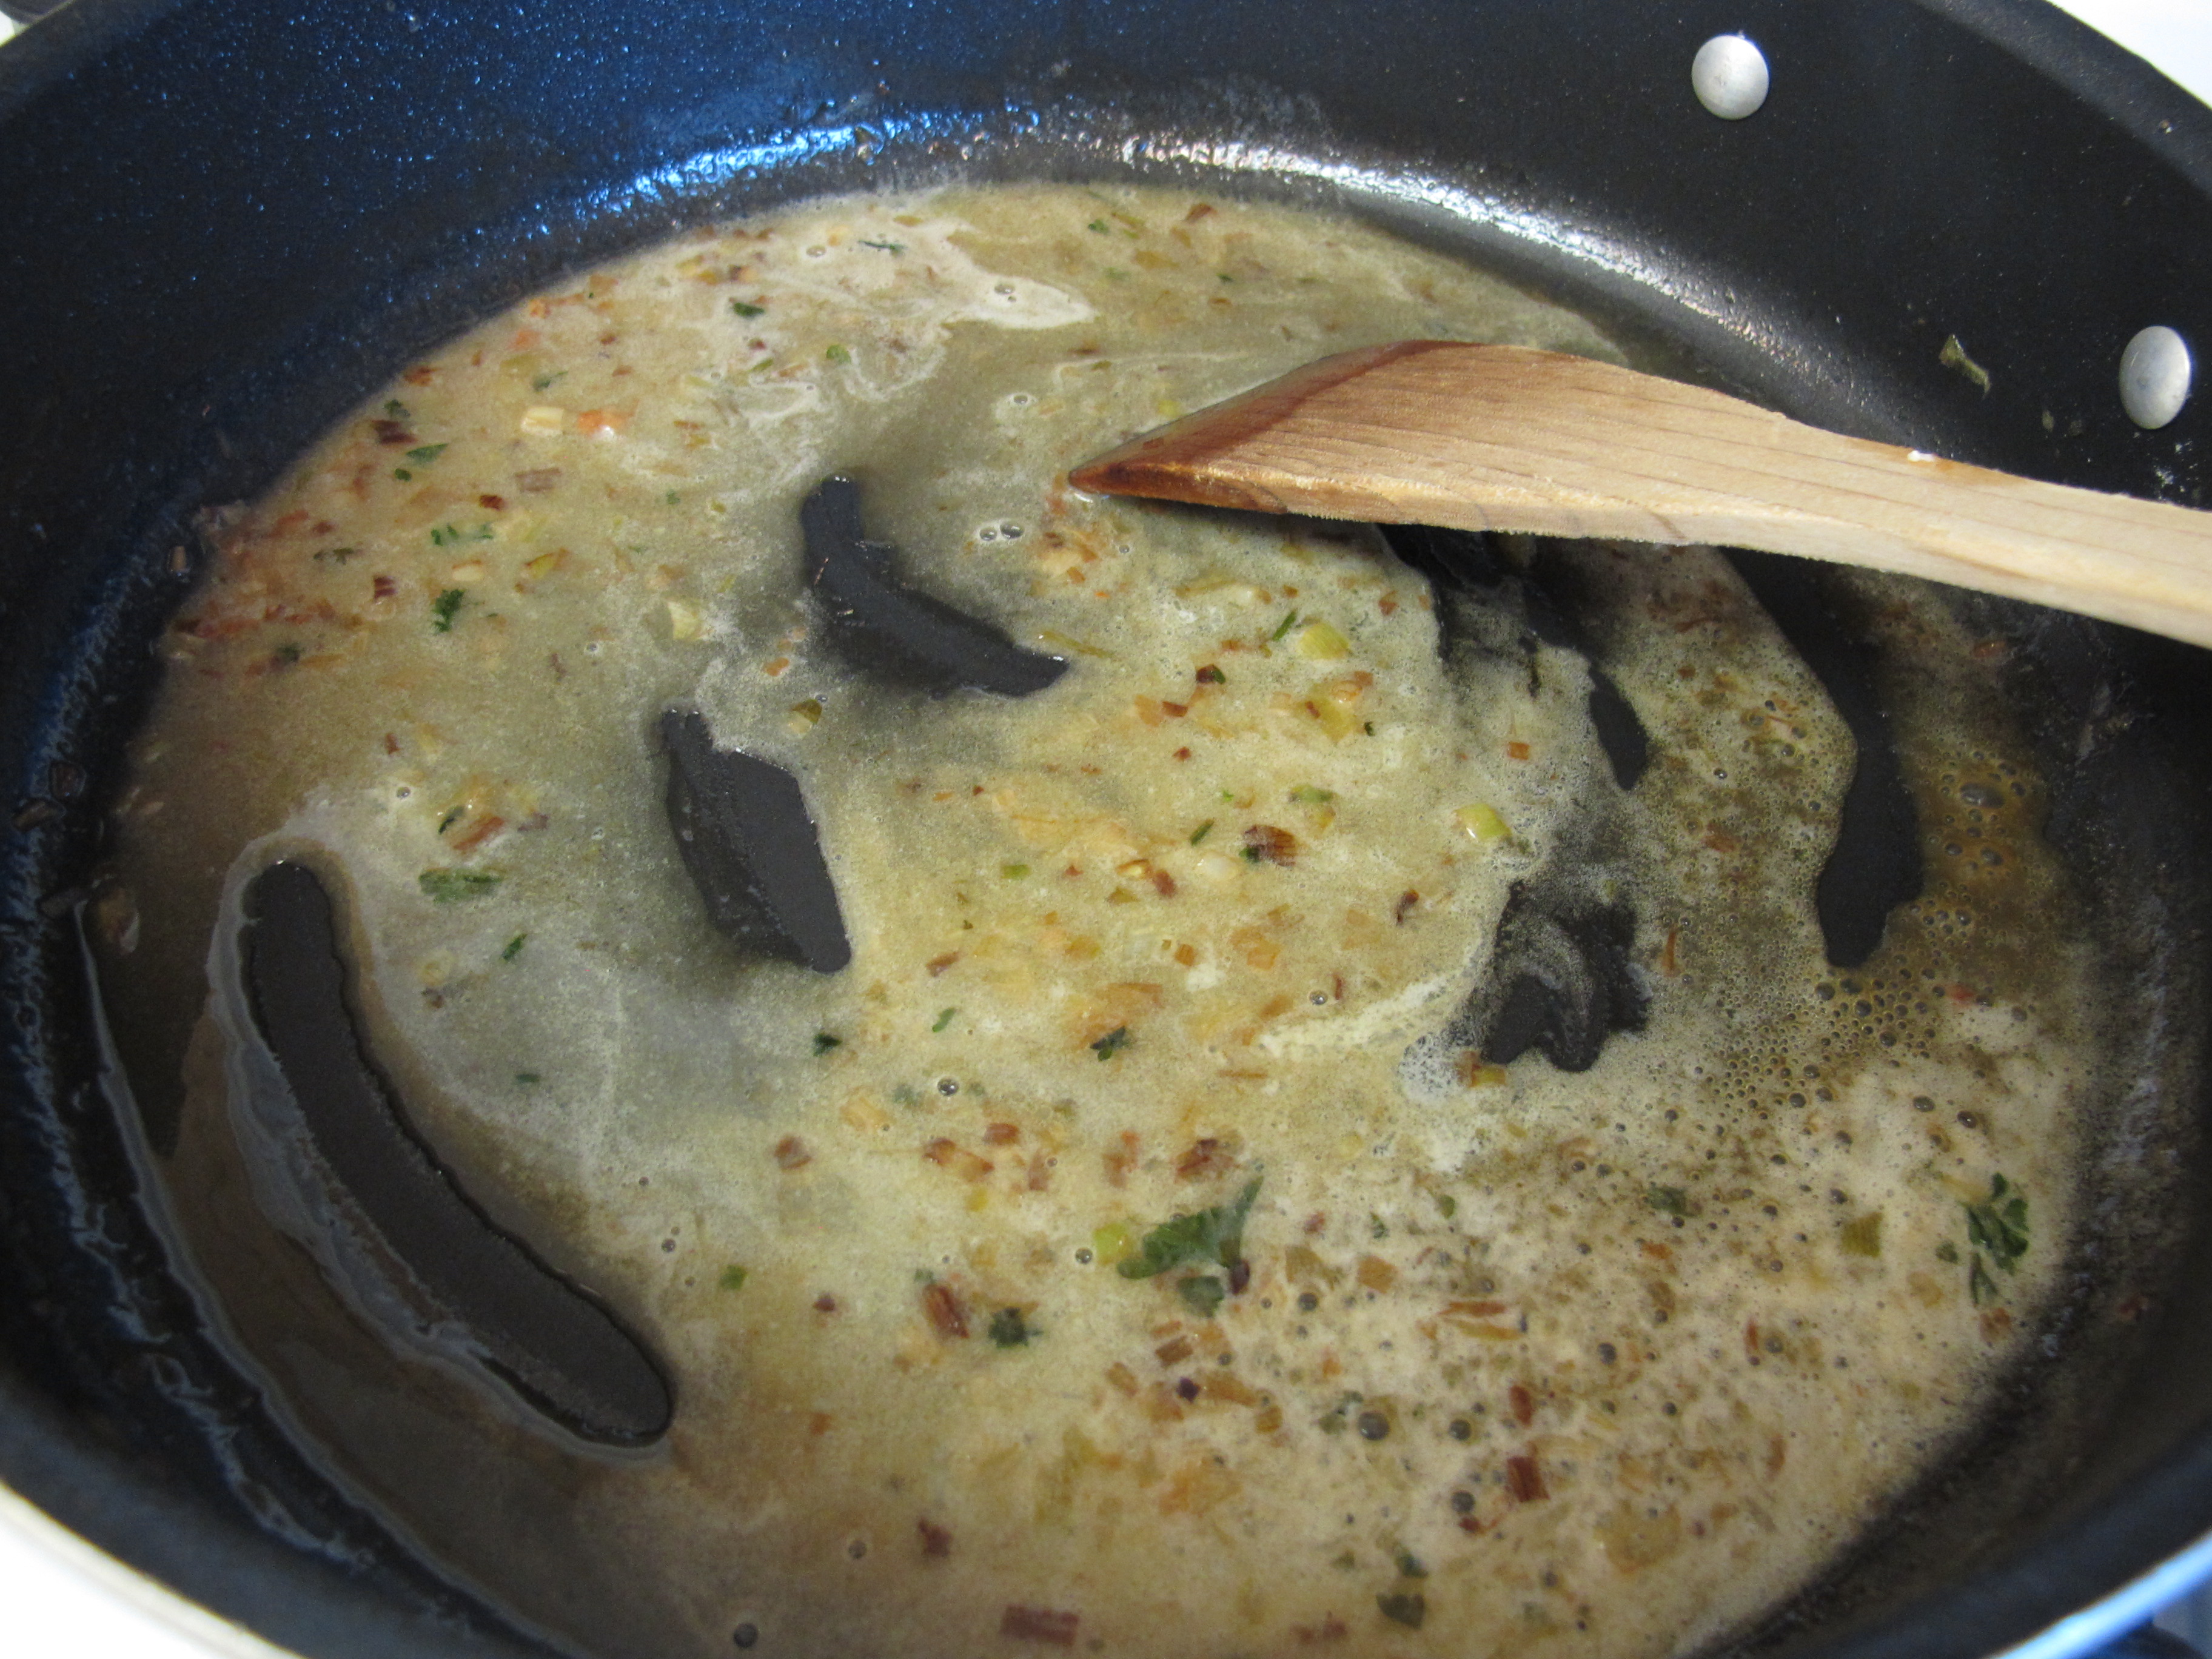
In a skillet, mix the remainder of the chicken broth with the beef broth, tomato paste, cumin, garlic granules, onion powder, chili powder, salt and pepper.
Bring to a boil.
Add the broth/flour mixture, stirring constantly until smooth.
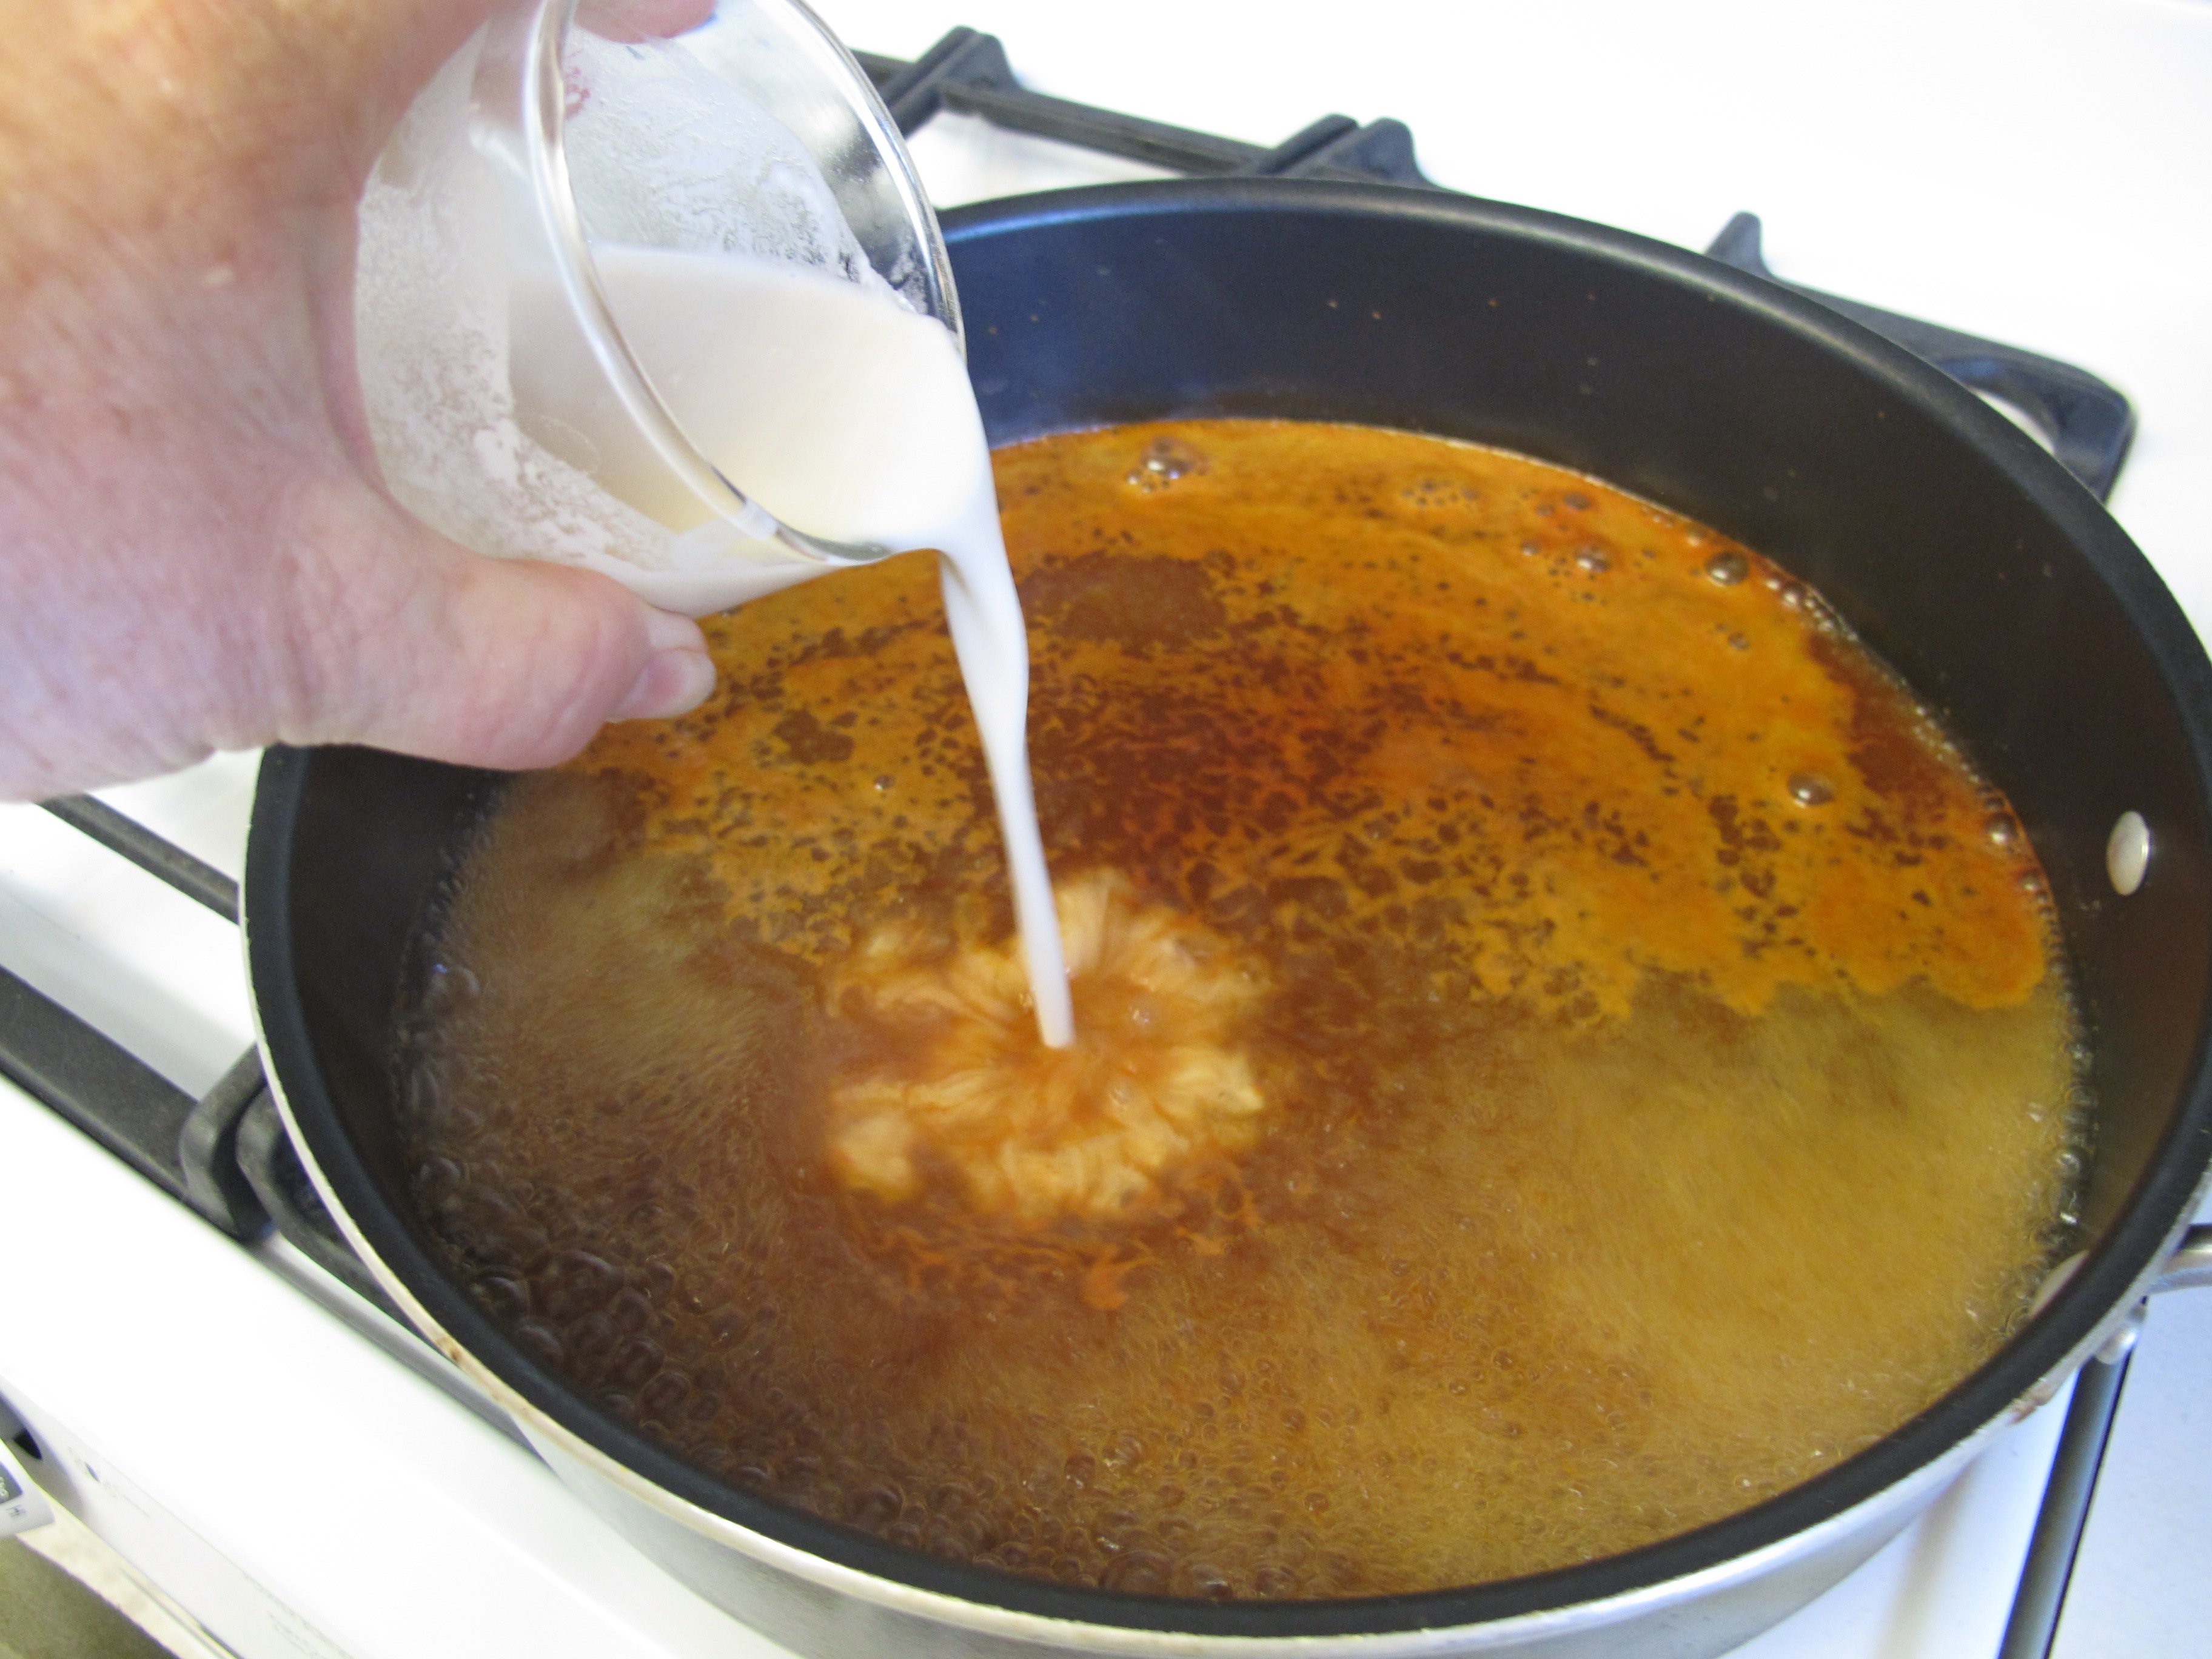
Whisk and simmer until smooth and slightly thicker. Set aside in a bowl.
Preheat oven to 375 degrees.
ENCHILADAS
1 T. olive oil
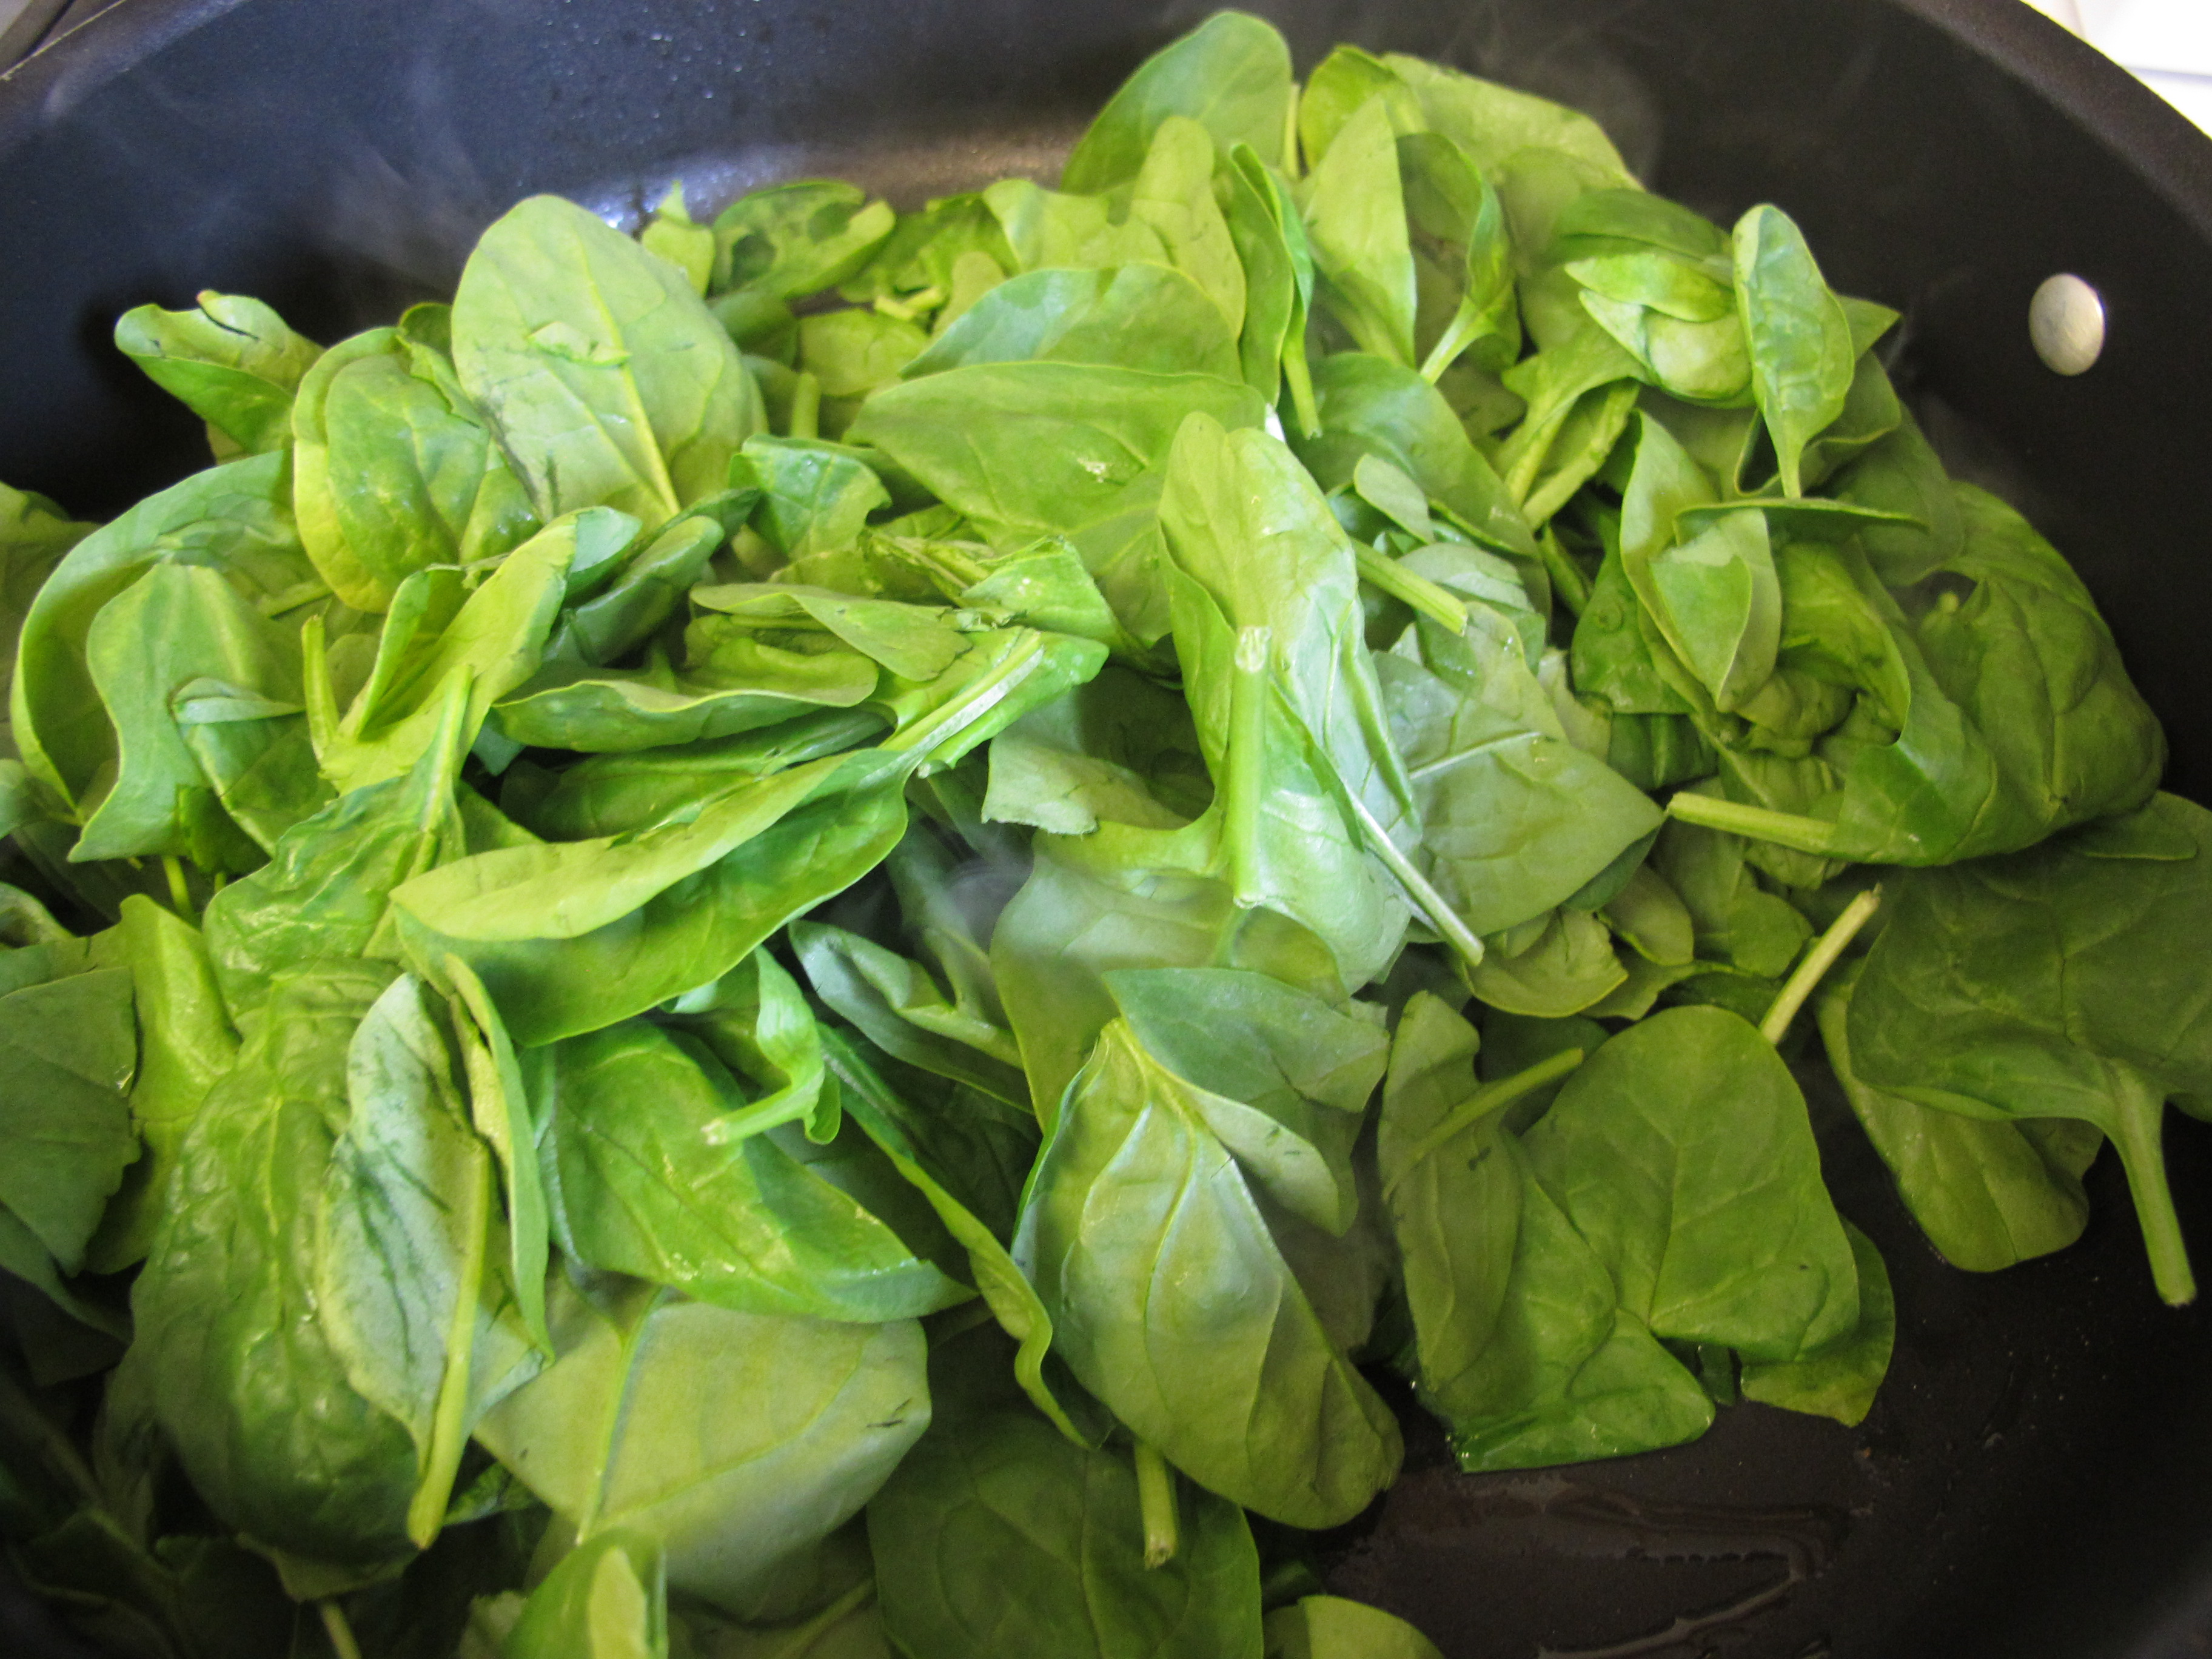
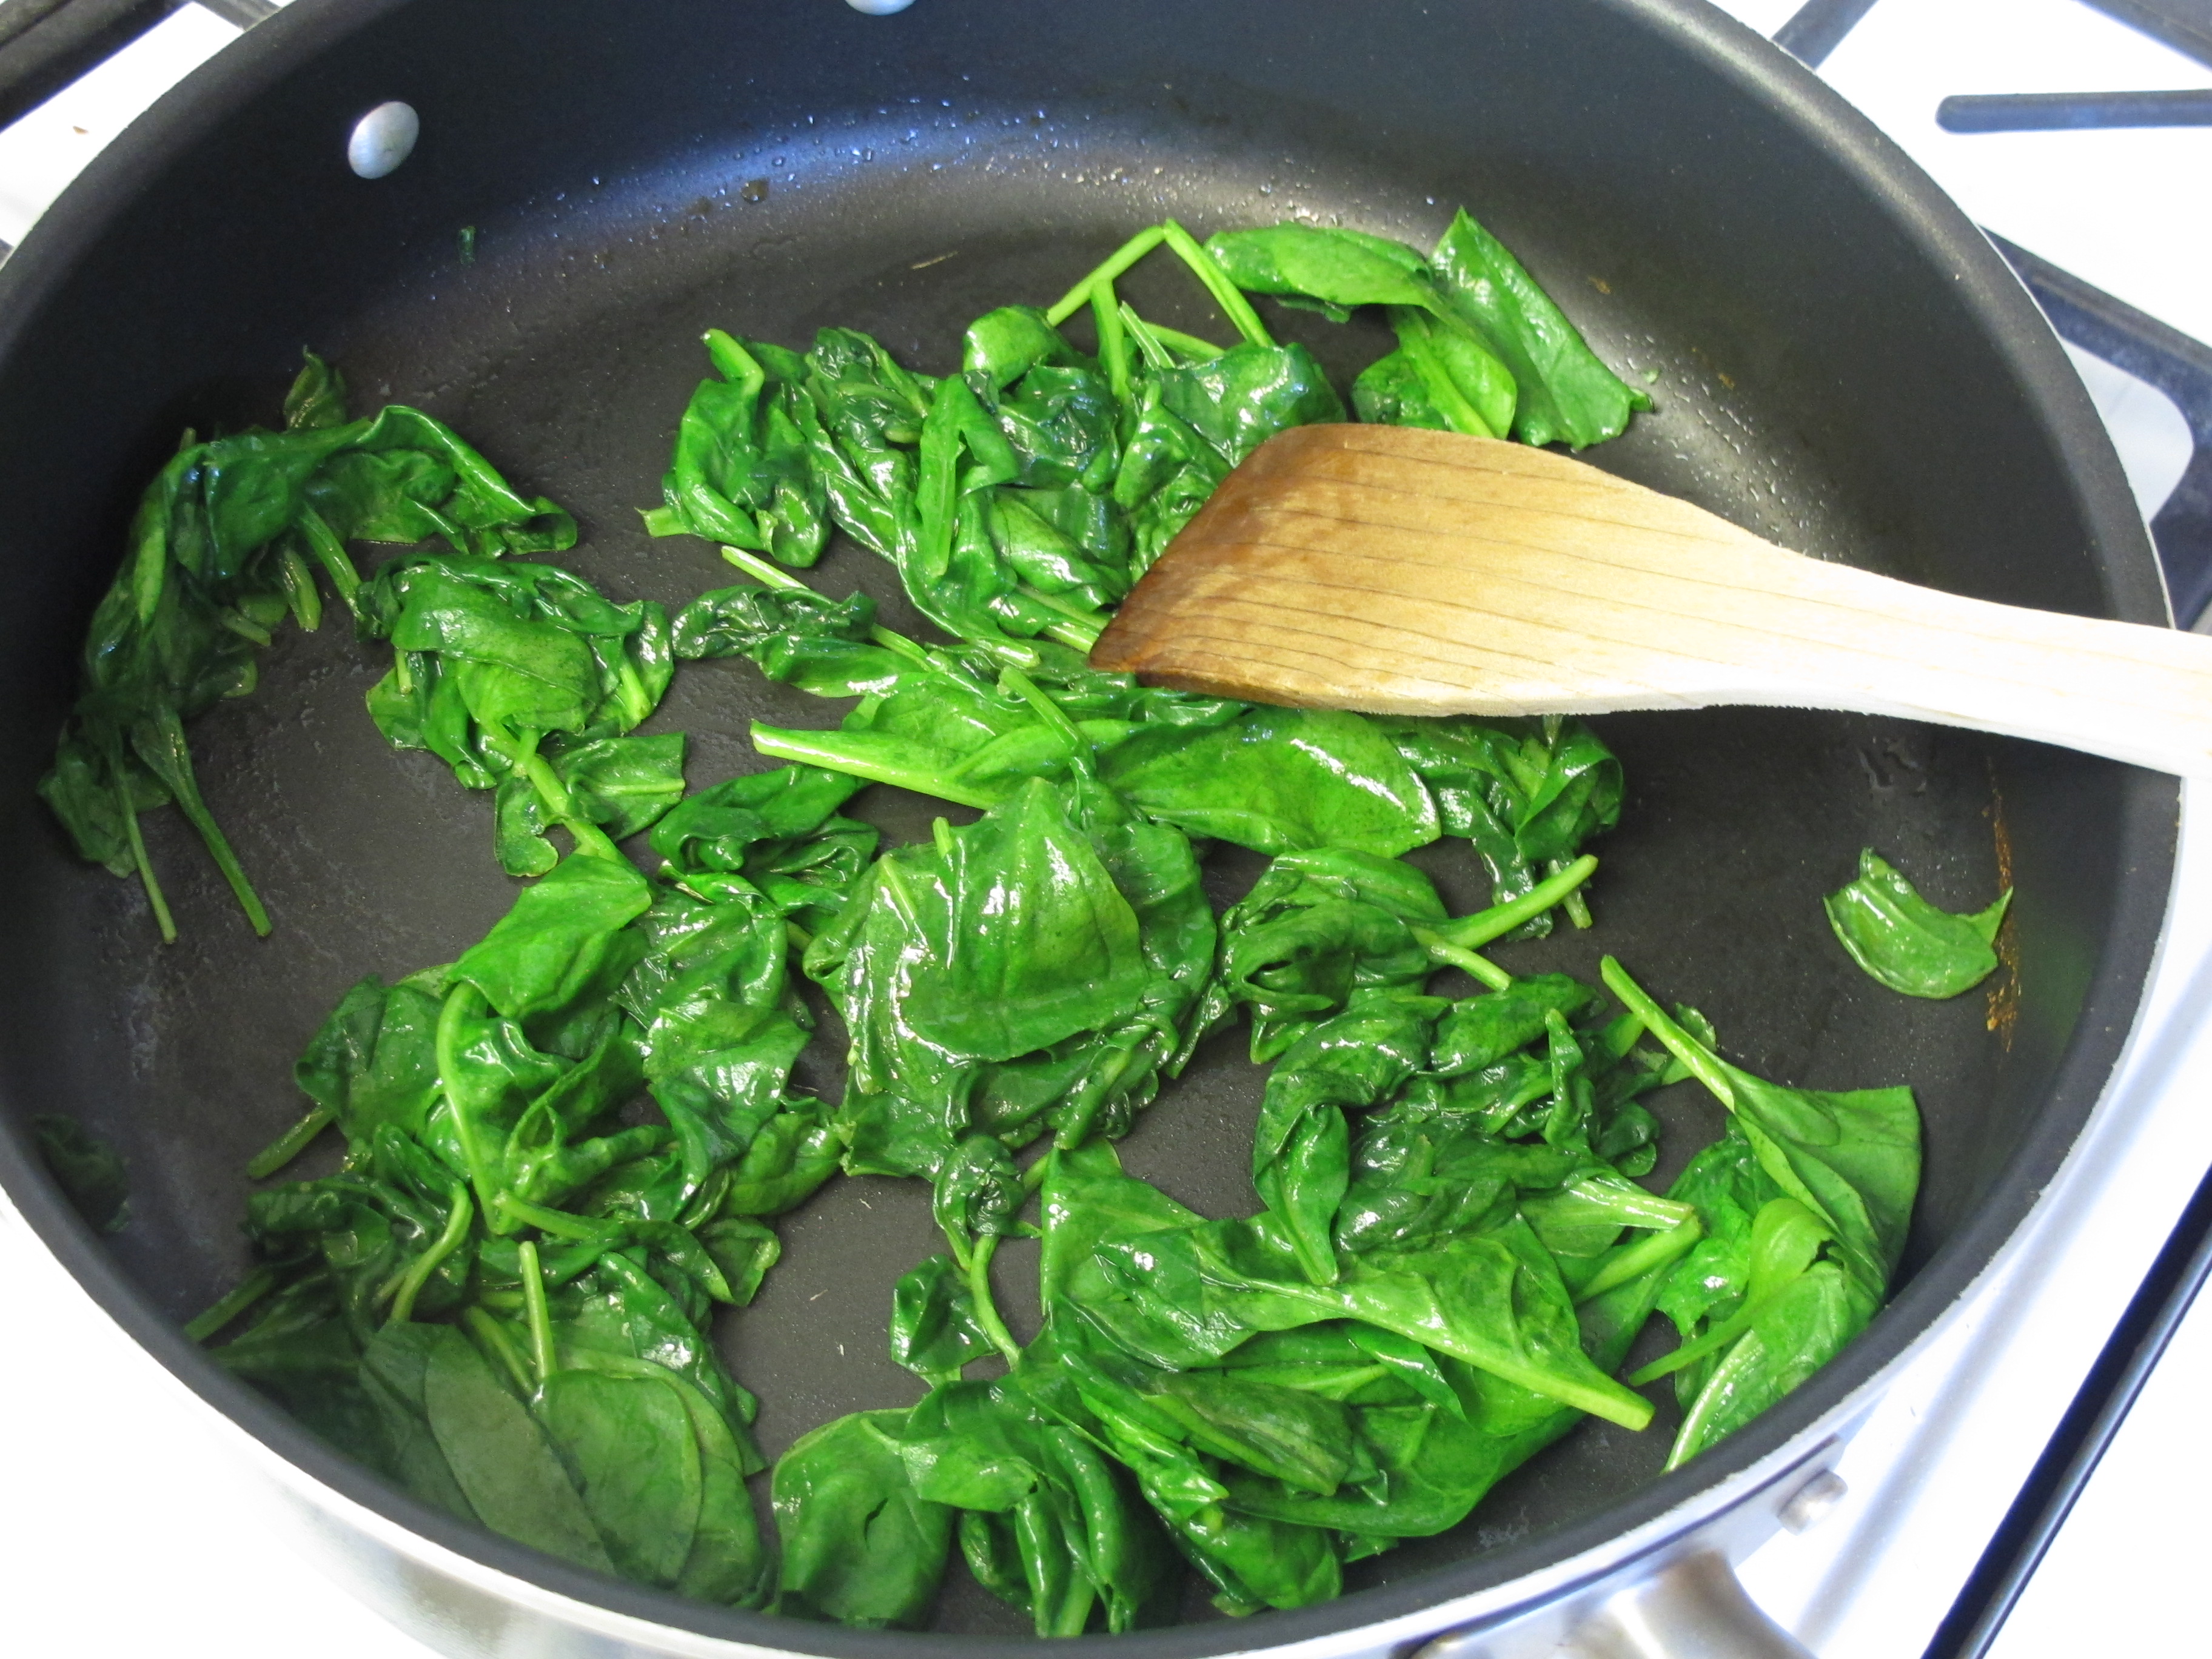
6 oz. fresh baby spinach
Note: I would chop the spinach slightly so it distributes throughout the enchiladas more. You can either do this before sauteing or after. This is not shown in the pictures.
In the same skillet, heat the olive oil and quick saute the spinach over medium heat for 1 -2 minutes until slightly wilted.
1 – 15 oz. can black beans, rinsed and drained
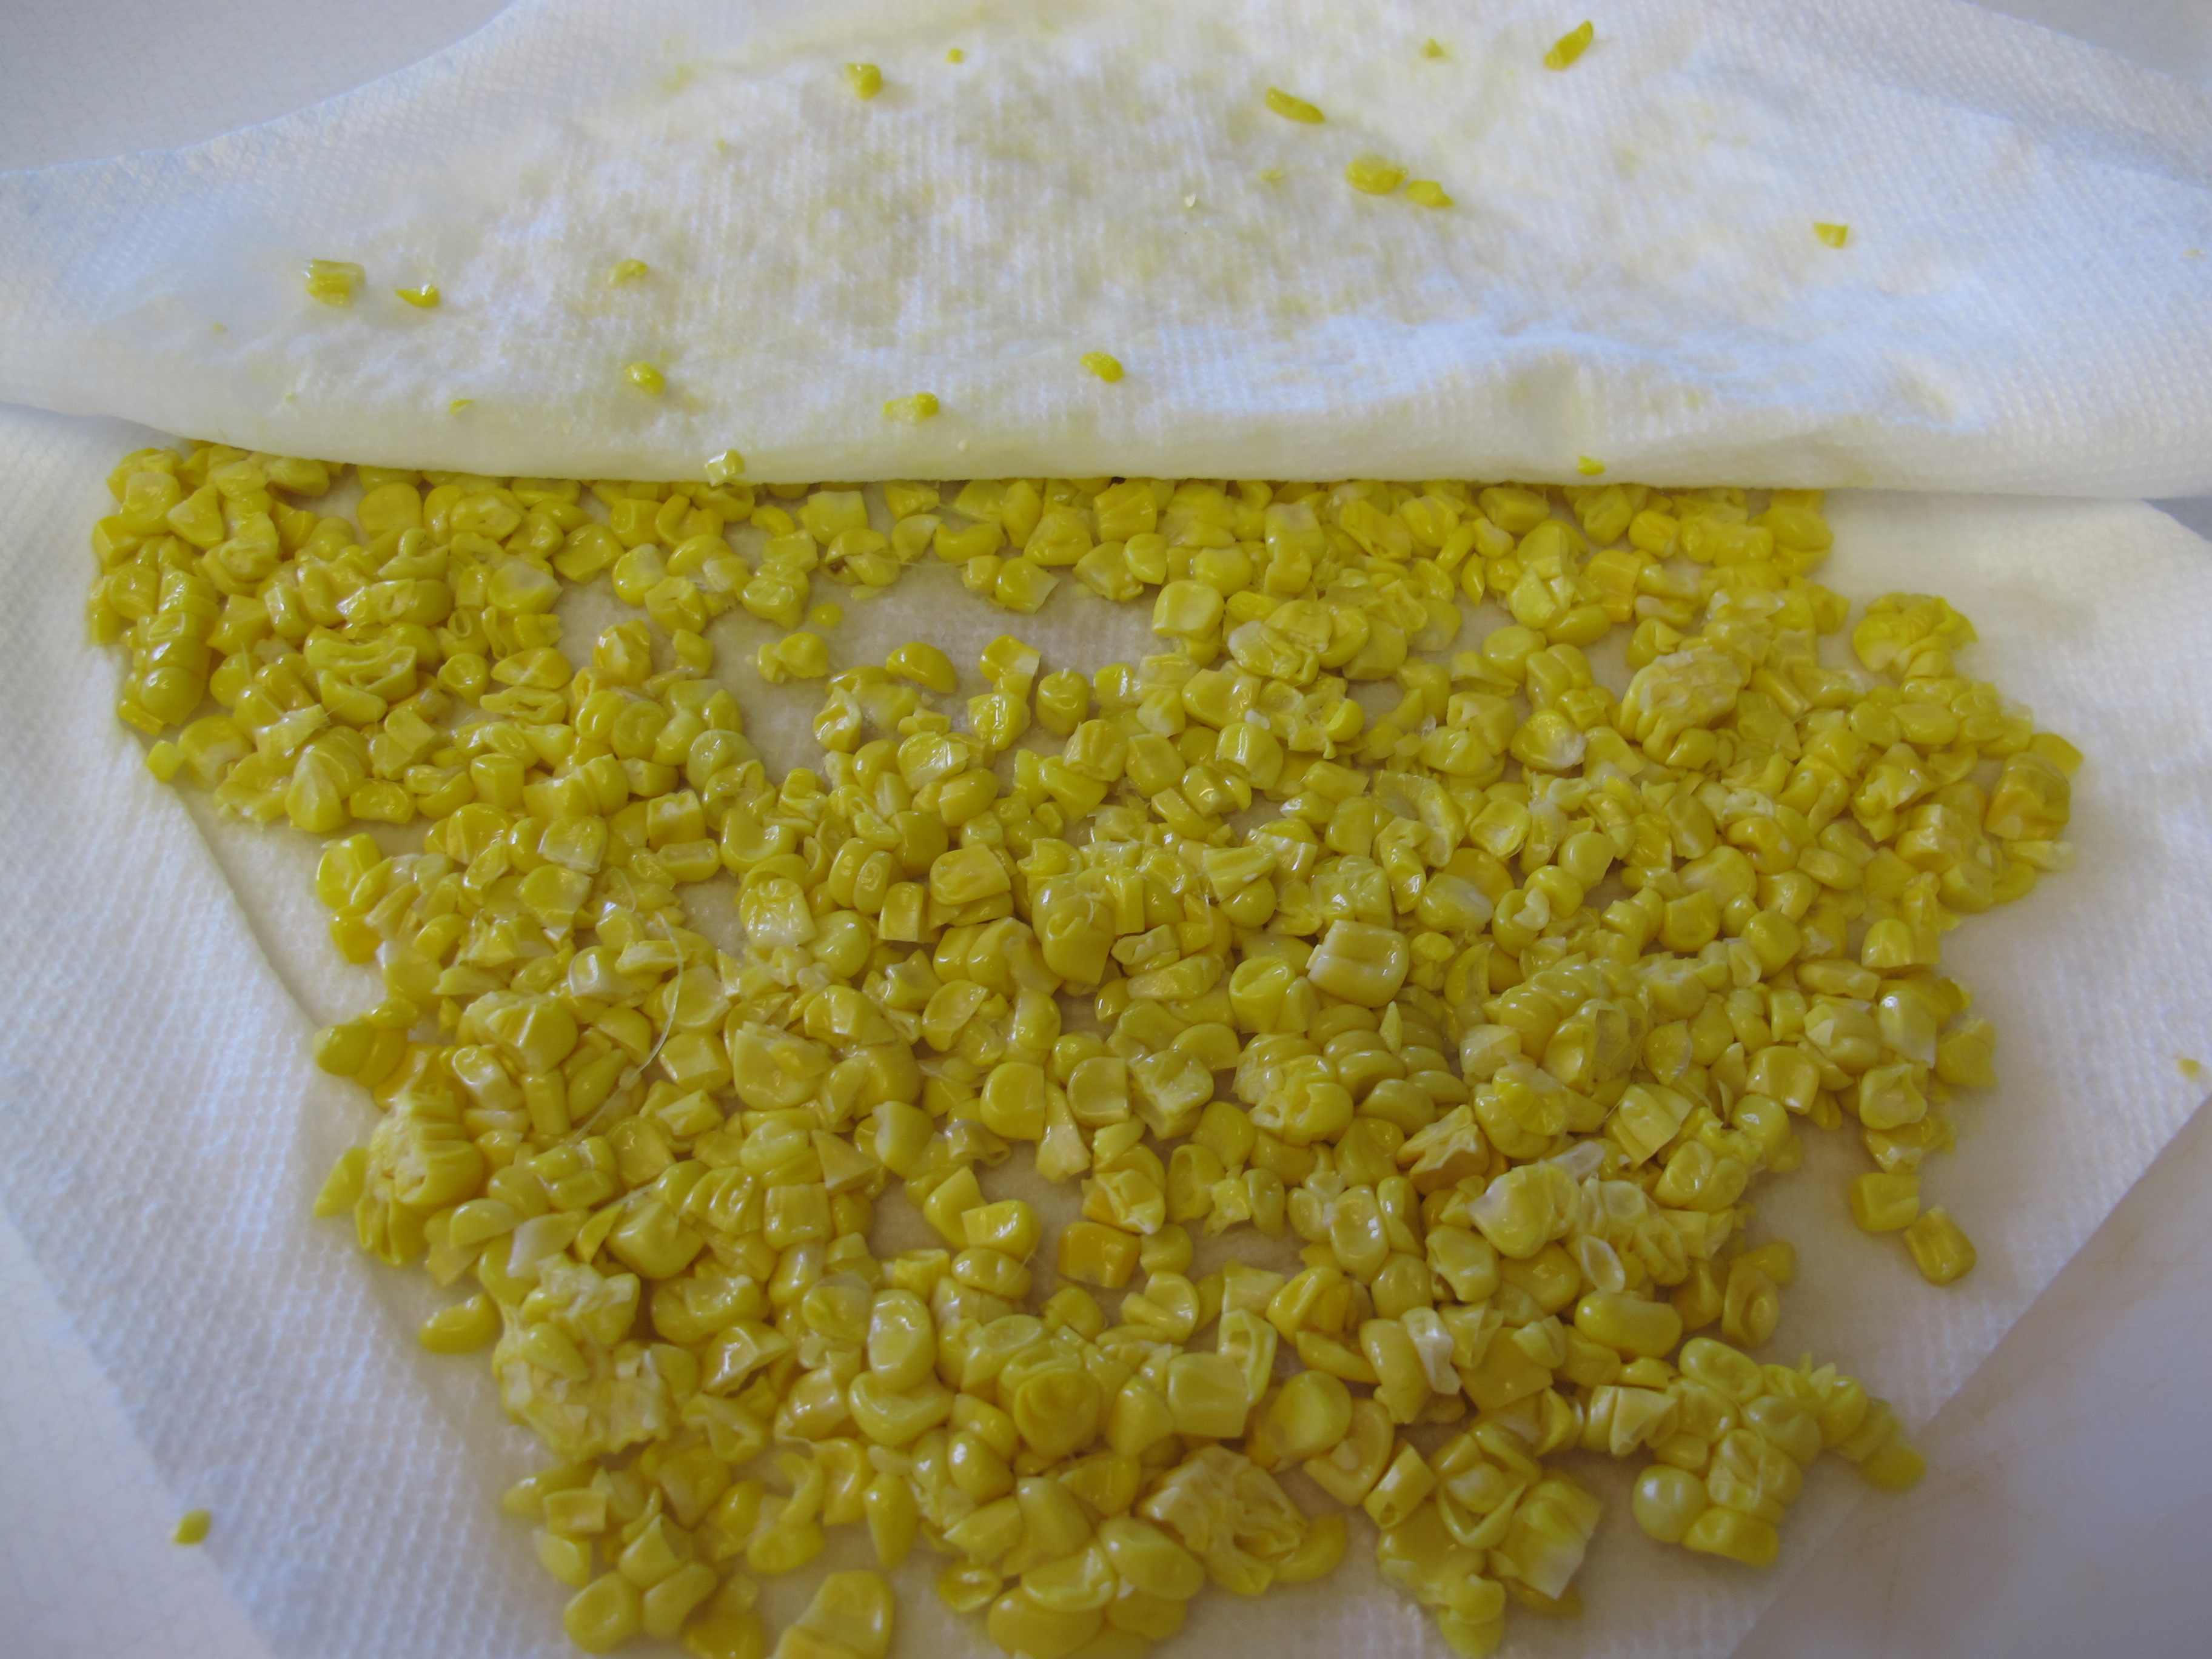
1 – 11 oz. can corn, drained (canned or frozen) (I like using the white shoepeg corn)
3 green onions, thinly sliced
1/3 cup cilantro, chopped
2 tsp. cumin (yes – this is an additional 2 tsp. of cumin)
3 cup shredded 3 cheese blend, divided
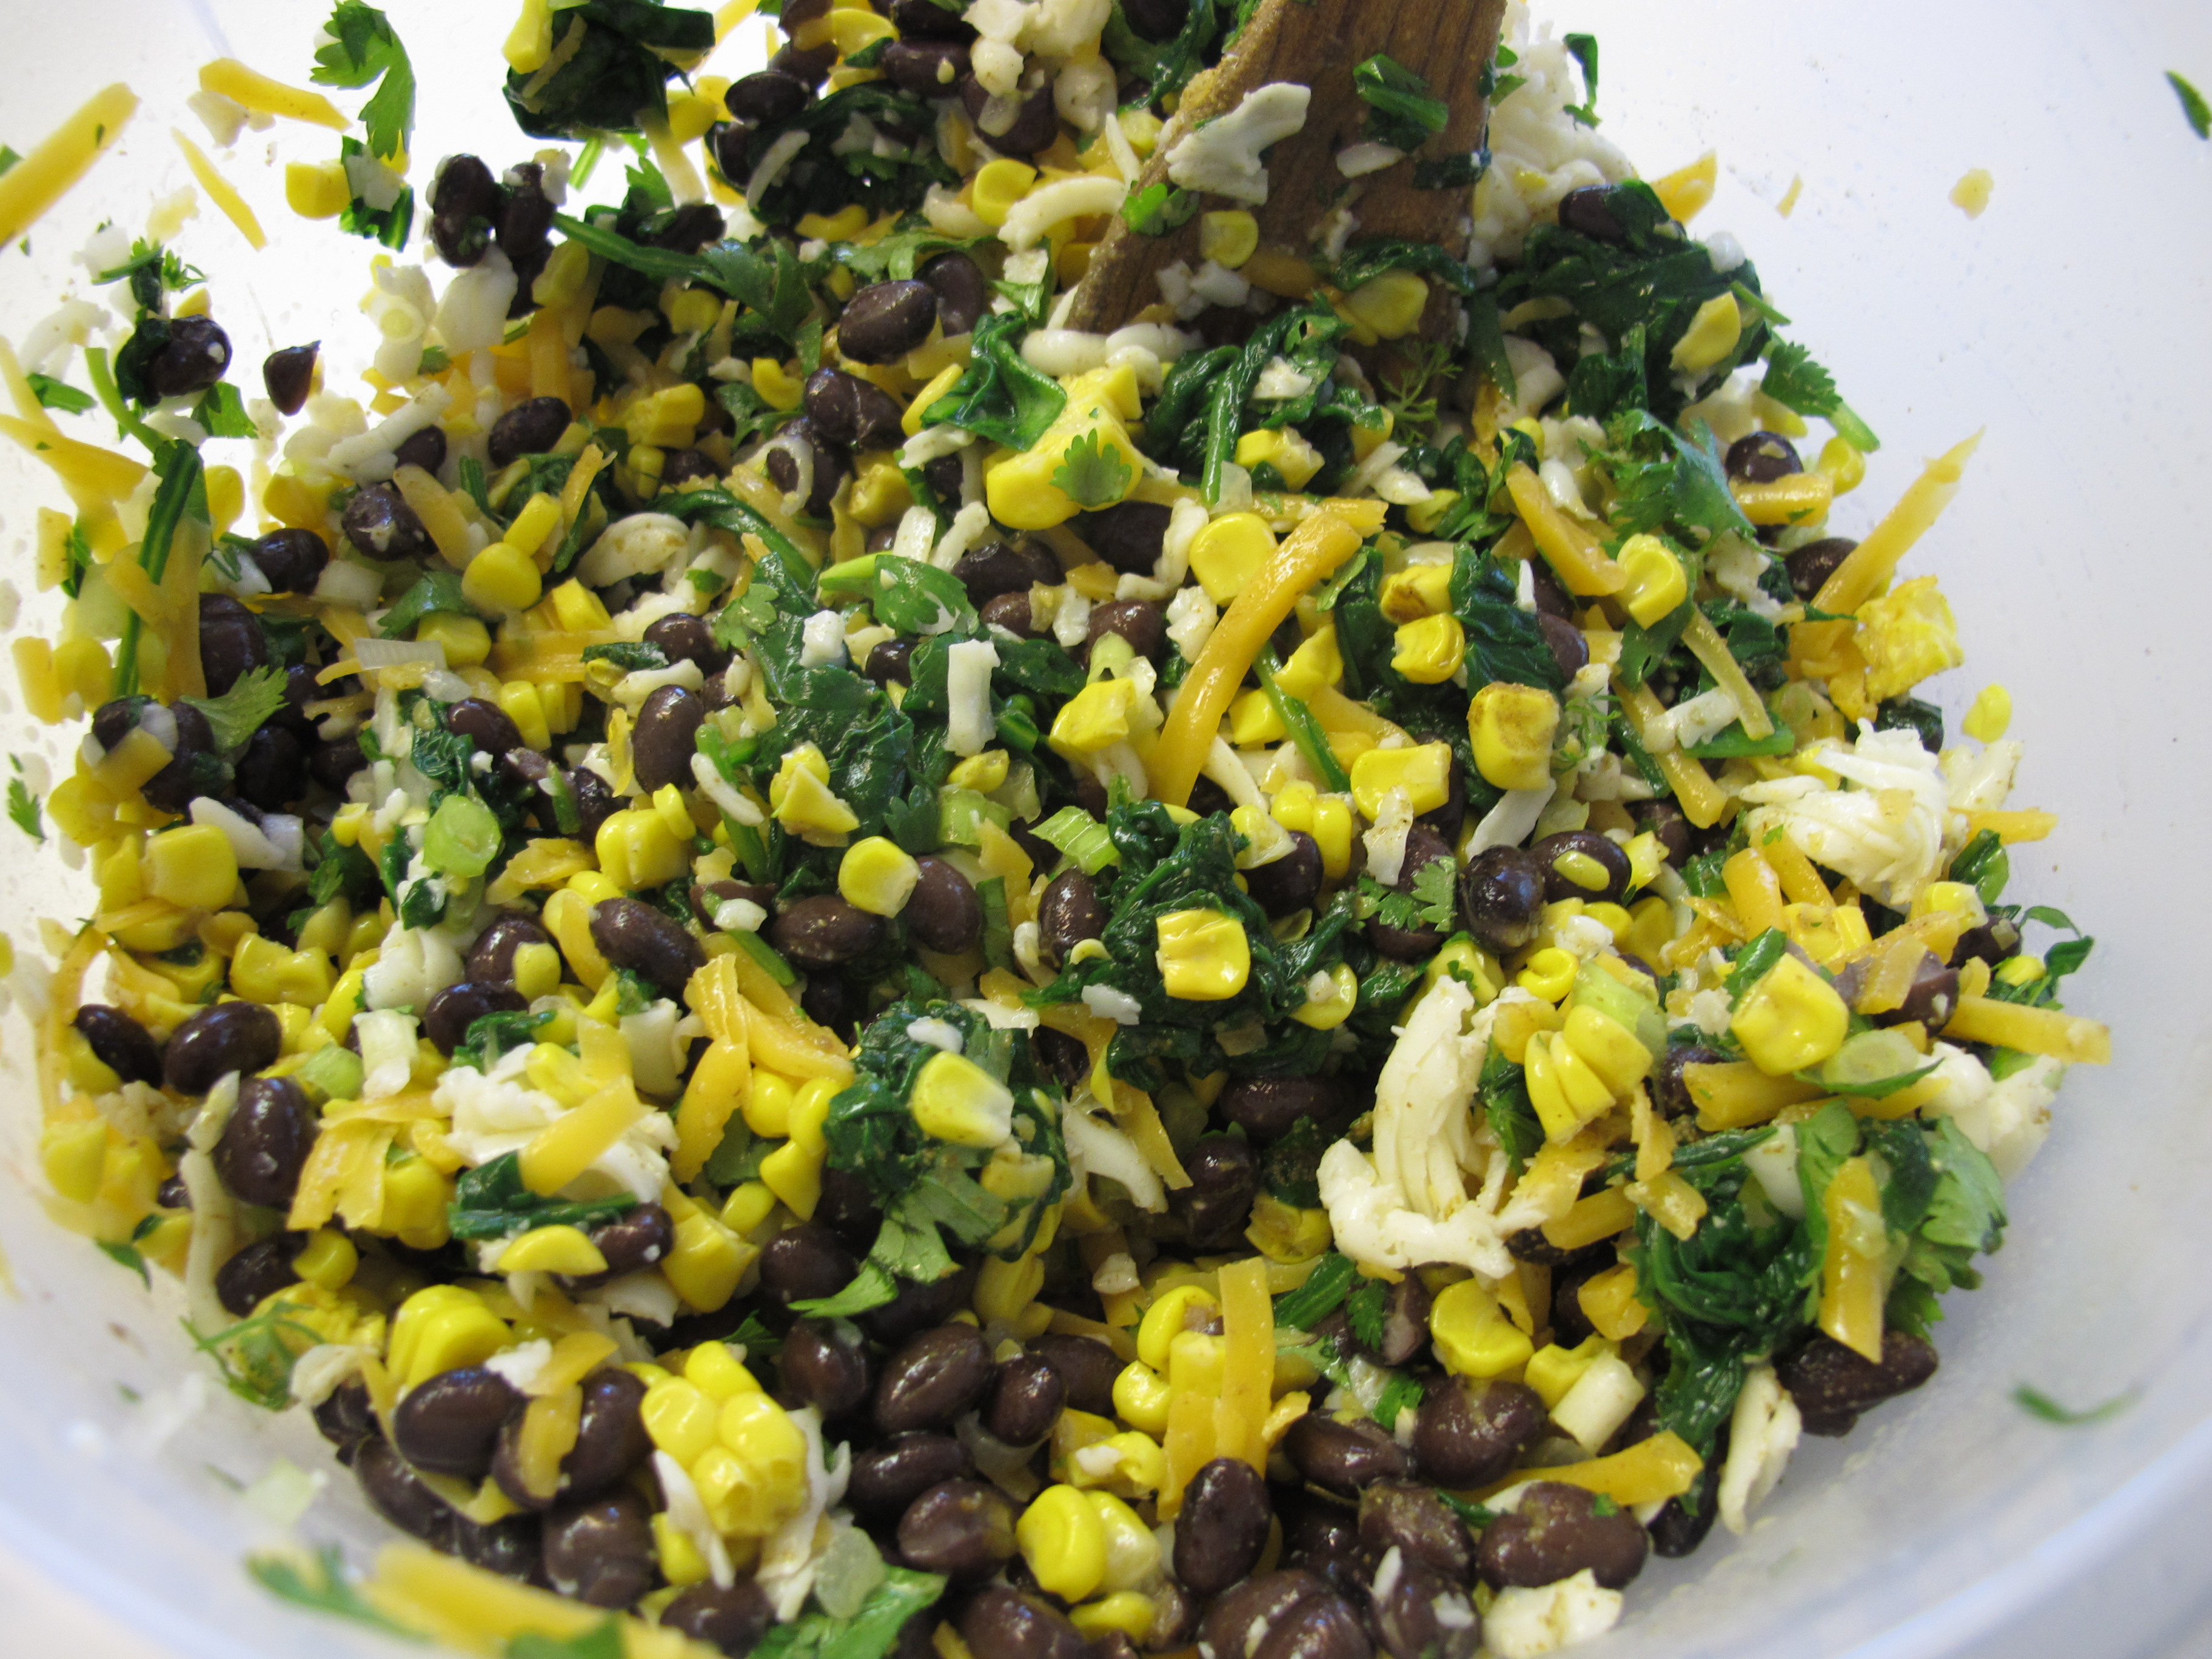
In a large bowl, combine the black beans, corn, green onions, cilantro, cumin and 2 cups of the cheese.
NOTE: I drained the corn and then laid it out on a paper towel and blotted the rest of the liquid off of it to keep the enchiladas from getting soggy.
Lightly spray a 9 x 13 baking dish and pour a small amount of the sauce to coat the bottom.
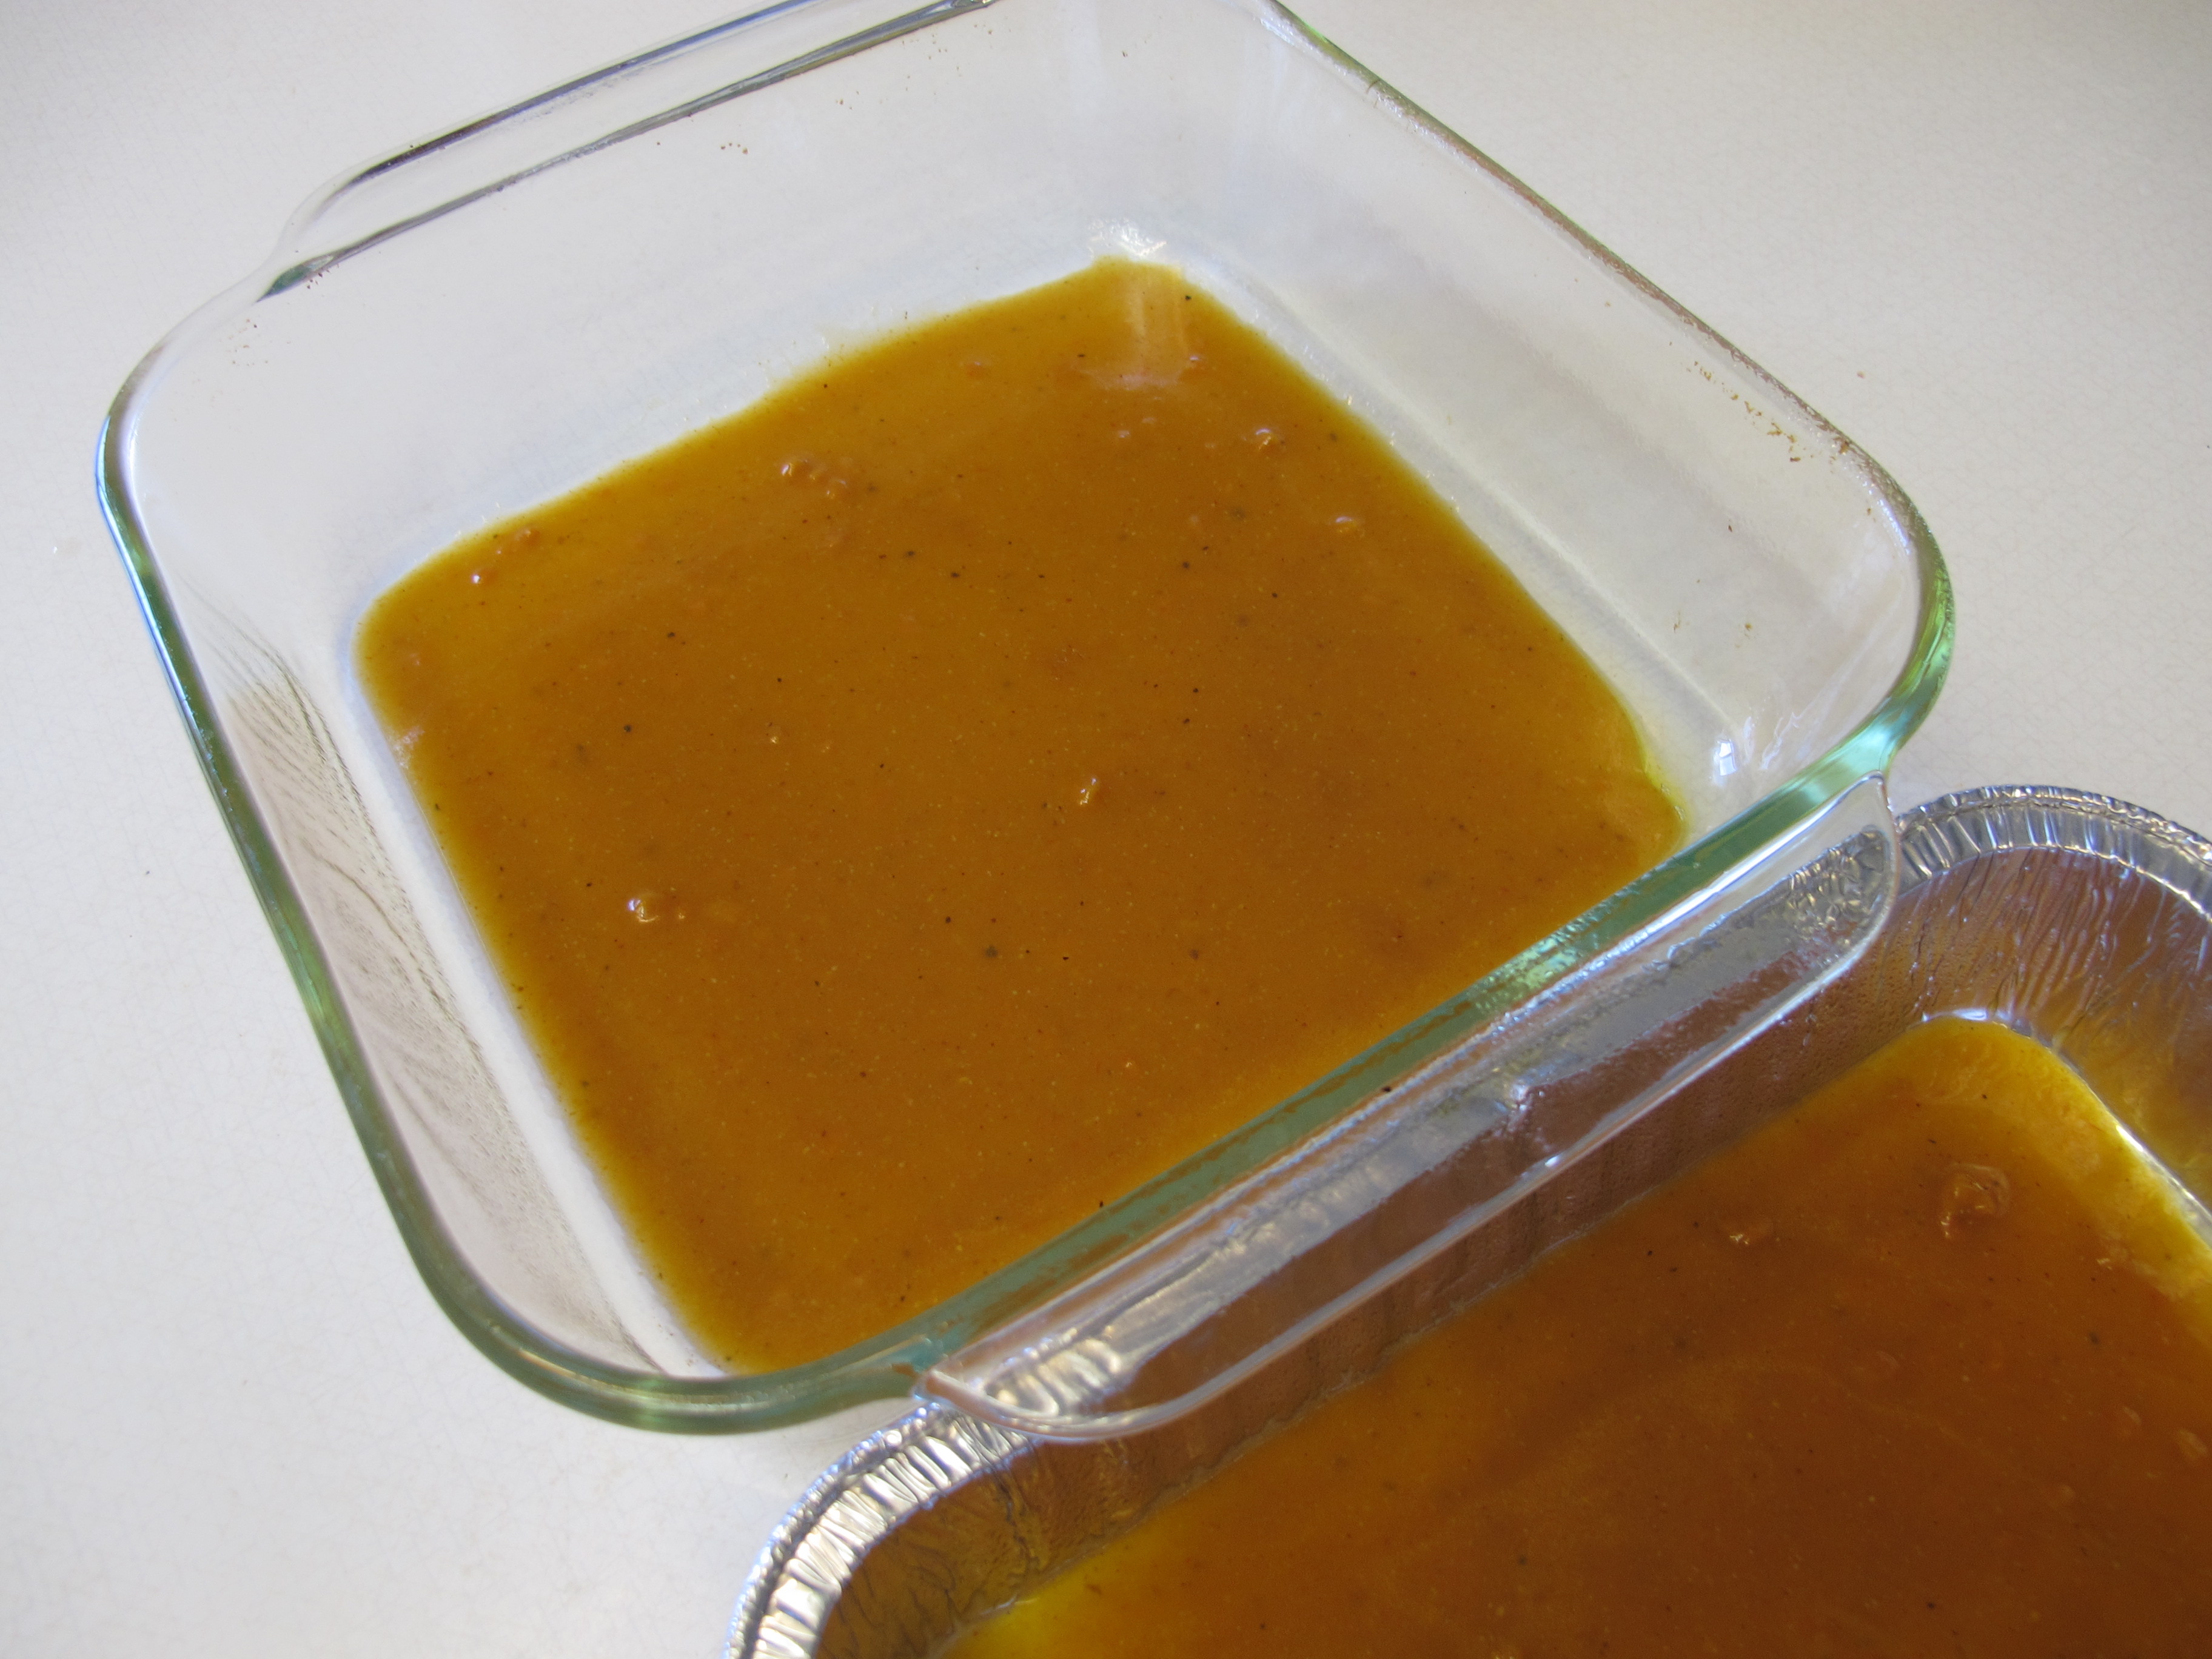
As you can see from this picture above, I was making the full recipe but dividing it in half – one to eat now, one to freeze for later.
8 tortillas, whole wheat or flour
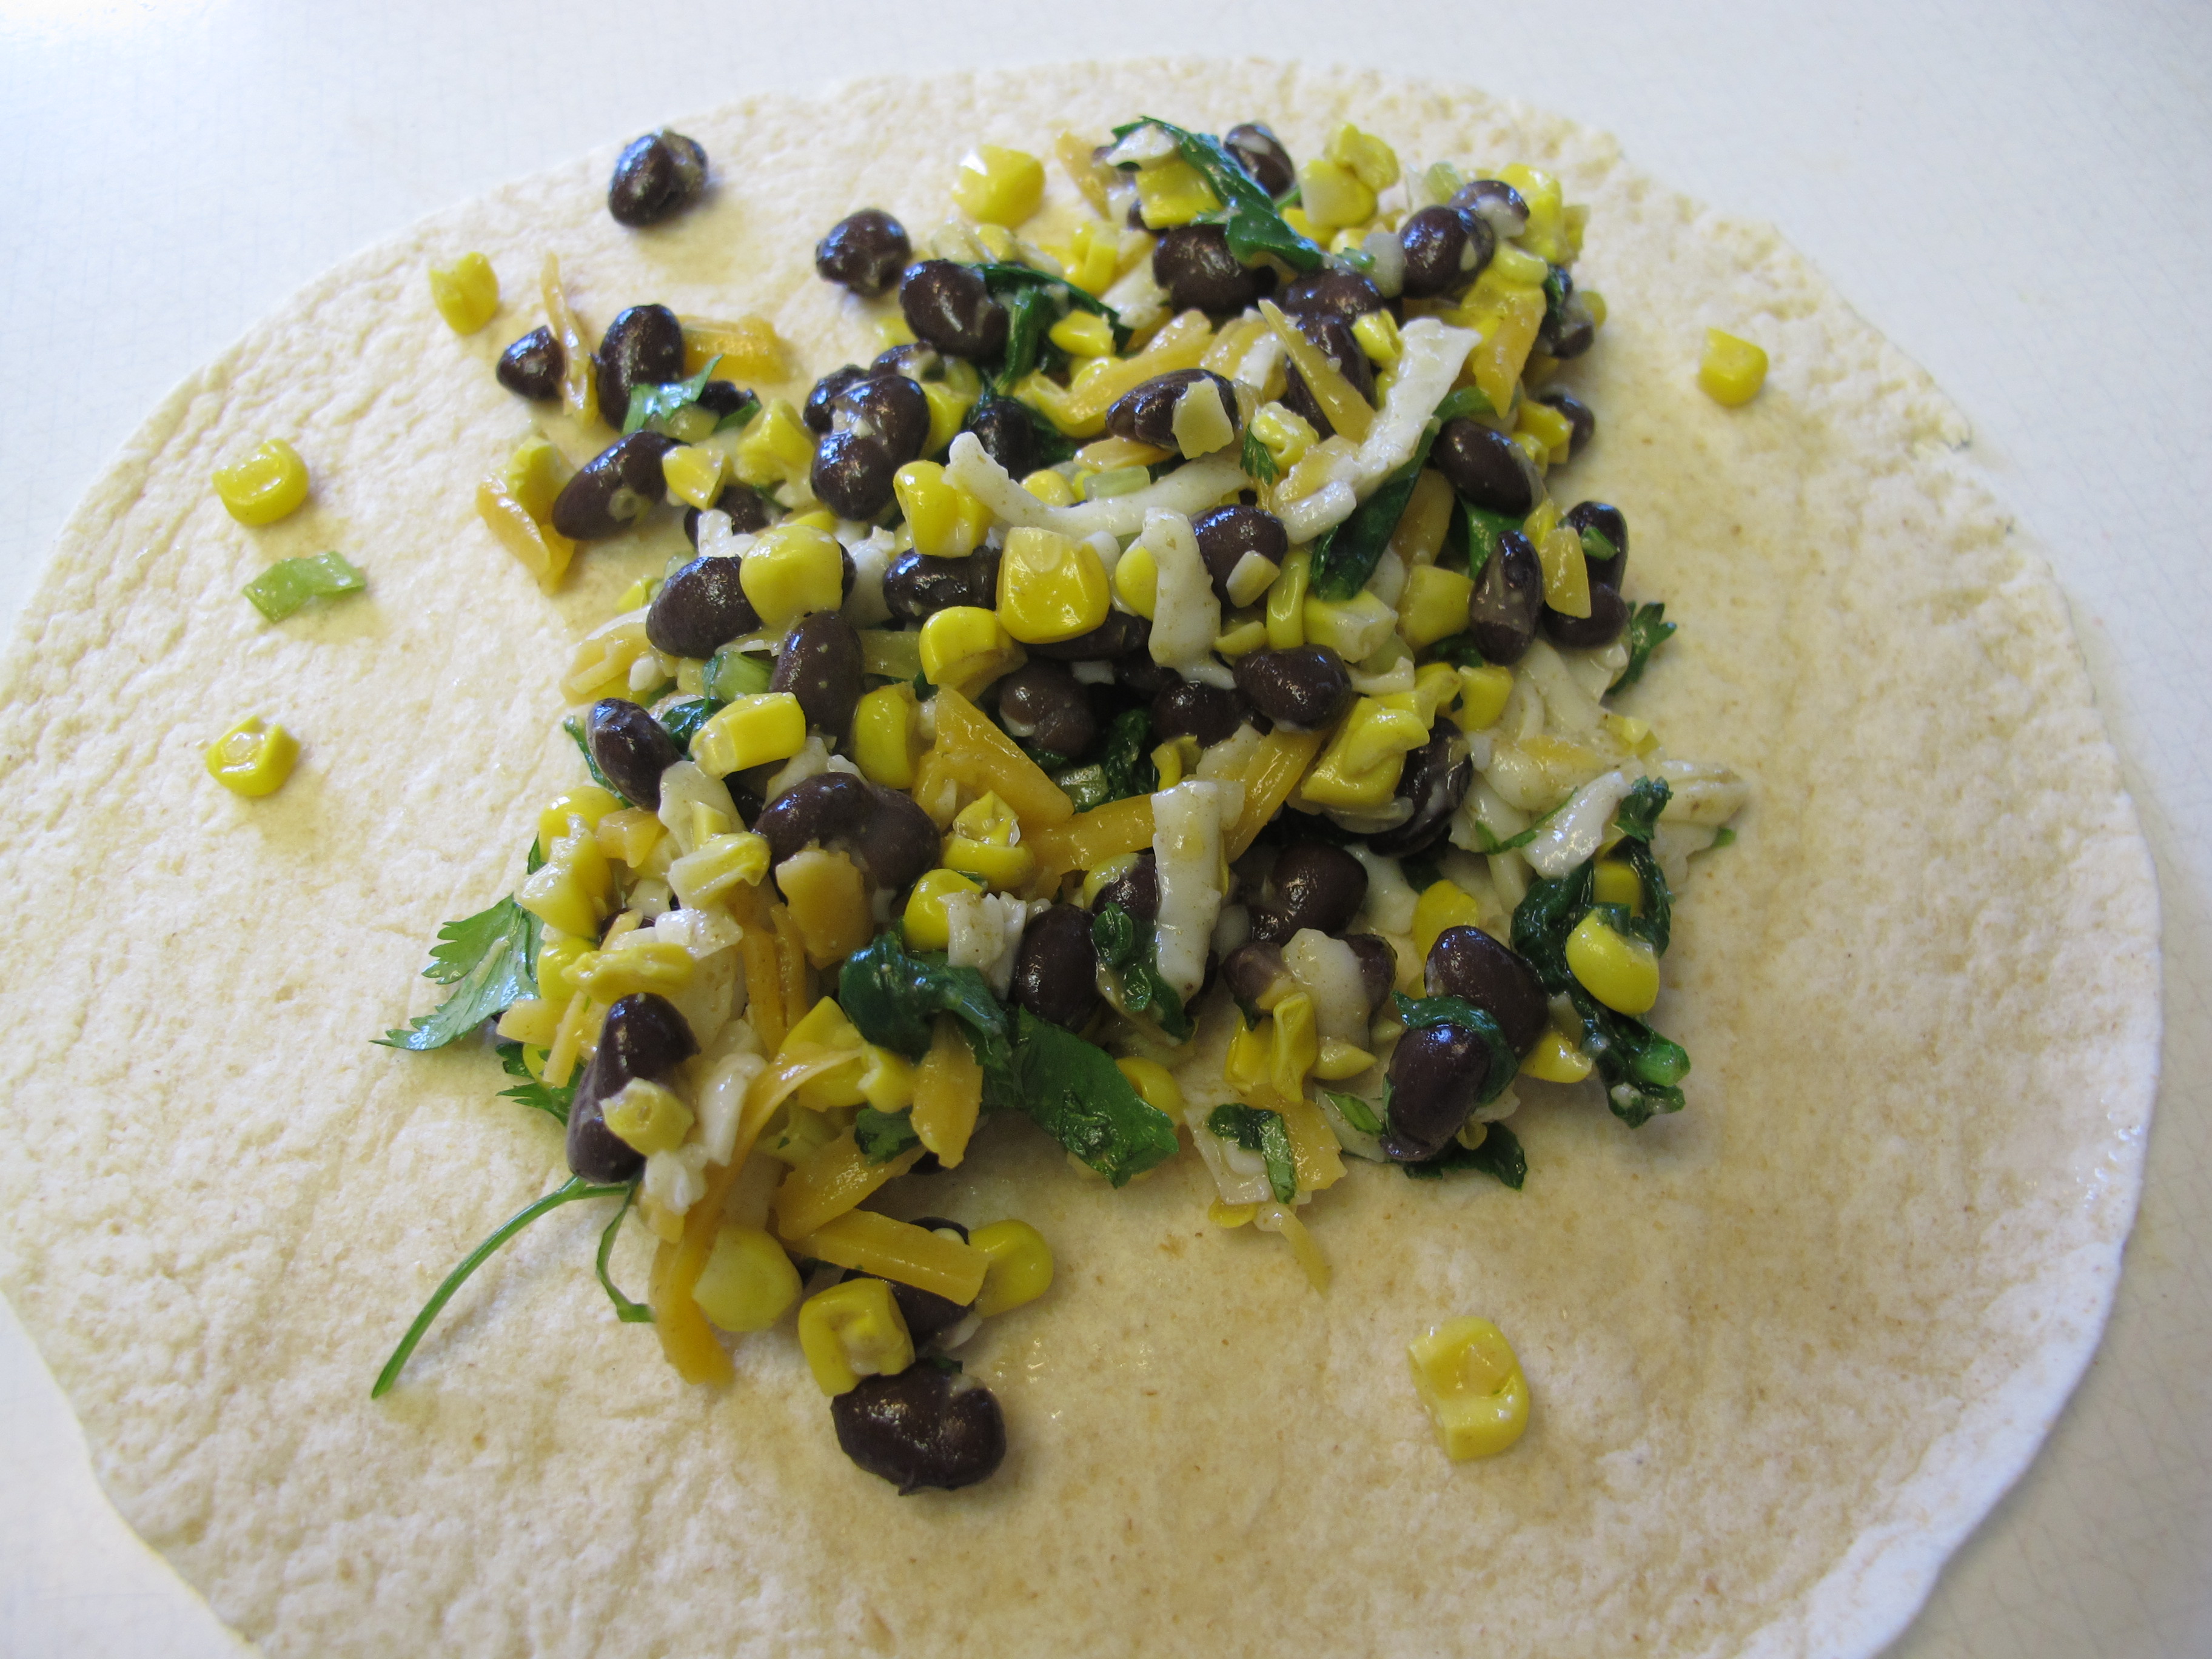
Lay 8 tortillas out on the counter and divide filling evenly. Roll up tightly and place seam side down in the baking dish.
FREEZE AHEAD: Assemble enchiladas – Do not add cheese or sauce on top. Cover with Seran wrap or Press and Seal. Place cheese and sauce in separate freezer bags. Put on top of covered enchiladas – cover entire pan with foil.
Pour remaining sauce over the enchiladas, coating evenly.
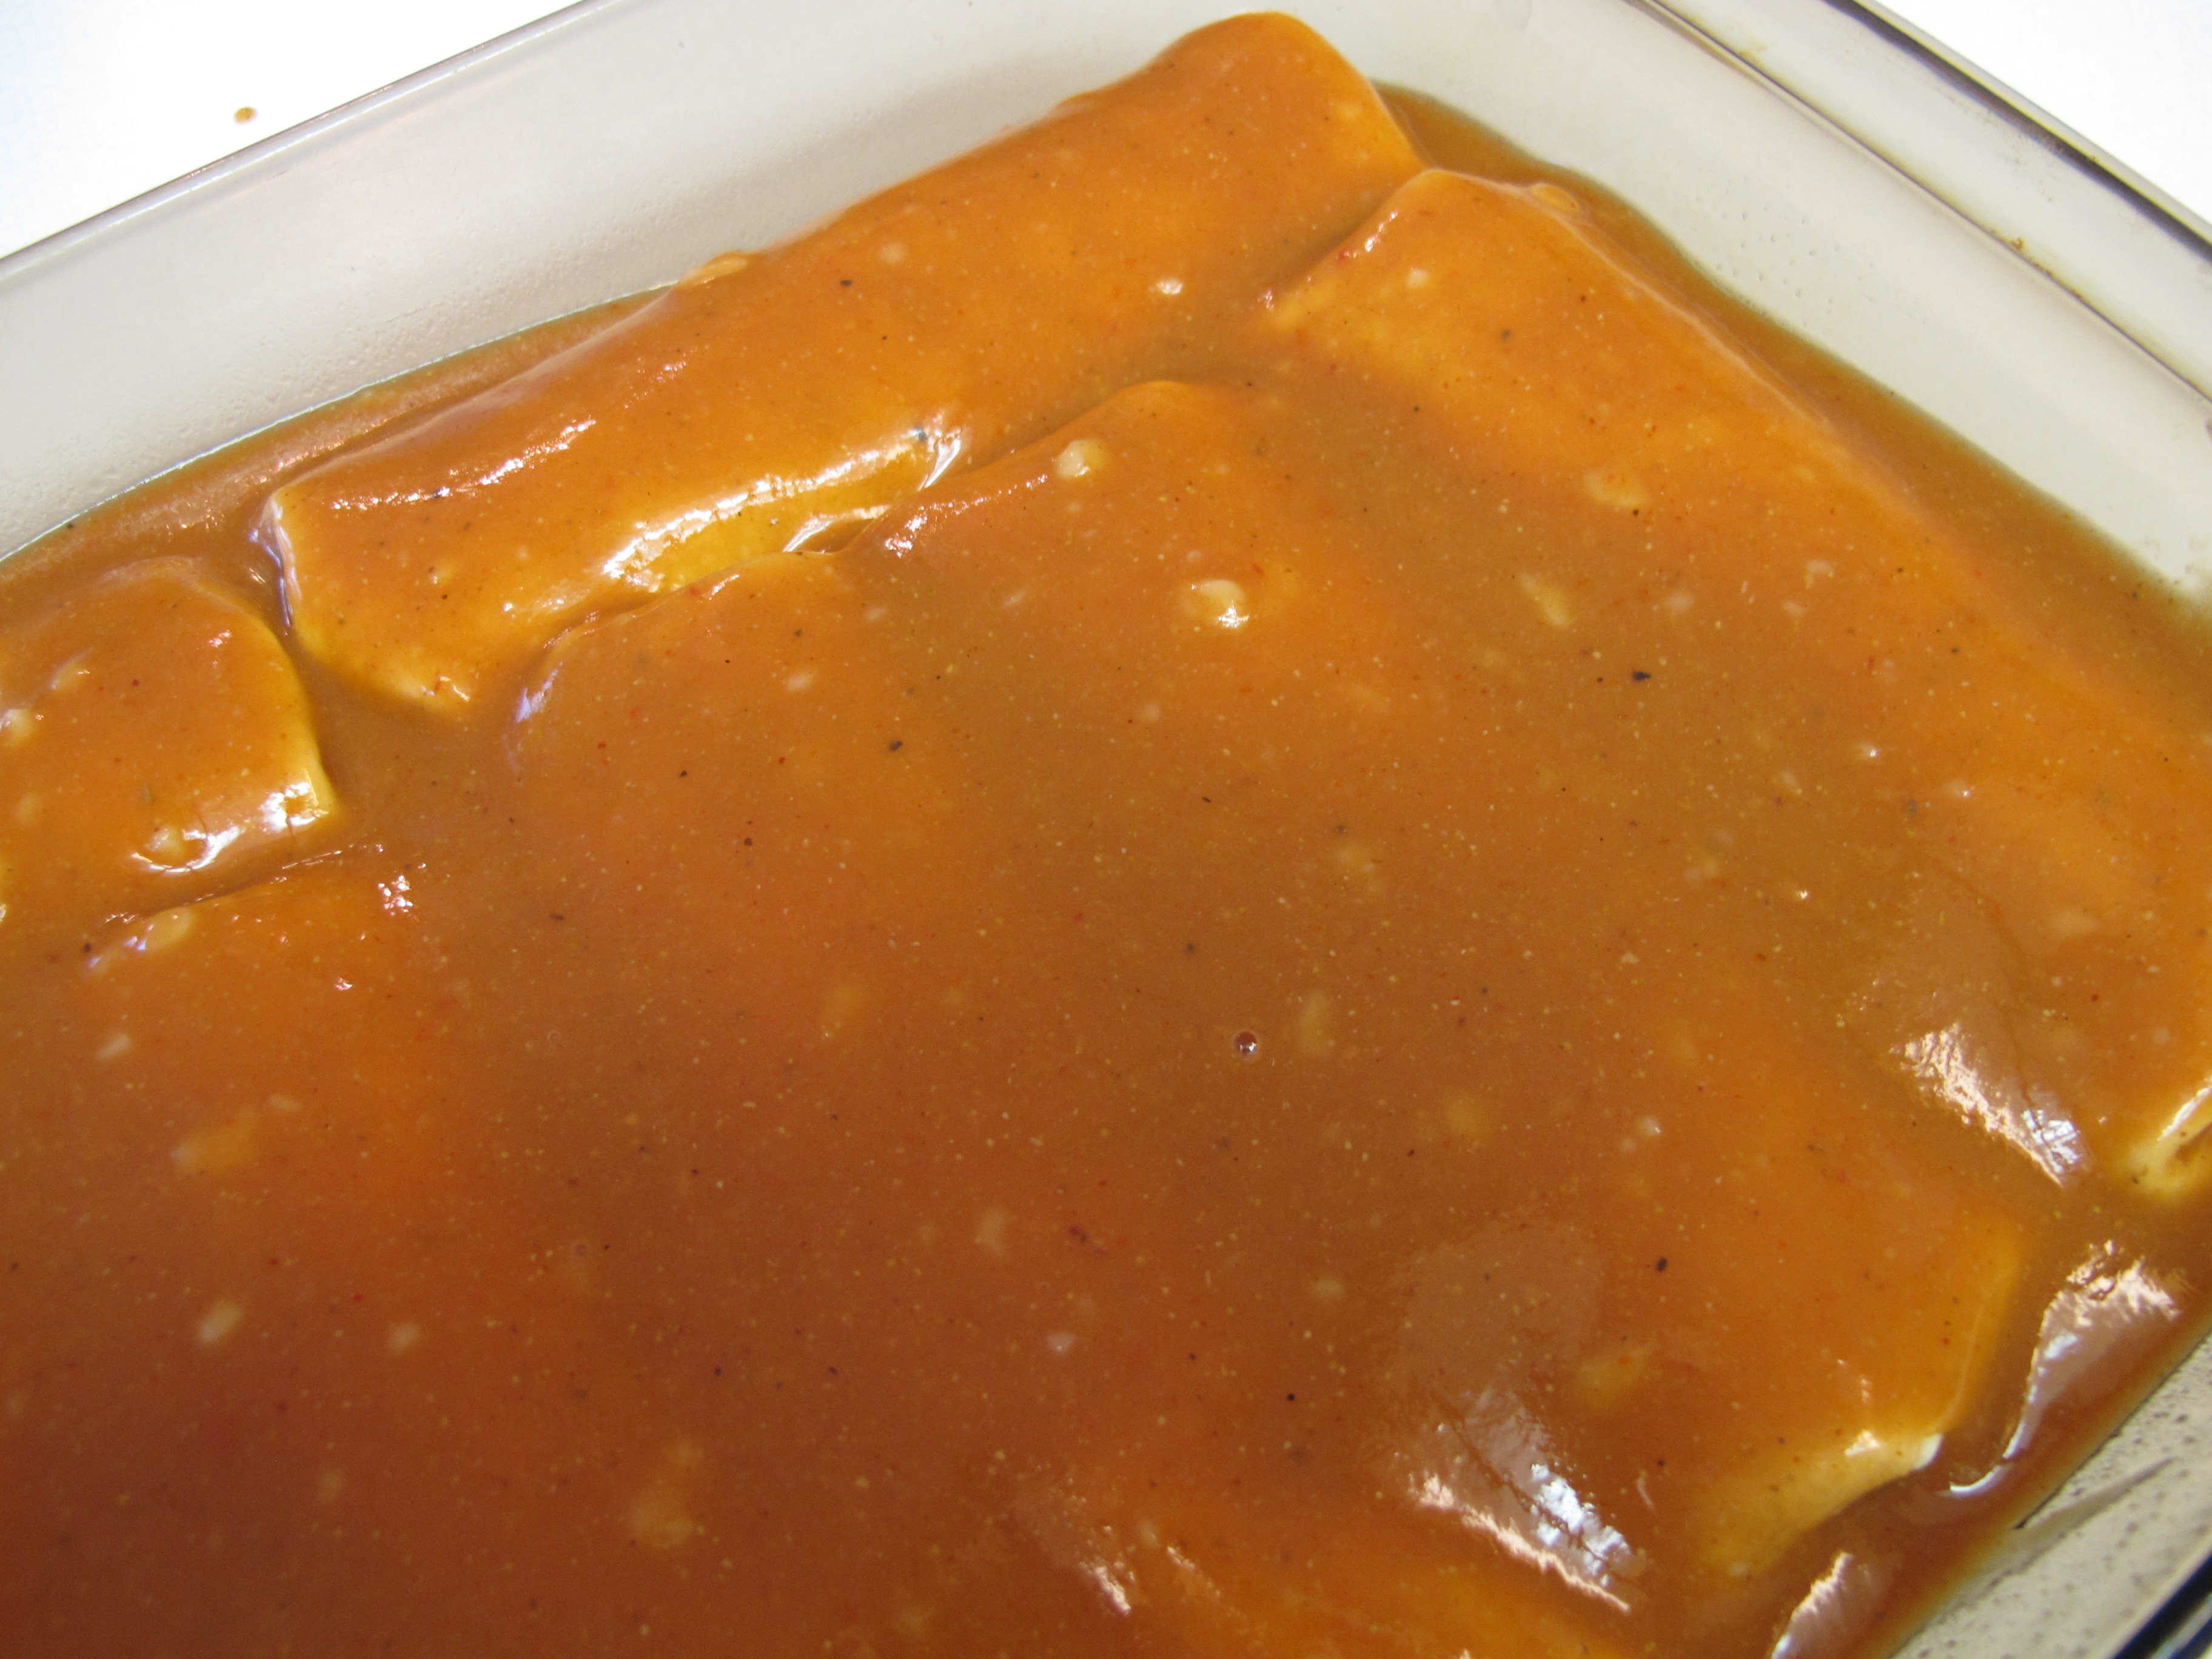
Sprinkle 1 cup cheese on top.
Bake about 20 – 25 minutes until hot and bubbly.
FREEZE AHEAD: On serving day: Thaw sauce – pour over frozen enchiladas. Sprinkle cheese on top.
Bake at 400 degrees covered for 30 minutes and then uncovered for 15 minutes.
FULL RECIPE WITHOUT PICTURES —
BLACK BEAN SPINACH ENCHILADAS
SAUCE
1 can chicken broth, divided
1/4 cup flour
Mix 1/2 cup of broth with the flour until all the lumps are gone (like you would when making gravy).
1 can beef broth
1/4 cup tomato paste
2 tsp. cumin
1/4 tsp. garlic
1/4 tsp. onion powder
1/4 tsp. chili powder
salt
pepper
In a skillet, mix the remainder of the broth with the tomato paste, cumin, garlic powder, onion powder and chili powder.
Optional – Season with salt and pepper.
Bring to a boil.
Add the broth/flour mixture, stirring constantly until smooth. Set aside.
Preheat oven to 375 degrees.
ENCHILADAS
2 T. olive oil
6 oz. fresh baby spinach
In the same skillet, heat the olive oil and quick saute the spinach over medium heat for 1 -2 minutes until slightly wilted.
1 – 15 oz. can black beans, rinsed and drained
1 1/2 cups corn, drained (canned or frozen)
6 green onions, thinly sliced
1/3 cup cilantro, chopped
2 tsp. cumin
3 cup shredded 3 cheese blend, divided
In a large bowl, combine the black beans, corn, green onions, cilantro, cumin and 2 cups of the cheese.
Lightly spray a 9 x 13 baking dish and pour a small amount of the sauce to coat the bottom.
8 tortillas, whole wheat or flour
Generously fill tortillas with mixture, roll up tightly with ends tucked in. Place seam side down in dish.
FREEZE AHEAD: Assemble enchiladas – Do not add cheese or sauce on top. Cover with Seran wrap or Press and Seal. Place cheese and sauce in separate freezer bags. Put on top of covered enchiladas – cover entire pan with foil.
Pour remaining sauce over the enchiladas, coating evenly.
Sprinkle 1 cup cheese on top.
Bake about 20 – 25 minutes until hot and bubbly.
Garnish with cilantro and/or green onions. Serve with salsa.
FREEZE AHEAD: On serving day: Thaw sauce – pour over frozen enchiladas. Sprinkle cheese on top.
Bake at 400 degrees covered for 30 minutes and then uncovered for 15 minutes.
Chicken Piccata

Whenever I think about this Chicken Piccata dish, it makes my mouth water. I absolutely LOVE it!! It is one of our favorites!!!
This is one of those recipes that it really pays off to prepare everything ahead of time BEFORE you start cooking. Read through the recipe and have each of the items prepared and ready to add to the recipe. When making the sauce, each item is added one after the other and it just makes it easier to have everything ready and waiting.
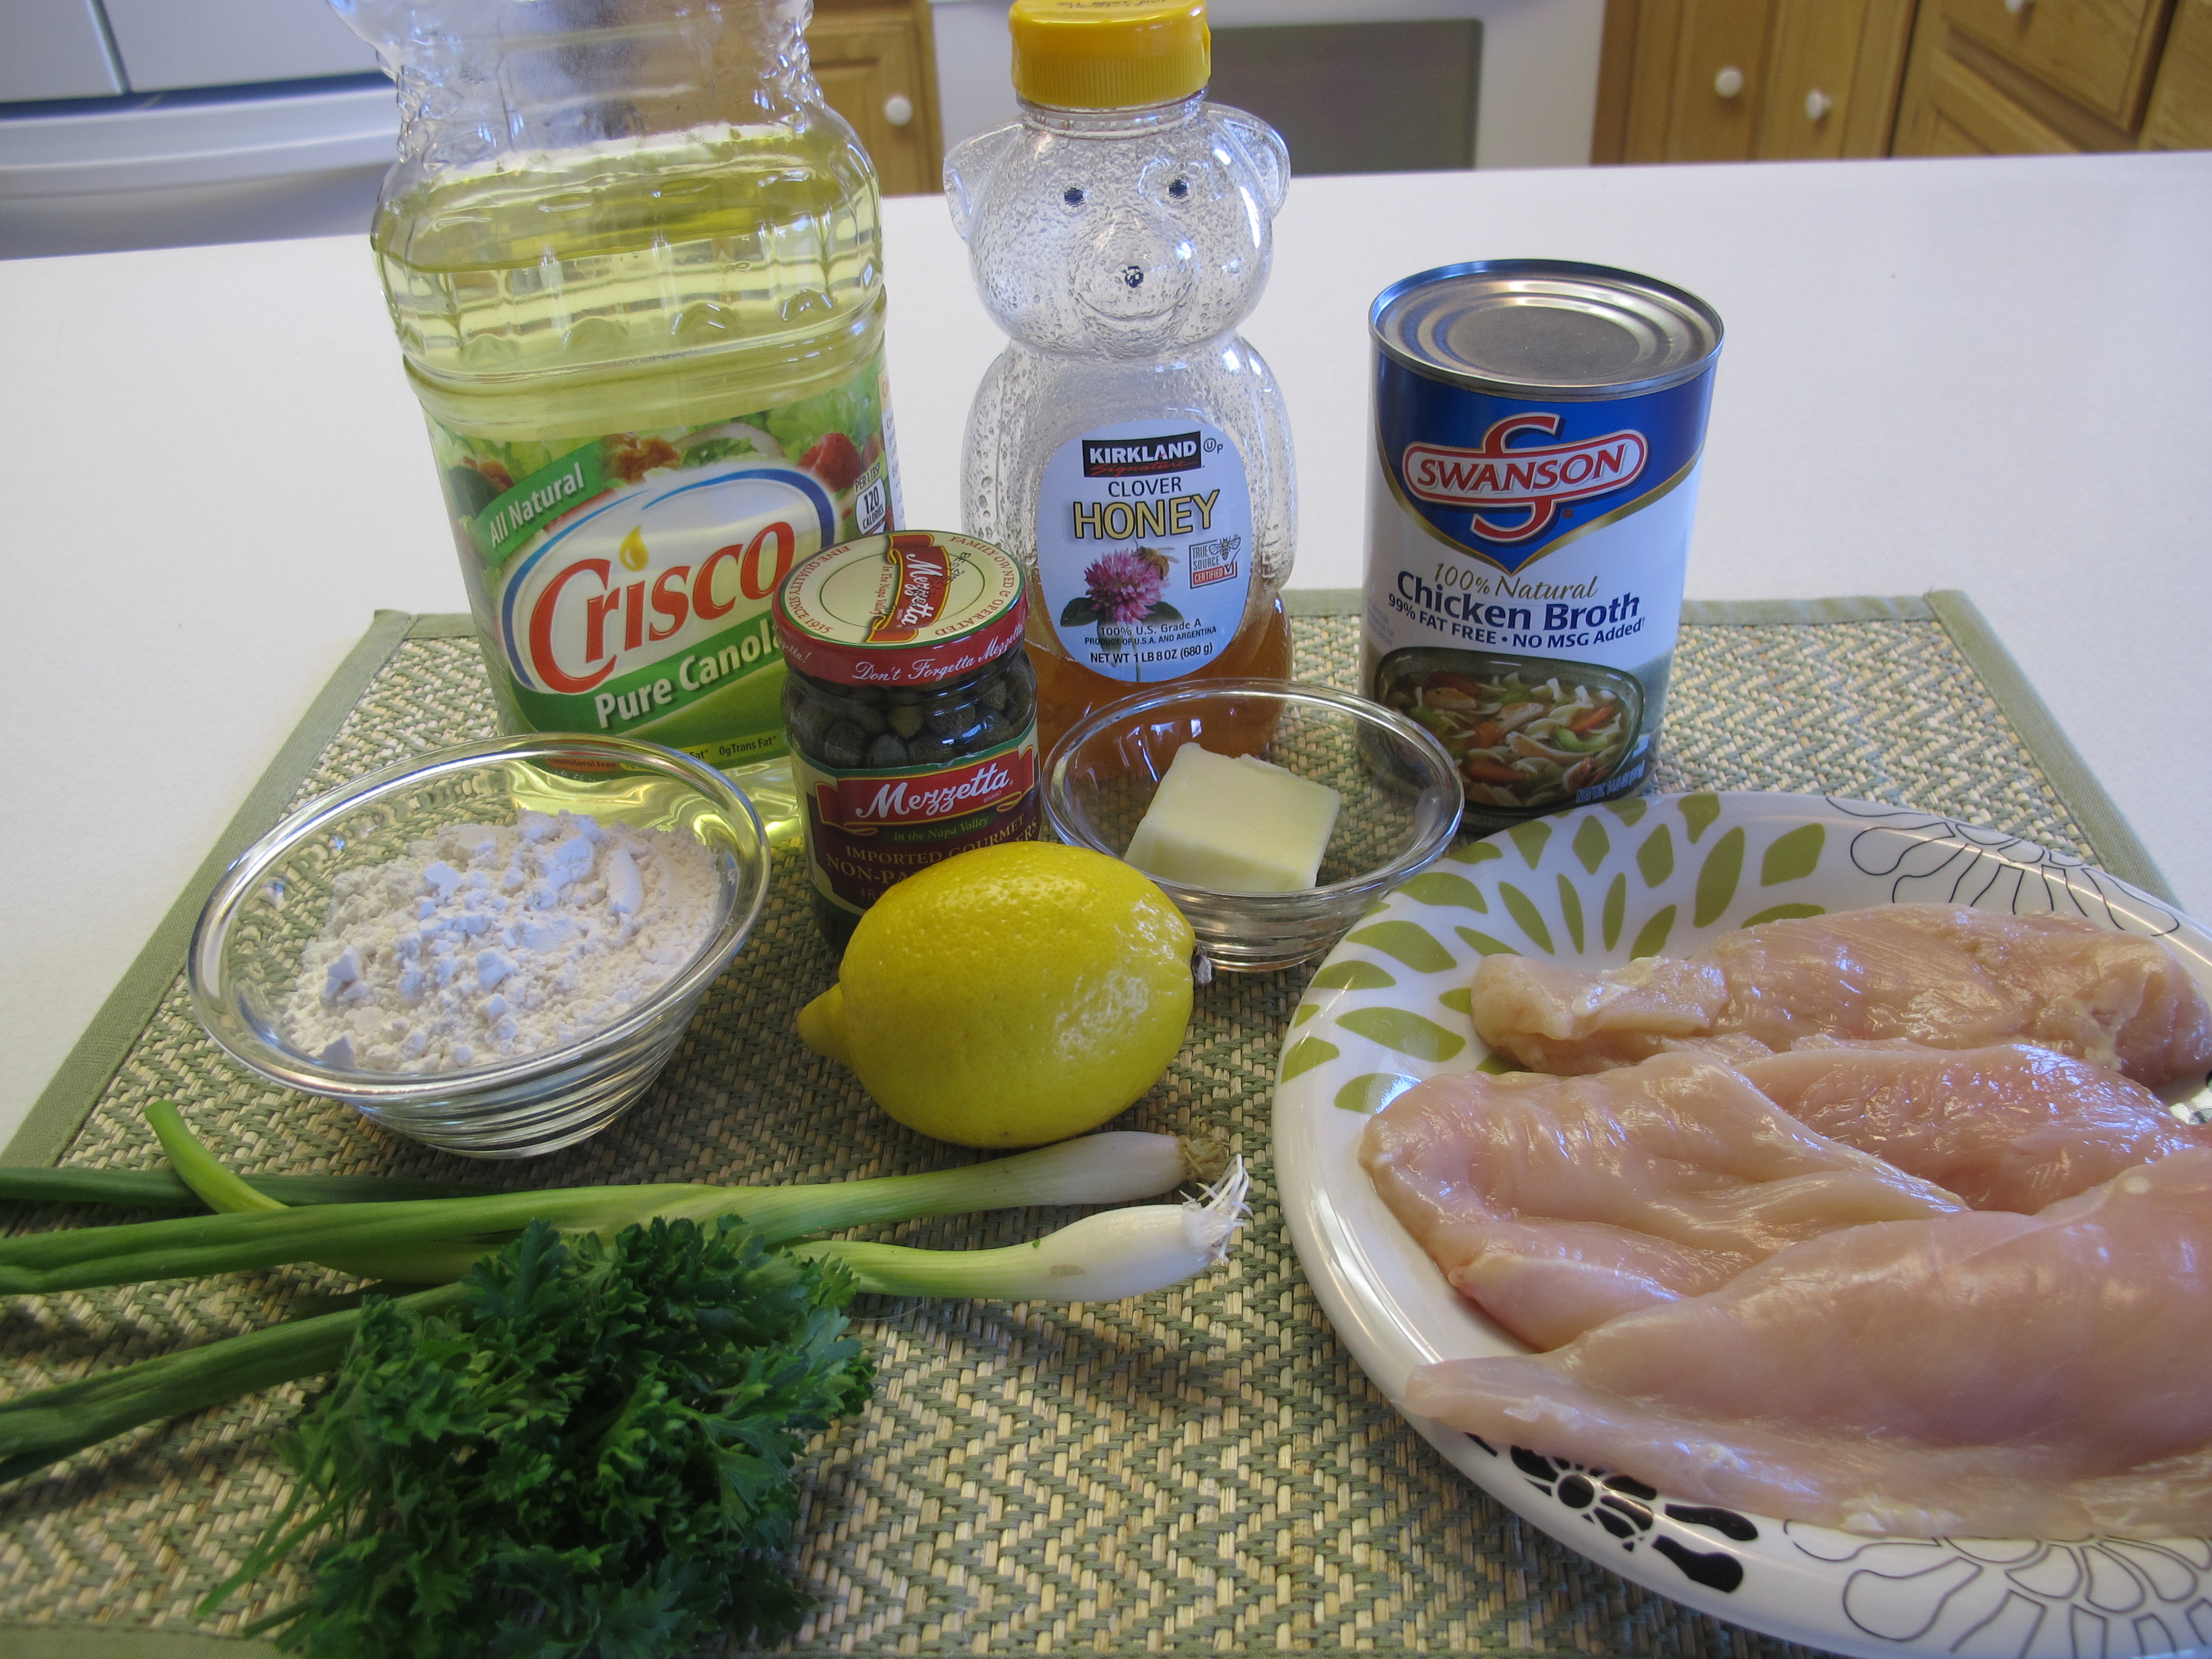
2 chicken breasts
Slice each chicken breast in half to make two fillets with each breast.

salt
pepper
garlic granules
Season each chicken piece with the seasonings.
1 T. canola oil
Add the oil to a frying pan and heat over medium heat until the oil shimmers and is hot, but not smoking.

Place chicken in the pan and fry undisturbed until you start seeing the edges start turning a tan color (about 2 minutes).
Flip the chicken over then brown the other side.
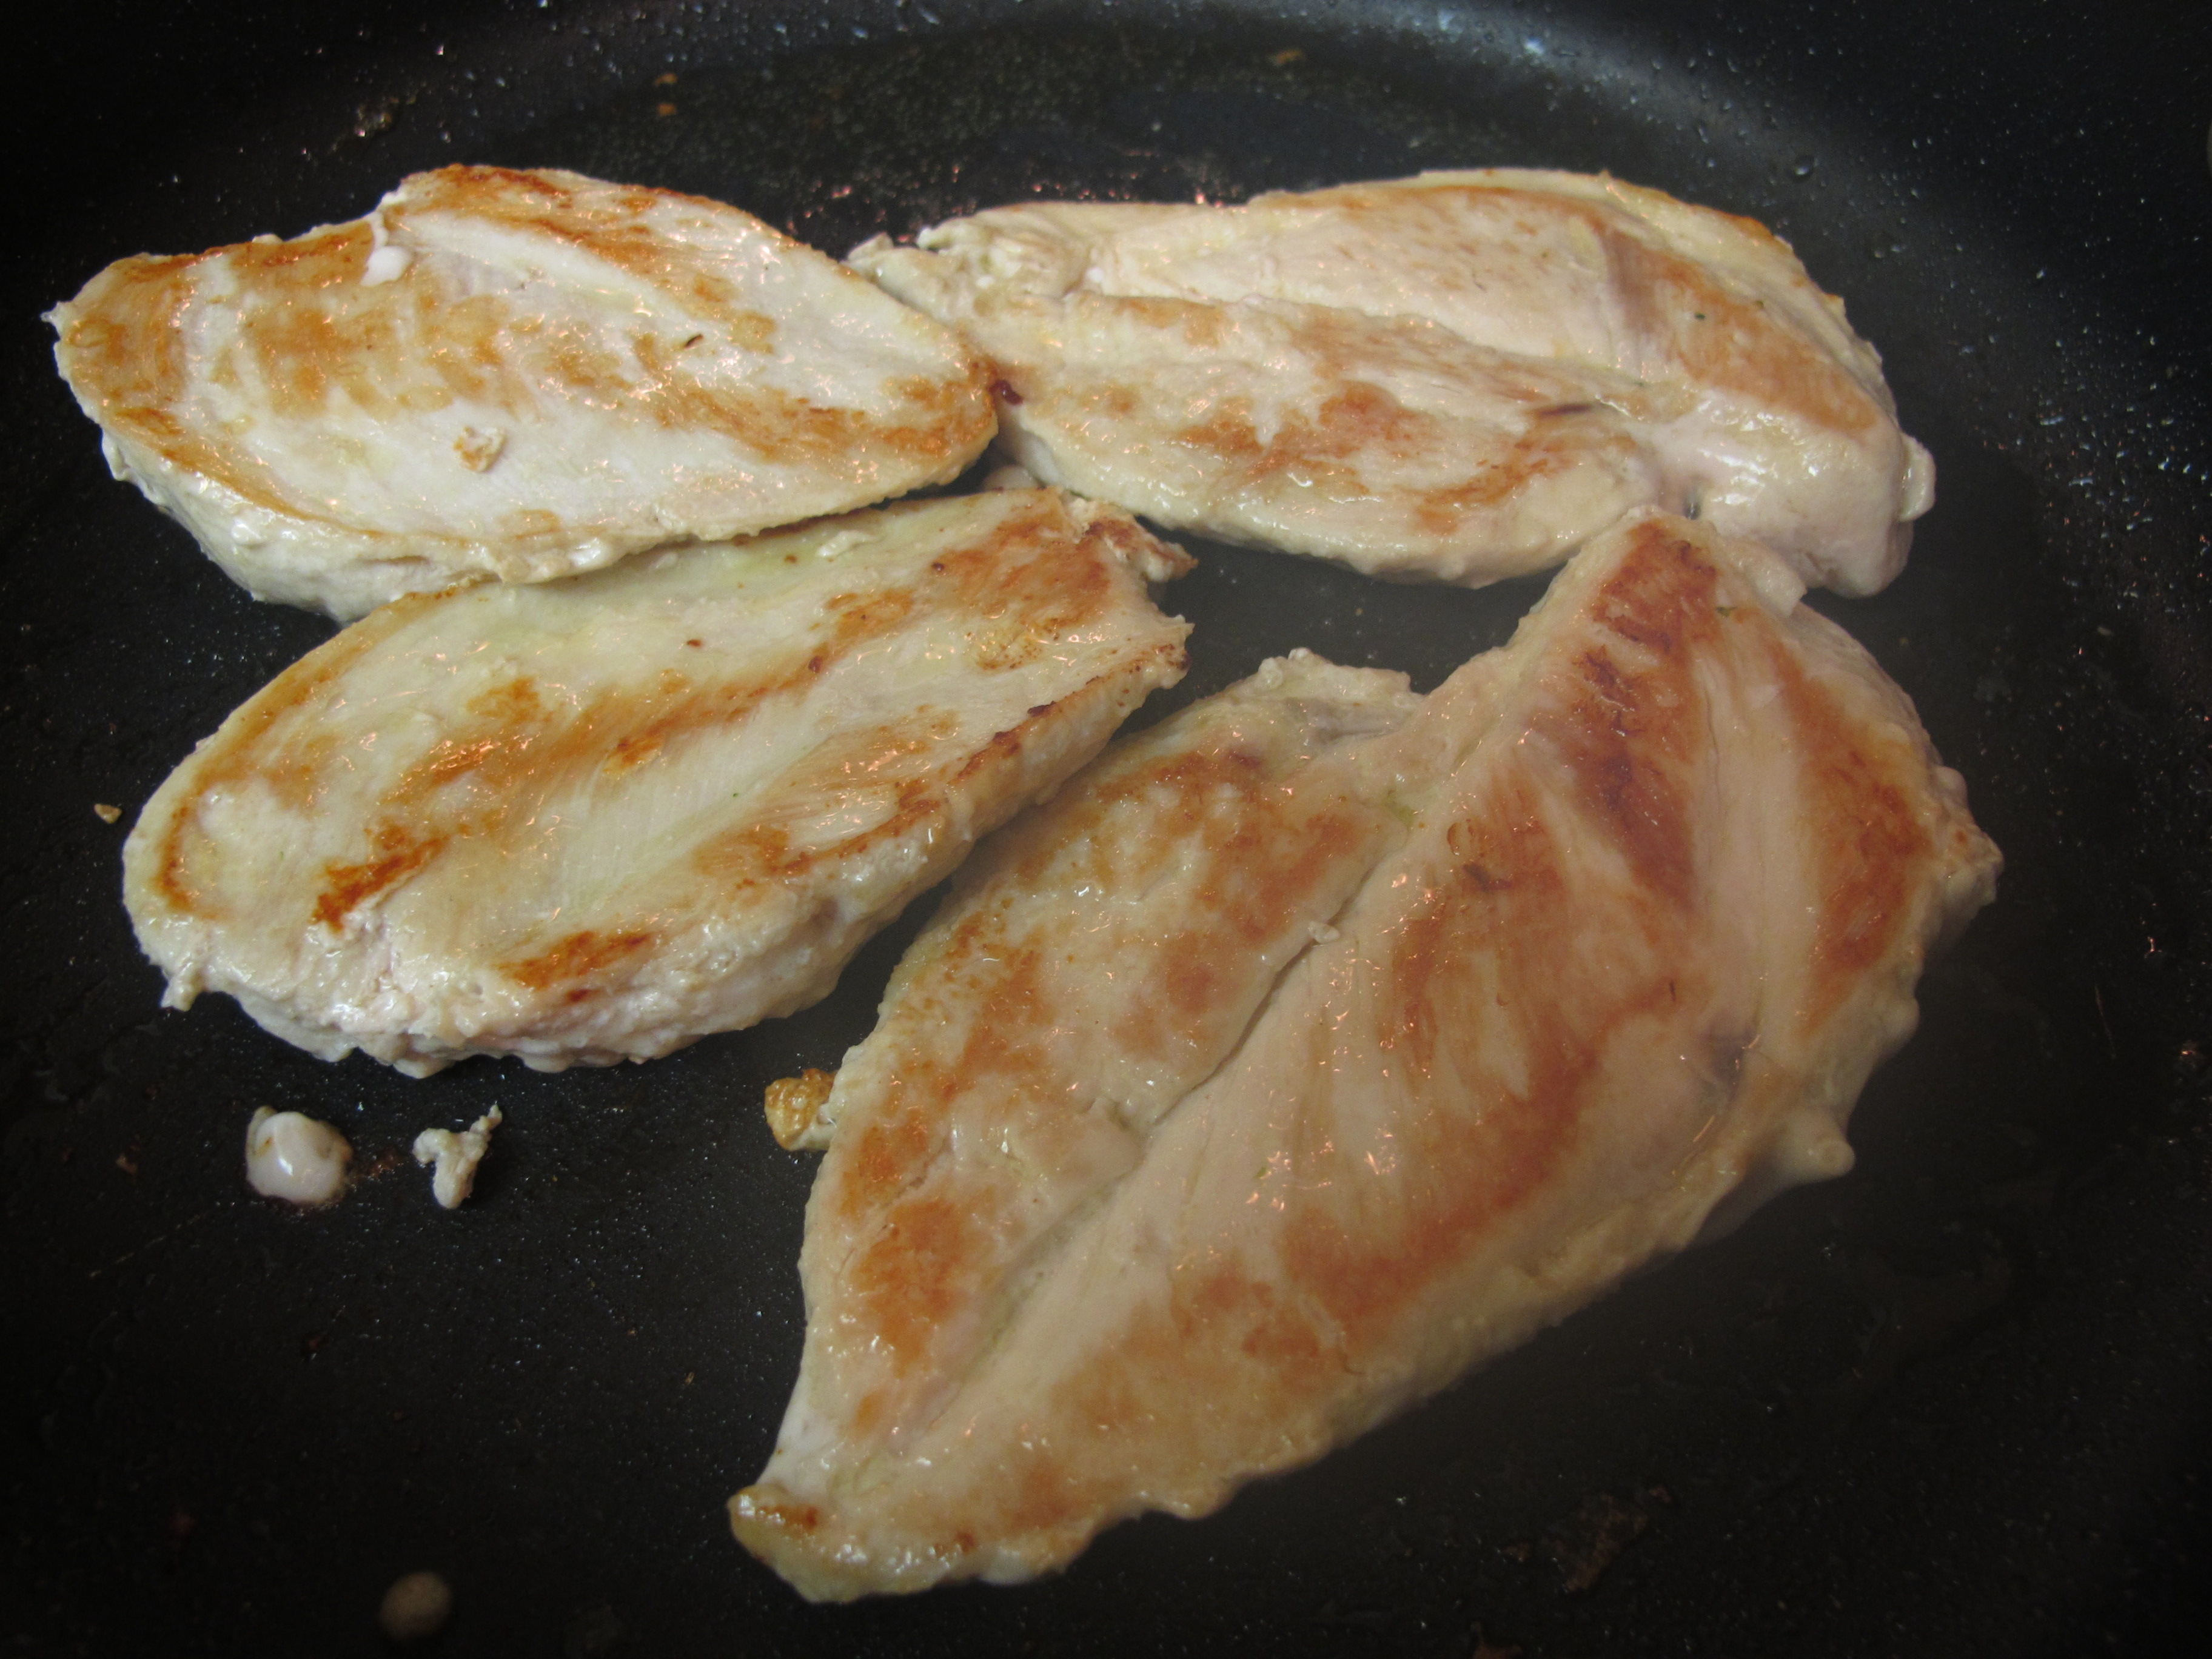
Transfer the cooked chicken to a plate and cover with foil to keep warm.
2 scallions – white part only, minced
Add minced scallions – fry until soft and fragrant.

1 cup chicken broth
Add the chicken broth. Let this boil down until there is about 1/4 cup left.
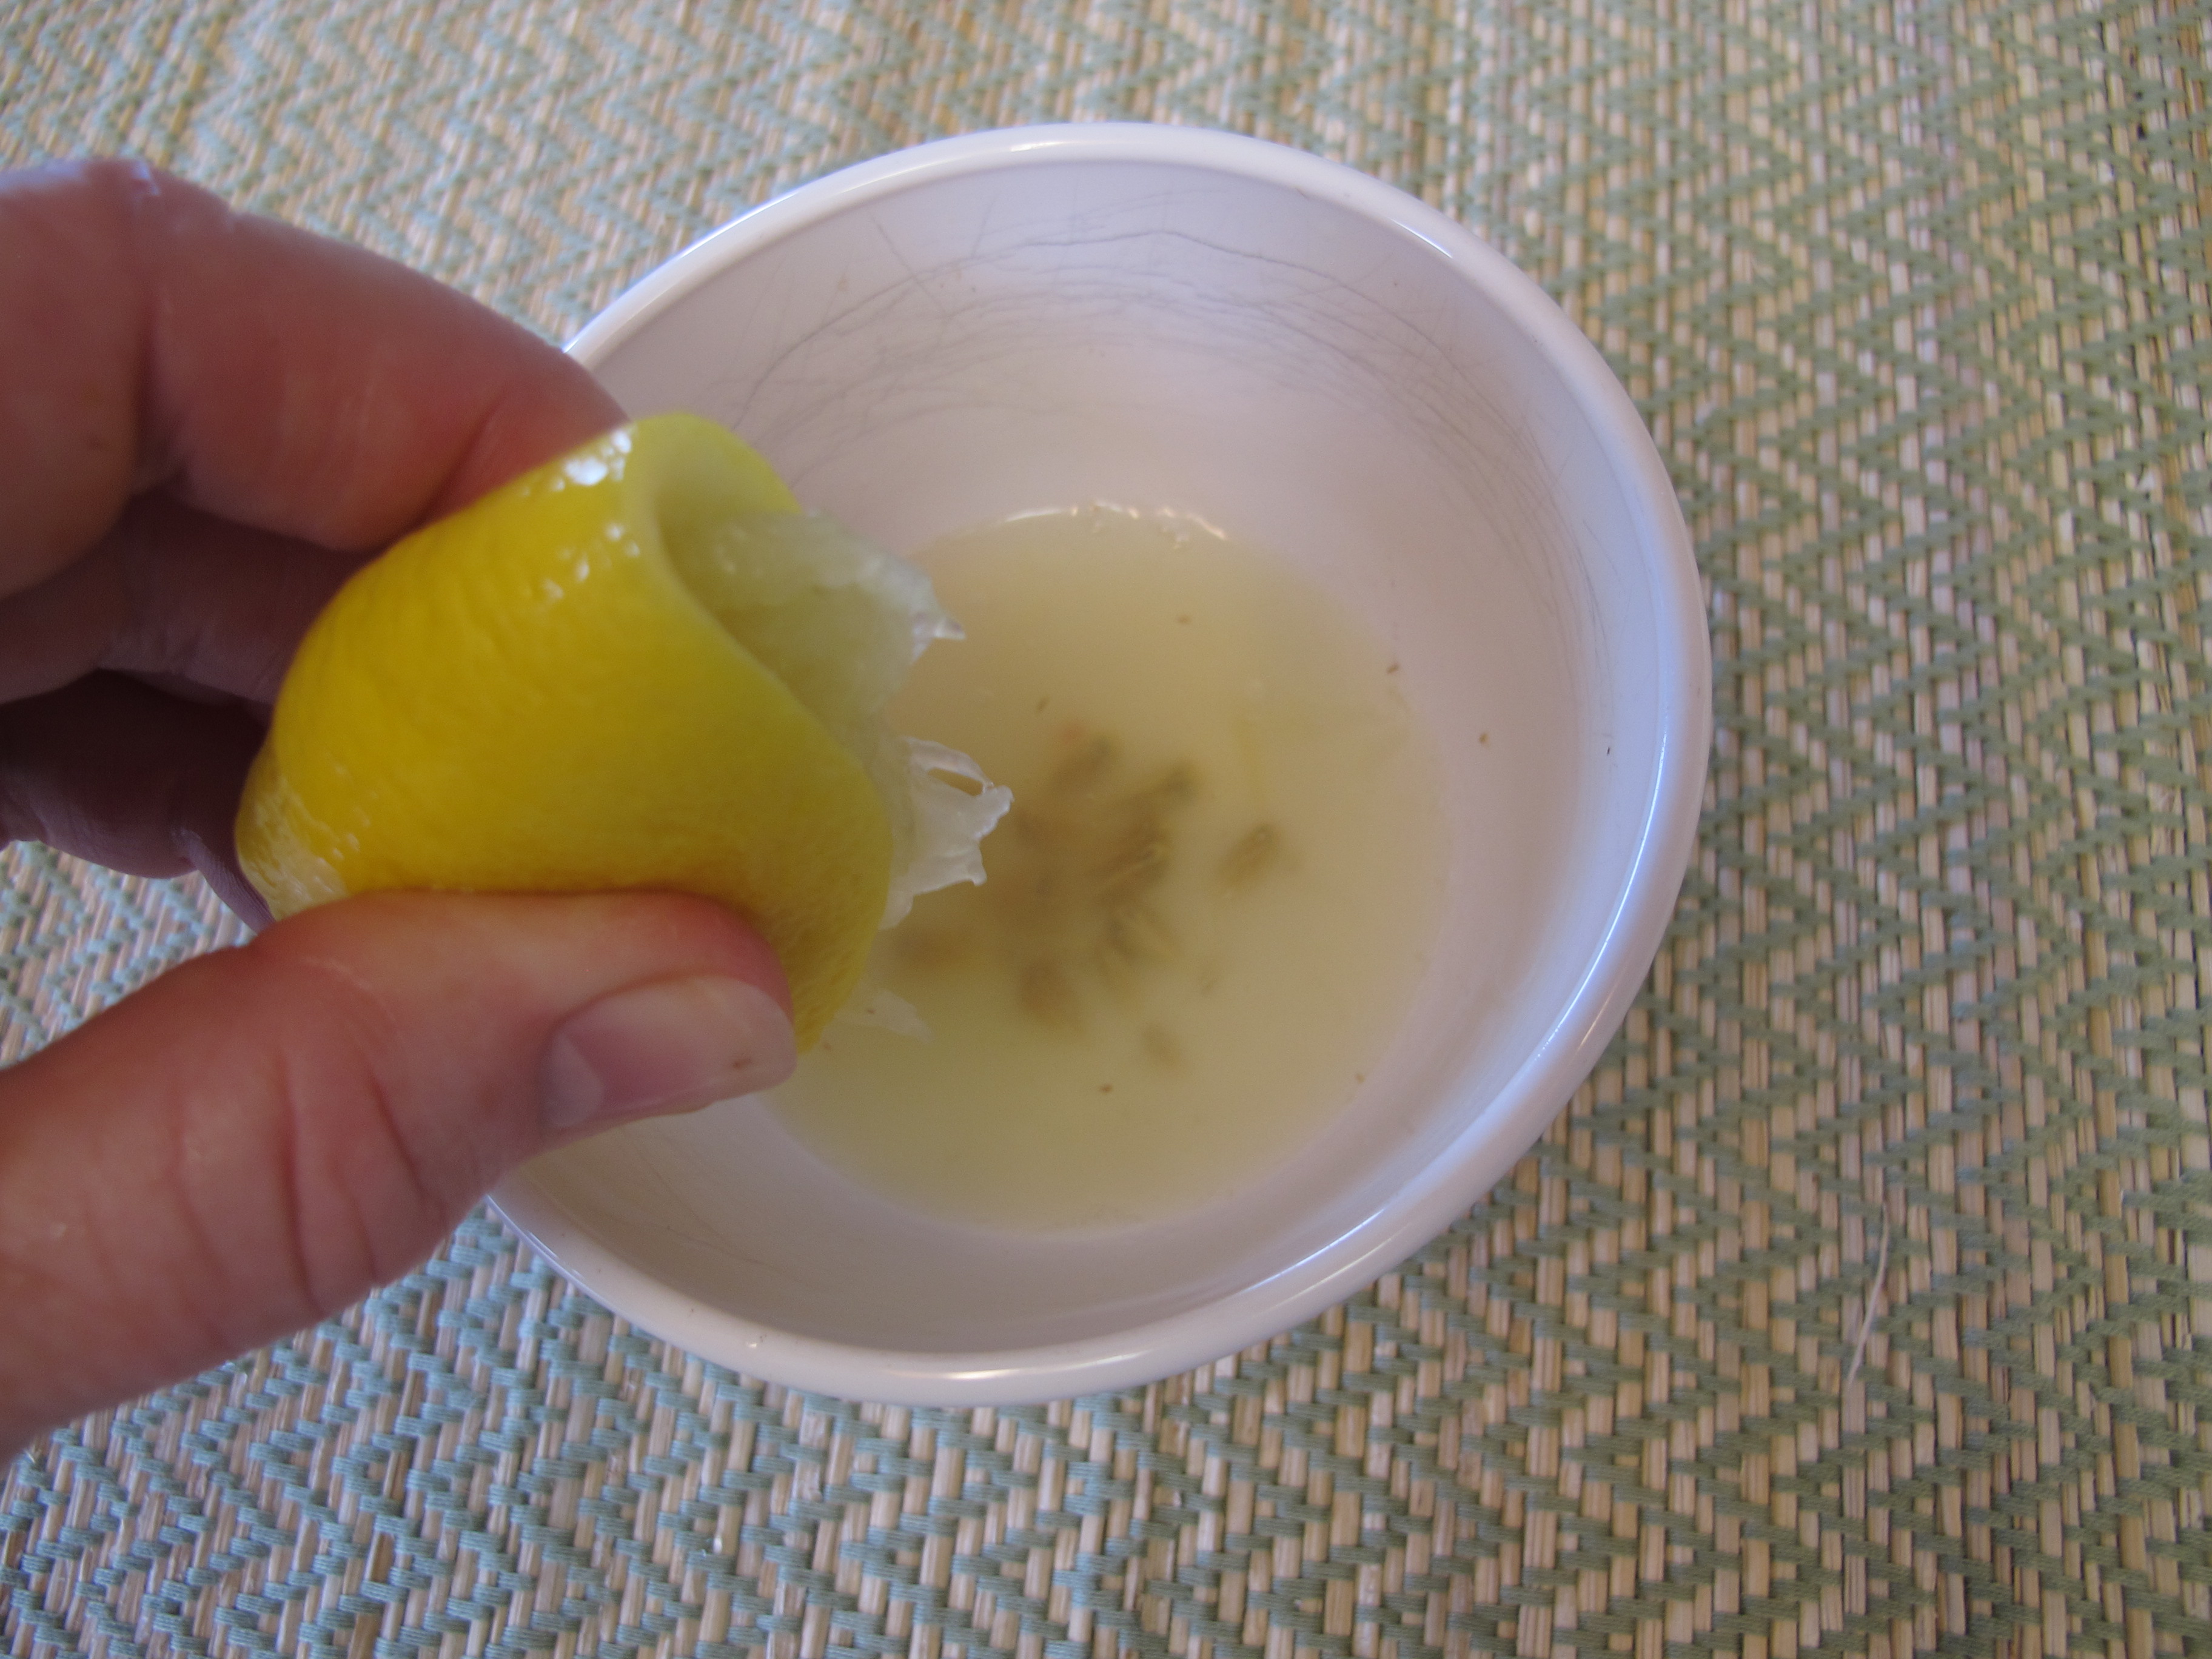
Zest one lemon. Set aside.

2 T. lemon juice
1 tsp. honey
Add the lemon juice and honey.
2 T. butter or Brummel and Brown butter
Stir in the butter.

2 T. parsley, minced
2 T. capers
1 tsp. lemon zest
Turn off the heat, then add the parsley, capers and lemon zest.

Place chicken on each plate and divide the sauce evenly.
ENJOY!
Recipe Source: No Recipes (found on Pinterest)
FULL RECIPE WITHOUT PICTURES —
CHICKEN PICCATA
2 chicken breasts
salt
pepper
garlic granules
2 T. canola oil
2 scallions – white part only, minced
2 T. lemon juice
1 cup chicken broth
1 tsp. honey
2 T. Brummel and Brown butter
2 T. parsley, minced
2 T. capers
1 tsp. lemon zest
Slice each chicken breast in half to make two fillets with each breast.
Season each piece of chicken.
Add the oil to a frying pan and heat over medium heat until the oil shimmers and is hot, but not smoking.
Place chicken in the pan and fry undisturbed until you start seeing the edges start turning a tan color (about 2 minutes).
Flip the chicken over then brown the other side.
Transfer the cooked chicken to a plate and keep warm.
SAUCE:
Add the minced scallions to the fry pan. Fry until soft and fragrant.
Add the chicken broth. Let this boil down until there is about !/4 cup left
Add the lemon juice and honey.
Stir in the butter.
Turn off the heat, then add the parsley, capers and lemon zest.
Place chicken on each plate and divide the sauce evenly.
ENJOY!
Recipe Source: No Recipes (found on Pinterest)
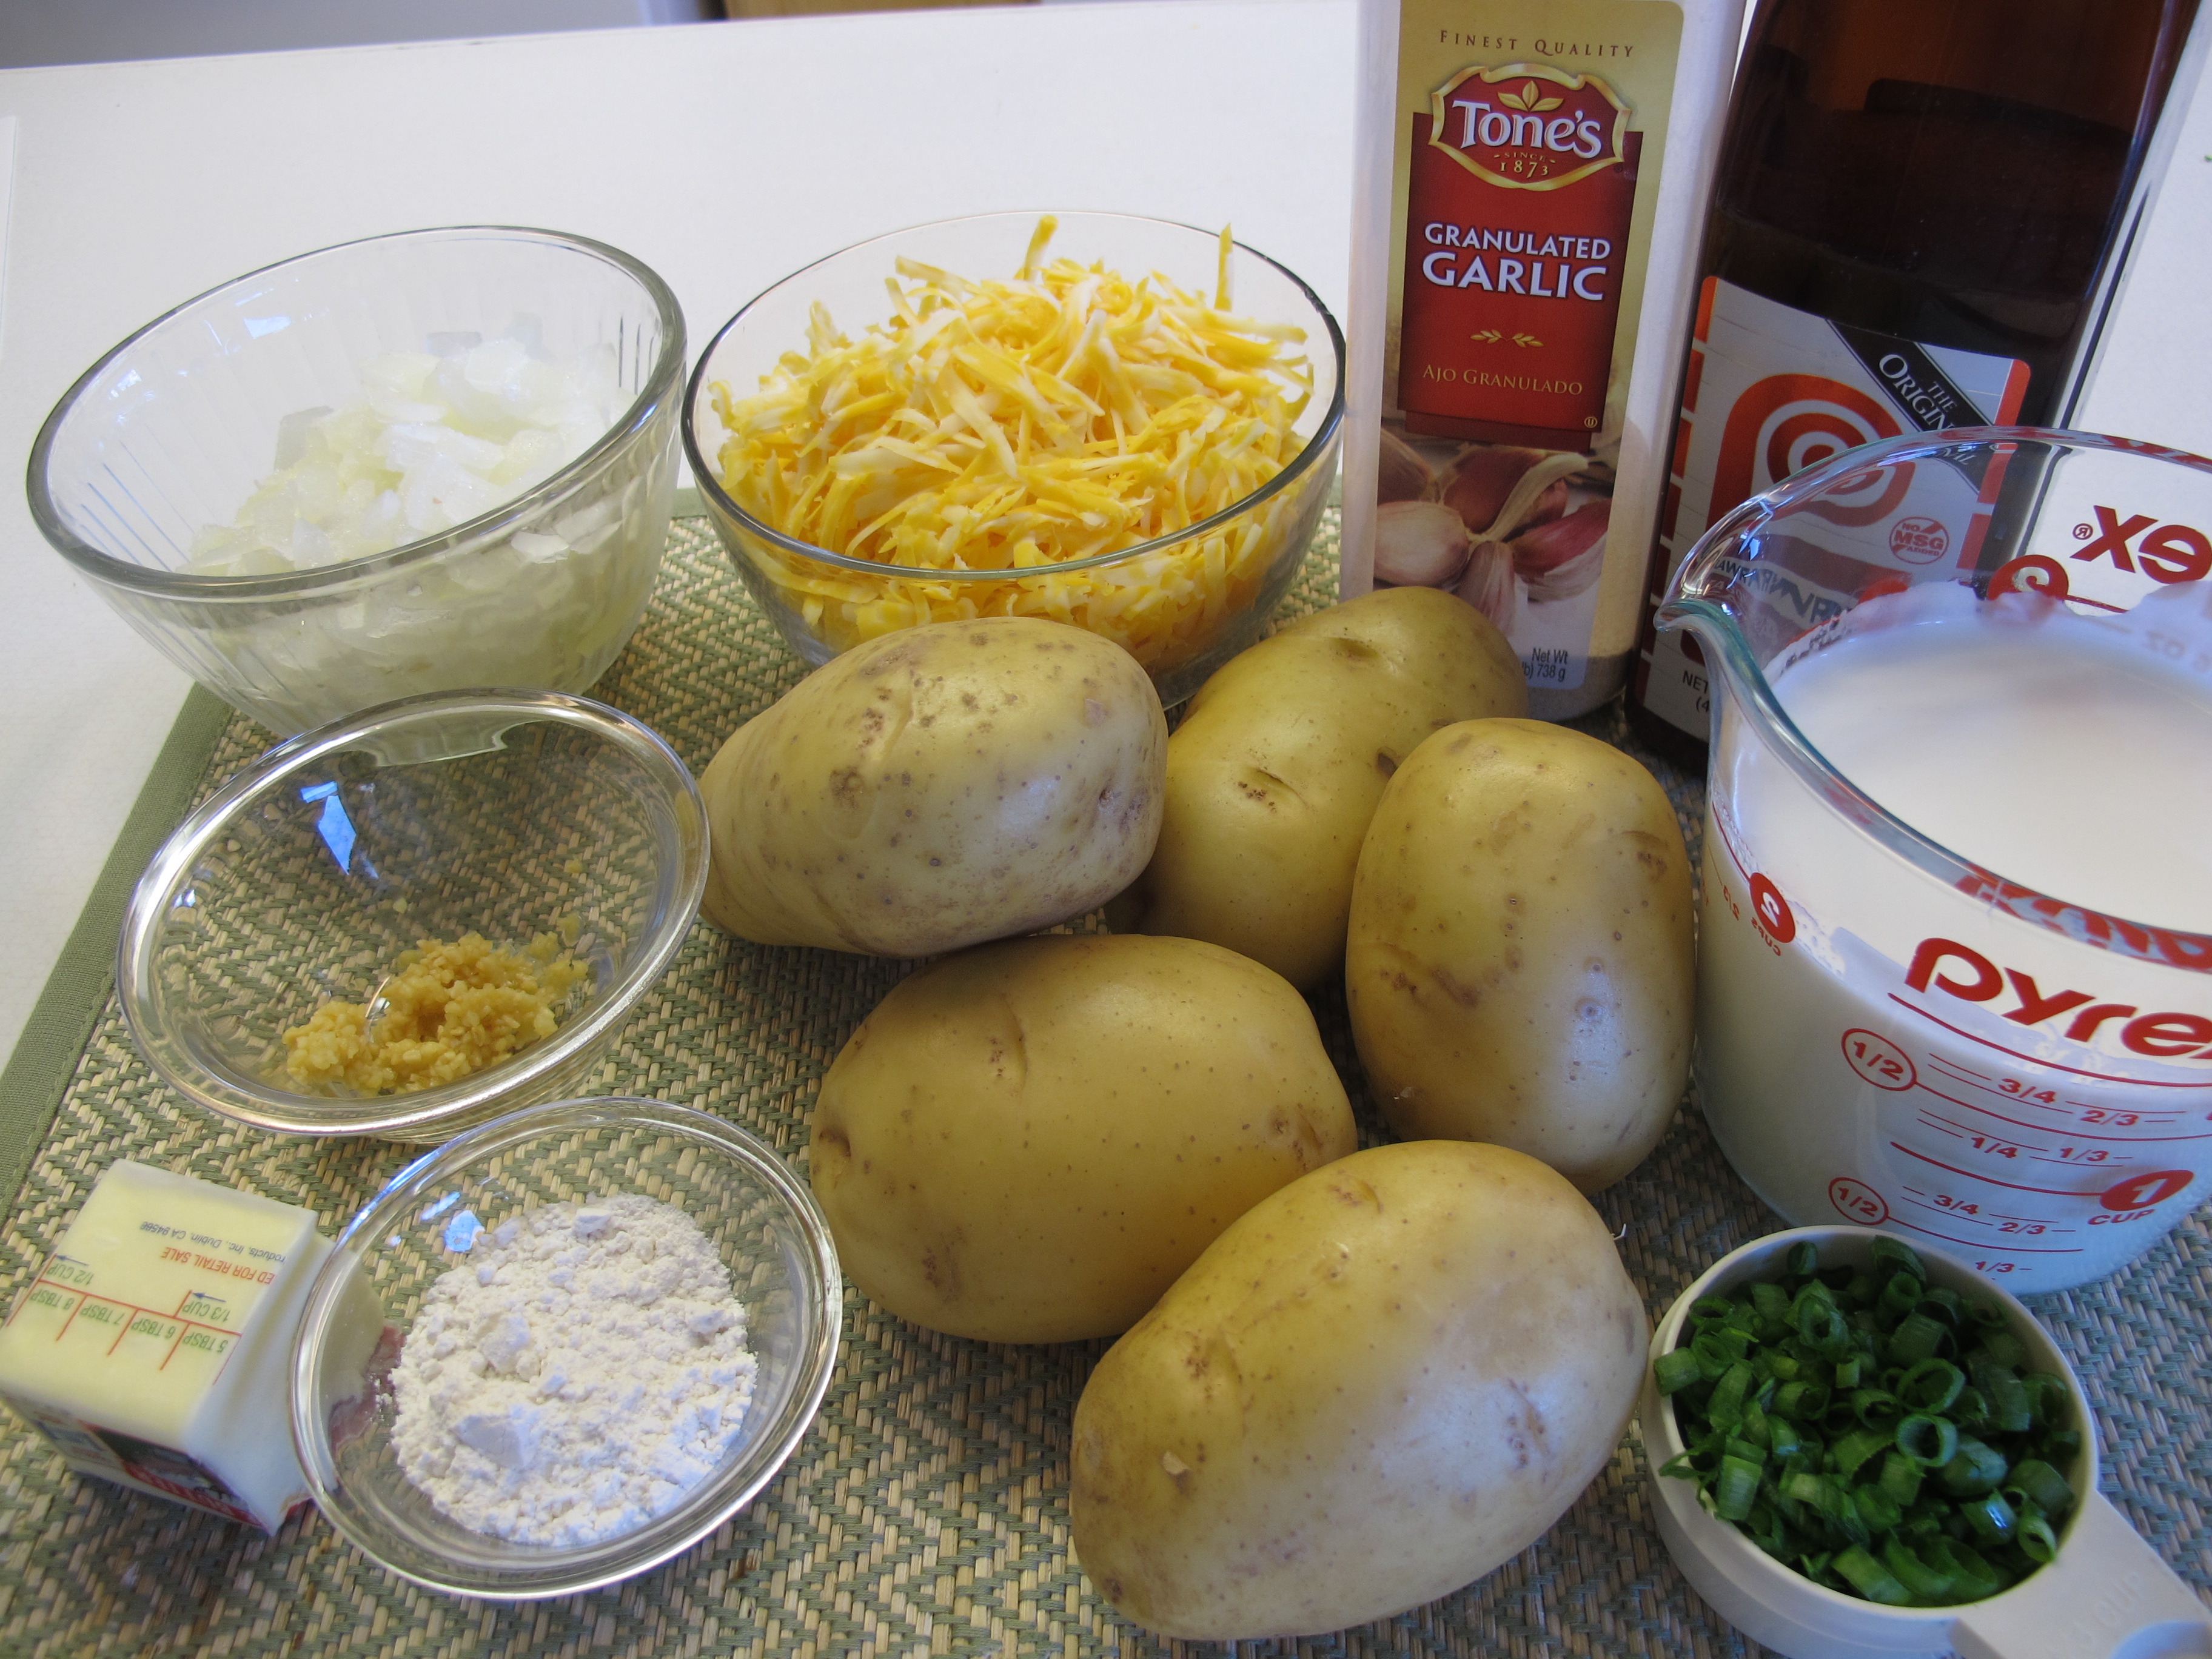
Cheesy Scalloped Potatoes
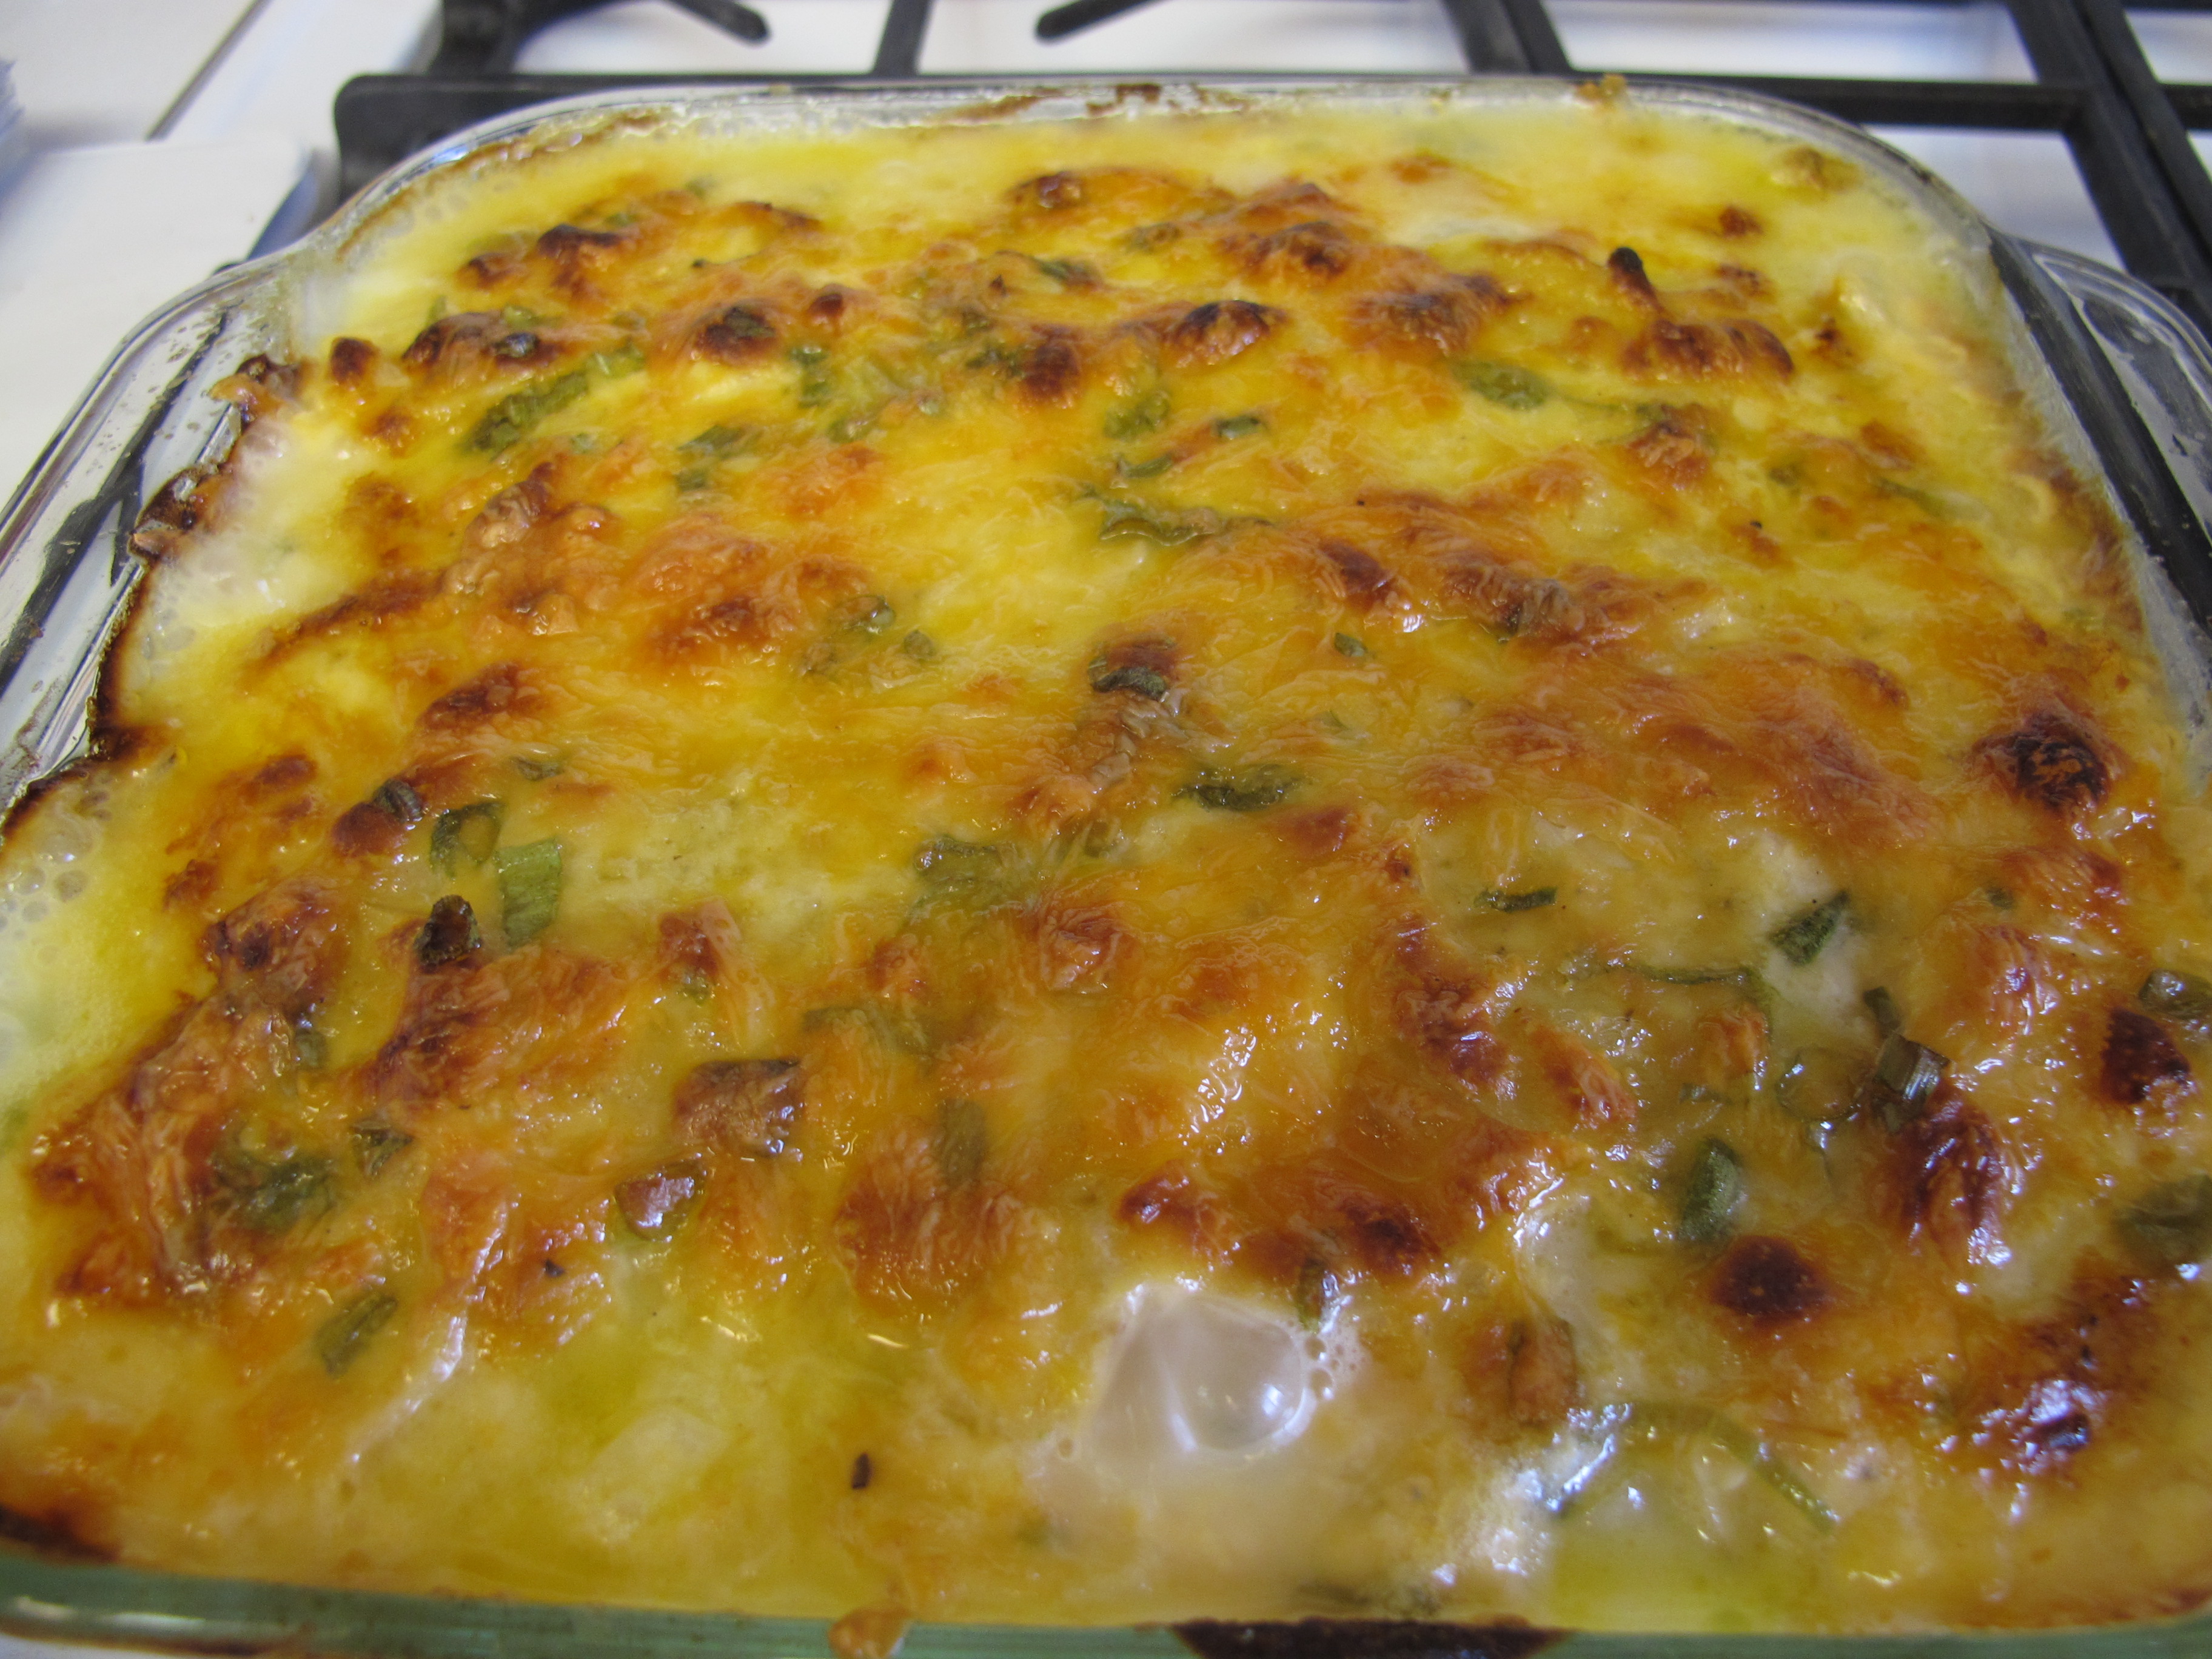
Karen and Eric brought these potatoes to our family Christmas party and we loved them! Tender potato slices smothered in a creamy garlic cheese sauce, baked until brown and bubbly. Eric’s only complaint – he wishes we had given him his meat slicer before he made these potatoes. He said that it sure would have made slicing all those potatoes so much easier!
(Pictures shown are half the recipe.)
Preheat oven to 375 degrees.
4 large Yukon gold potatoes (any kind will do), skins on, thinly sliced
After potatoes are sliced, place them in a bowl of cold water to keep them from turning brown while you are making the sauce.

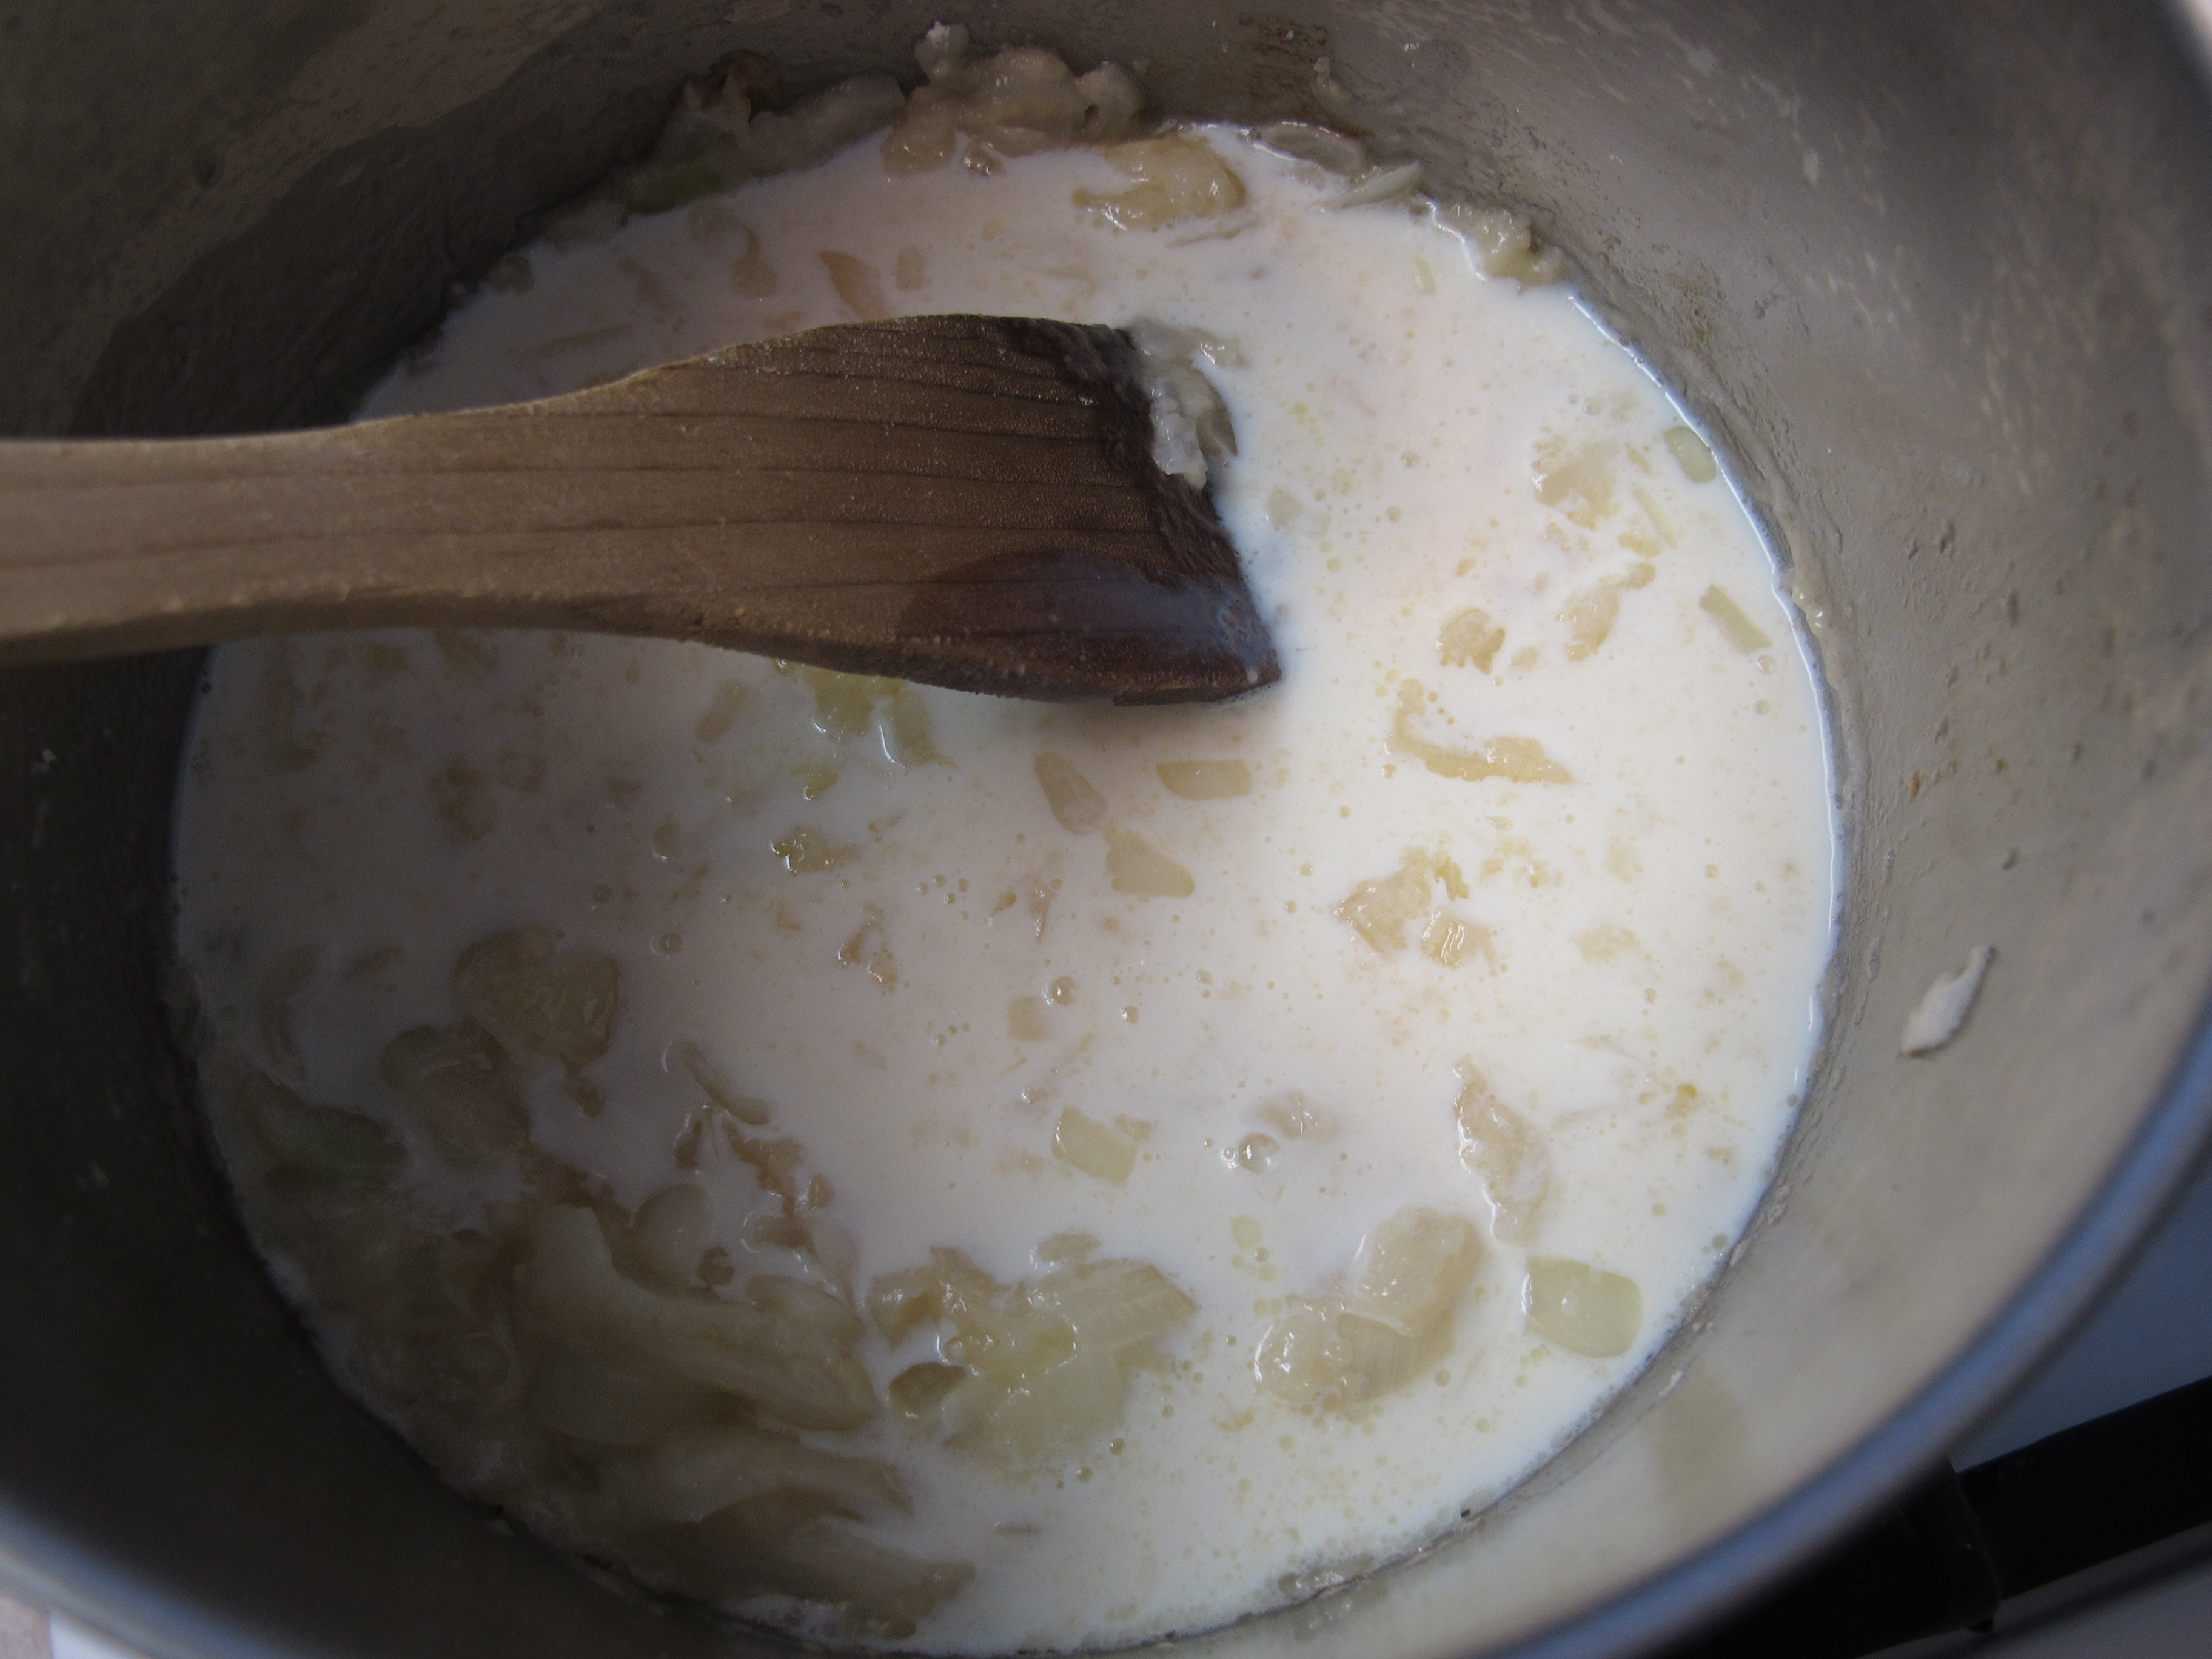
SAUCE:
1/4 cup butter

1 1/2 cups onion, diced
Add the diced onion and cook until soft.

2 T. flour
Stir the flour thoroughly into the onions.

2 cups whole milk
2 cloves garlic, diced very small or use a garlic press.
Add the milk and garlic.
seasoned salt
garlic granules
pepper
Season as needed.
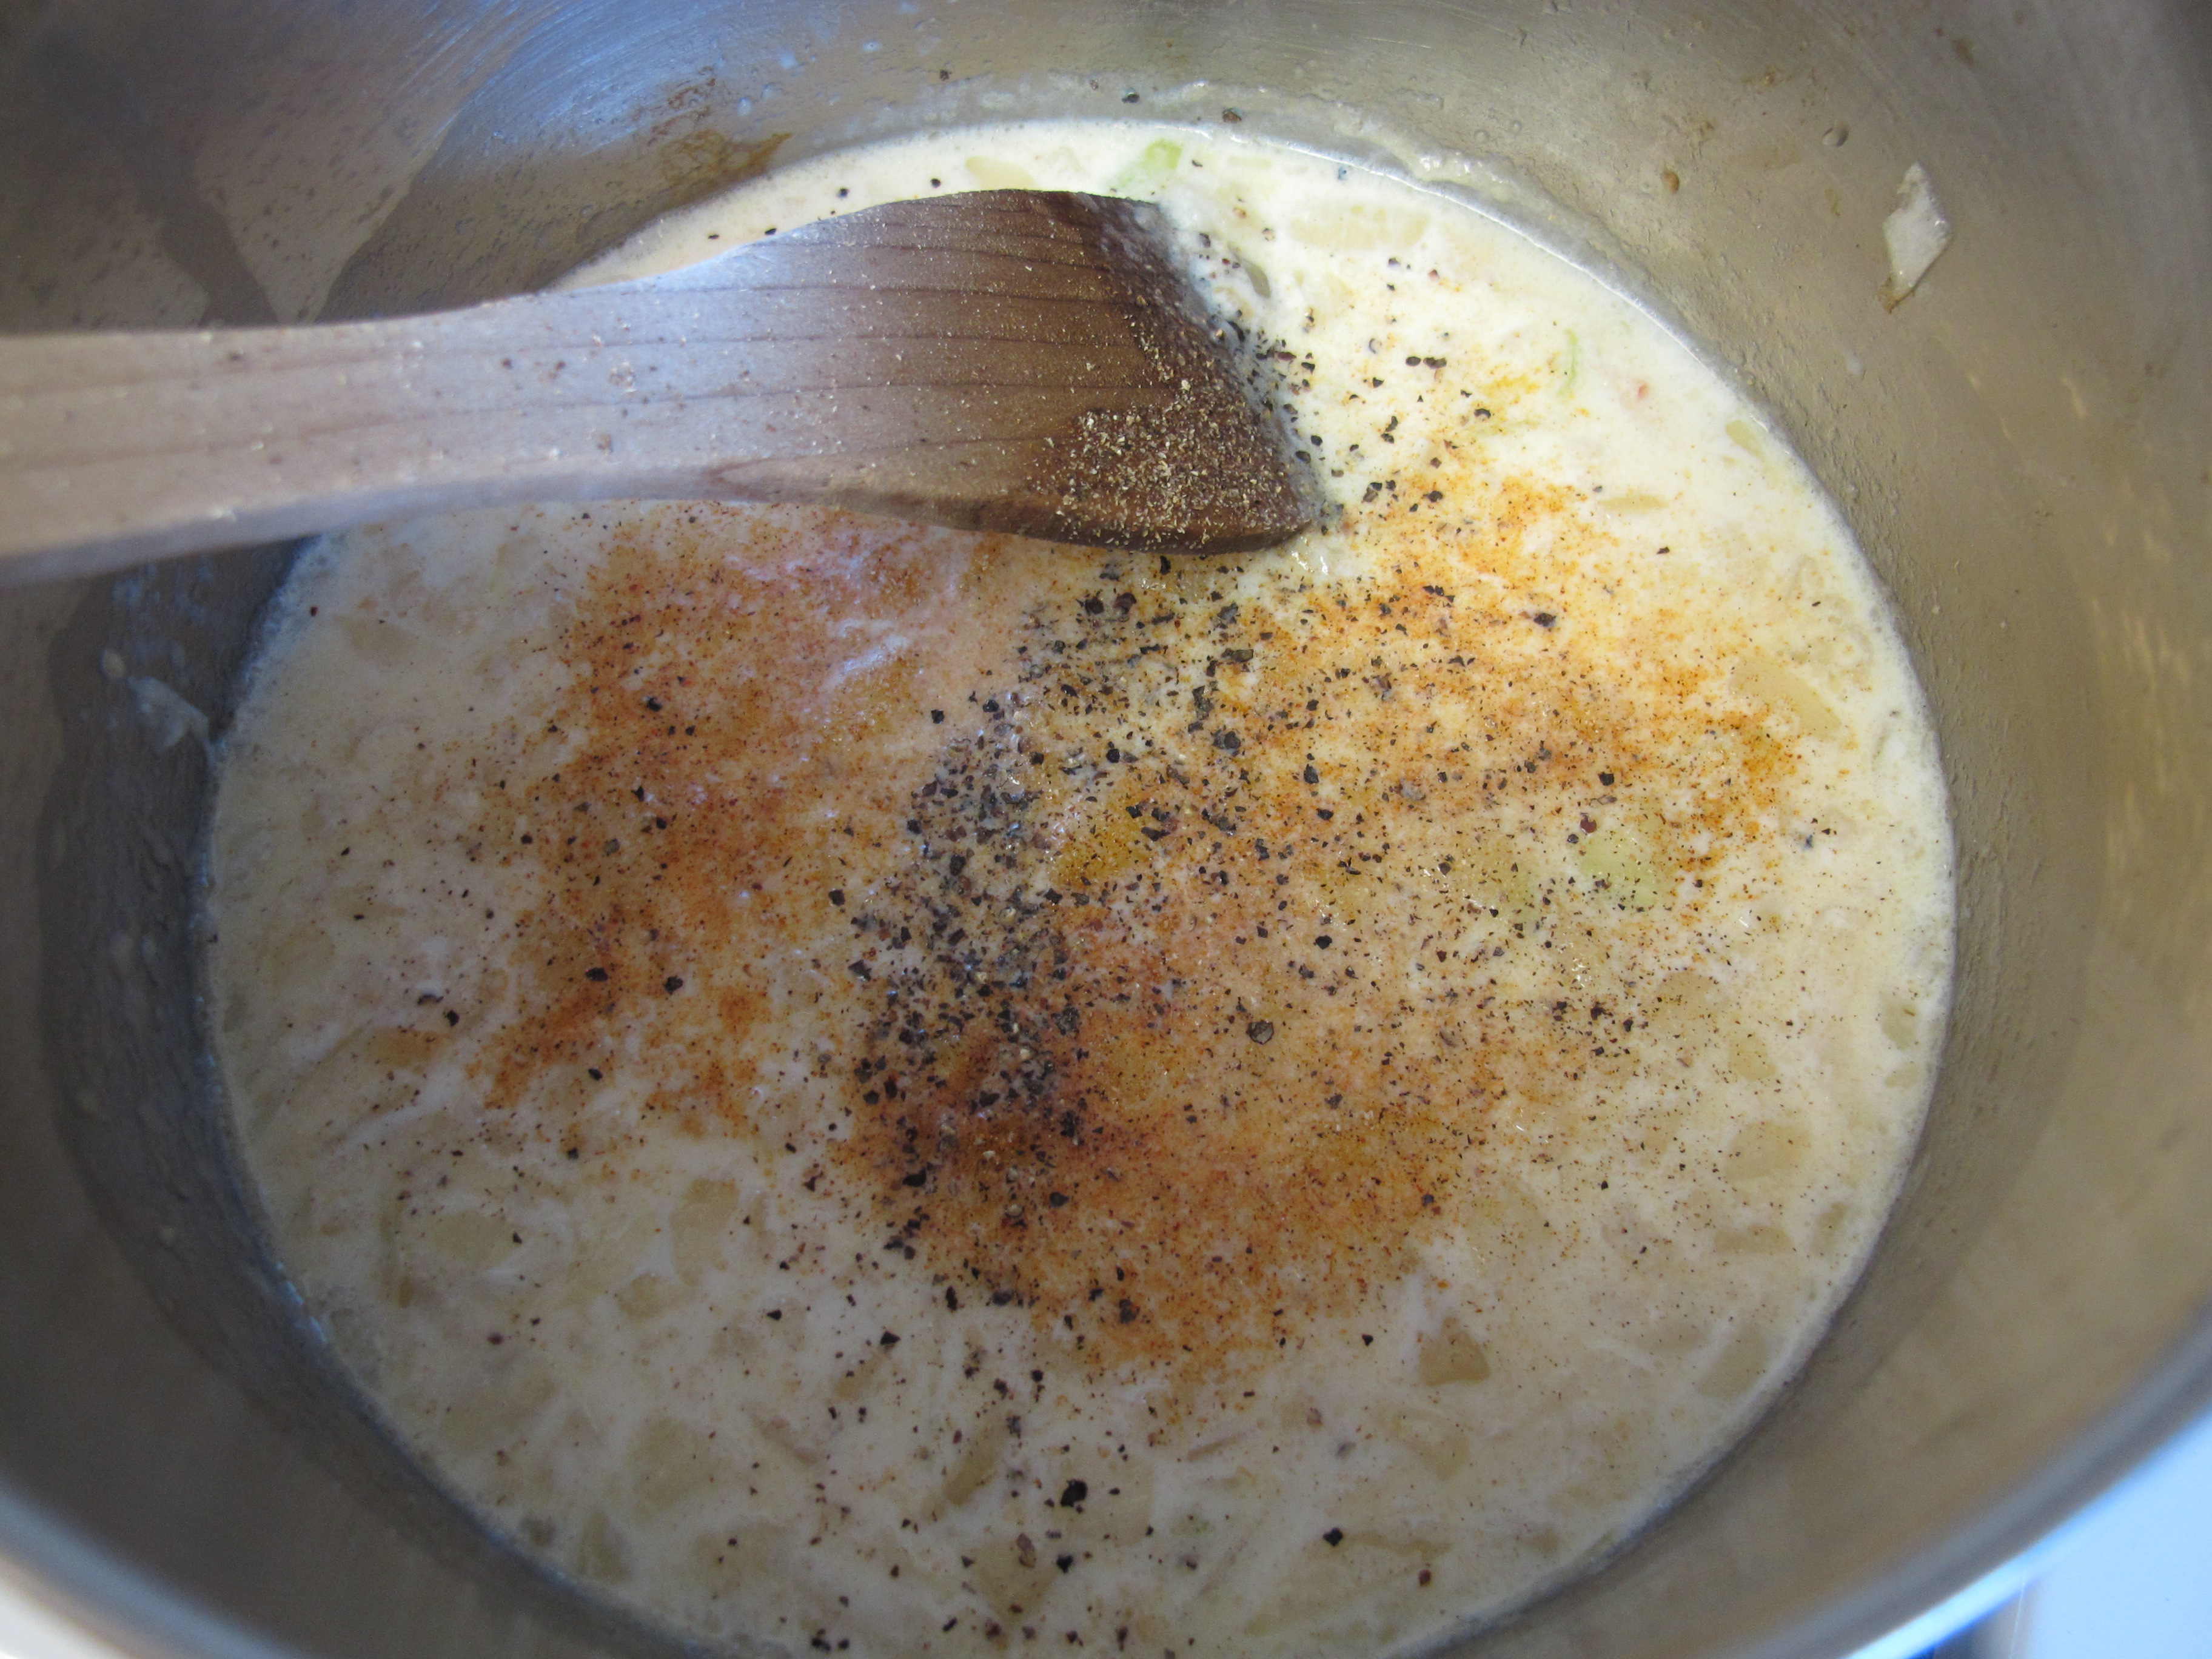
Stir sauce over medium/high heat until it begins to bubble and thicken.
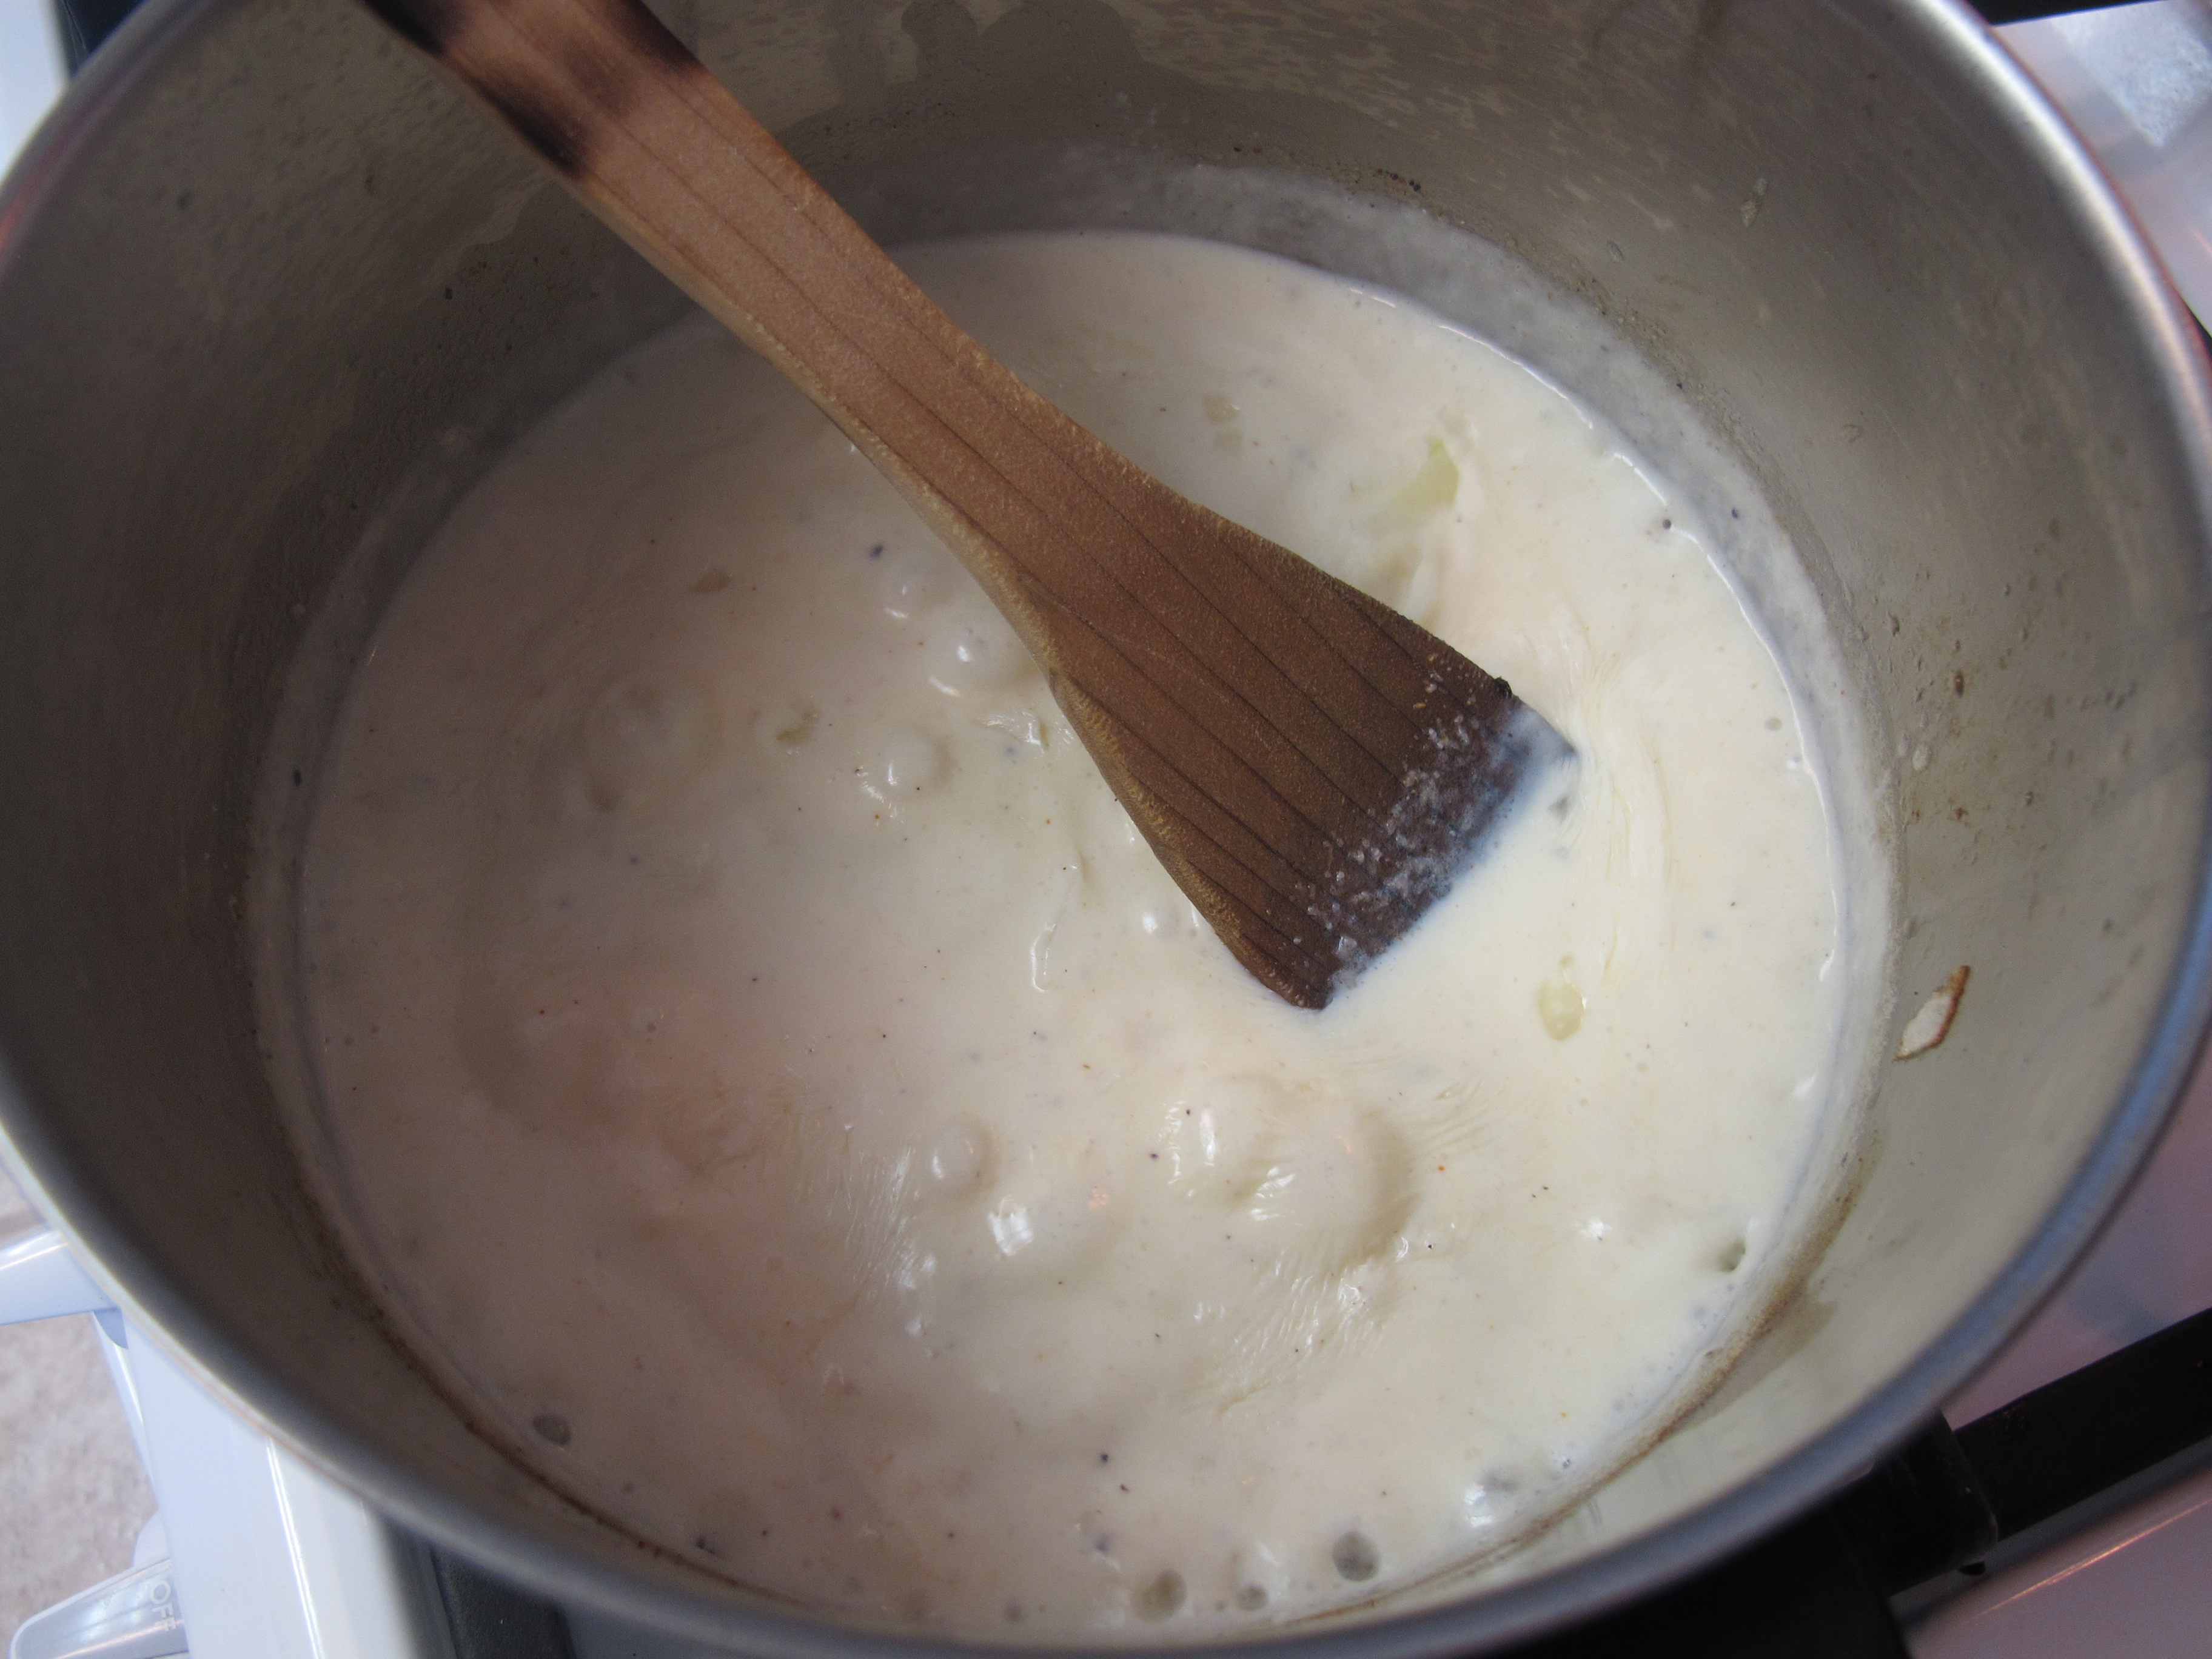
2 1/4 cups shredded cheese (I used a blend of cheddar and monterey jack), divided
Remove from heat and stir in 2 cups of the grated cheese. Set aside.

Spray a 9 x 13 casserole pan with cooking spray.
1/3 cup chives, snipped
Start with a layer of potato slices on the bottom of the dish, followed by a sprinkling of snipped chives and then another layer of potatoes more chives until all the potatoes are used up.

Pour the sauce and then shake the pan slightly so that all the sauce settles into all the nooks and crannies.

Sprinkle the top with the remaining 1/4 cup of cheese and another sprinkling of chives.

Place the casserole dish on a baking sheet in case it bubbles over.
Bake for 60 minutes until brown and bubbly.

RECIPE SOURCE: Revised from Karen A. who got it from Family Feedbag (Pinterest)
FULL RECIPE WITHOUT PICTURES —
CHEESY SCALLOPED POTATOES
1/4 cup butter
1 1/2 cups onion, diced
2 T. flour
2 cups whole milk
2 cloves garlic, diced very small or use a garlic press
2 1/4 cups shredded cheese (I used a blend of cheddar and monterey jack), divided
1/3 cup chives, snipped
seasoned salt
garlic granules
4 large yukon gold potatoes (any kind will do), skins on, thinly sliced
Start with a layer of potato slices on the bottom of the dish, followed by a sprinkling of snipped chives and then another layer of potatoes more chives until all the potatoes are used up.
Pour the sauce and then shake the pan slightly so that all the sauce settles into all the nooks and crannies. Sprinkle the top the remaining 1/4 cup of cheese and another sprinkling of chives.
Place the casserole dish on a baking sheet in case it bubbles over.
Bake for 60 minutes until brown and bubbly.
RECIPE SOURCE: Revised from Karen A. who got it from Family Feedbag (Pinterest)
Frozen Strawberry Crunch

This is a “lick the bowl” dessert!!! I call it “Heaven in a pan!!!” It is so cool and refreshing and absolutely delicious!! I am in love with it!!!!
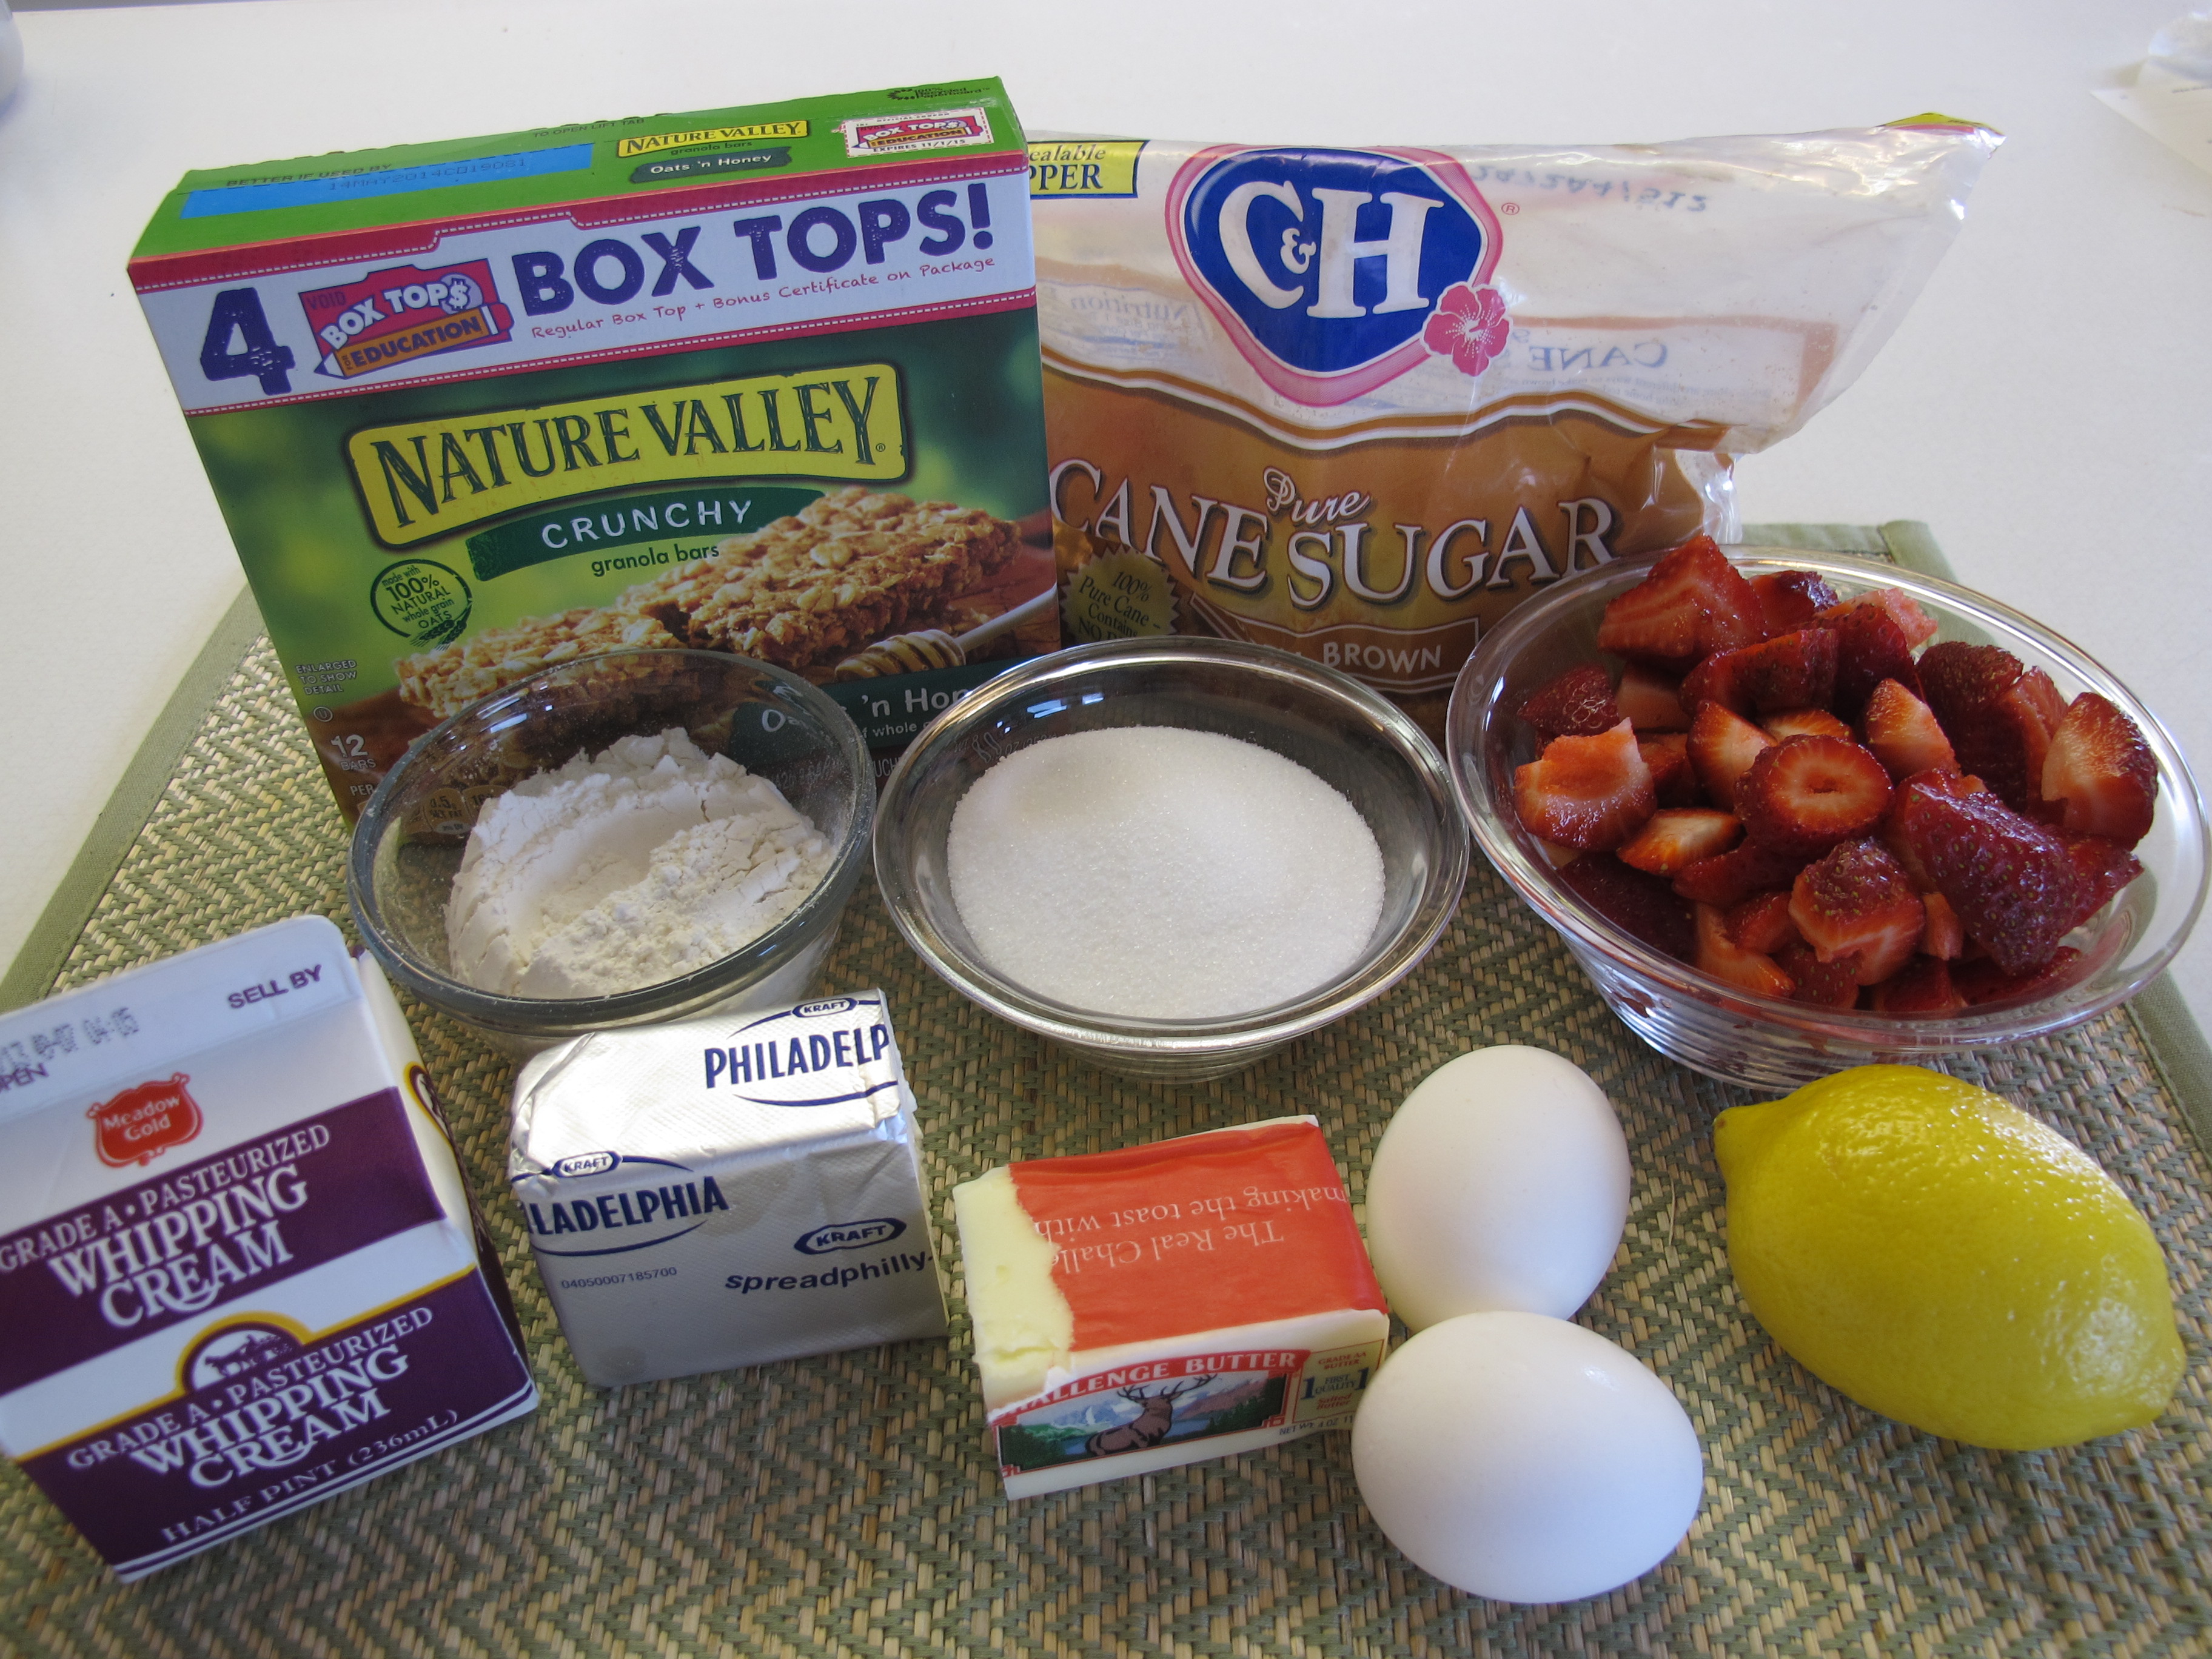
NOTE: Pictures show me using a stand mixer. I found that this is not a good idea and switched to a regular bowl and hand mixer. There are not enough ingredients to fill the bowl enough and the ingredients don’t get whipped up like they should.
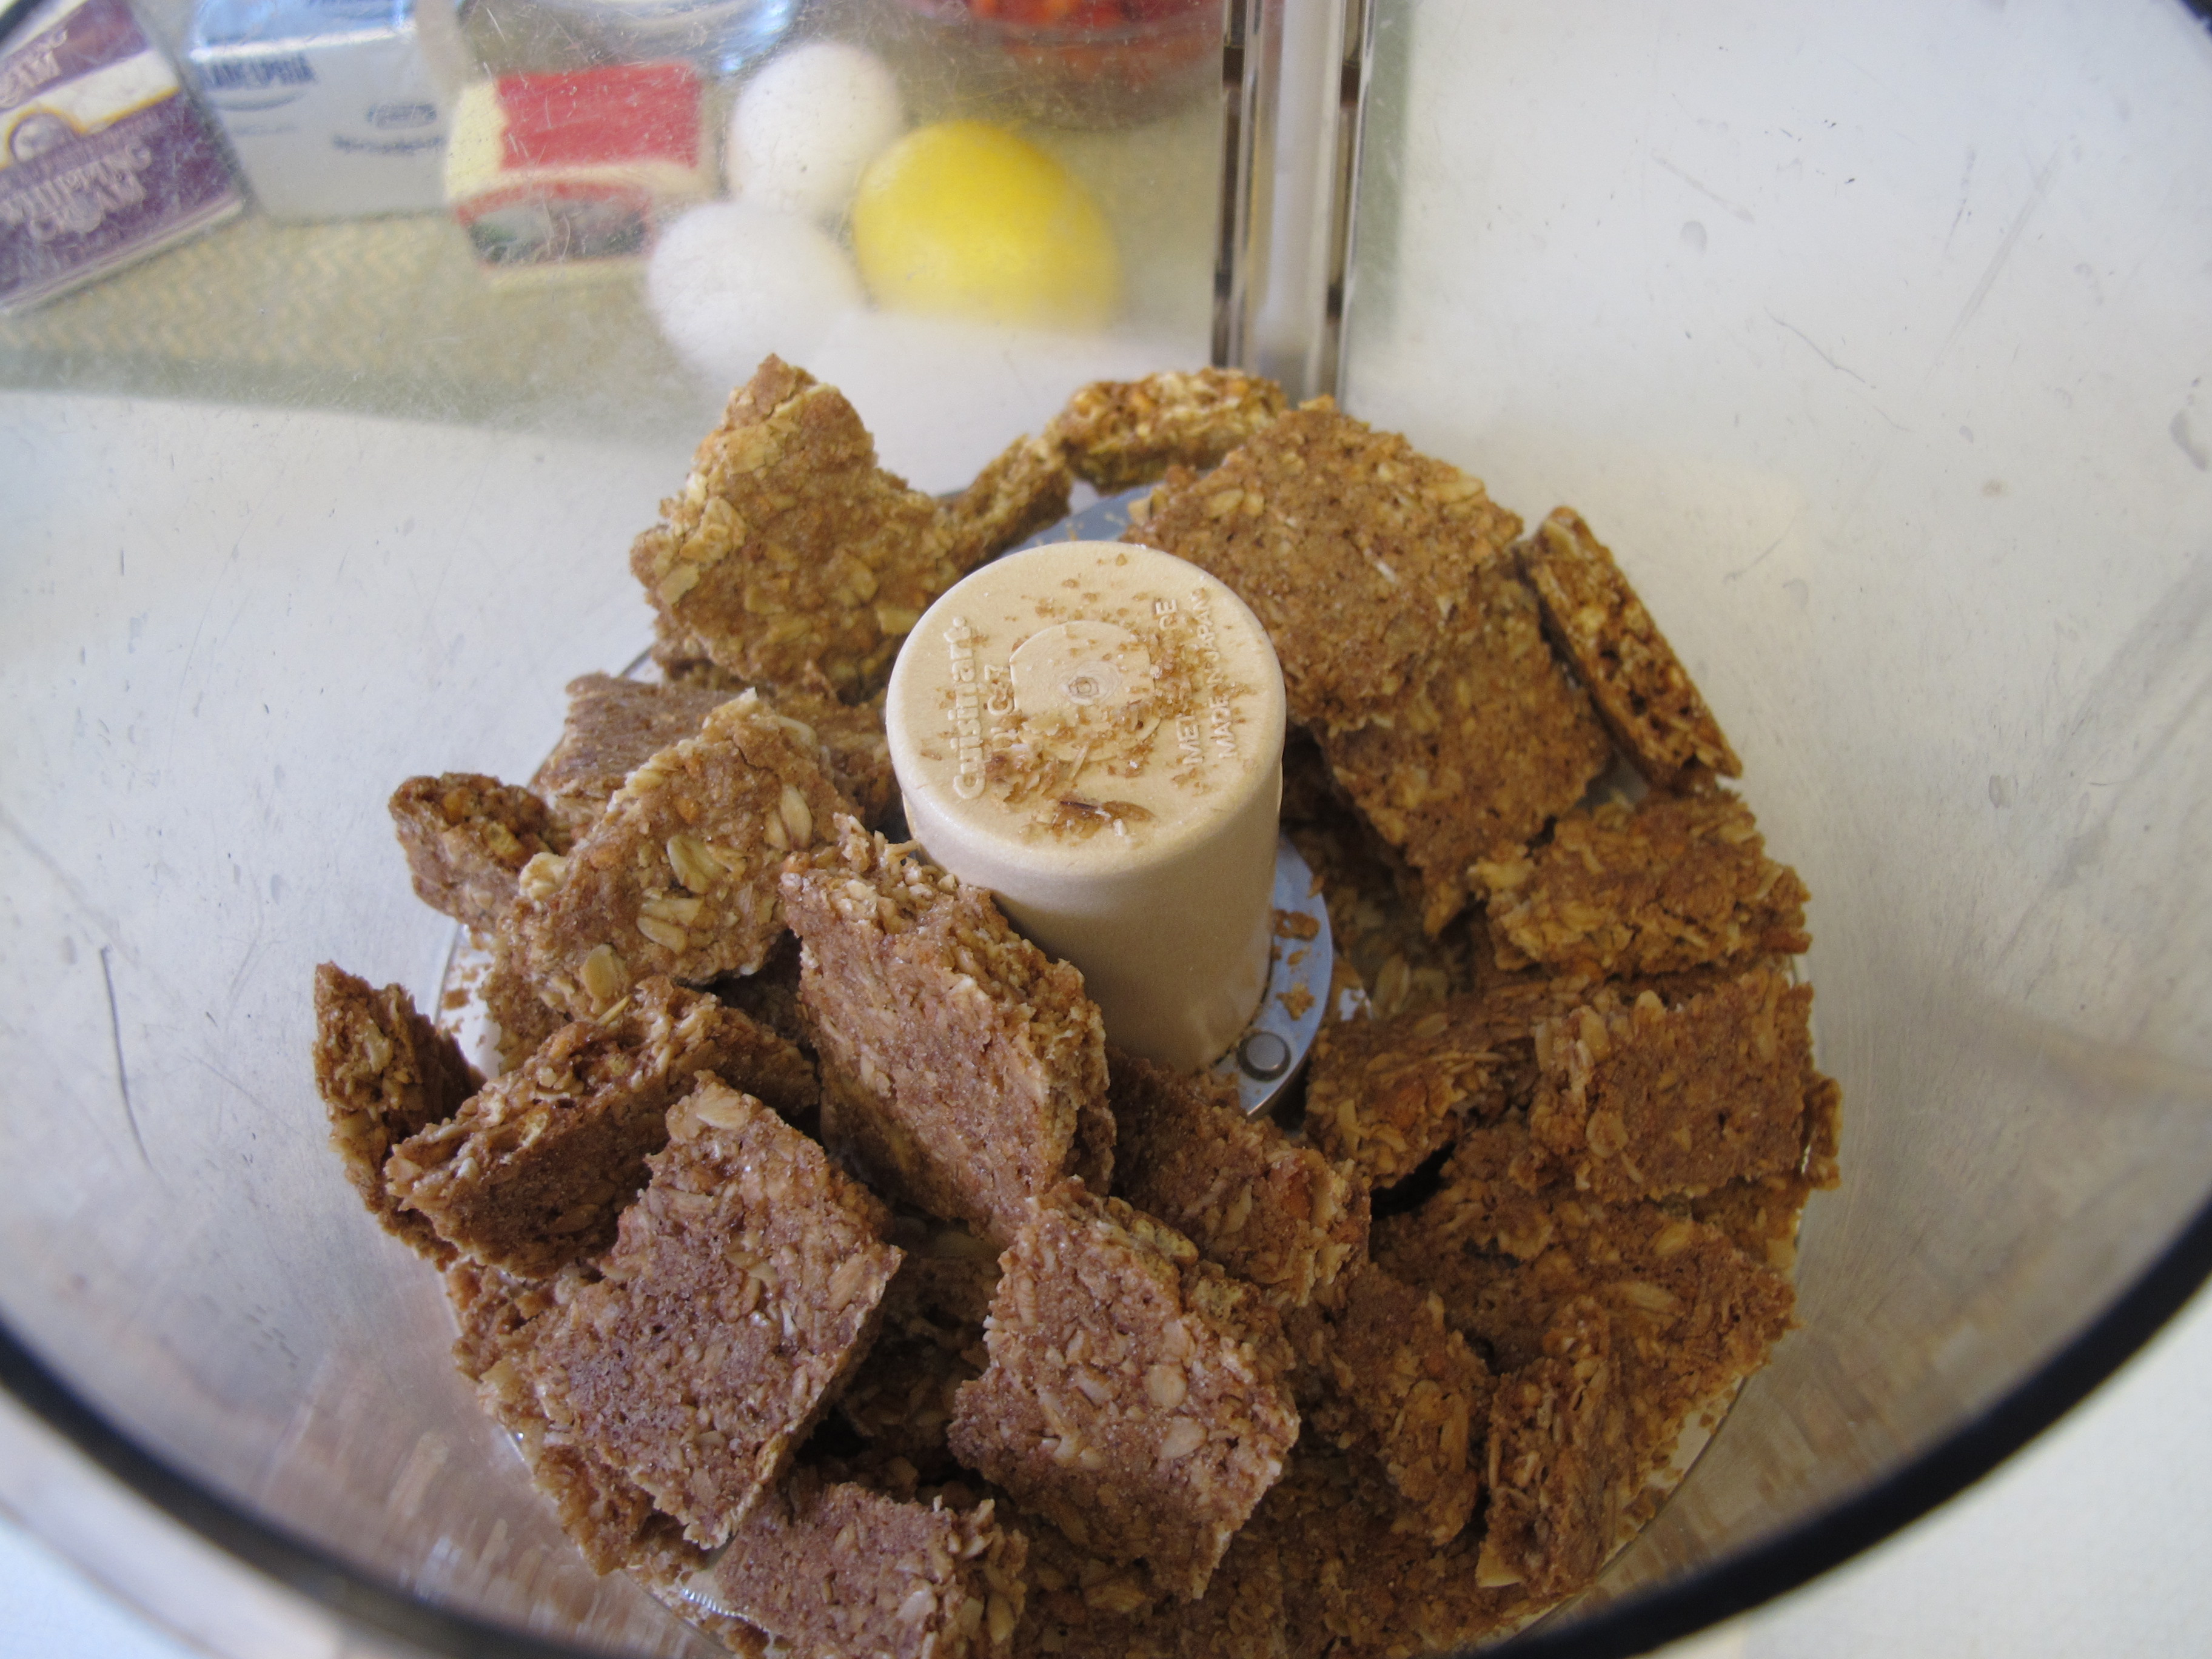
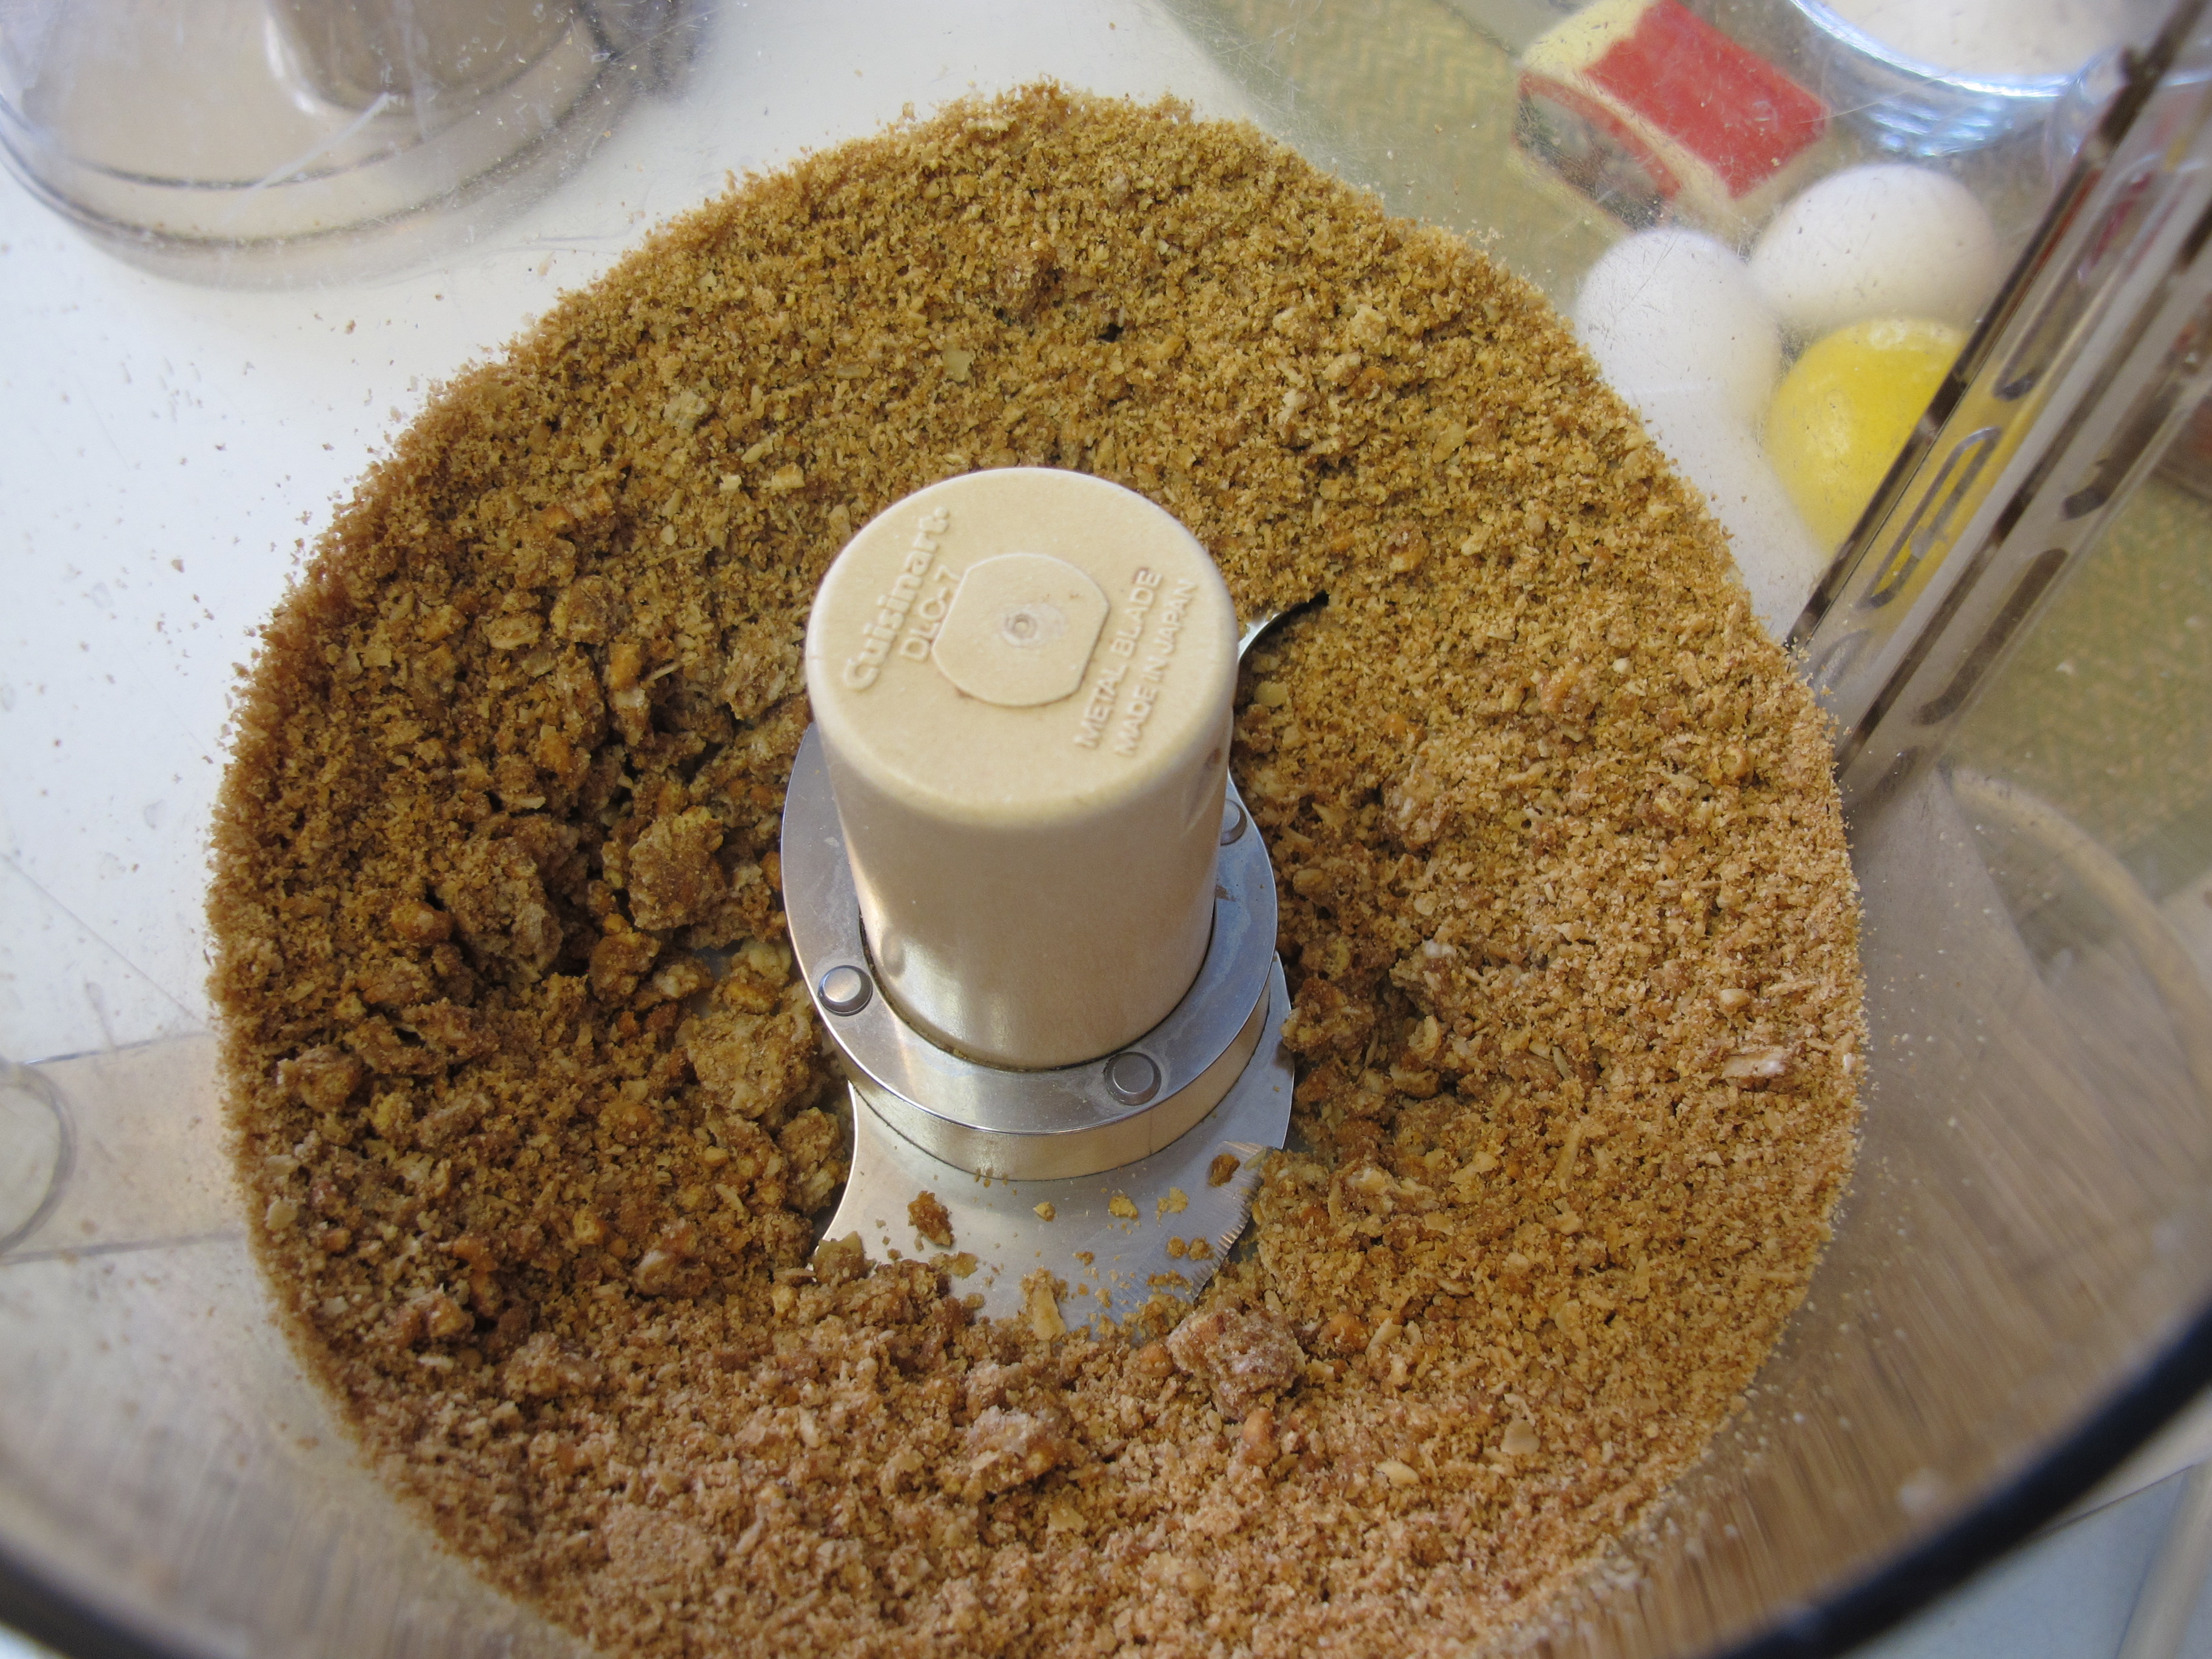
1 box Nature Valley Oats and Honey Granola Bars (Make sure you save the box tops for your local school!)
Process Nature Valley Granola Bars in a food processor until you achieve a course crumb. If you don’t have a food processor, put Granola bars in a zip lock bag and pound them into crumbs.
1/3 cup brown sugar
1/2 cup flour
6 T. butter, melted
In a large bowl, add the crumbs, brown sugar, flour and melted butter and mix together.

Line an 8 x 8 glass pan with parchment paper. Add crumb mixture.
Bake at 350 degrees for 20 minutes.
Let cool. Divide in half and set aside.
NOTE: If you don’t have parchment paper, just add crumbs to the pan and bake. Spread crumbs on a cookie sheet to cool.

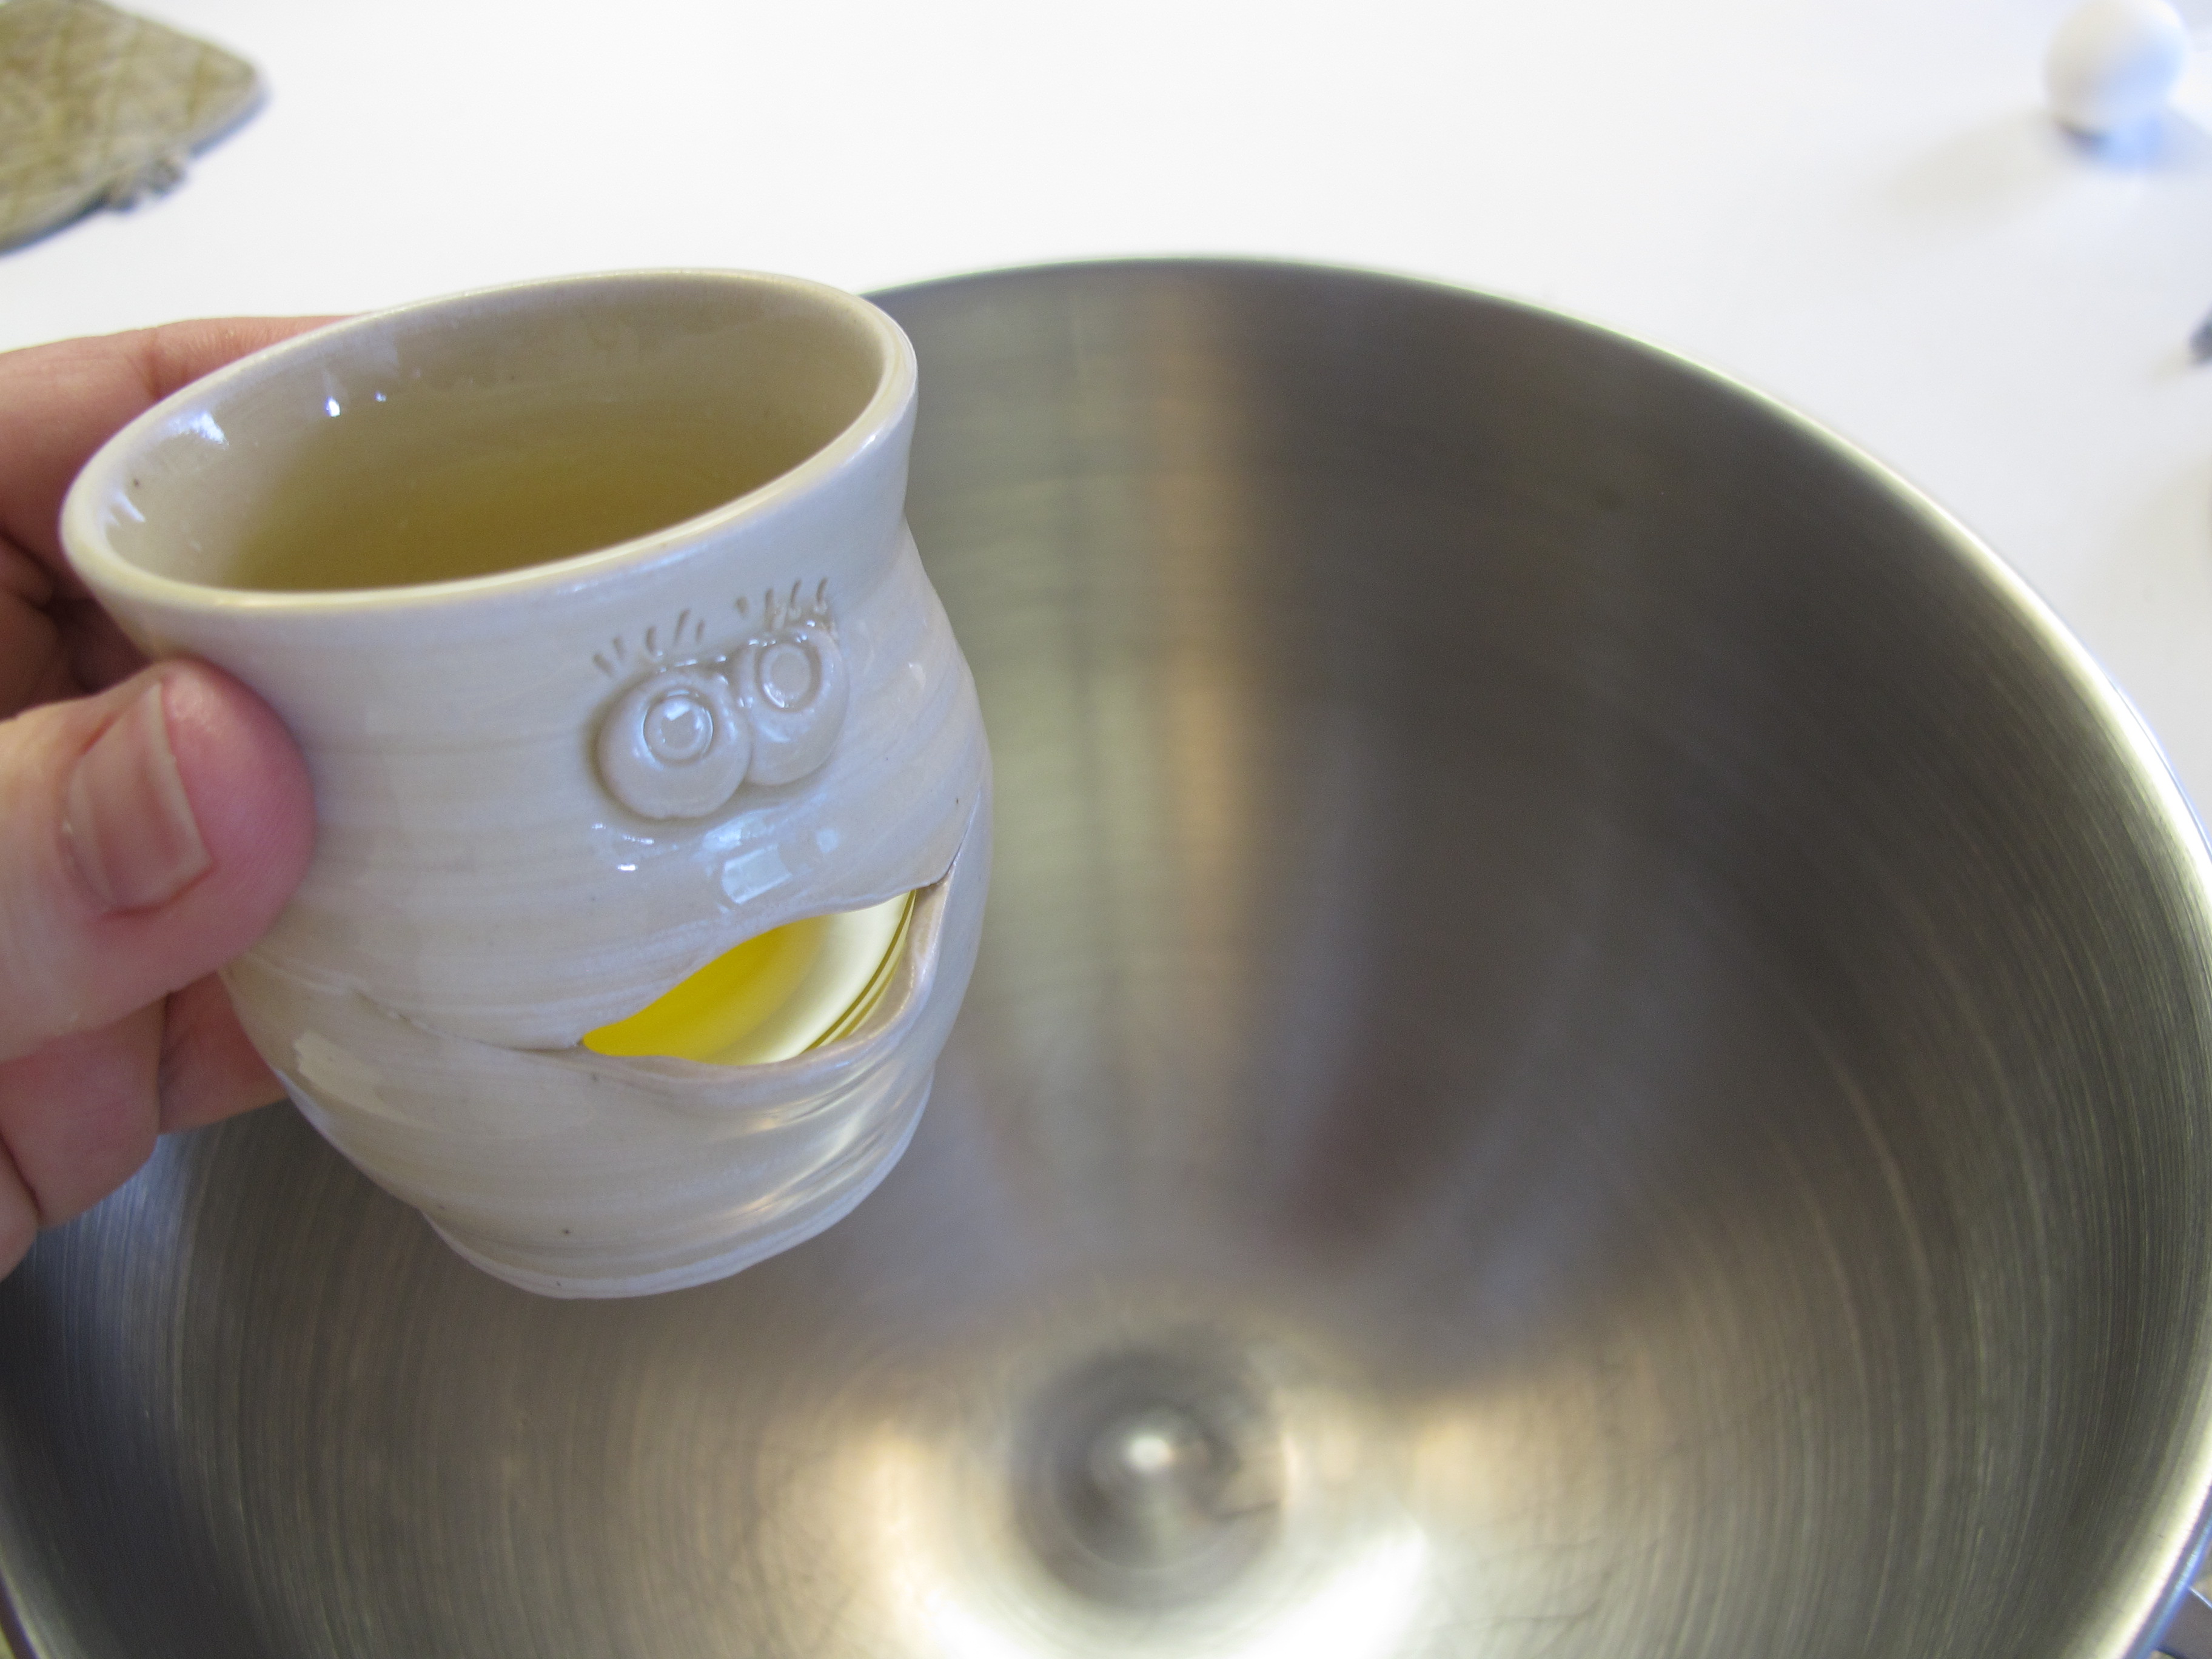
2 egg whites
1/2 cup sugar
In a large bowl, combine egg whites and sugar and mix on high.
(Don’t you just love my totally awesome egg separator!! A friend gave it to me for Christmas one year. I love it!!)
1 cup whipping cream
Add the whipping cream and continue mixing for another 5 minutes.

1 lemon
Squeeze the lemon into a small bowl so you can pick the seeds out. Add to the mixture.

4 oz. cream cheese, softened
Add softened cream cheese. Mix on low speed until incorporated.
1 1/2 cups fresh strawberries, chopped
Fold the strawberries into the cream mixture.

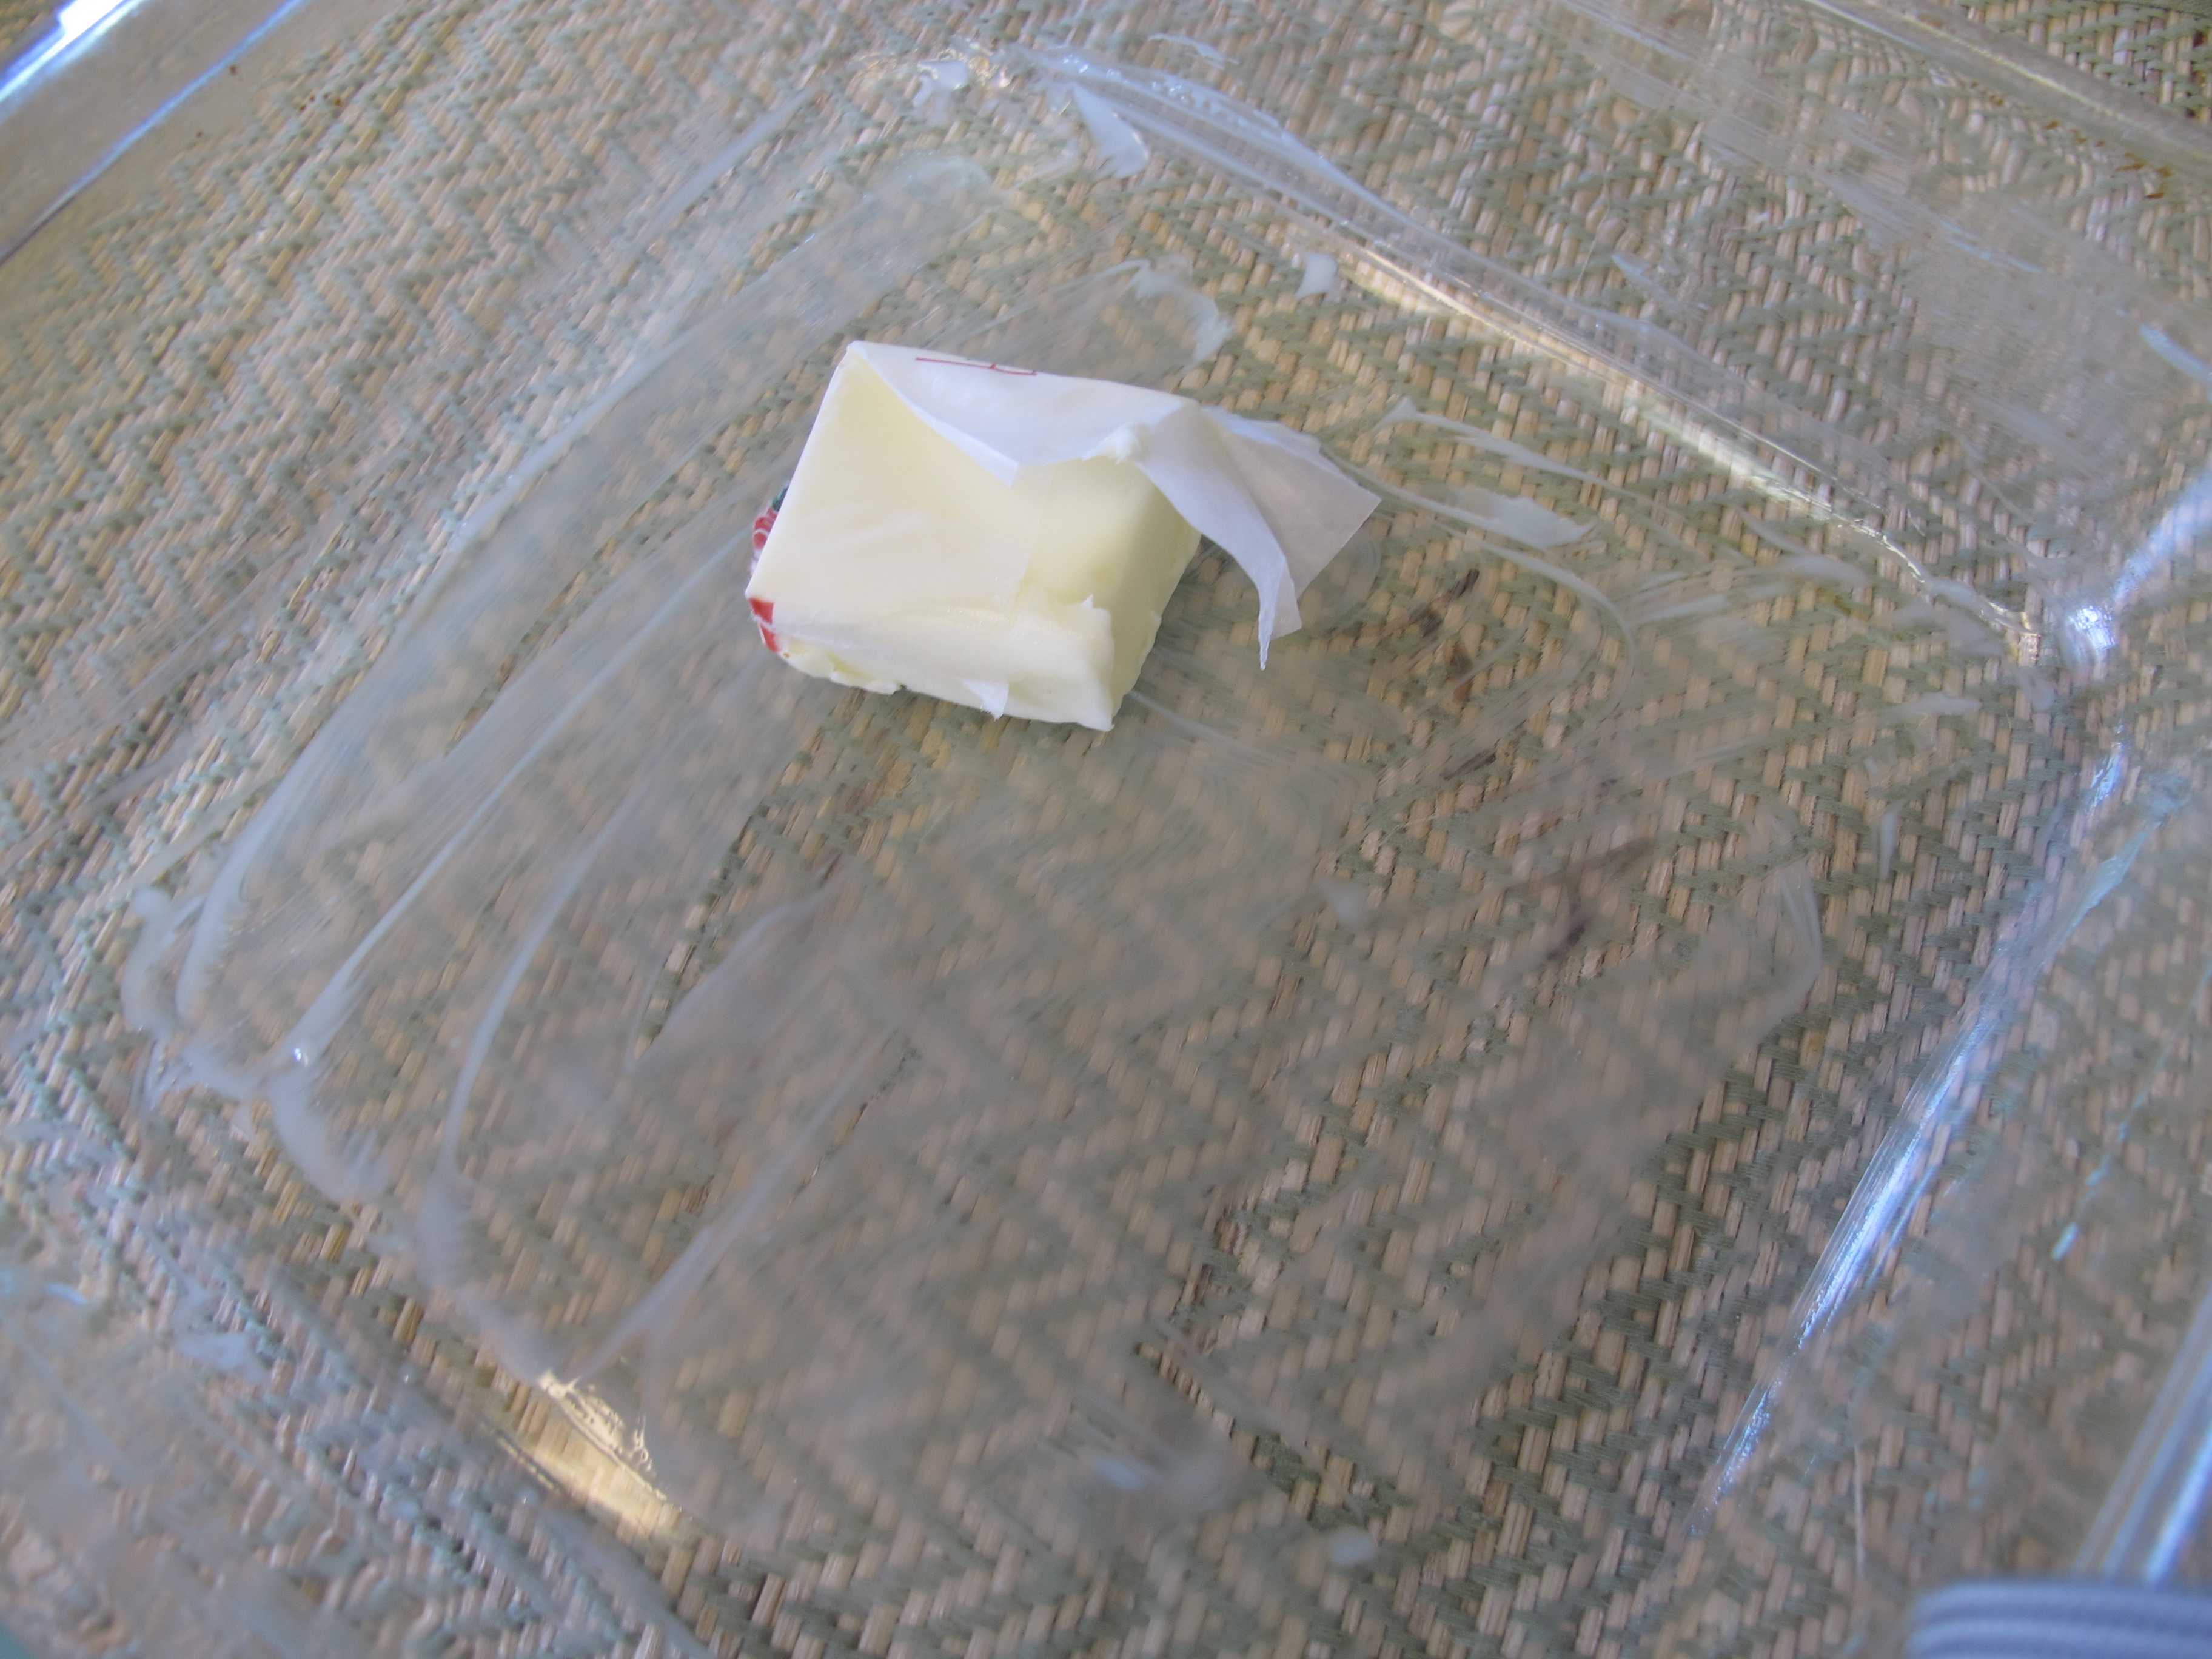
Butter the 8 x 8 glass pan and press half the crumb mixture on the bottom.
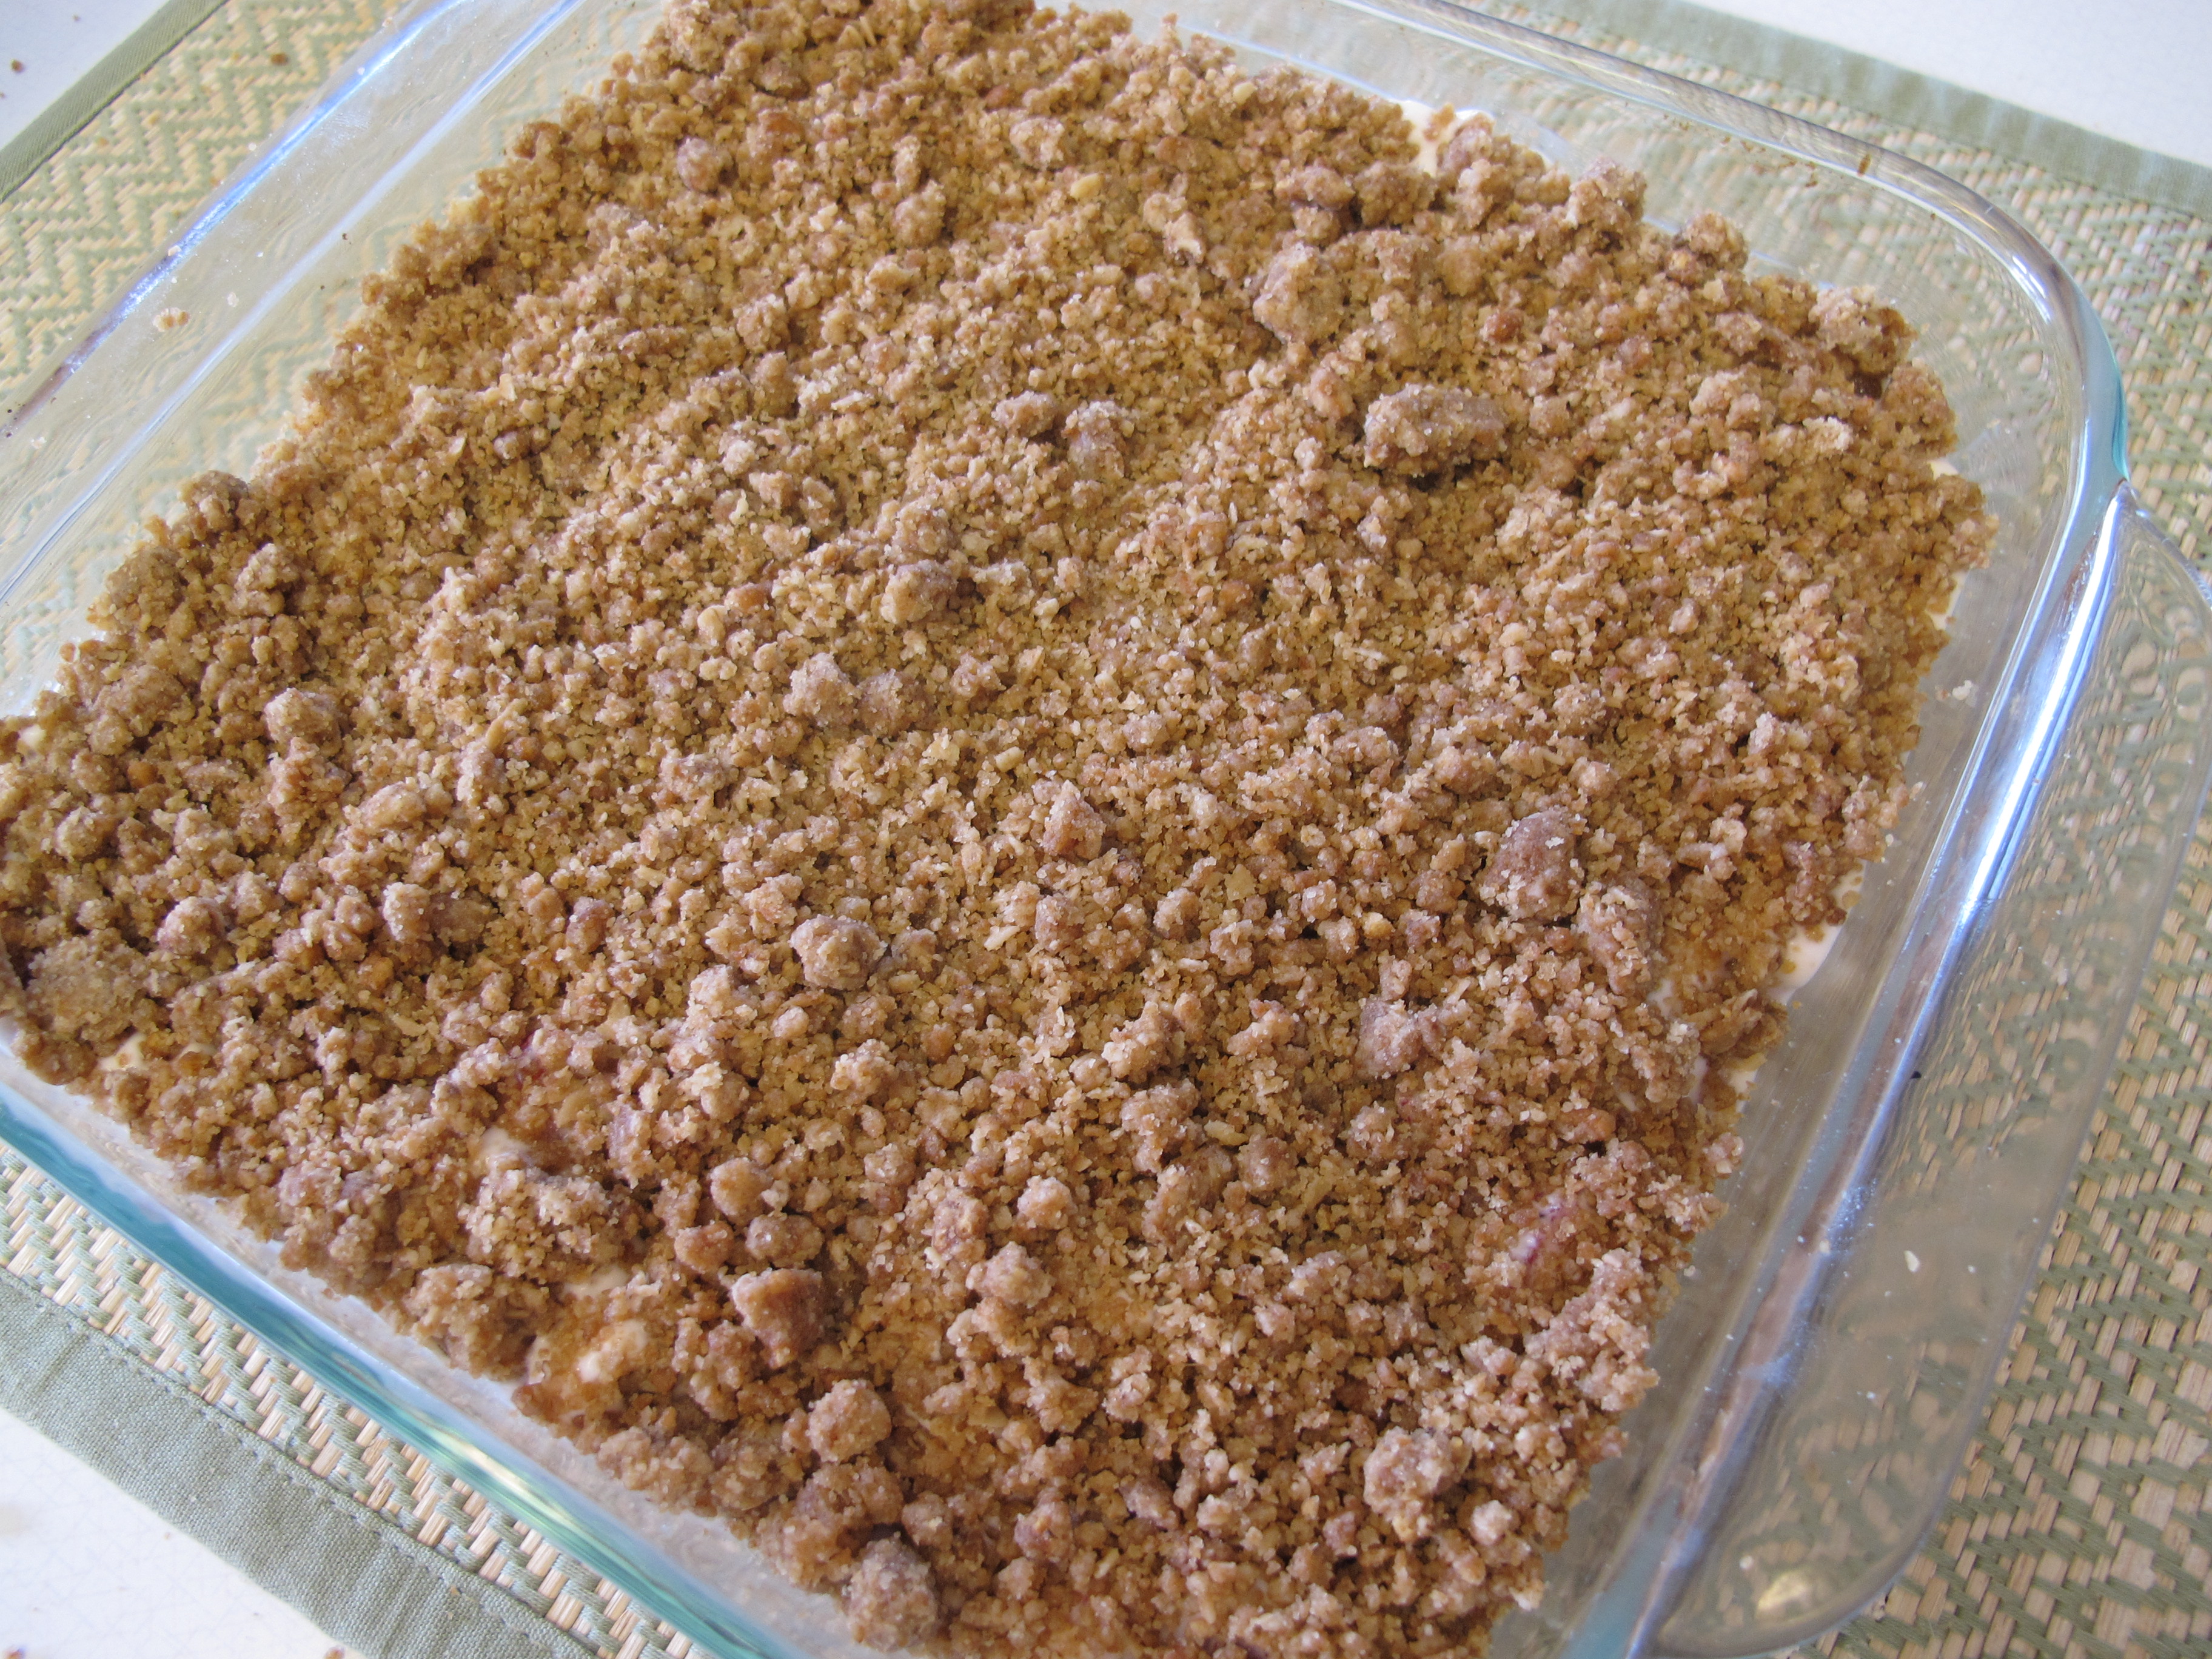
Top with strawberry cream mixture.

Add the remaining crumbs on top.

Cover and freeze for at least 3 hours. You can make and freeze this ahead. Just make sure you take it out of the freezer at least 1-2 hours before servings so it has a chance to thaw a bit.
RECIPE SOURCE: Revised from Sugar and Charm (found on Pinterest)
FULL RECIPE WITHOUT PICTURES —
FROZEN STRAWBERRY CRUNCH
1 box Nature Valley Oats and Honey Granola Bars
1/3 cup brown sugar
1/2 cup flour
6 T. butter, melted
2 egg whites
1/2 cup sugar
1 cup whipping cream
1 lemon
4 oz. cream cheese, softened
1 1/2 cups fresh strawberries, chopped
NOTE: Do not use a stand mixer to prepare this recipe. There are not enough ingredients to fill the bowl enough and the ingredients don’t get whipped up like they should.
Process Nature Valley Granola Bars in a food processor until you achieve a course crumb. If you don’t have a food processor, put Granola bars in a zip lock bag and pound them into crumbs.
In a large bowl, add the crumbs, brown sugar, flour and melted butter and mix together.
Line an 8 x 8 glass pan with parchment paper. Add crumb mixture.
Bake at 350 degrees for 20 minutes.
Let cool. Divide in half and set aside.
NOTE: If you don’t have parchment paper, just add crumbs to the pan and bake. Spread crumbs on a cookie sheet to cool.
In a large bowl, combine egg whites and sugar and mix on high.
Add the whipping cream and continue mixing for another 5 minutes.
Squeeze the lemon into a small bowl so you can pick the seeds out. Add to the mixture.
Add softened cream cheese. Mix on low speed until incorporated.
Fold the strawberries into the cream mixture.
Butter the 8 x 8 glass pan and press half the crumb mixture on the bottom.
Top with strawberry cream mixture.
Add the remaining crumbs on top.
Cover and freeze for at least 3 hours. You can make and freeze this ahead. Just make sure you take it out of the freezer at least 1- 2 hours before servings so it has a chance to thaw a bit.
RECIPE SOURCE: Revised from Sugar and Charm (found on Pinterest)
French Dip Sandwiches
")
My good friend , Kae Curtis, shared this idea with me. It is a great crowd pleaser and so easy to throw together. The garlic from the bread adds that little bit of extra favor to make this a delicious sandwich.
Everyone will love these great french dip sandwiches!

These sandwiches only take 4 ingredients –
1 loaf of garlic bread
roast beef (I used 1 pound for 1 loaf of bread. It is best to buy rare roast beef because it will cook when you heat up the loaf.)
cheese – any type you like
au jus mix
onions (optional)
mushrooms (optional)

Place garlic bread on a long piece of aluminum foil. Lay roast beef inside garlic bread. Top with cheese.
")
Wrap uncut loaf with another piece of aluminum foil.

Place in 350 degree oven and heat for approximately 30 minutes or until roast beef is hot and the cheese has melted.
I forgot to take a picture – but we also grilled some onions and mushrooms to add to the sandwich once it came out of the oven. This was an added bonus that we will definitely do again.
Serve with au jus for dipping.
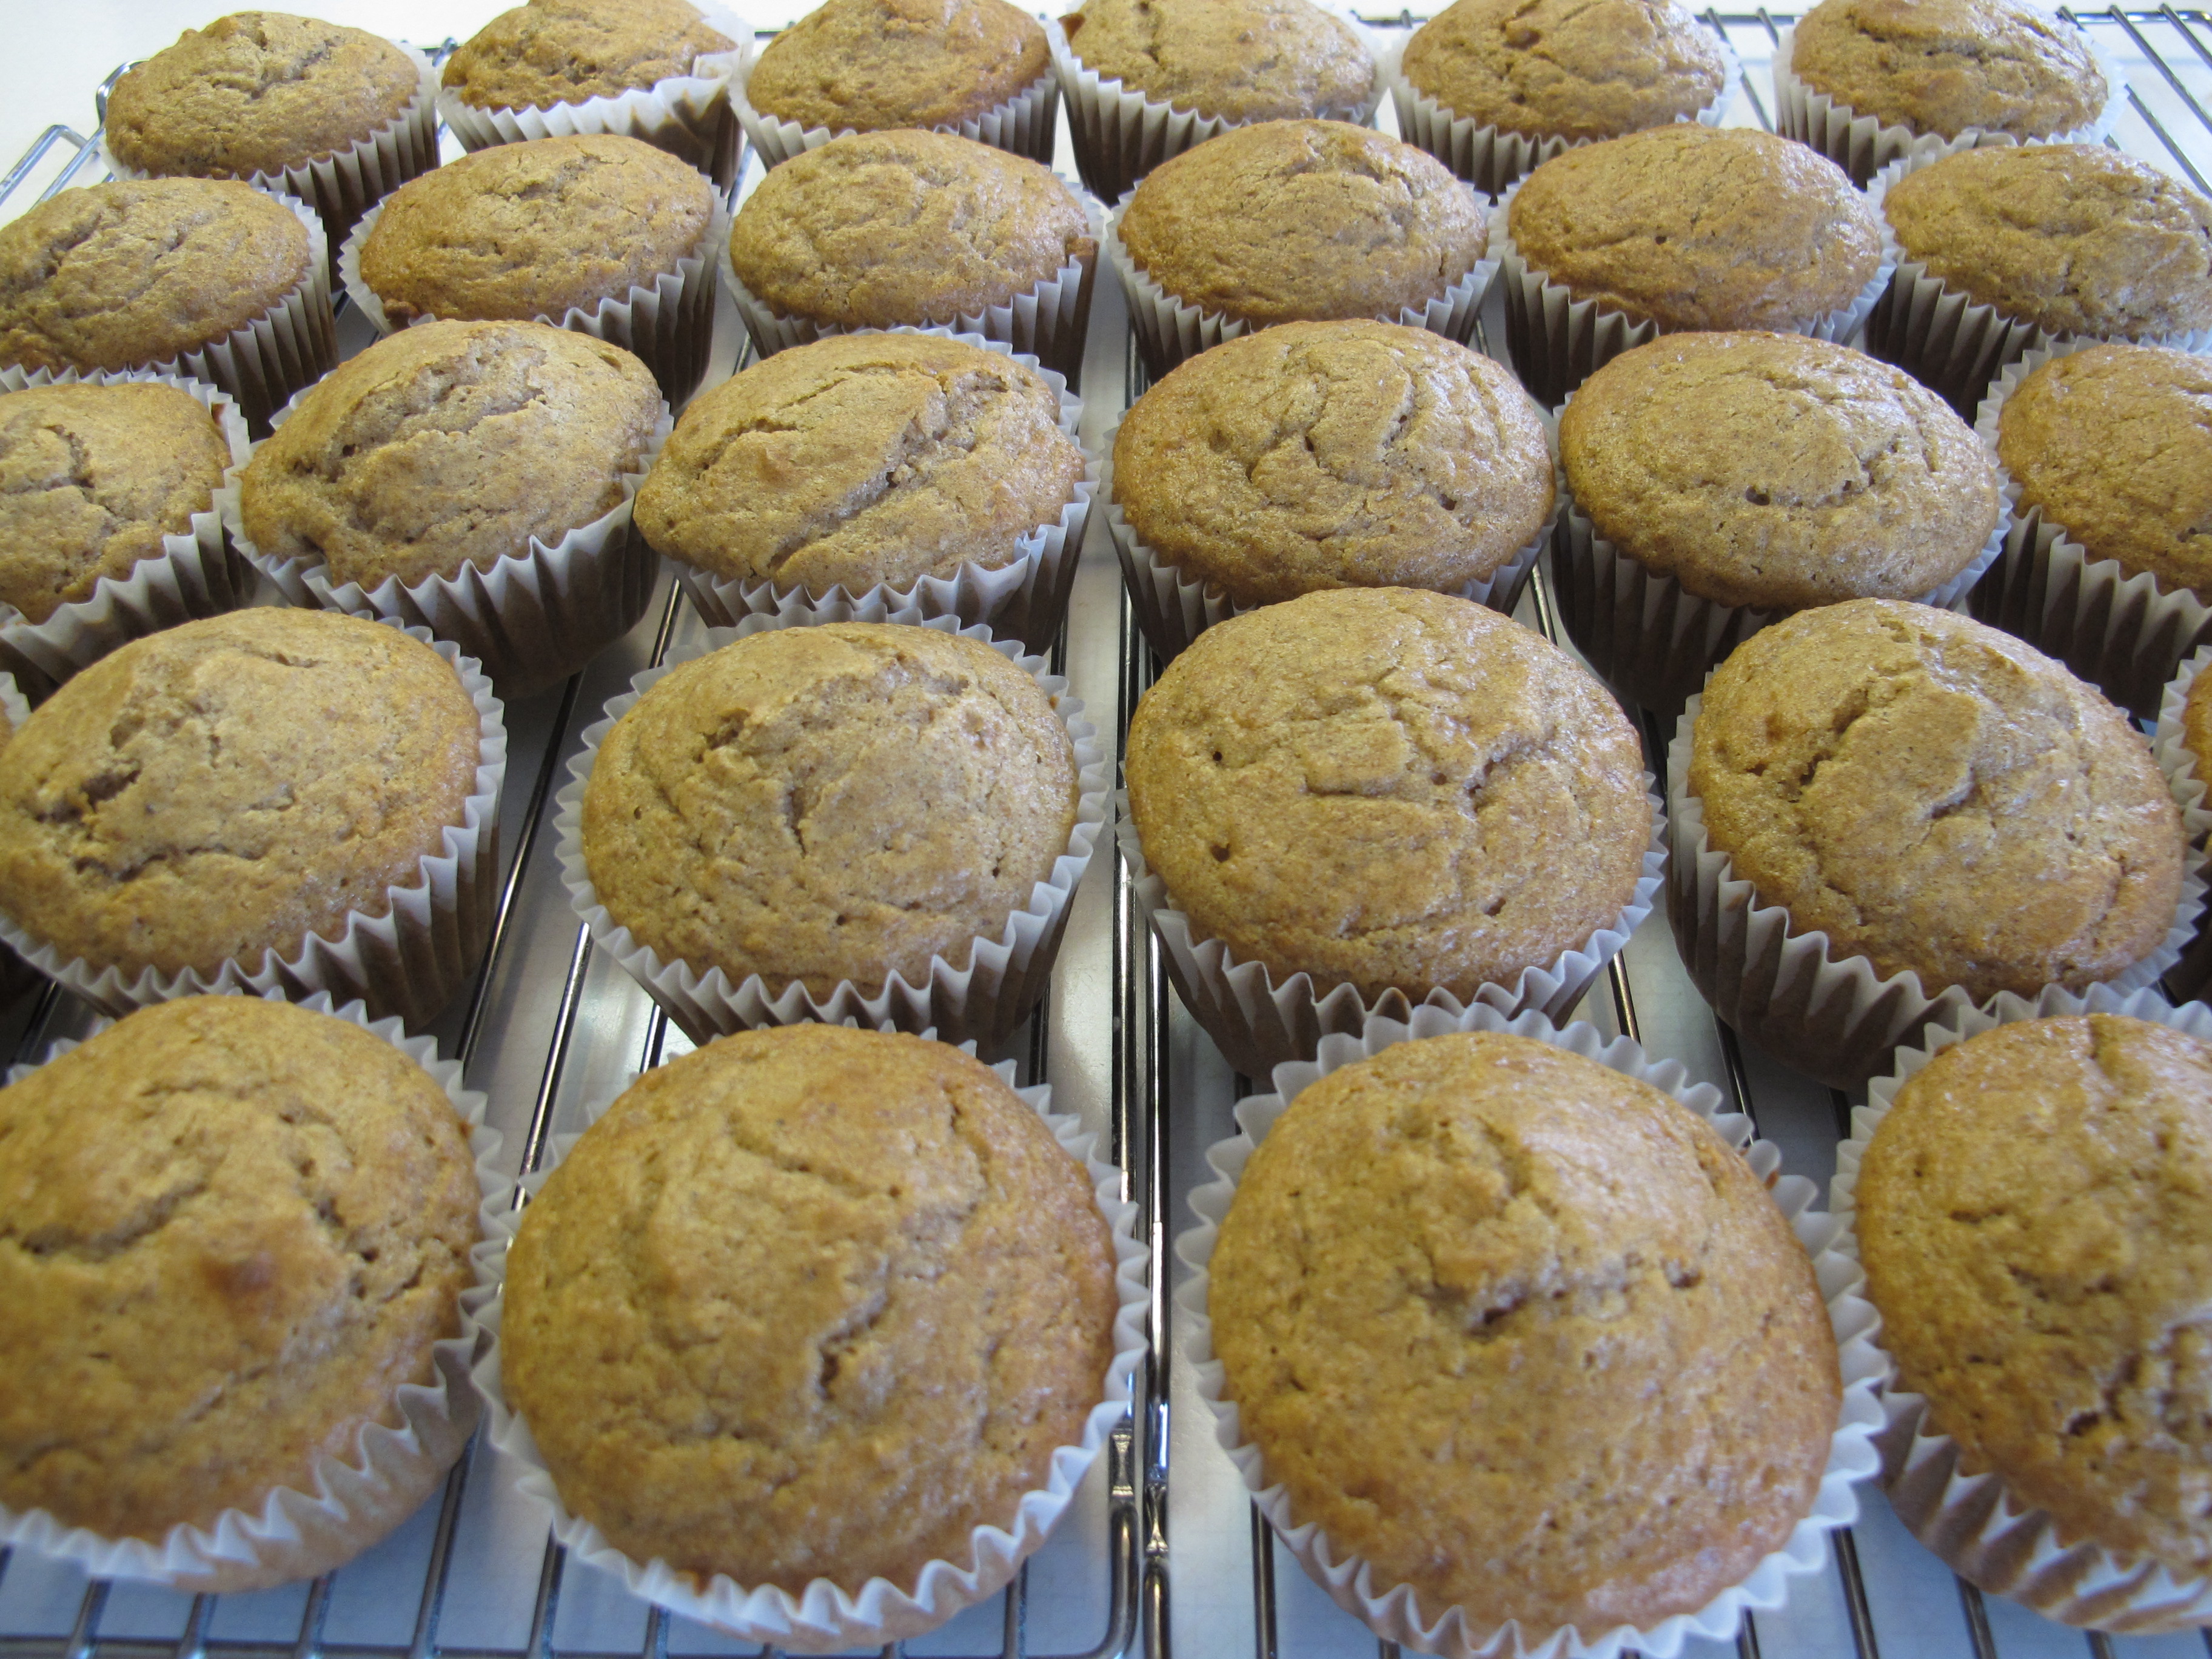
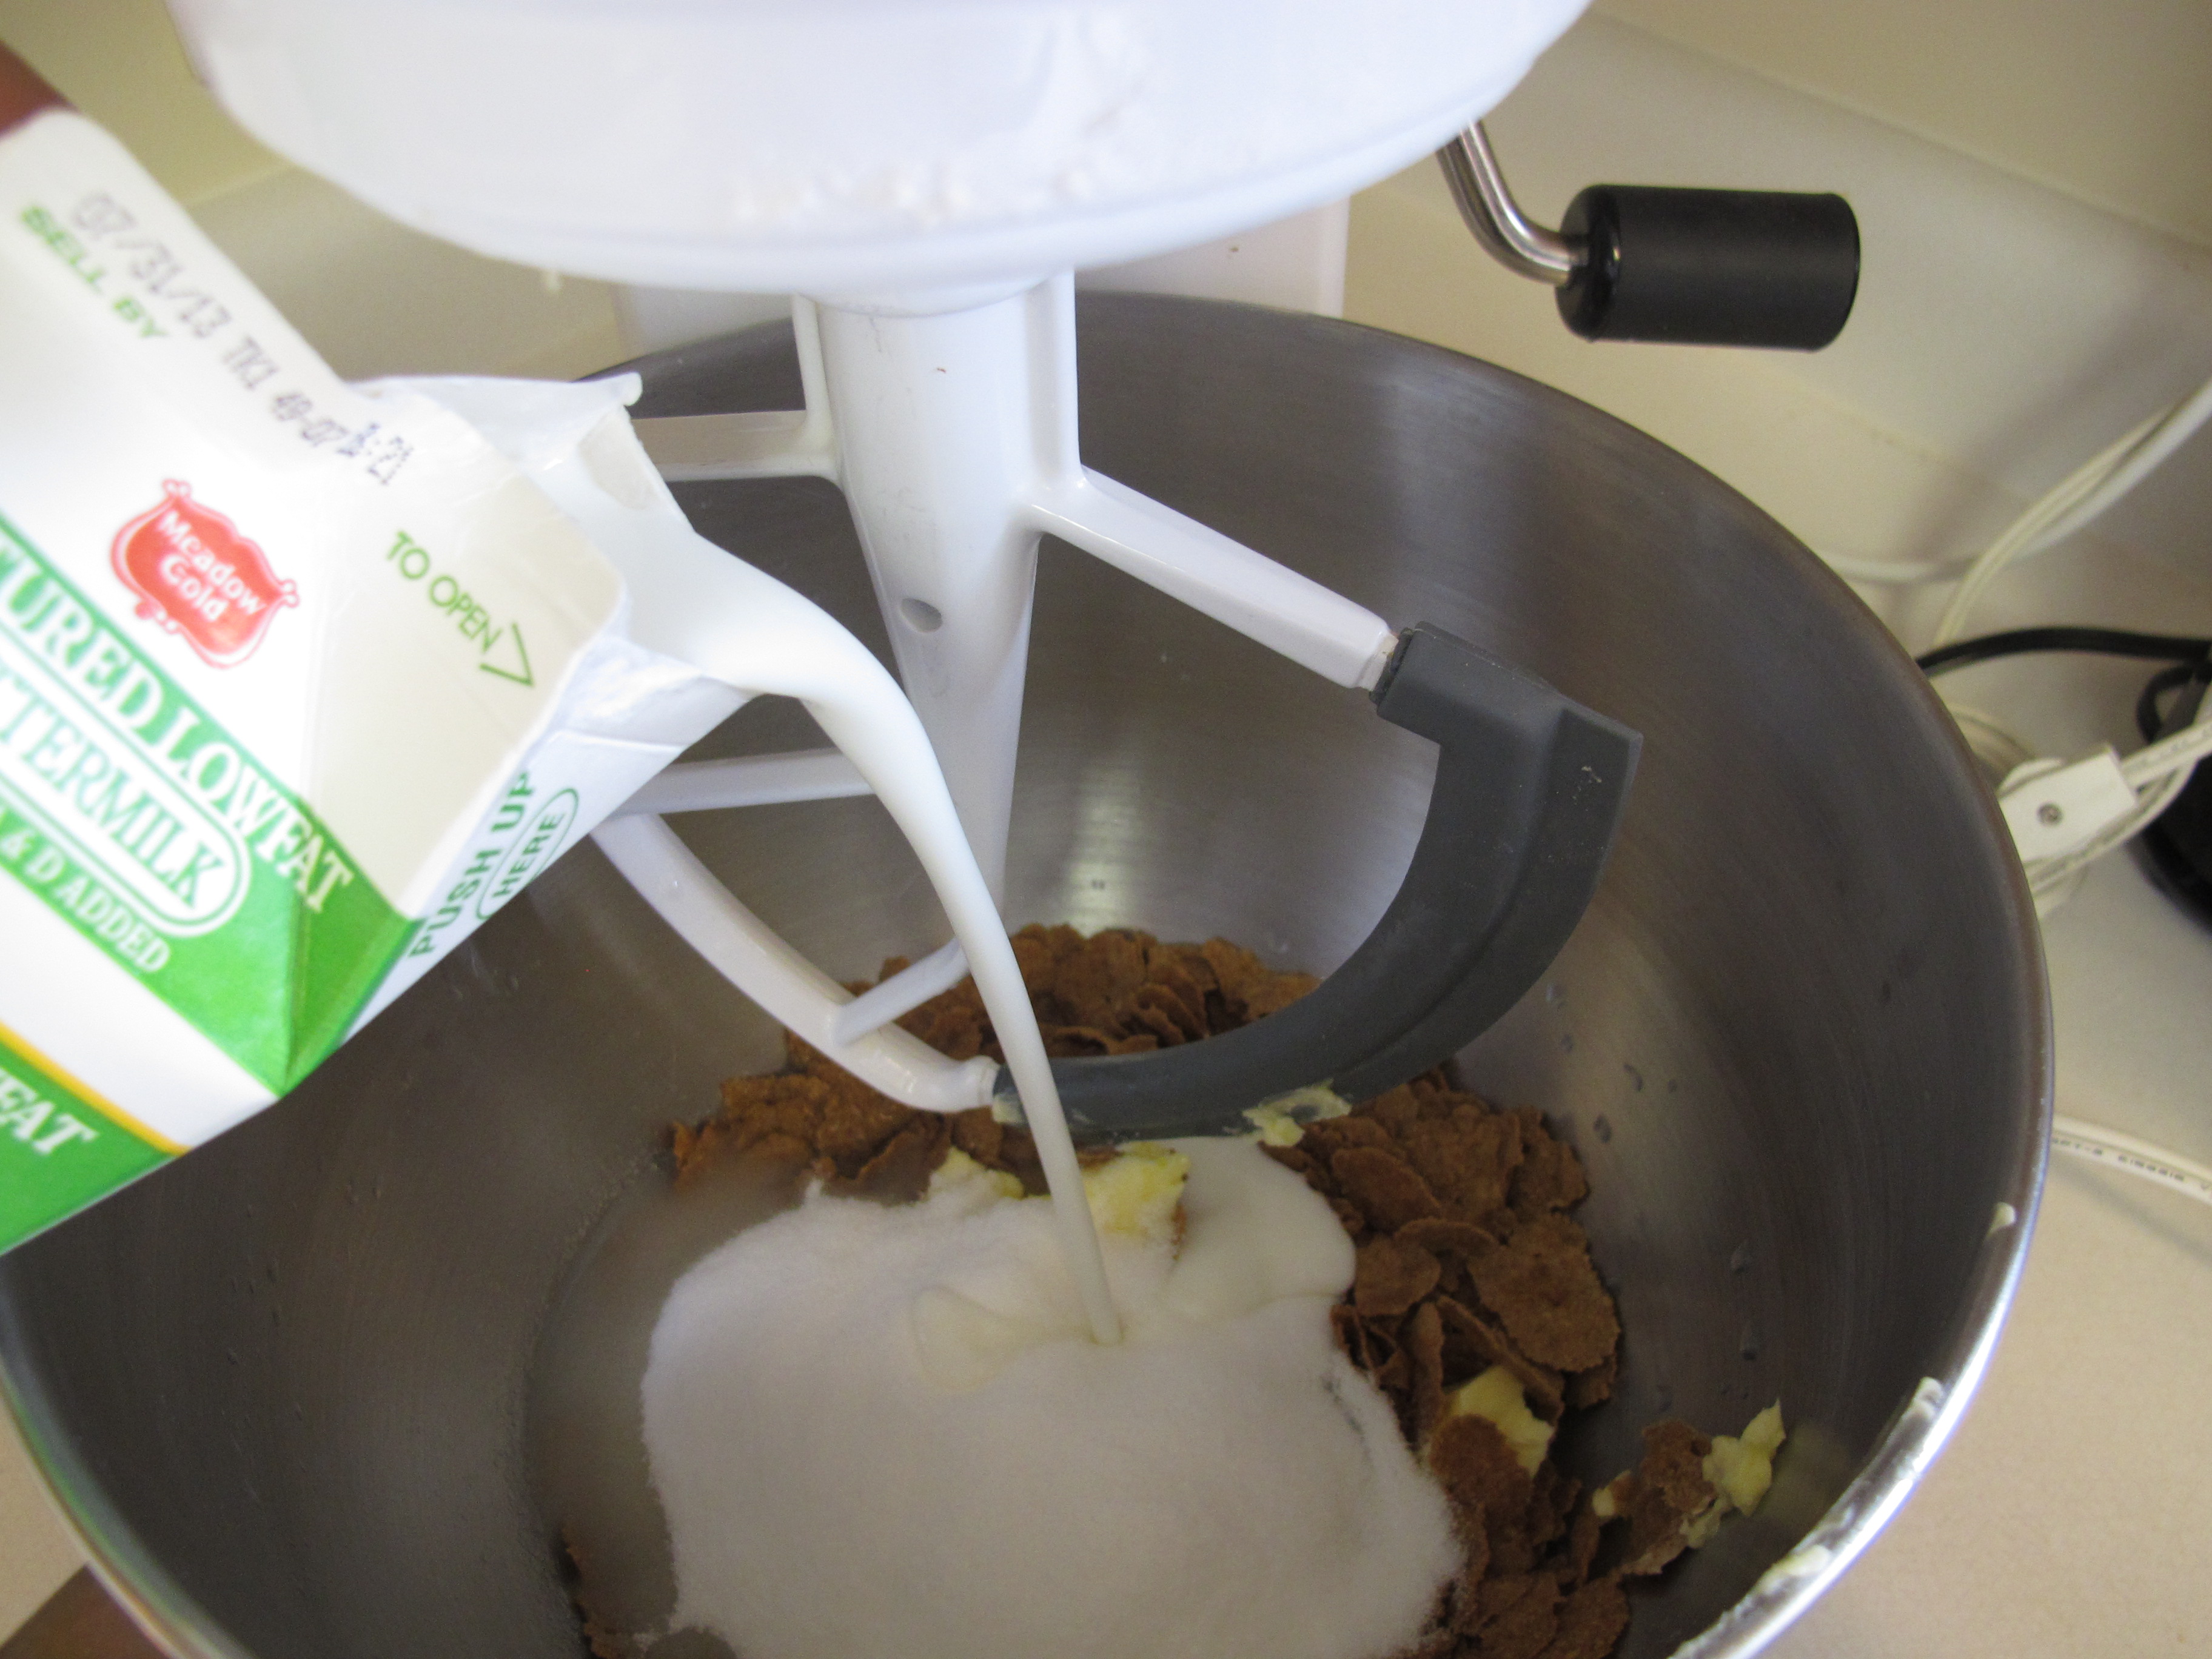
Bran Muffins
These muffins will make a delicious addition to your breakfast each morning. The batter can be stored in the refrigerator up to 6 weeks so you can make them fresh each day. If you make the entire recipe – they freeze very well too.

The recipe calls for 100% Bran Flakes and Raisin Bran. We do not like raisins in our muffins so I chose to just use all 100% bran. If you like raisins, you will love using Raisin Bran.
2 cups 100% All Bran Flakes
1 cup 50% bran cereal (such as Raisin Bran). If you don’t like raisins, just use all Bran Flakes.
1/2 cup shortening
1 cup boiling water
A note about using shortening, butter, honey or any other ingredient that sticks to the measuring cup:
Run hot water over the measuring cup before measuring ingredient and it will slide right out.

Measure cereal into a large bowl. Add shortening. Pour boiling water over this.
1 1/4 cups sugar
2 cups buttermilk *
2 eggs, beaten
Add sugar, buttermilk and eggs.


2 1/2 cups flour
2 1/2 tsp. baking soda
2 tsp. salt
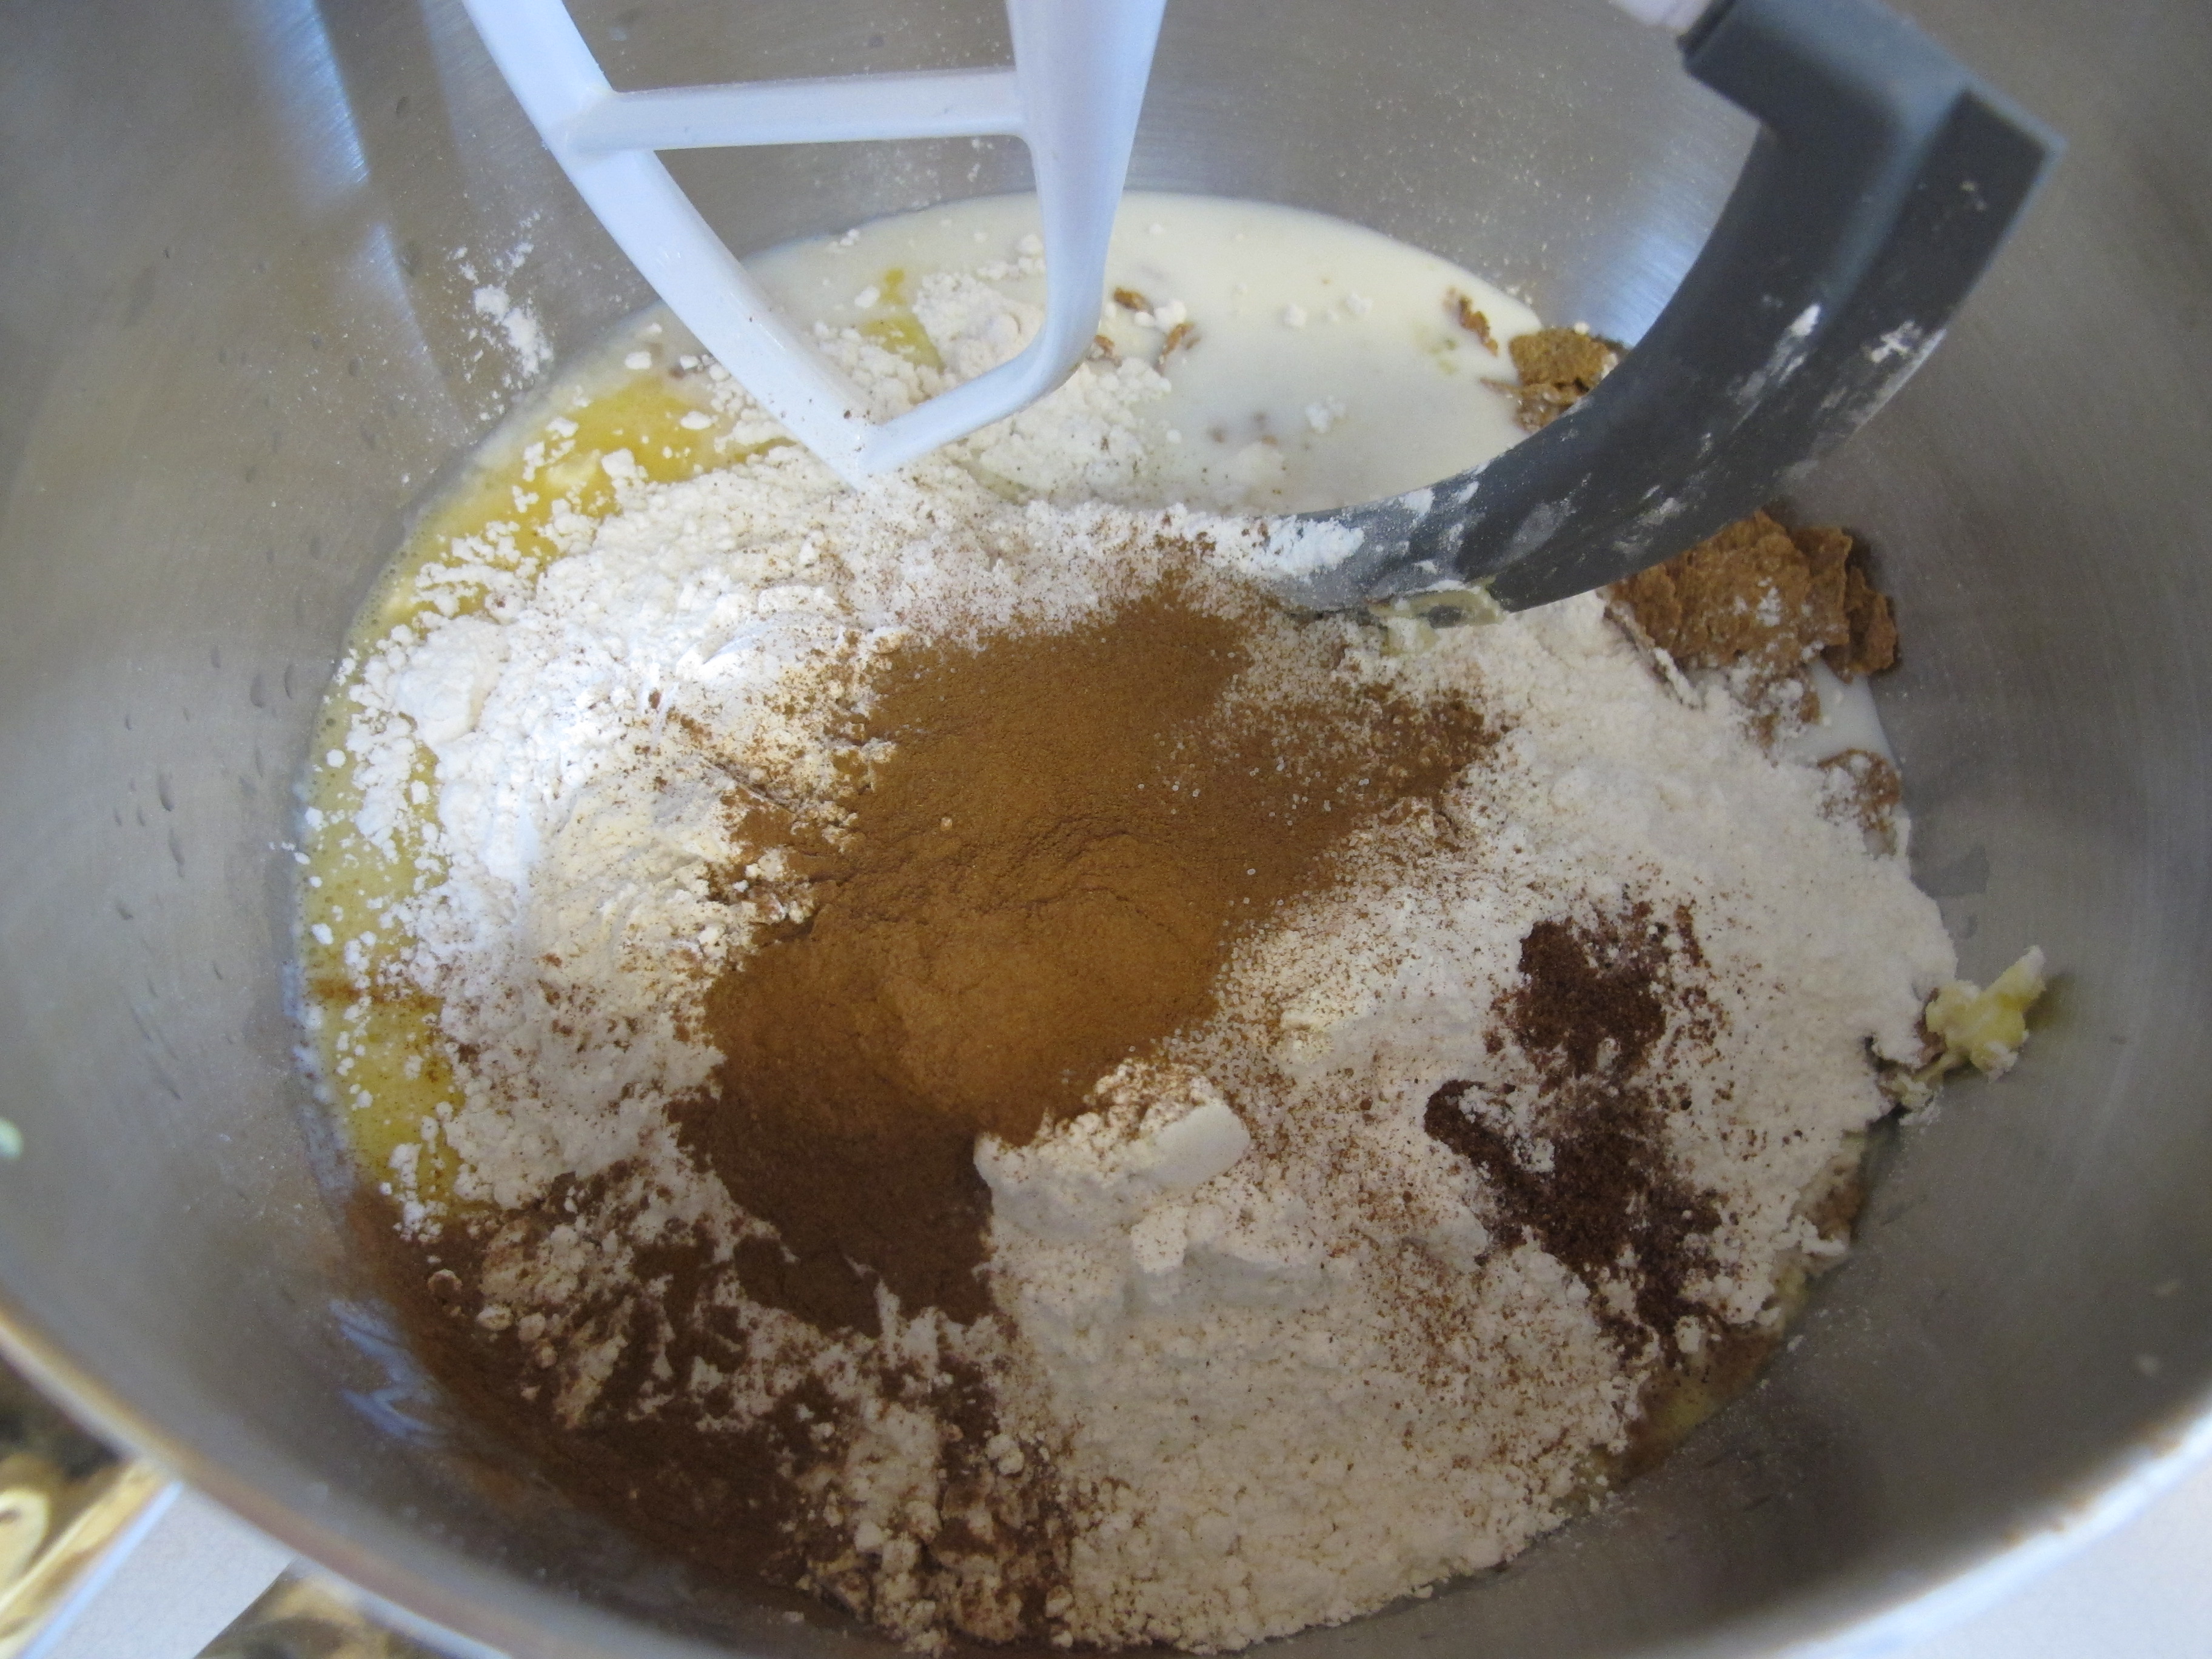
1 1/2 tsp. cinnamon
1/4 tsp. nutmeg
Add all dry ingredients. Blend well.
At this point the batter can be stored in the refrigerator in an air-tight container for up to six weeks.
To bake: Use cupcake papers or spray muffin tins with cooking spray. Fill cup 1/2 full. If you use cupcake papers – just know that if you try to eat these before they are completely cool, the muffin will stick to the paper and you will be very sad because you will lose half your muffin! Once they are cool, this does not happen – so be patient.
")
Bake at 425 degrees for 16 – 17 minutes or until done. Check with a toothpick.
Makes 30 muffins
* If you do not have buttermilk on hand – Mix 2 T. of white vinegar or lemon juice plus enough milk to measure 2 cups. Stir, then let stand for 1-2 minutes.
Food Storage: All listed ingredients can be stored in your pantry, other than the buttermilk and eggs. Use powdered milk, with the vinegar or lemon juice to make the buttermilk and use powdered eggs in place of real eggs.
FULL RECIPE WITHOUT PICTURES —
REFRIGERATOR BRAN MUFFINS
2 cups 100% all bran cereal
1 cup 50% bran cereal (such as raisin bran). If you don’t like raisins, just use bran flakes.
1/2 cup shortening
1 cup boiling water
1 1/4 cups sugar
2 cups buttermilk
2 eggs, beaten
2 1/2 cups flour
2 1/2 tsp. baking soda
2 tsp. salt
1 1/2 tsp. cinnamon
1/4 tsp. nutmeg
Measure cereal into a large bowl. Add shortening. Pour hot water over this.
Add sugar, buttermilk and eggs.
Add flour, soda, salt, cinnamon and nutmeg. Blend well.
At this point the batter can be stored in the refrigerator in an air-tight container for up to six weeks.
To bake: spray muffin tins with cooking spray or use cupcake papers. Fill cup 1/2 full. If you use cupcake papers – just know that if you try to eat these before they are completely cool, the muffin will stick to the paper and you will be very sad because you will lose half your muffin! Once they are cool, this does not happen so be patient.
Bake at 425 degrees for 17 minutes or until done. Check with a toothpick.
Makes 30 muffins
* If you do not have buttermilk on hand – Mix 2 T. of white vinegar or lemon juice plus enough milk to measure 2 cups. Stir, then let stand for 1-2 minutes.
Food Storage: All listed ingredients can be stored in your pantry, other than the buttermilk and eggs. Use powdered milk, with the vinegar or lemon juice to make the buttermilk and use powdered eggs in place of real eggs.
Crunchy Pepper Jack Chicken
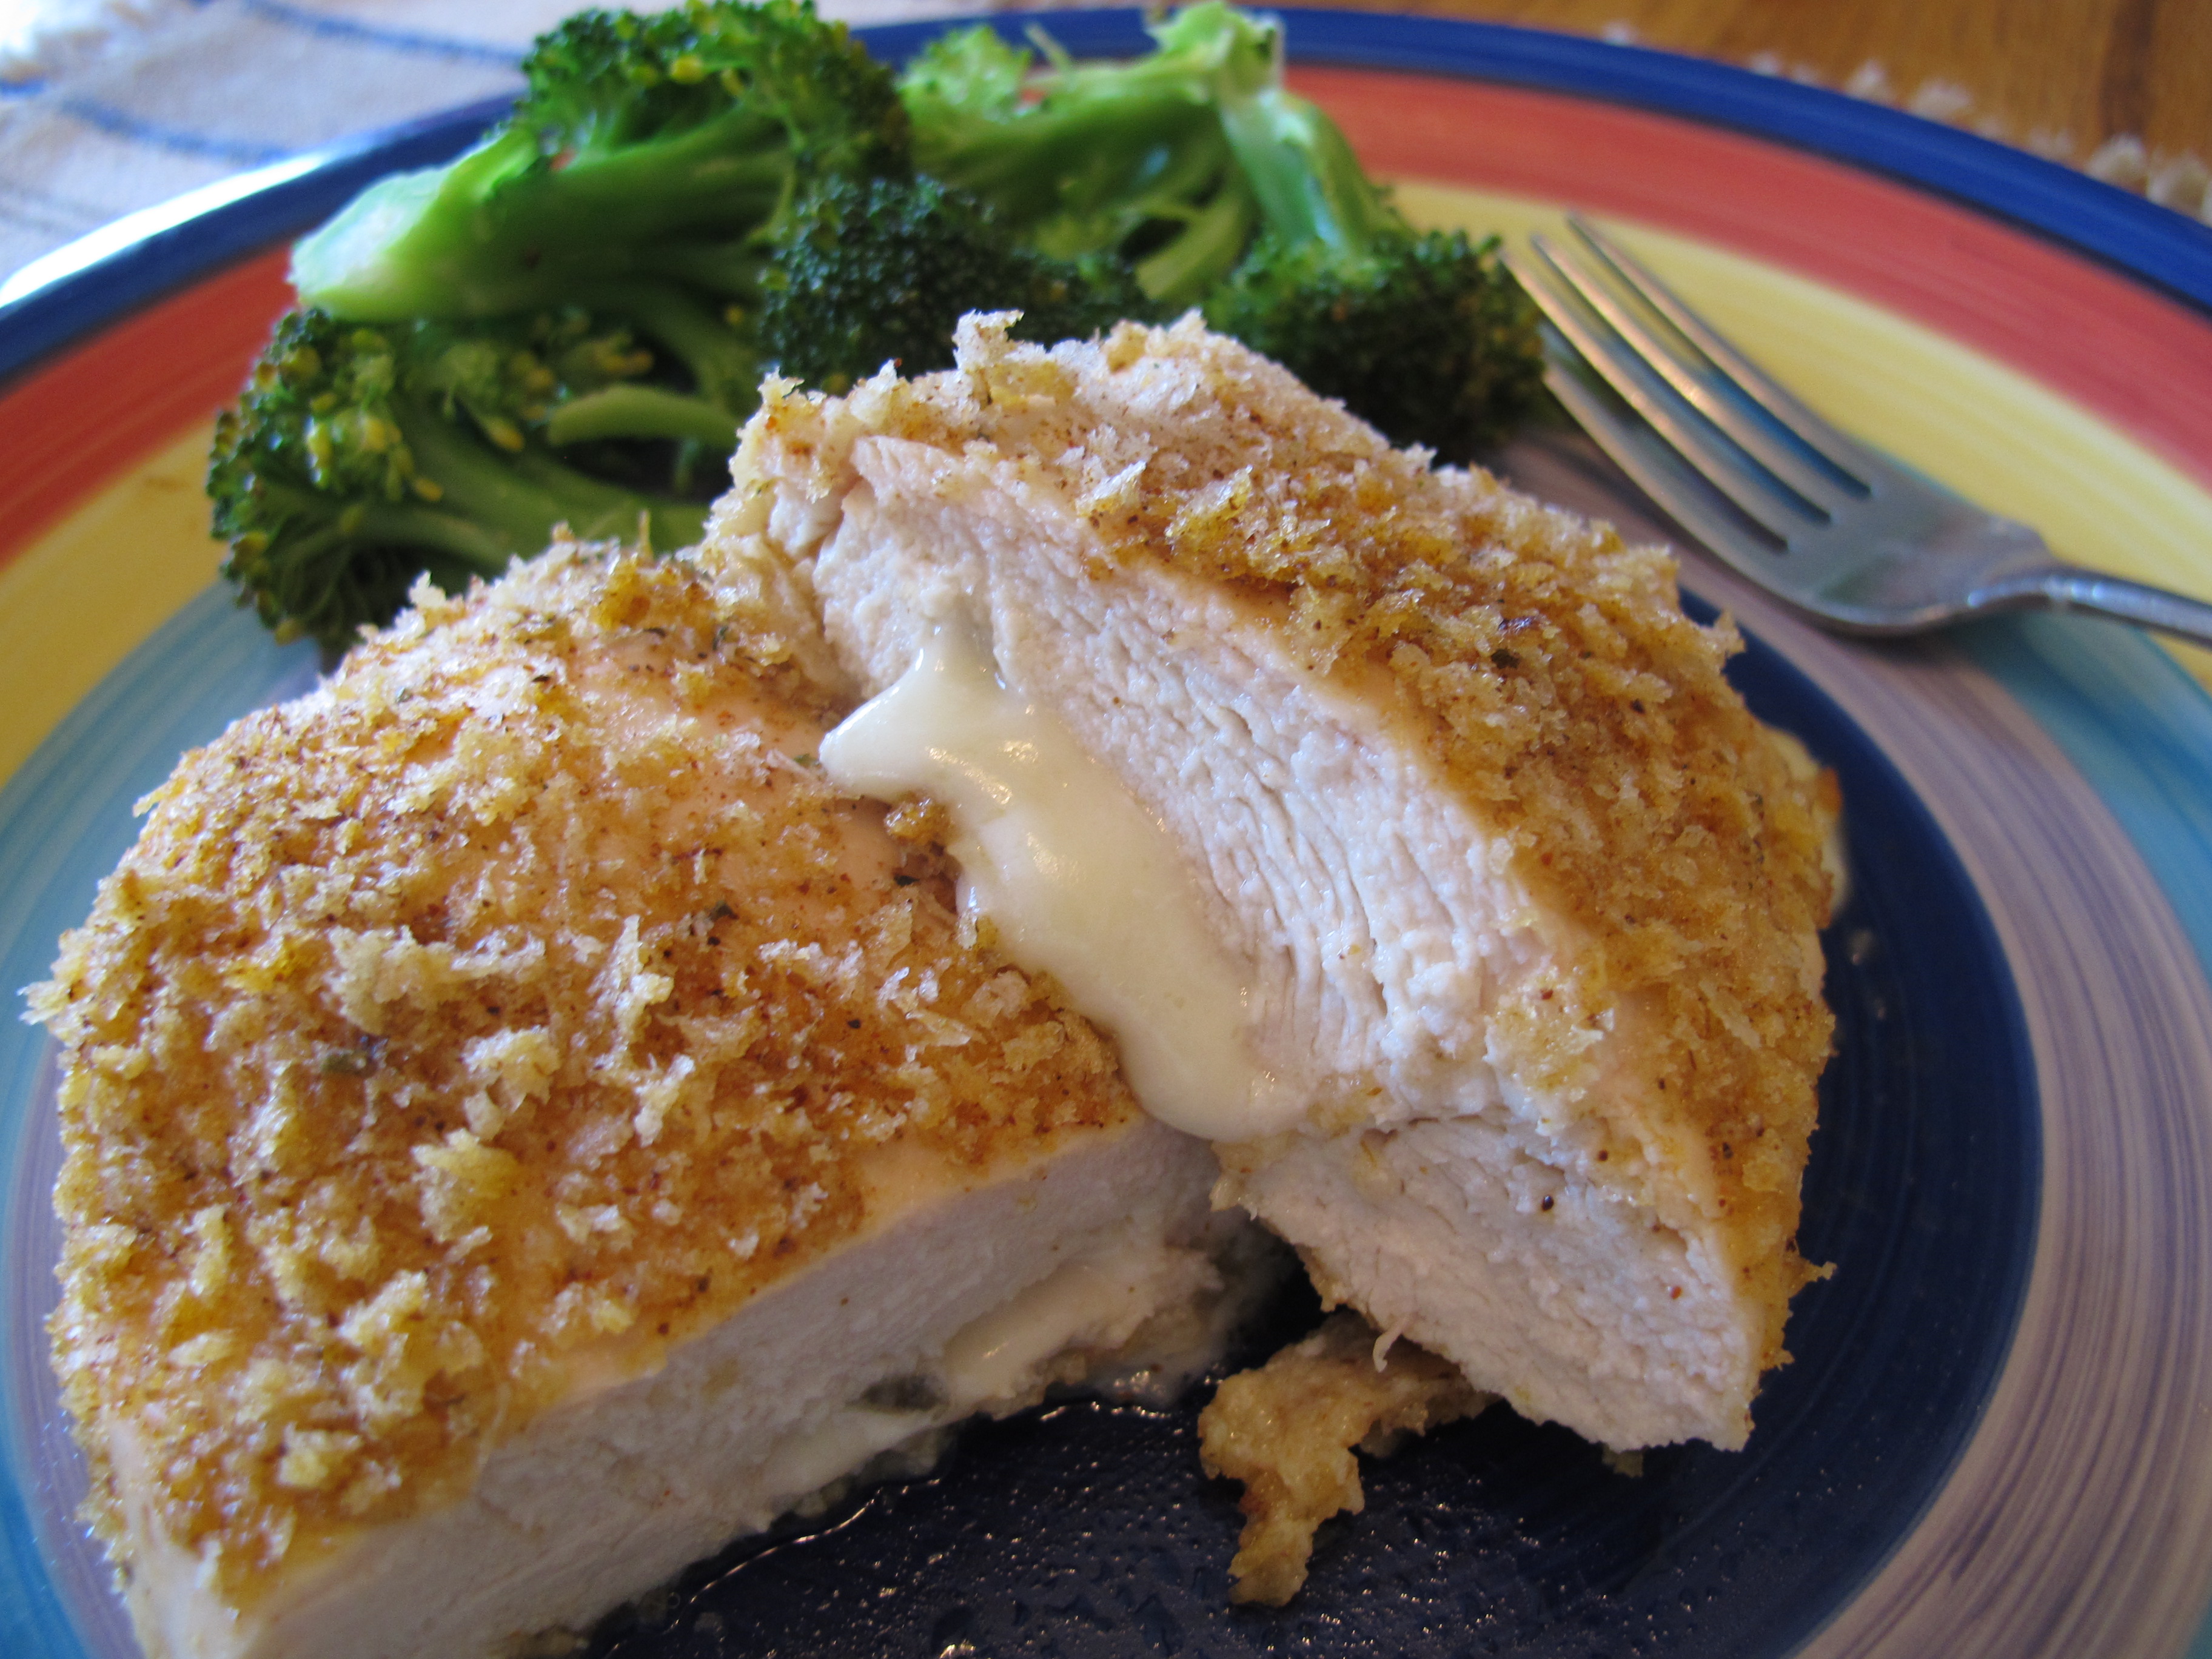
With it’s crispy outside coating and creamy, yet spicy filling, this chicken is delicious. Serve with sliced avocado or guacamole.
(Pictures show the recipe cut in half)
Preheat oven to 375 degrees.
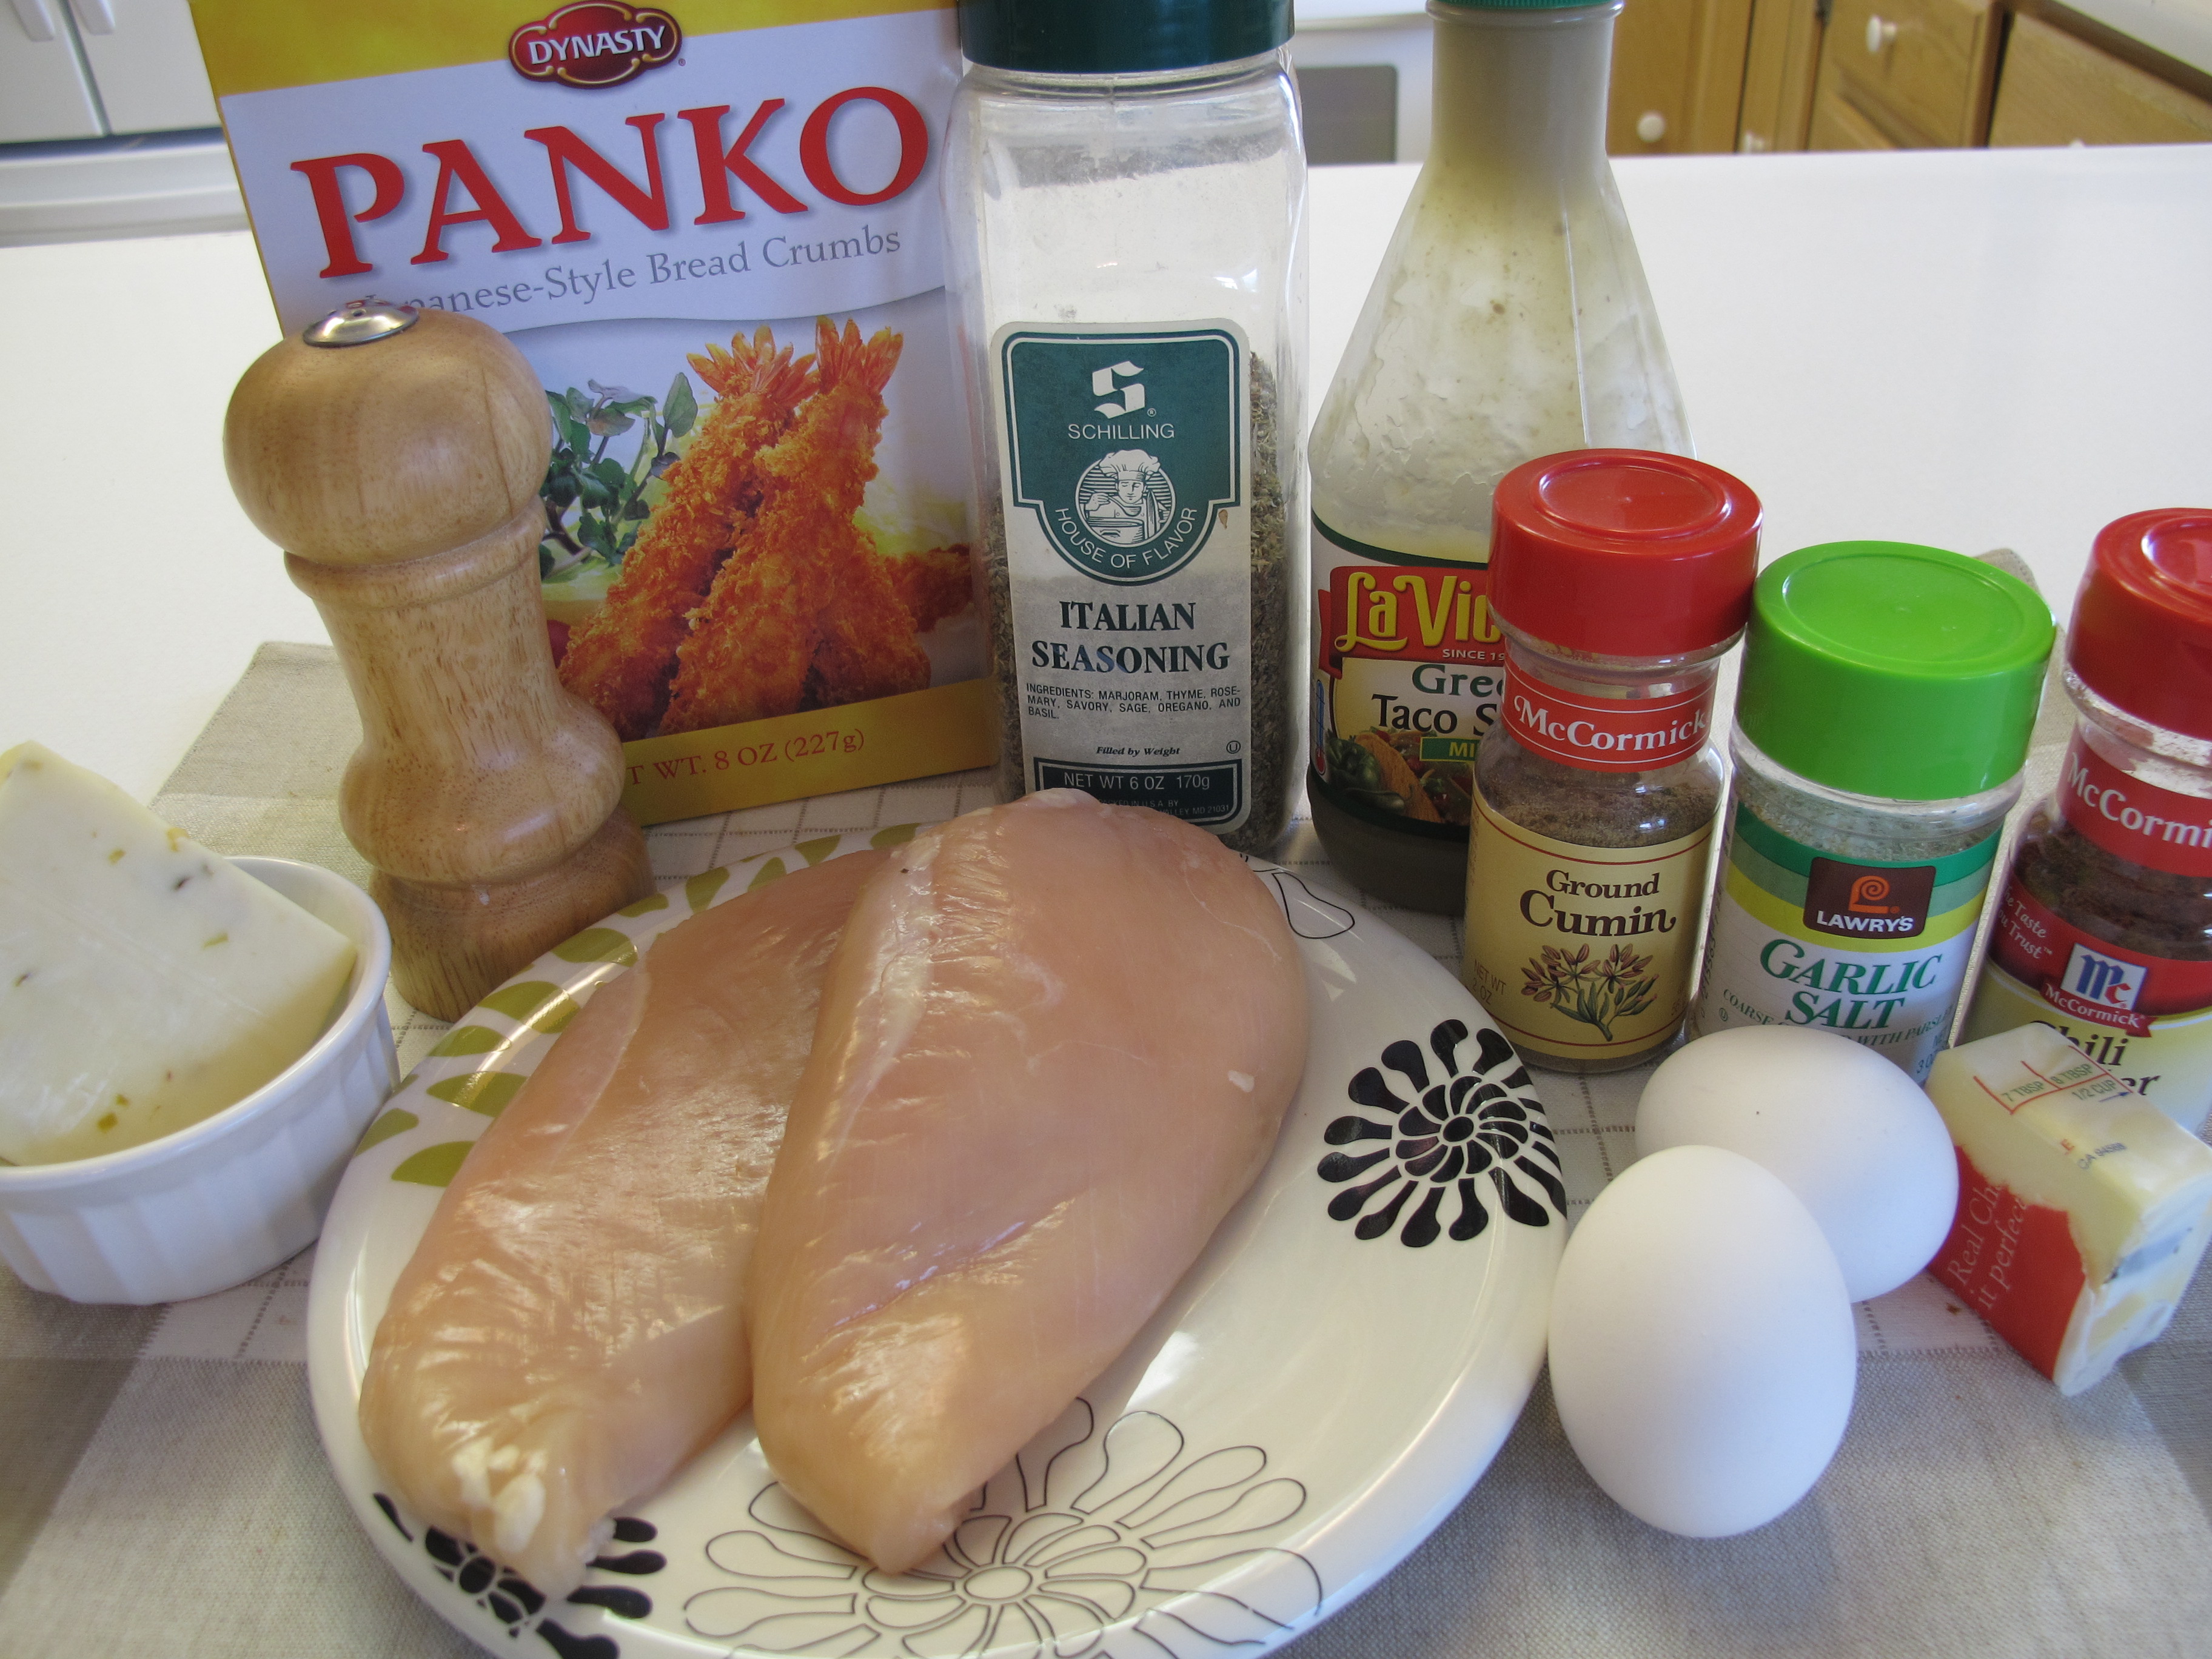
1/4 cup Brummel and Brown butter (not shown in the picture)
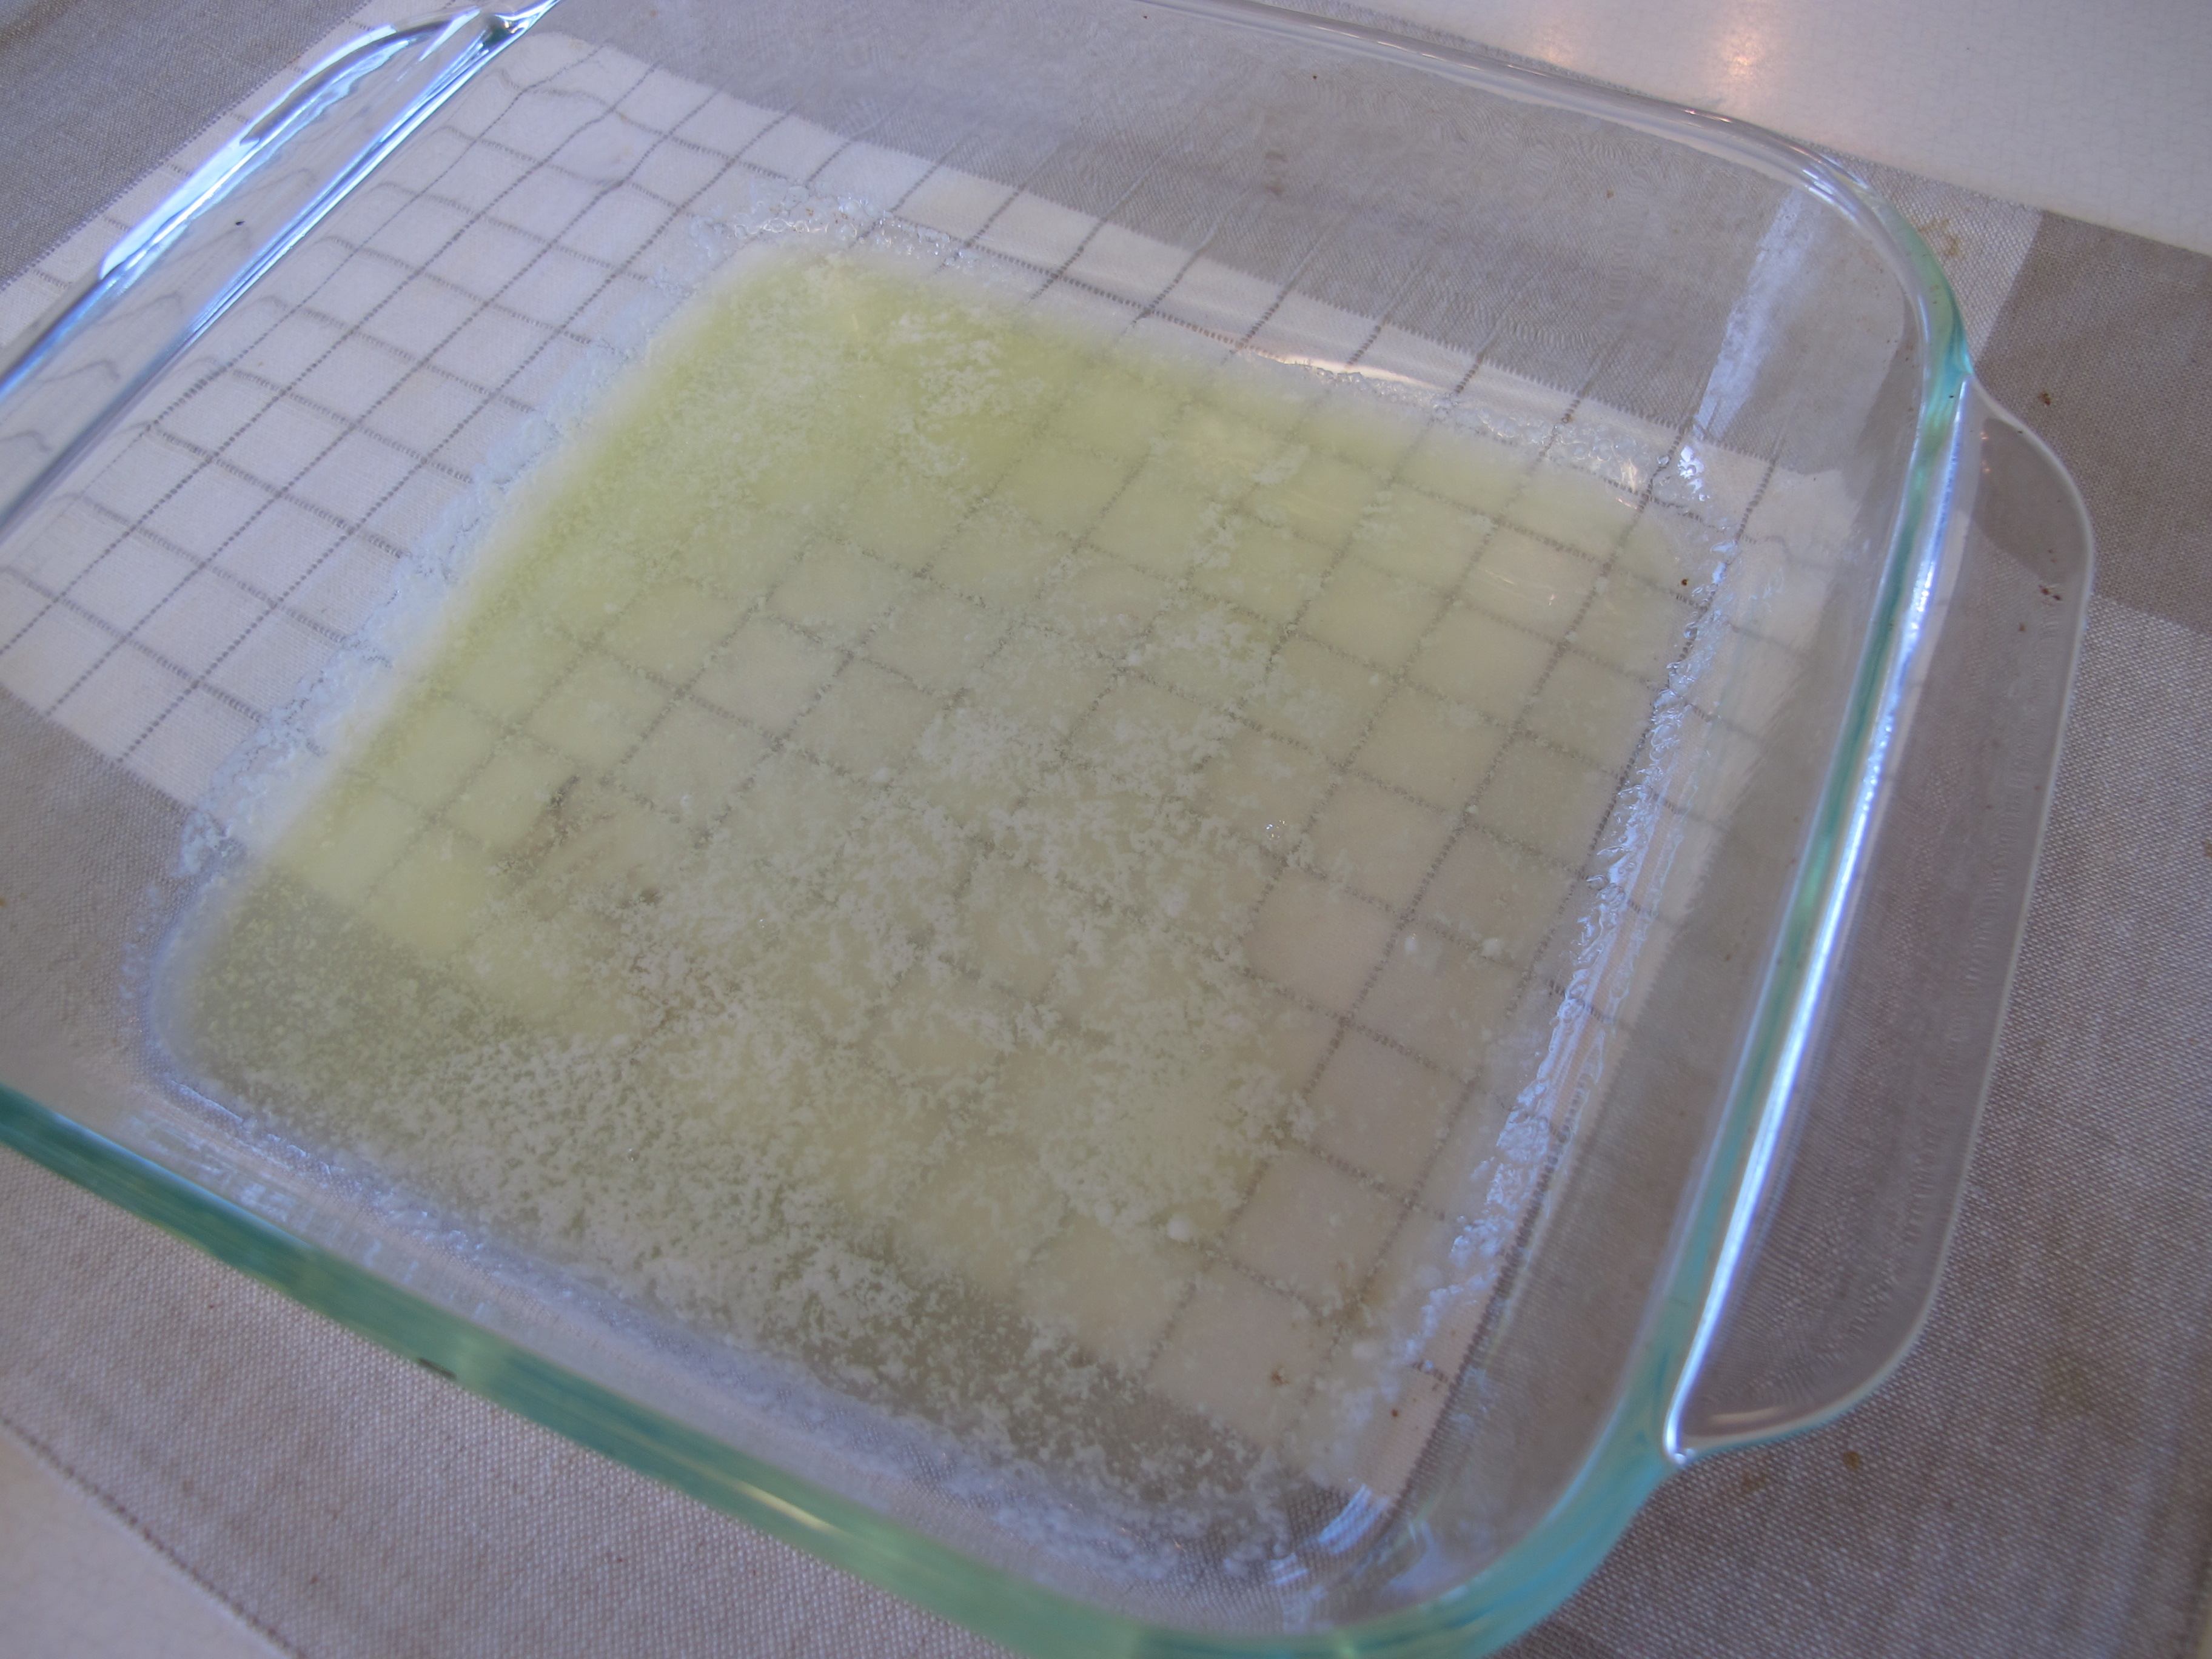
Place 1/4 cup butter in a 9 x 13 baking dish in the microwave and heat until butter is melted. Set aside.
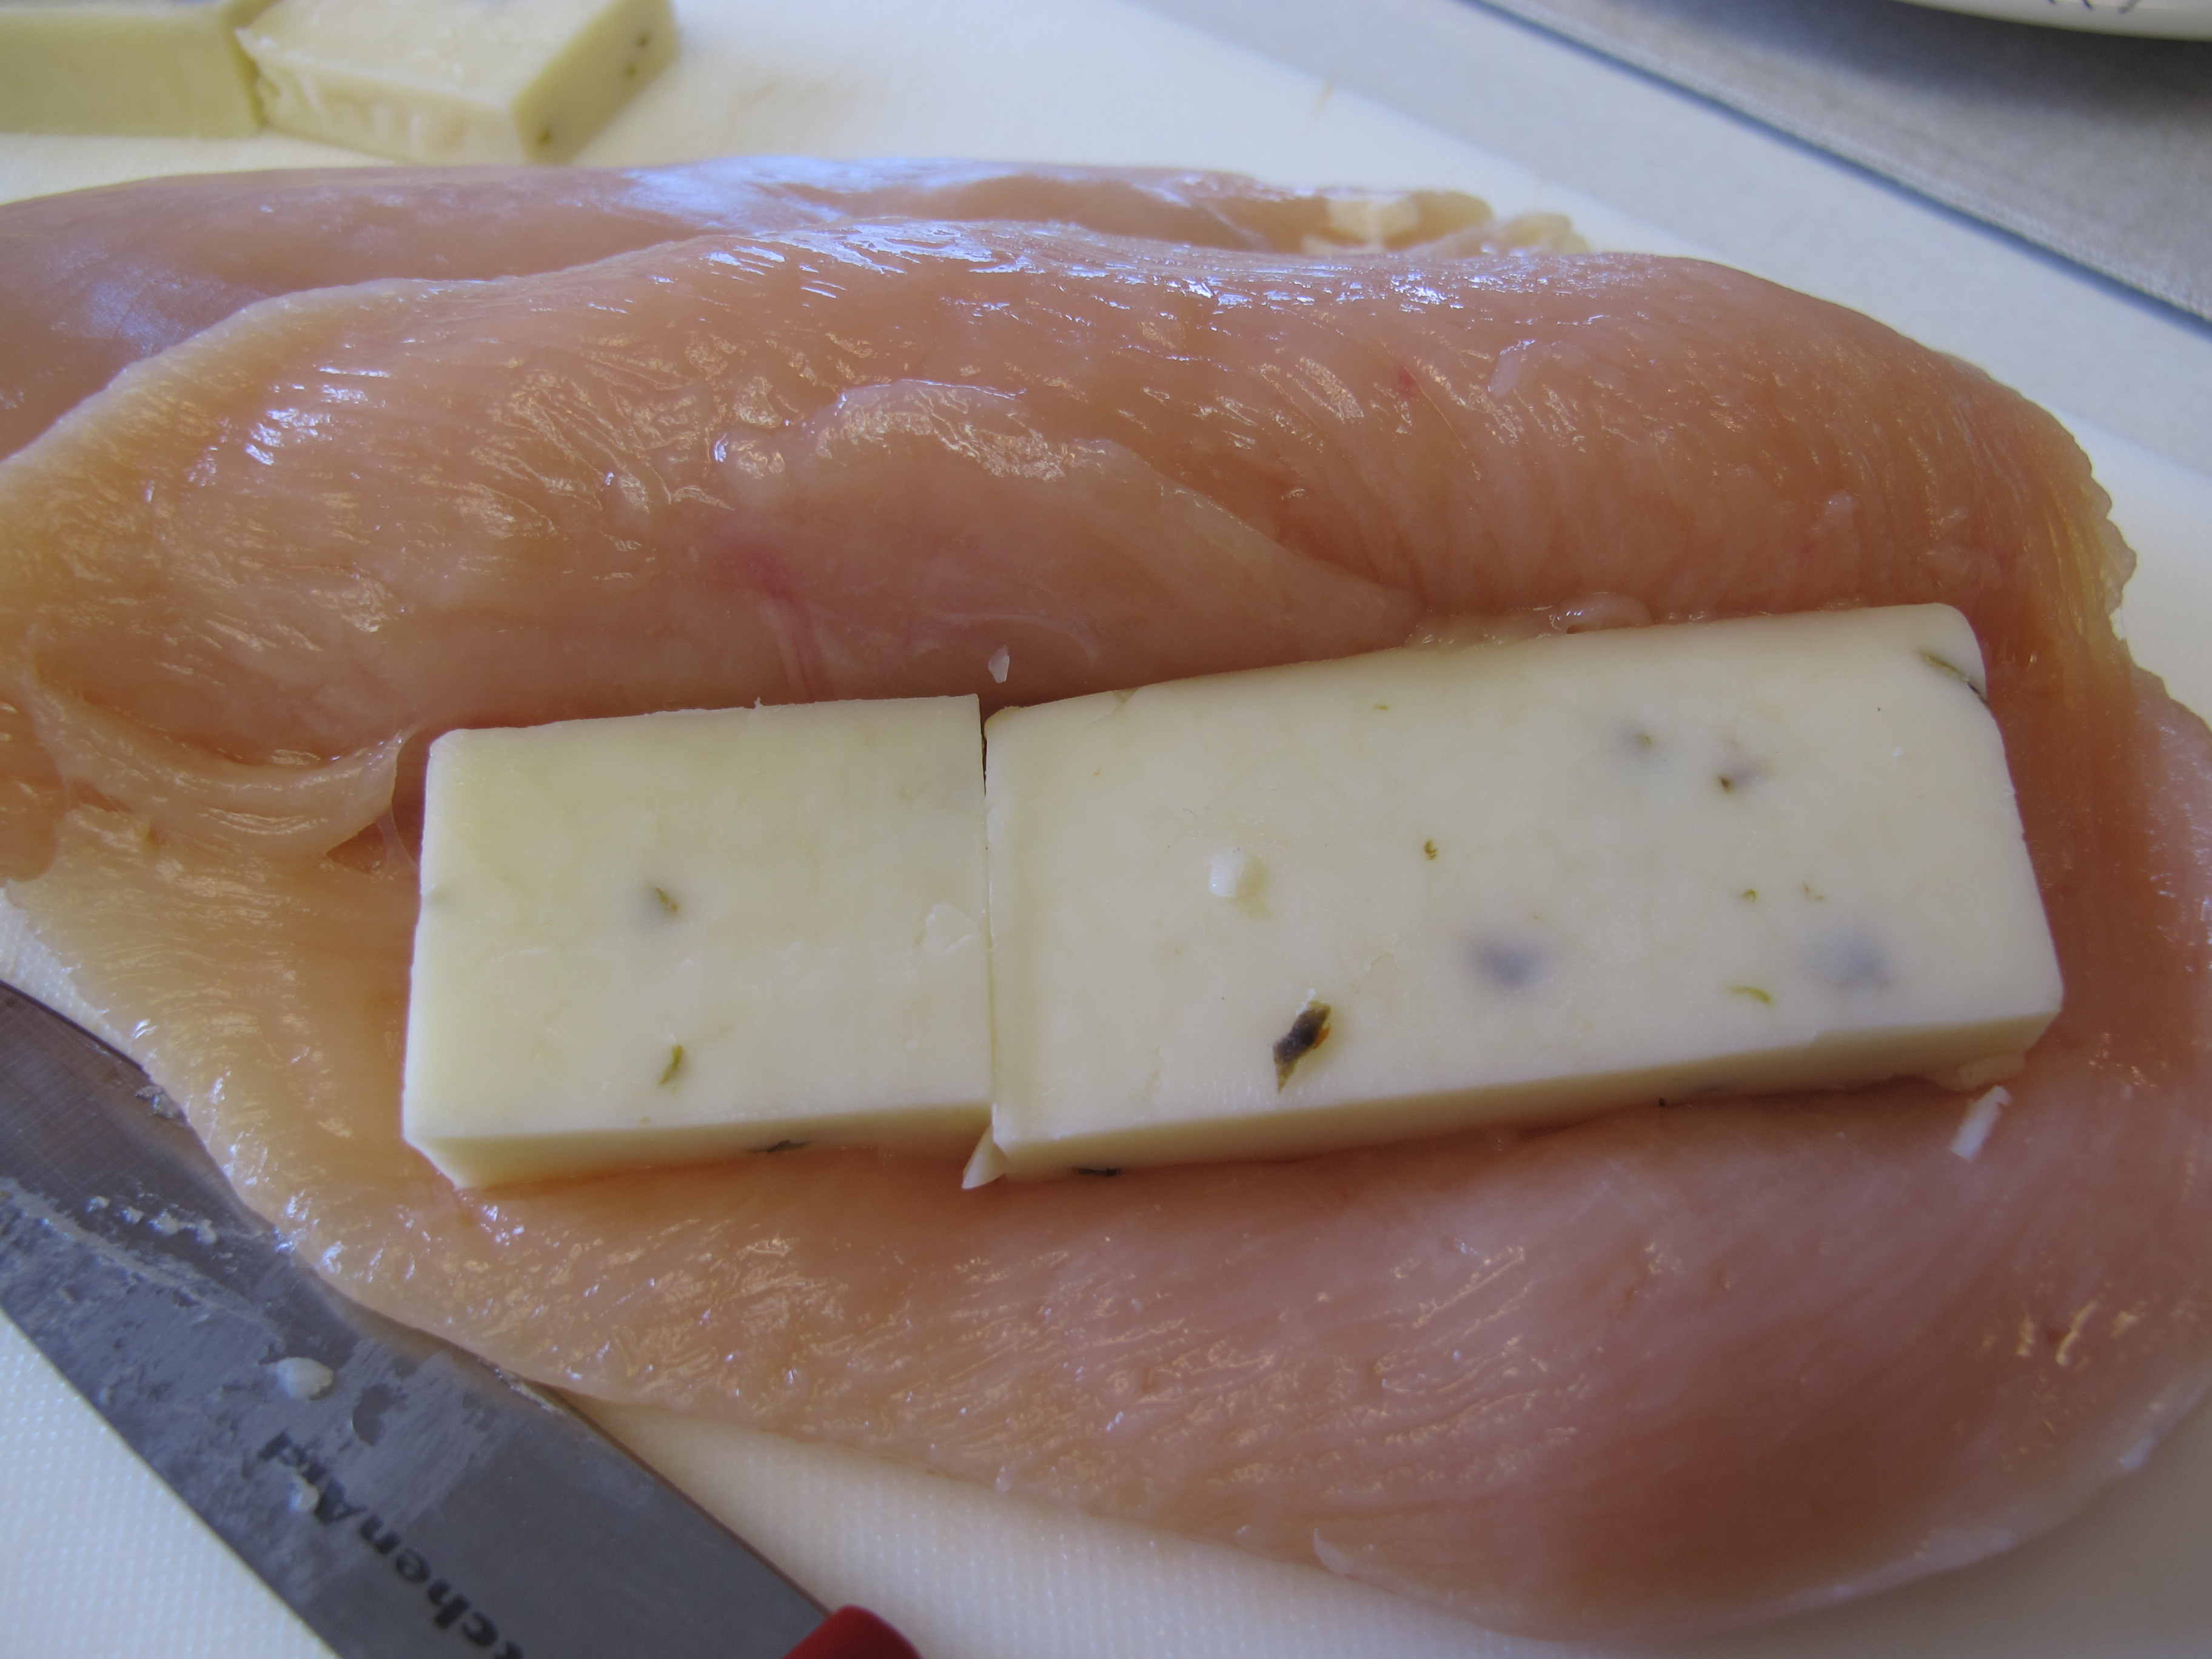
10 oz. Pepper Jack cheese (block)
6 boneless, skinless chicken breasts
Cut Pepper Jack cheese into 6 equal pieces (measuring about 3/8″ x 4″)
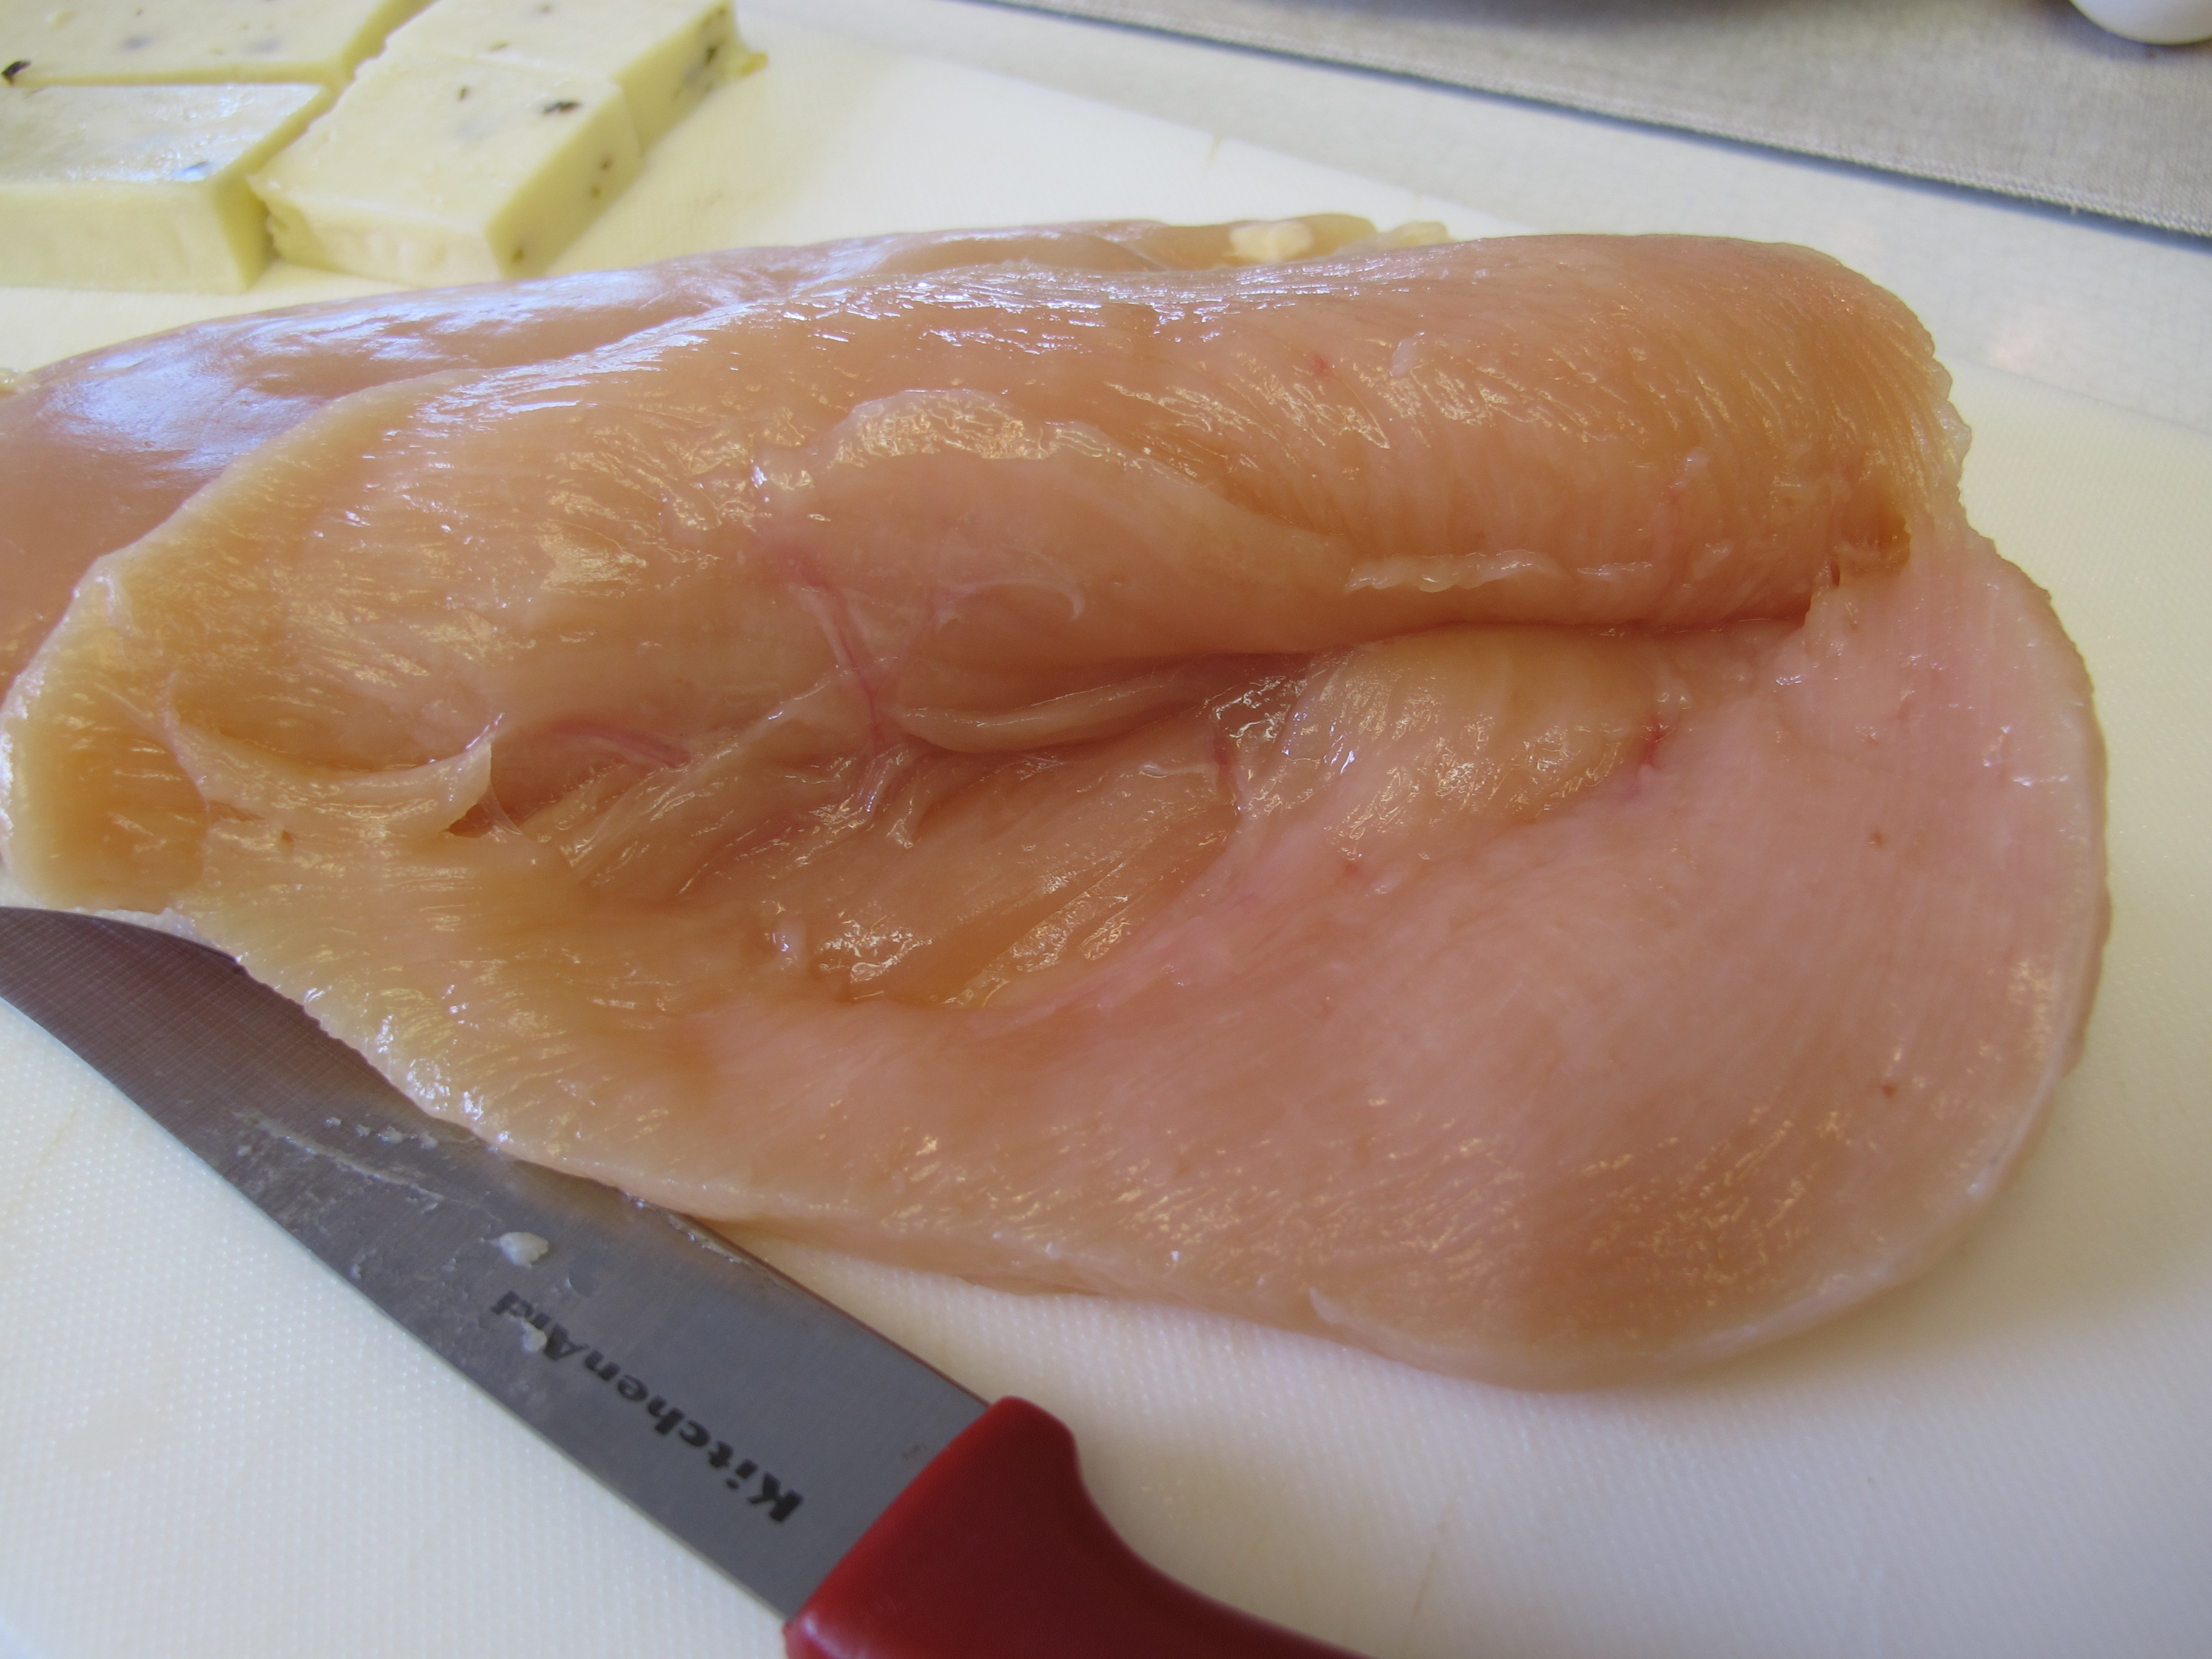
Cut a horizontal slit into the side of each chicken breast – don’t cut all the way through.
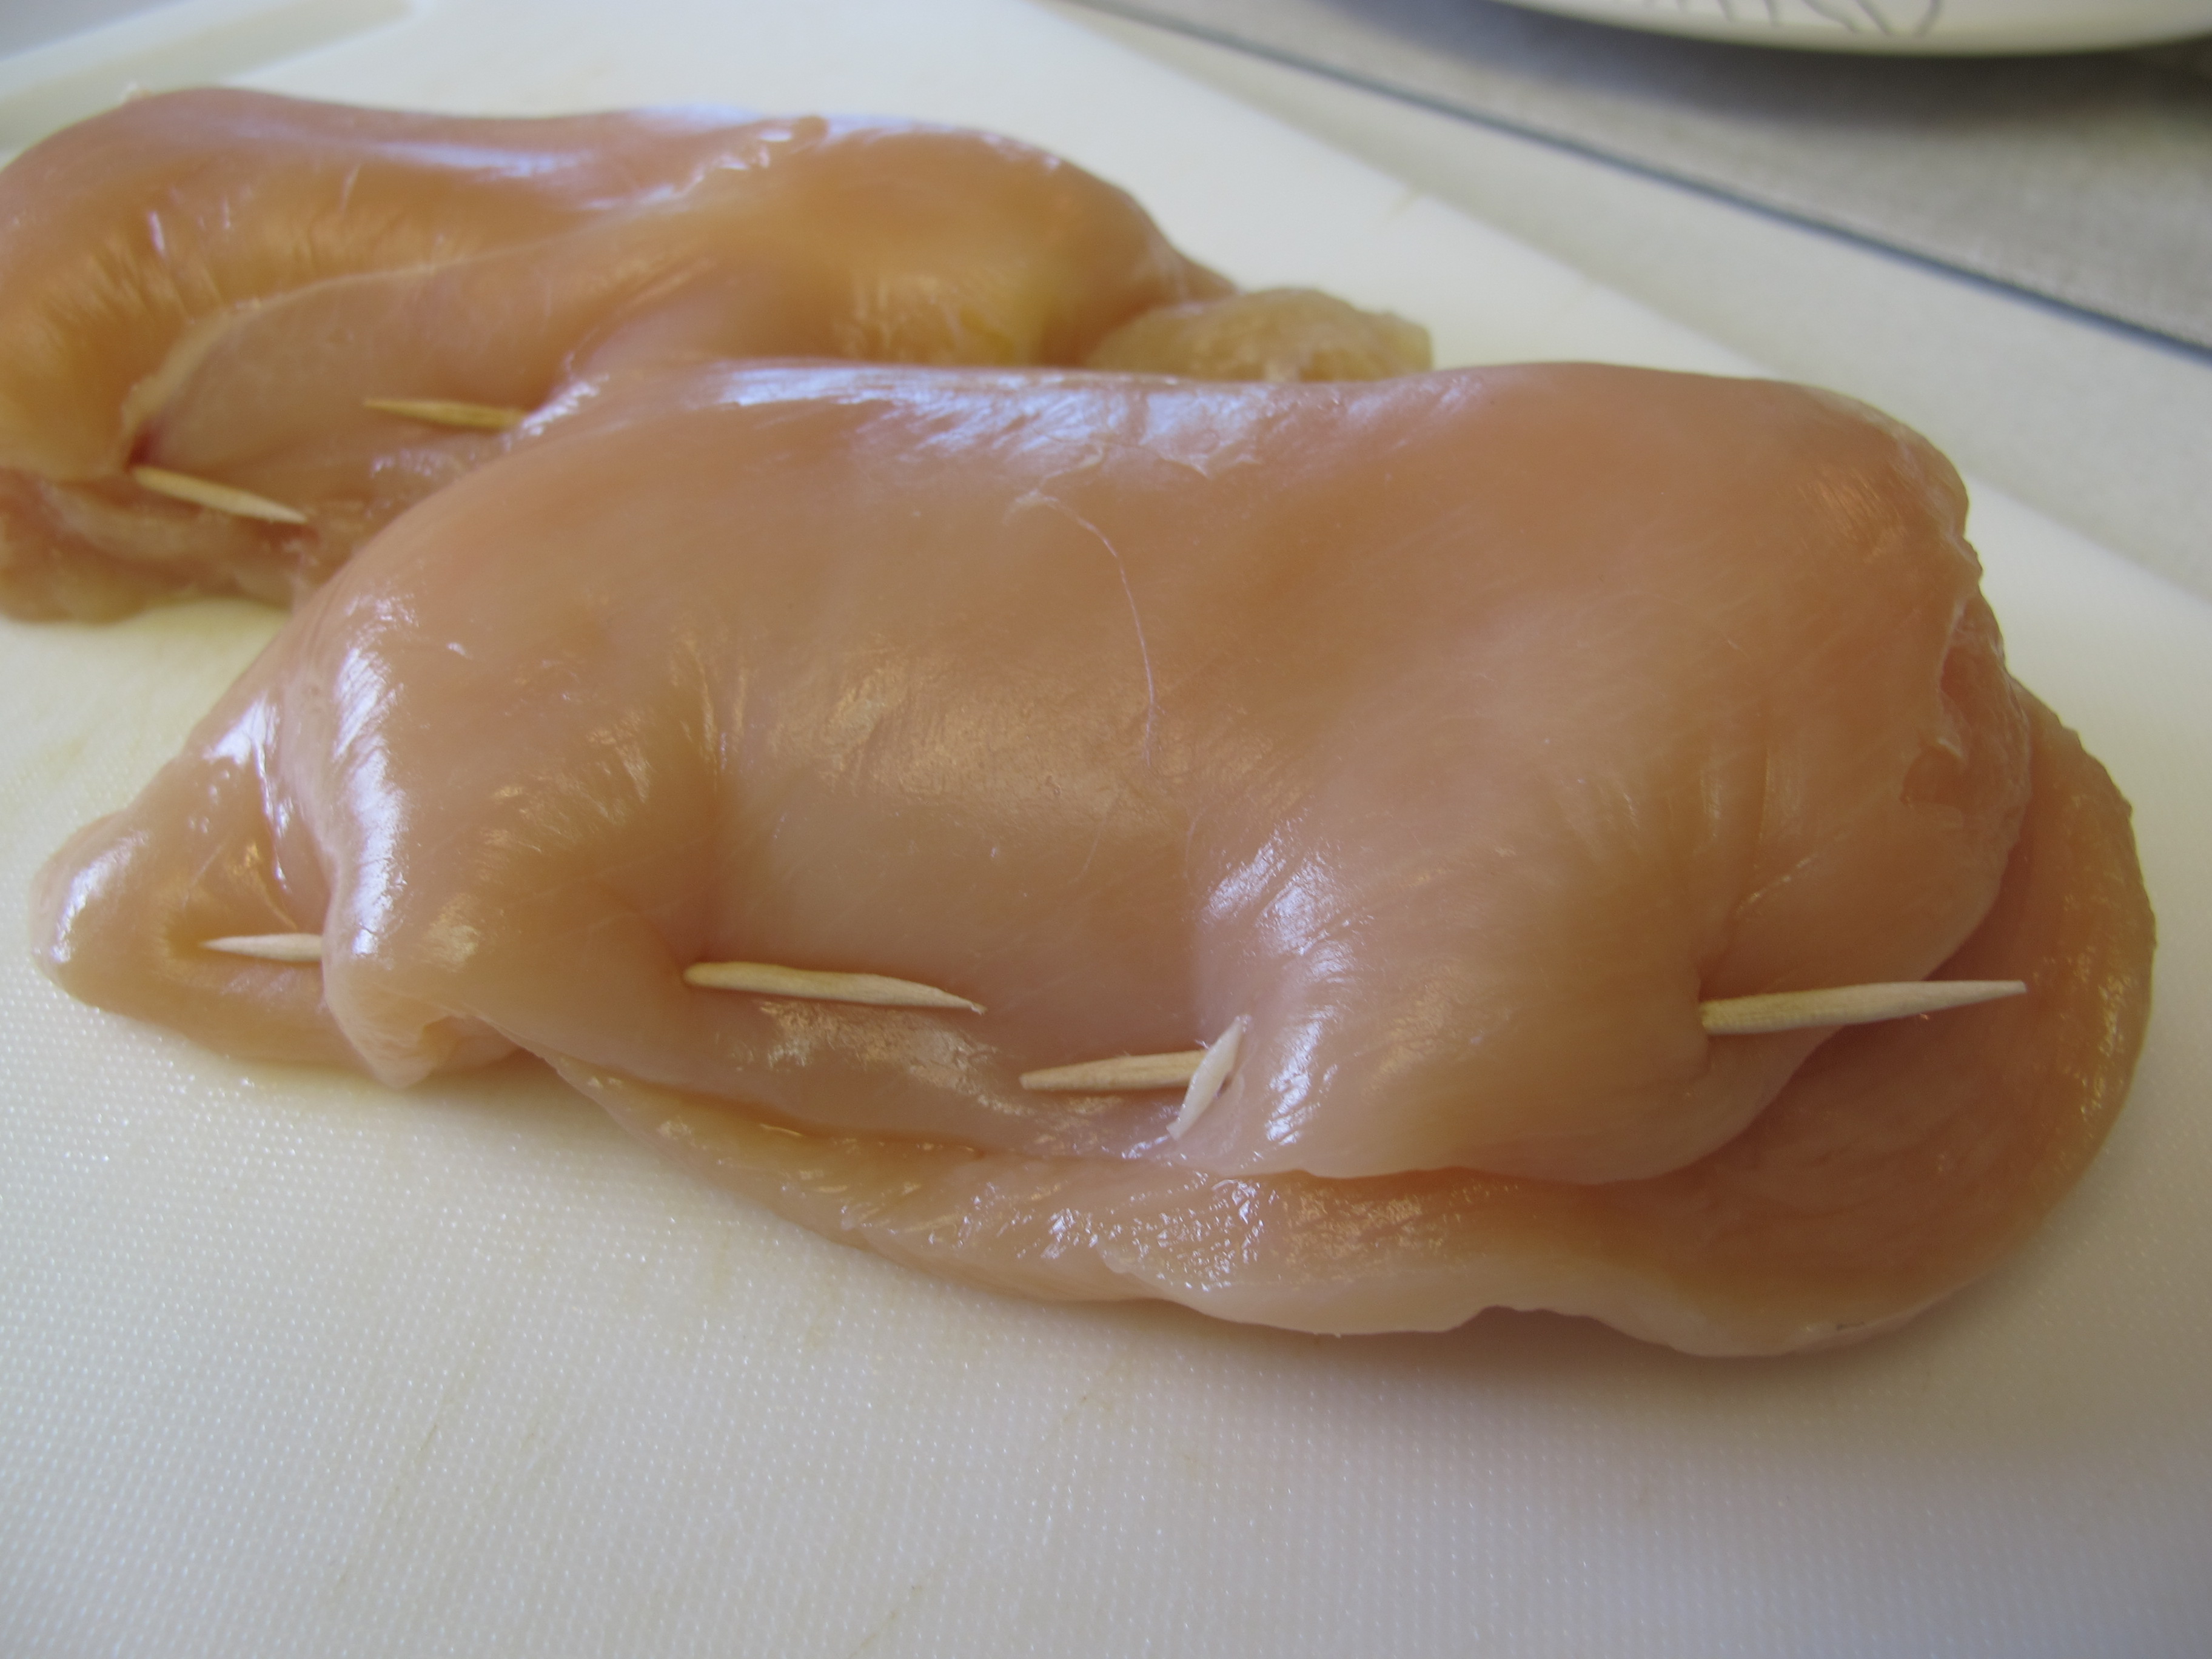
Place one piece of cheese in the pocket of each chicken breast.
To secure the cheese in the pocket, use 2-3 wooden toothpicks.
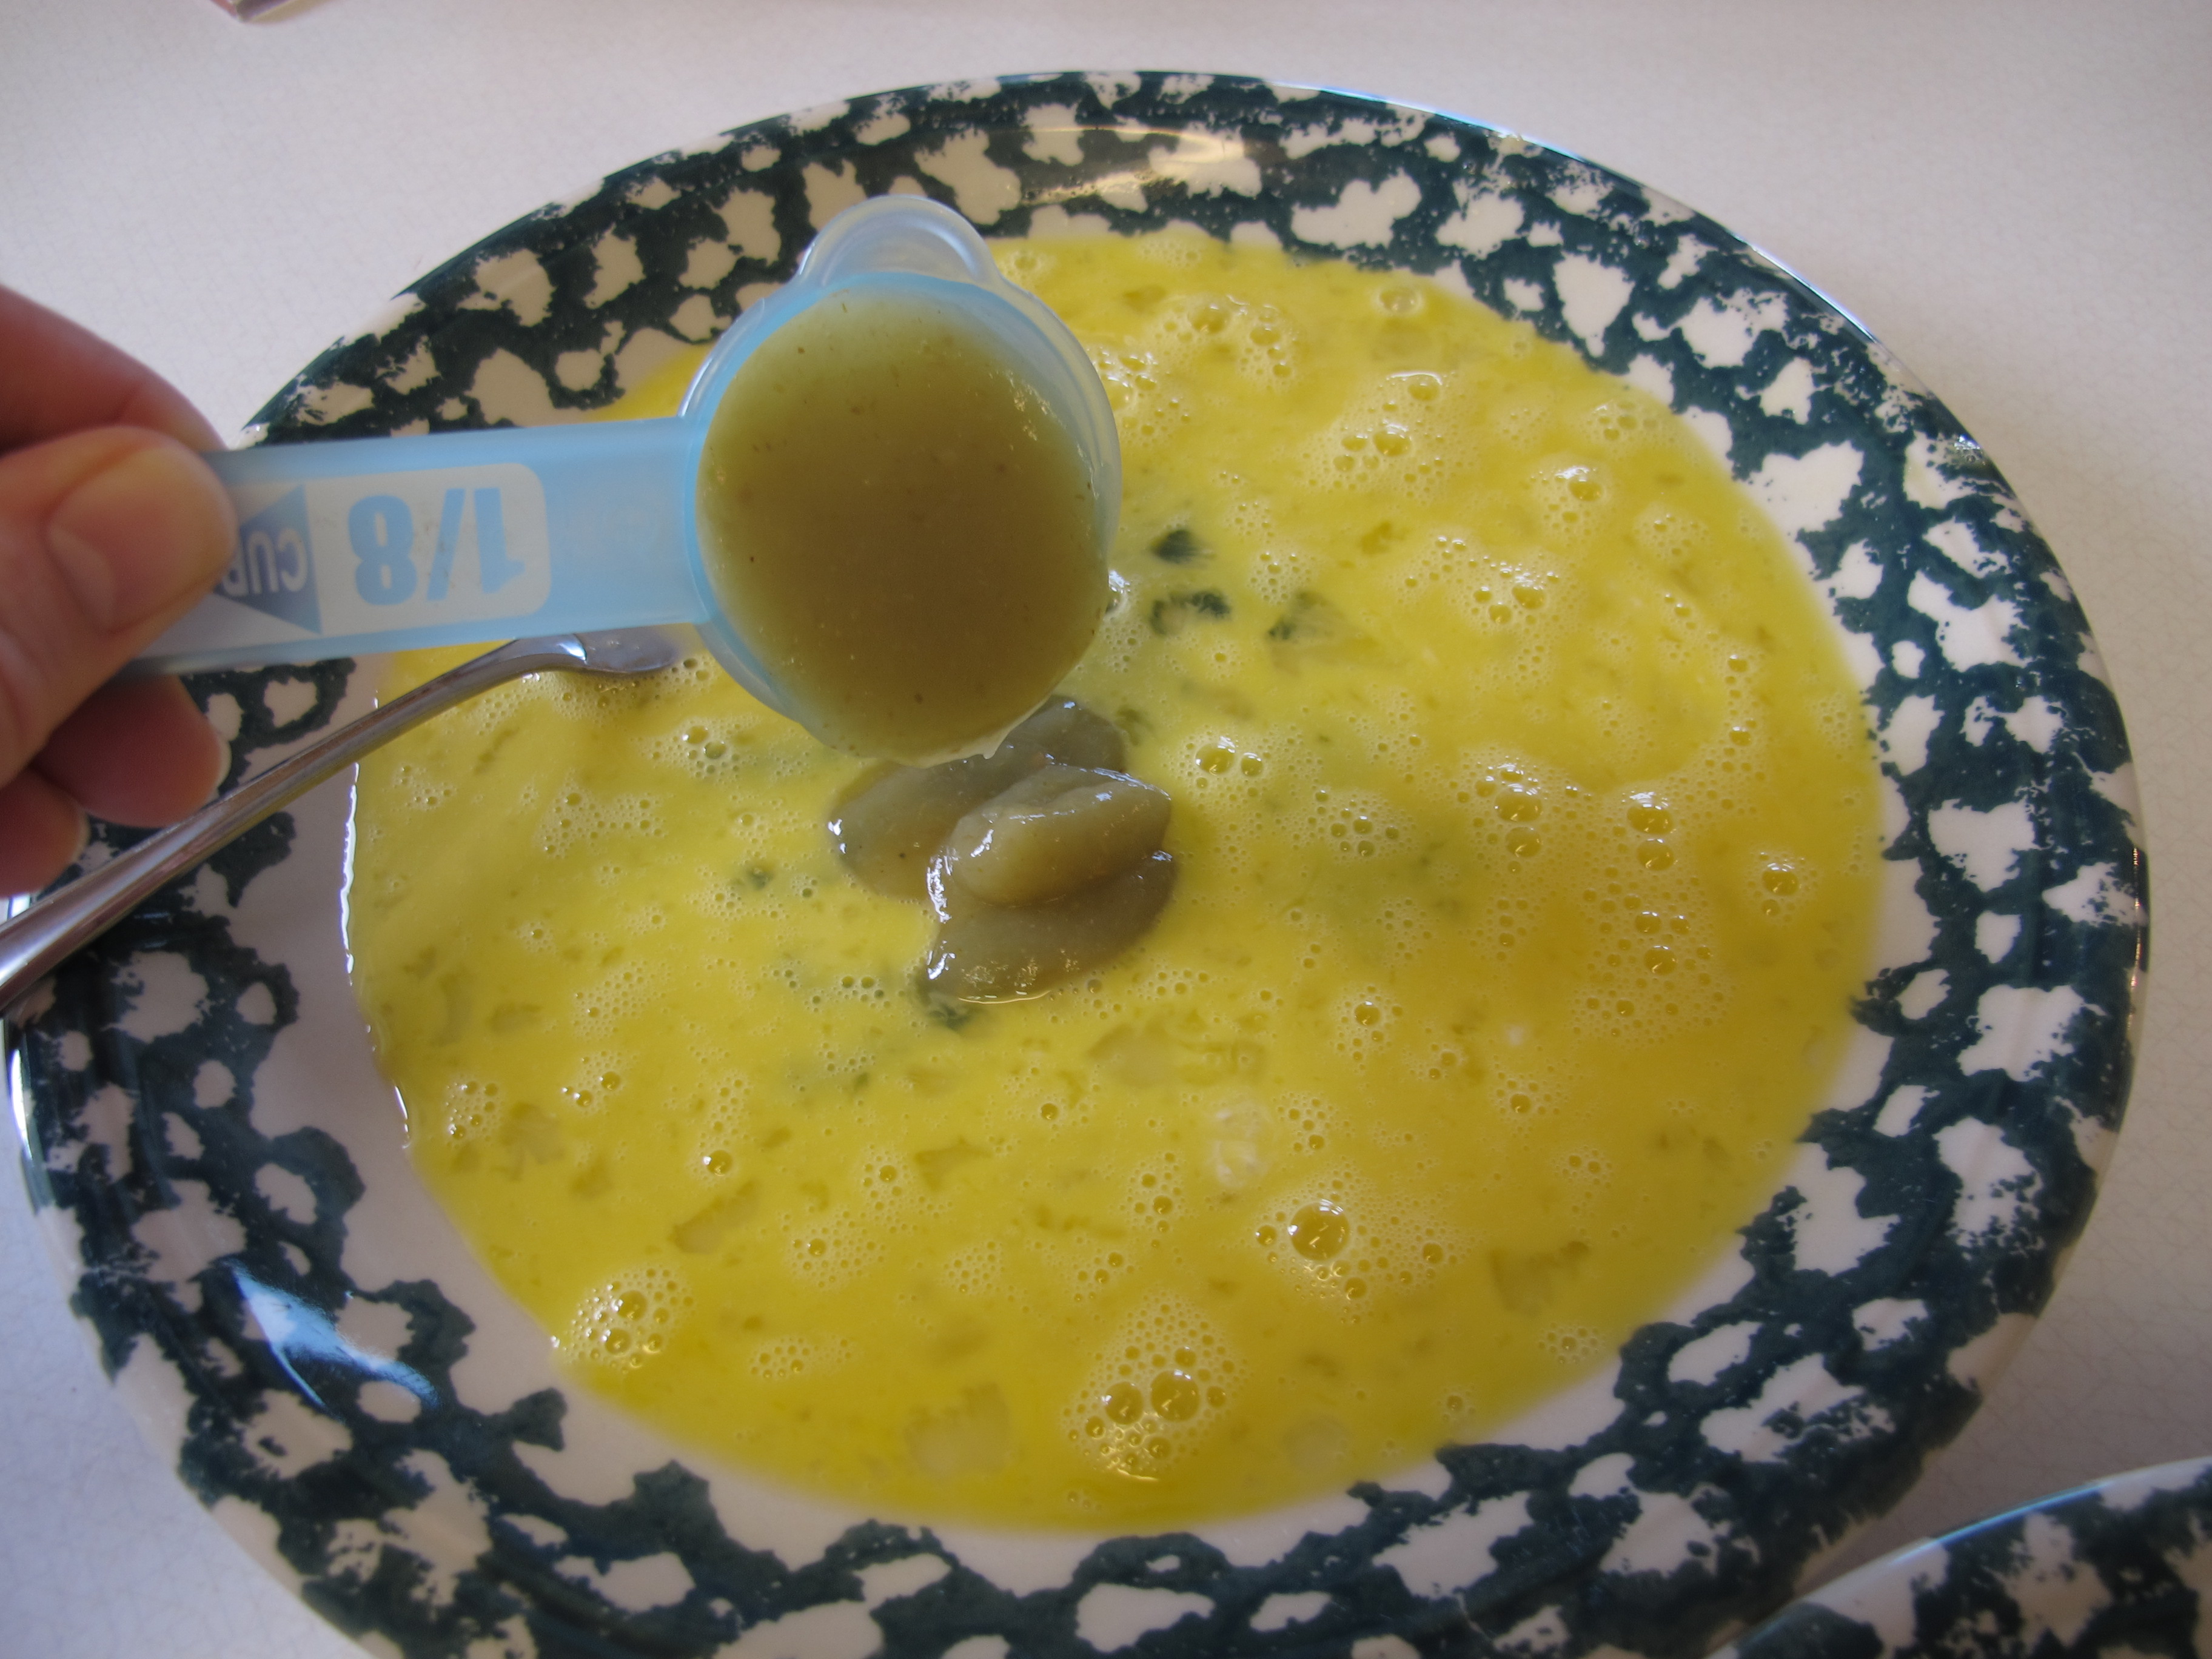
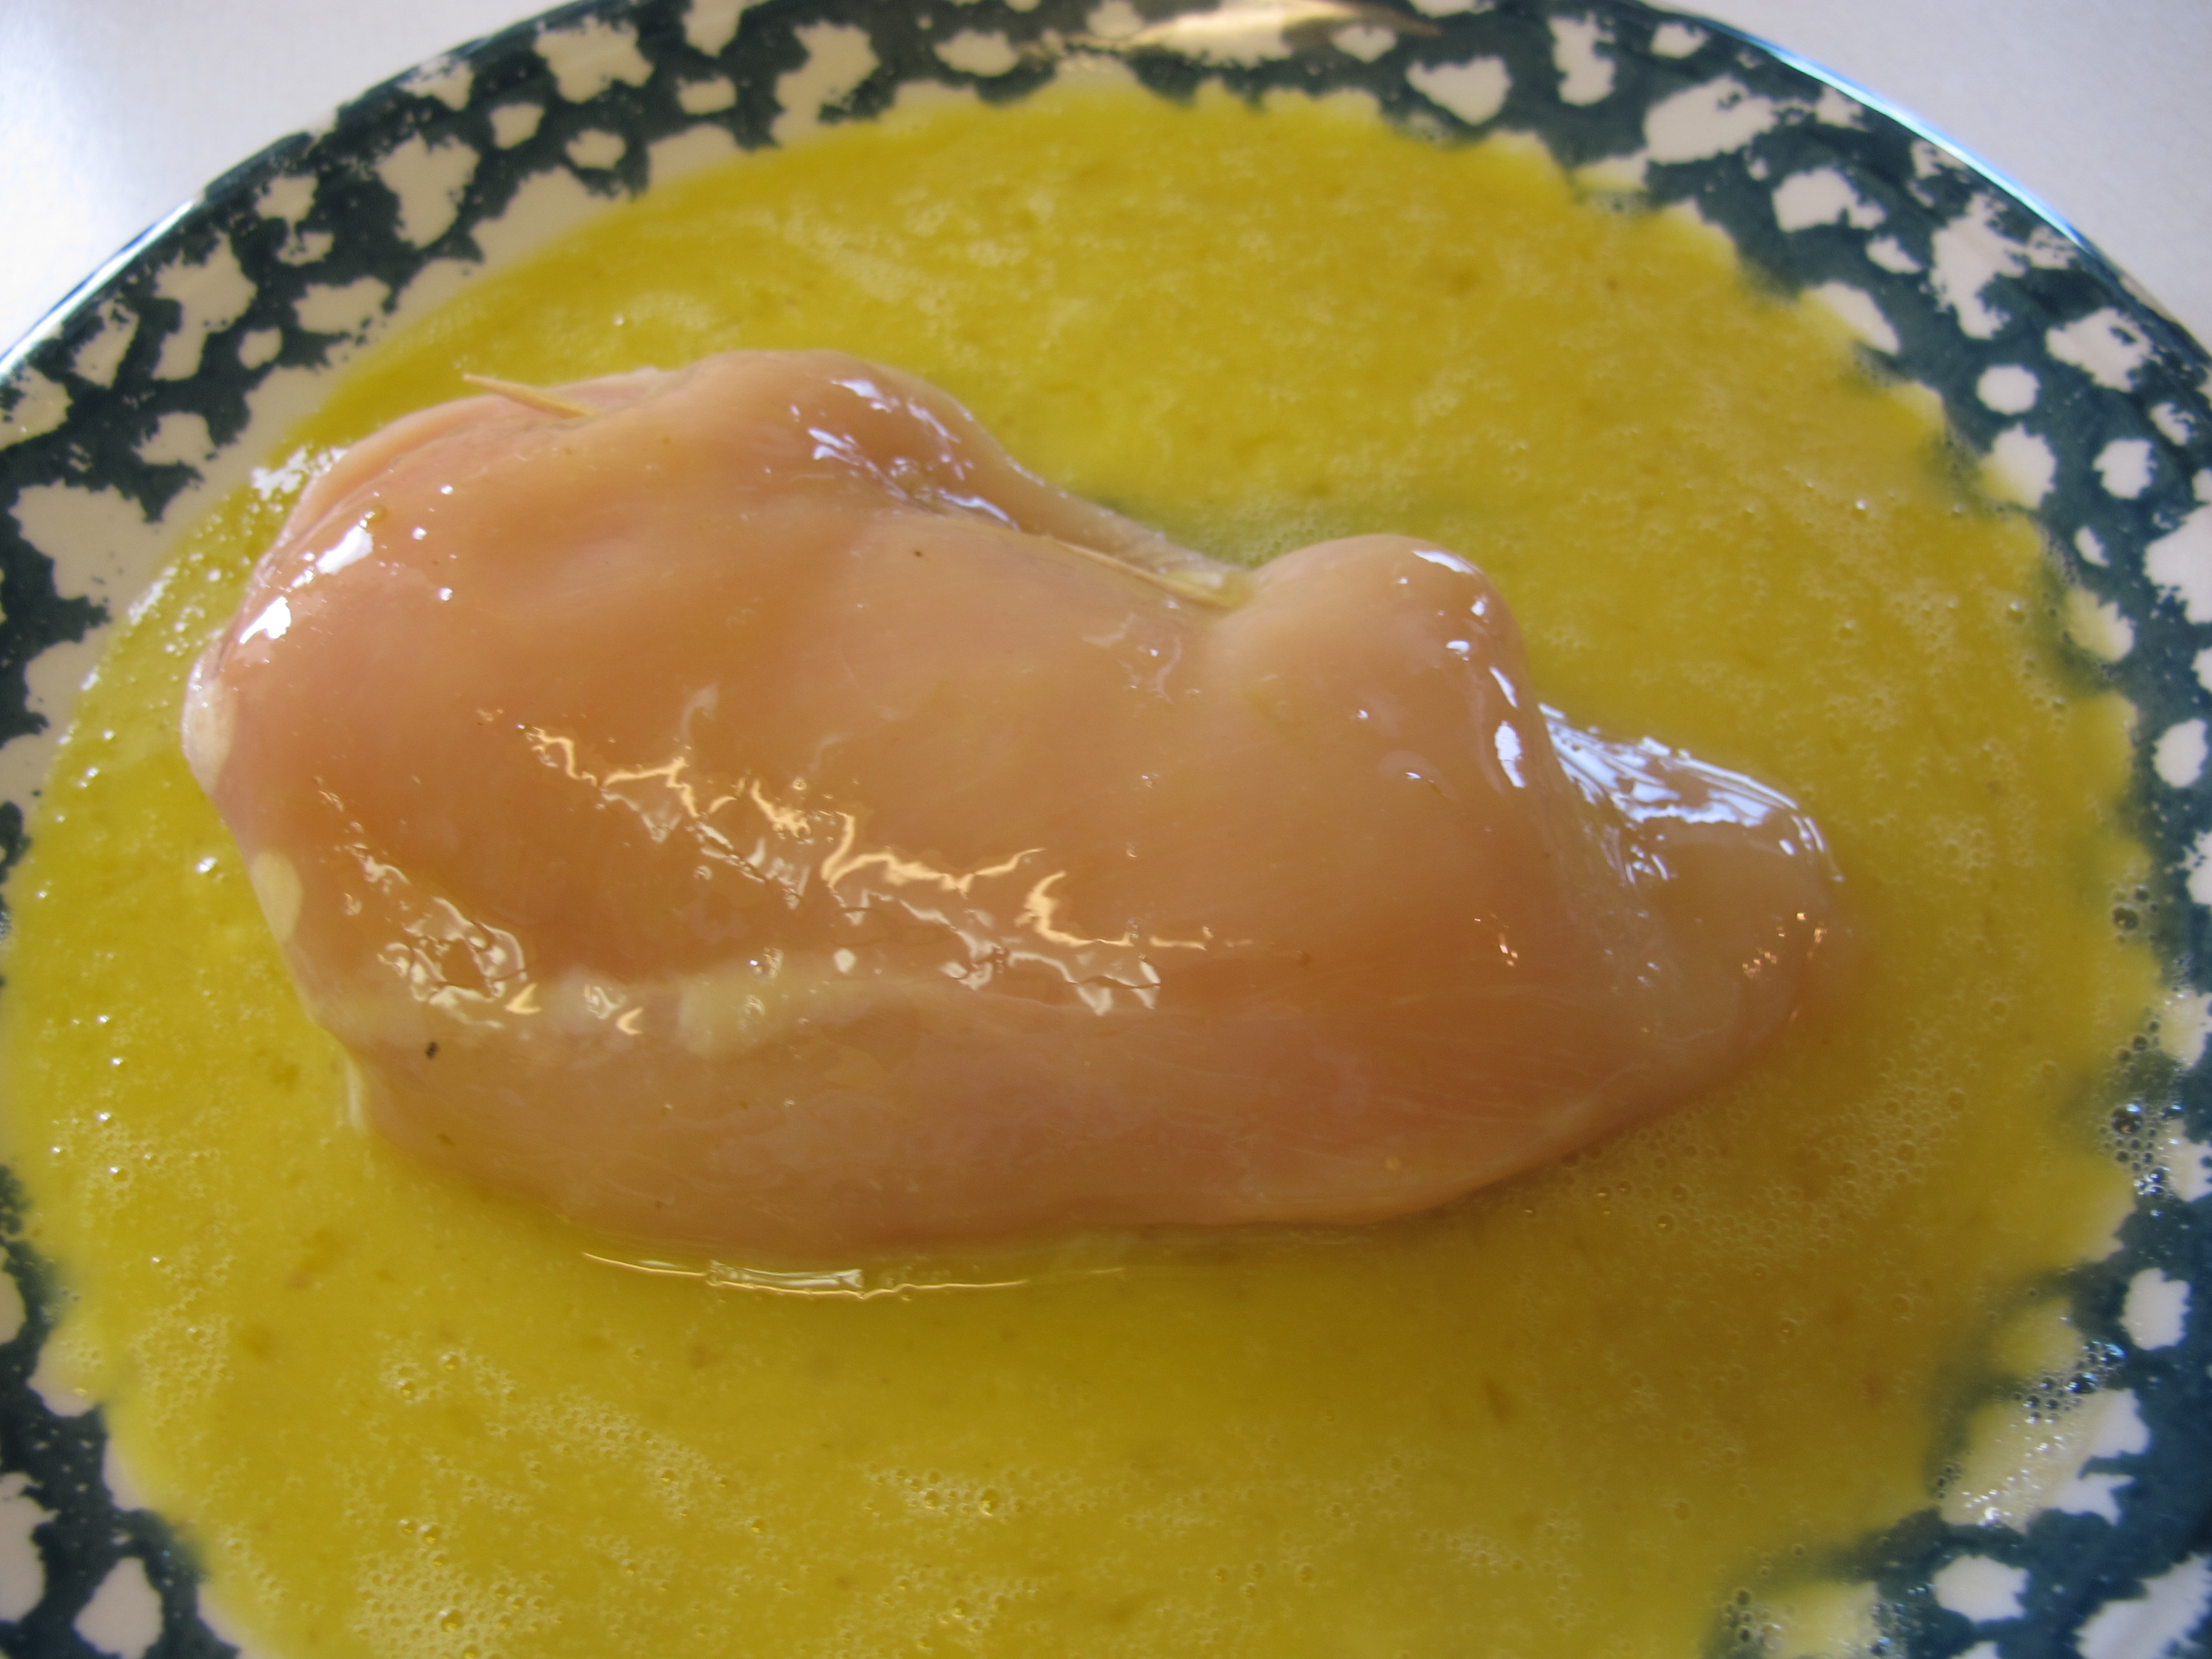
4 eggs, beaten
1/4 cup salsa (not chunky) or taco sauce (mild or medium) If you don’t have non-chunky salsa on hand, just blend your chunky salsa until smooth.
1/4 tsp. salt
In a shallow pan or plate, mix together the eggs, salsa and salt.
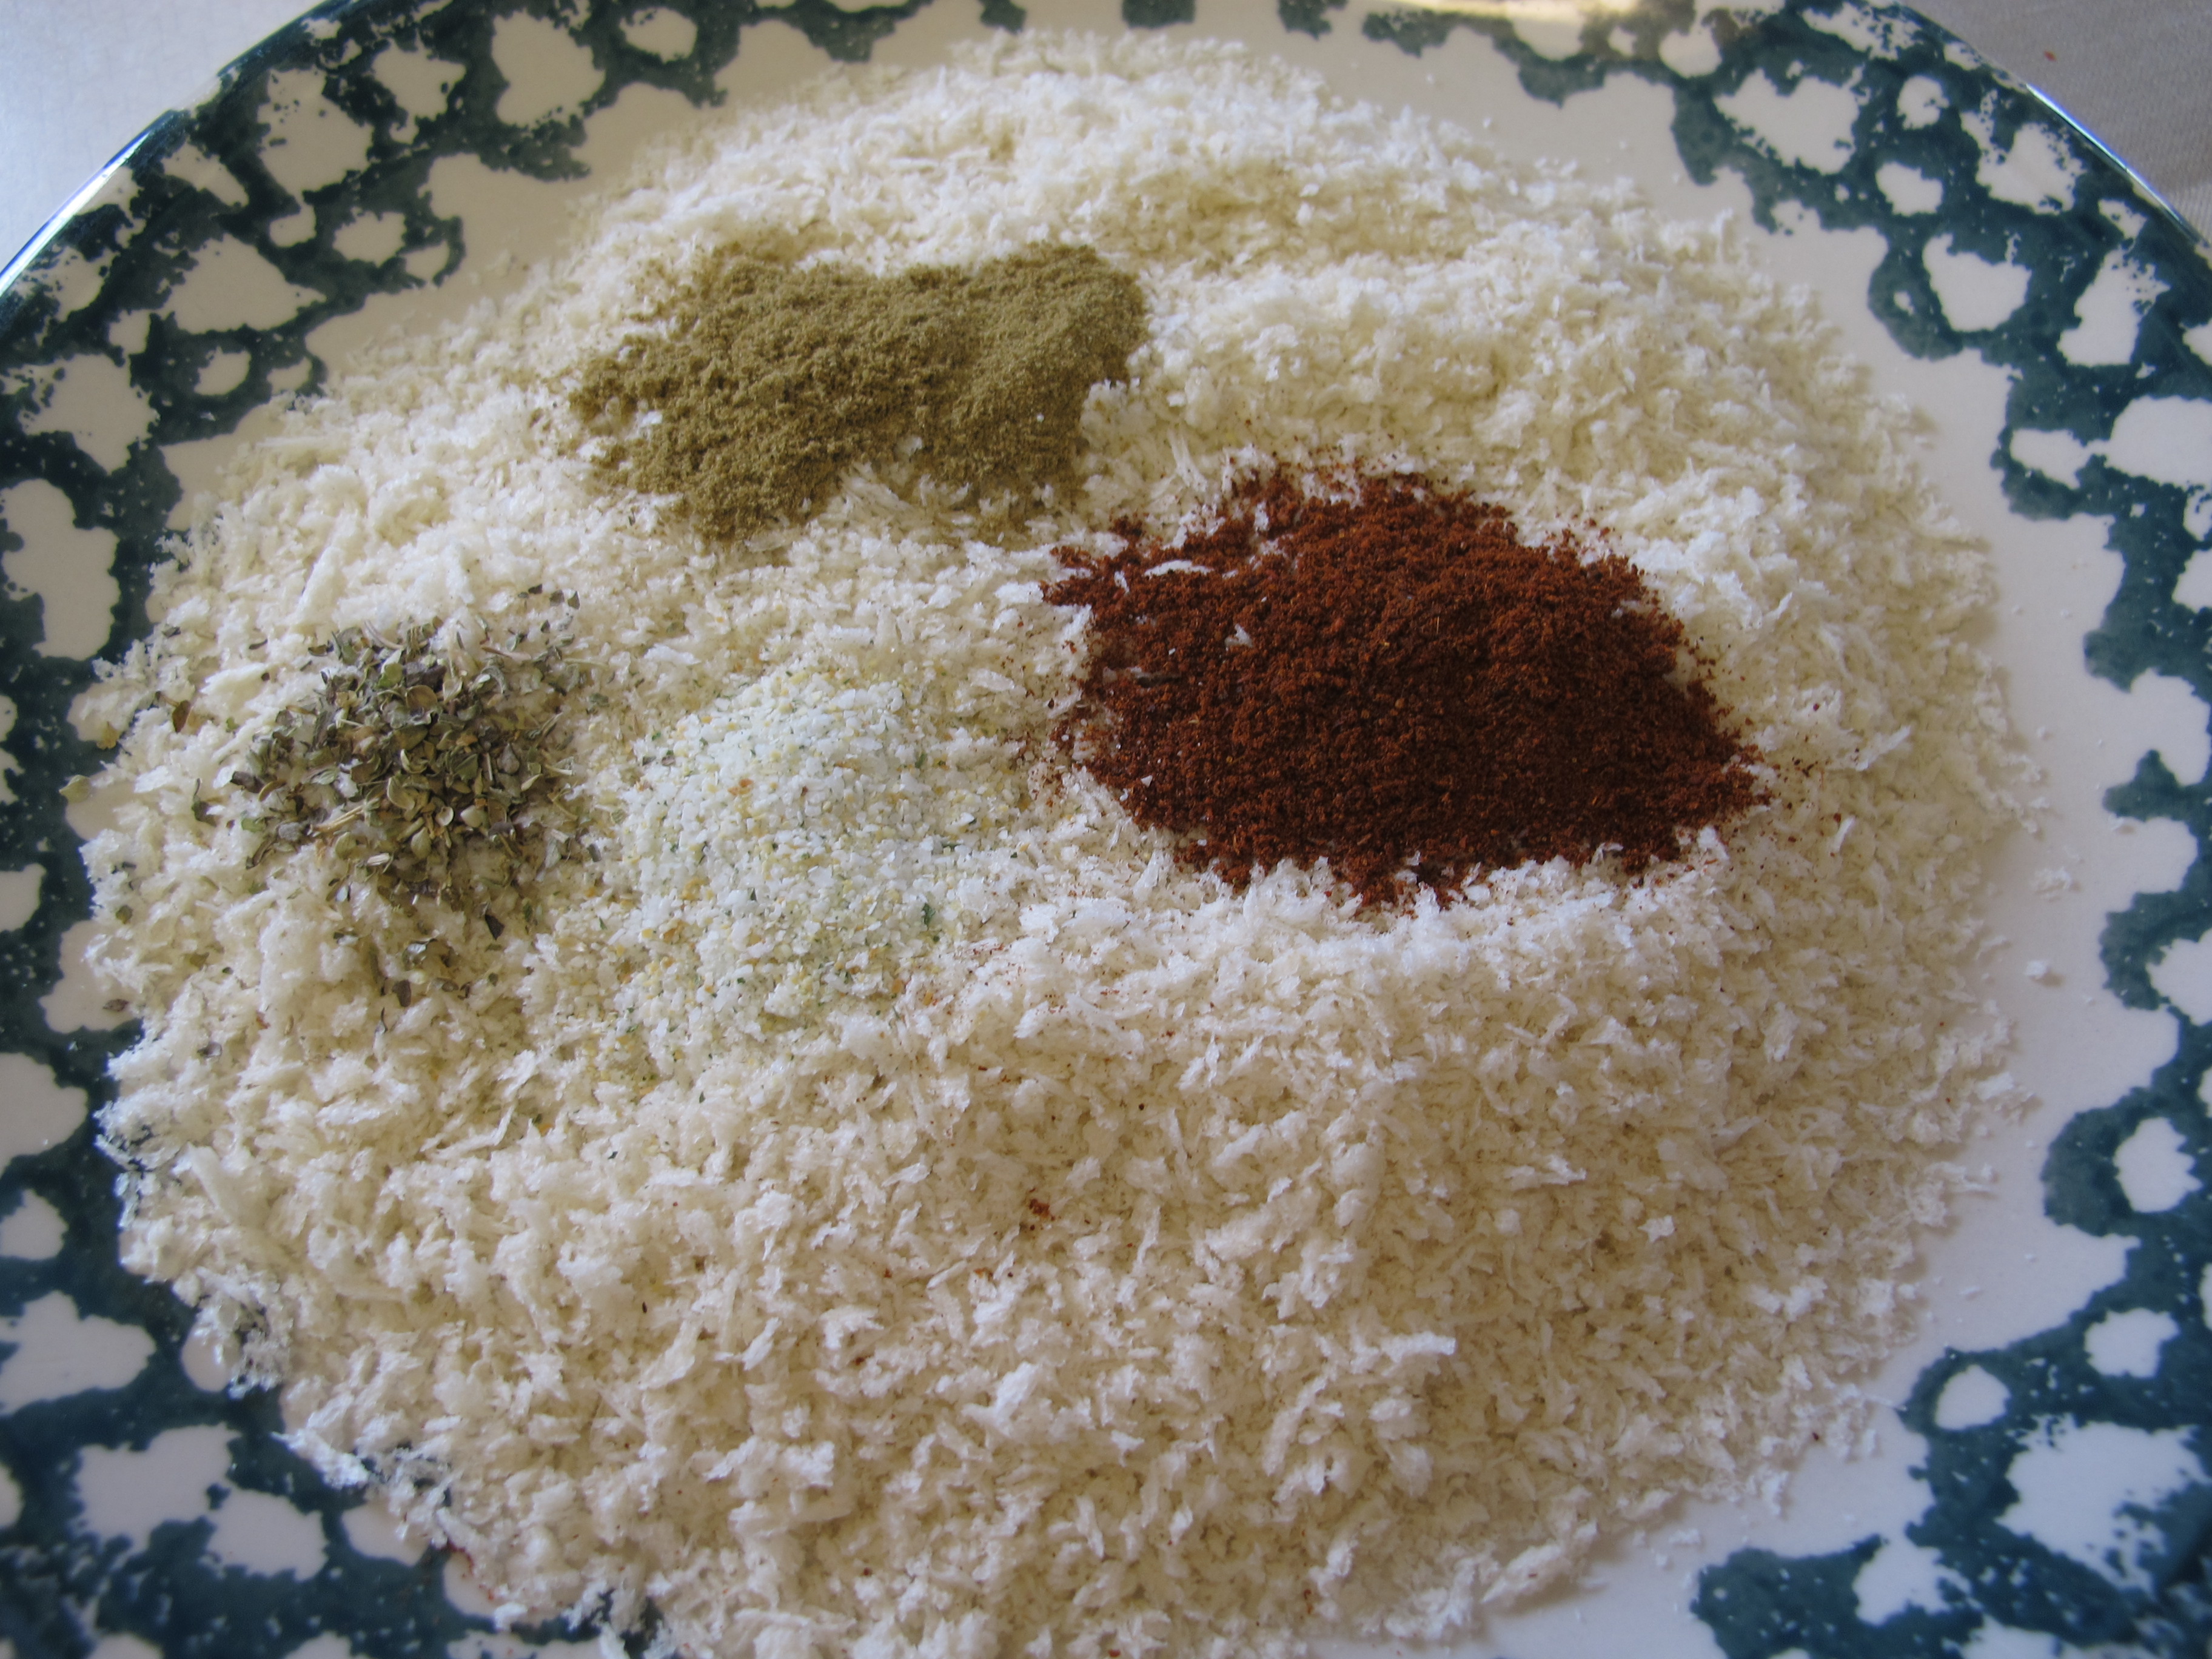
2 cups panko breadcrumbs *
2 tsp. chili powder
2 tsp. ground cumin
1 1/2 tsp. garlic salt
1/2 tsp. dried oregano or italian seasoning
* Japanese panko crumbs can be found in the ethnic section at the grocery store. Panko crumbs are much lighter than regular breadcrumbs and make a crunchier coating when baked.
In a separate shallow pan, combine the panko breadcrumbs, chili powder, garlic salt, and oregano or italian seasoning.
Dip each chicken breast in the egg mixture to coat, then dip in the panko crumb mixture.
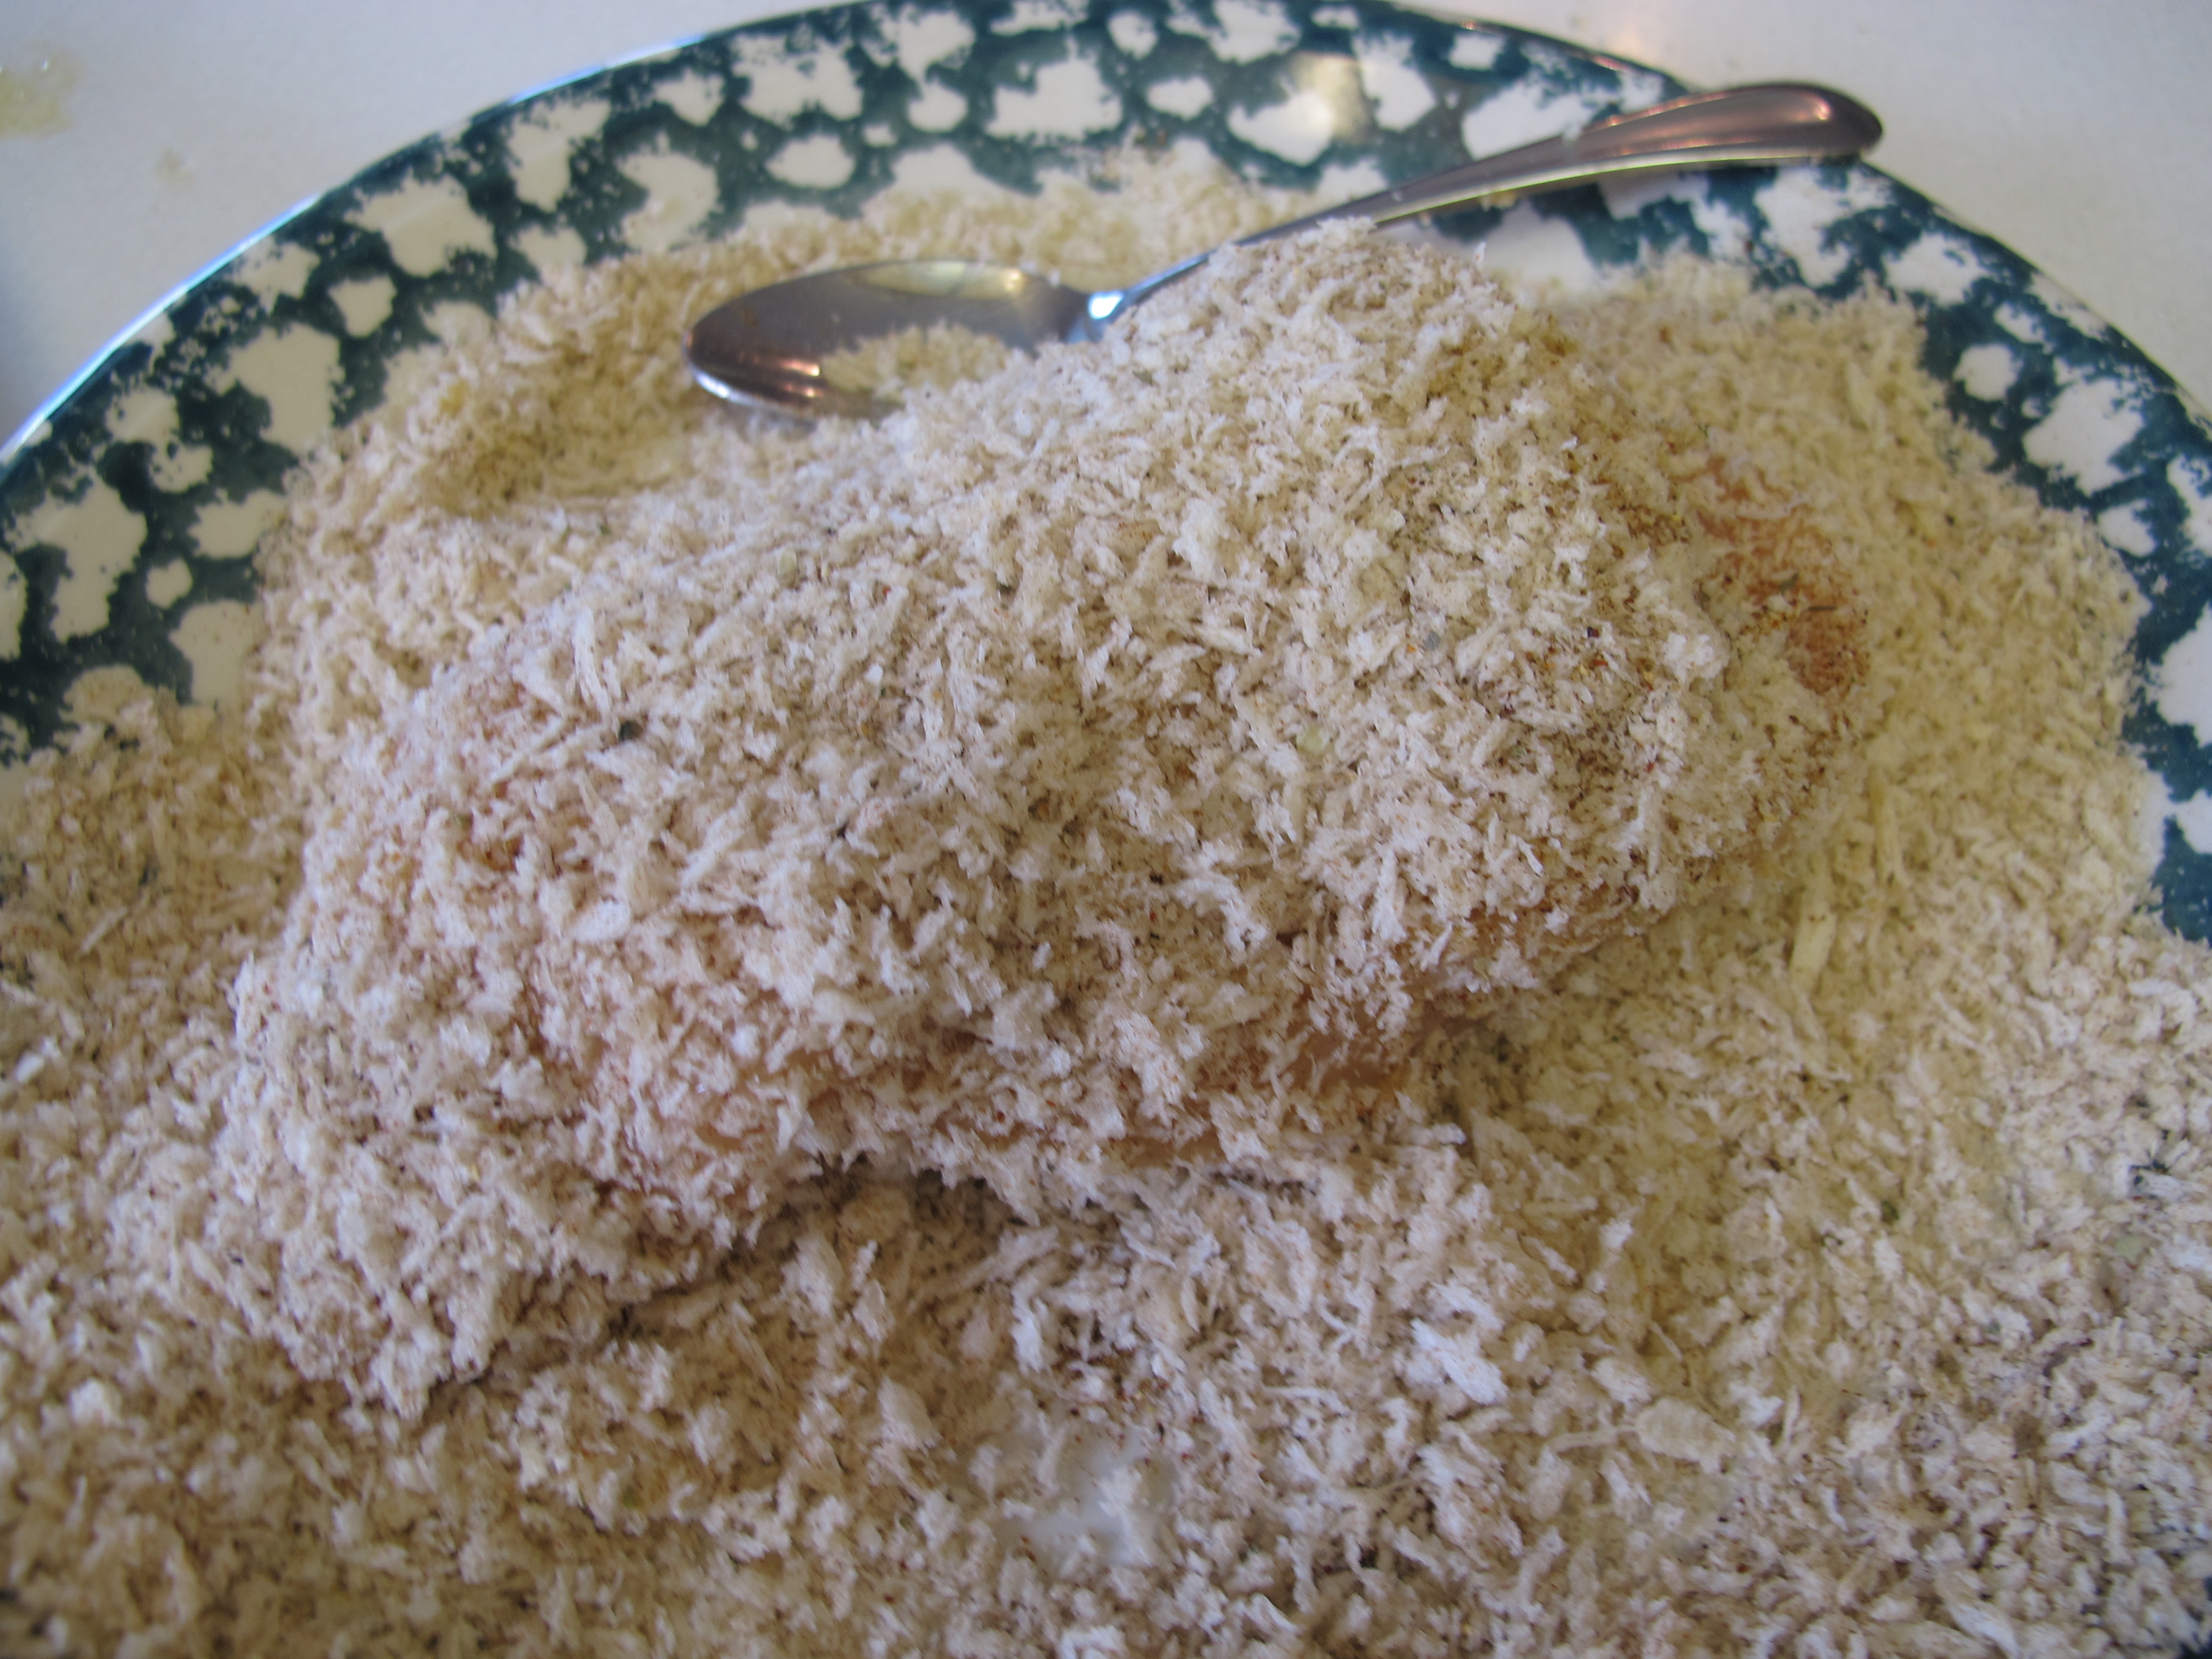
Place chicken in melted butter, turning to coat with butter.
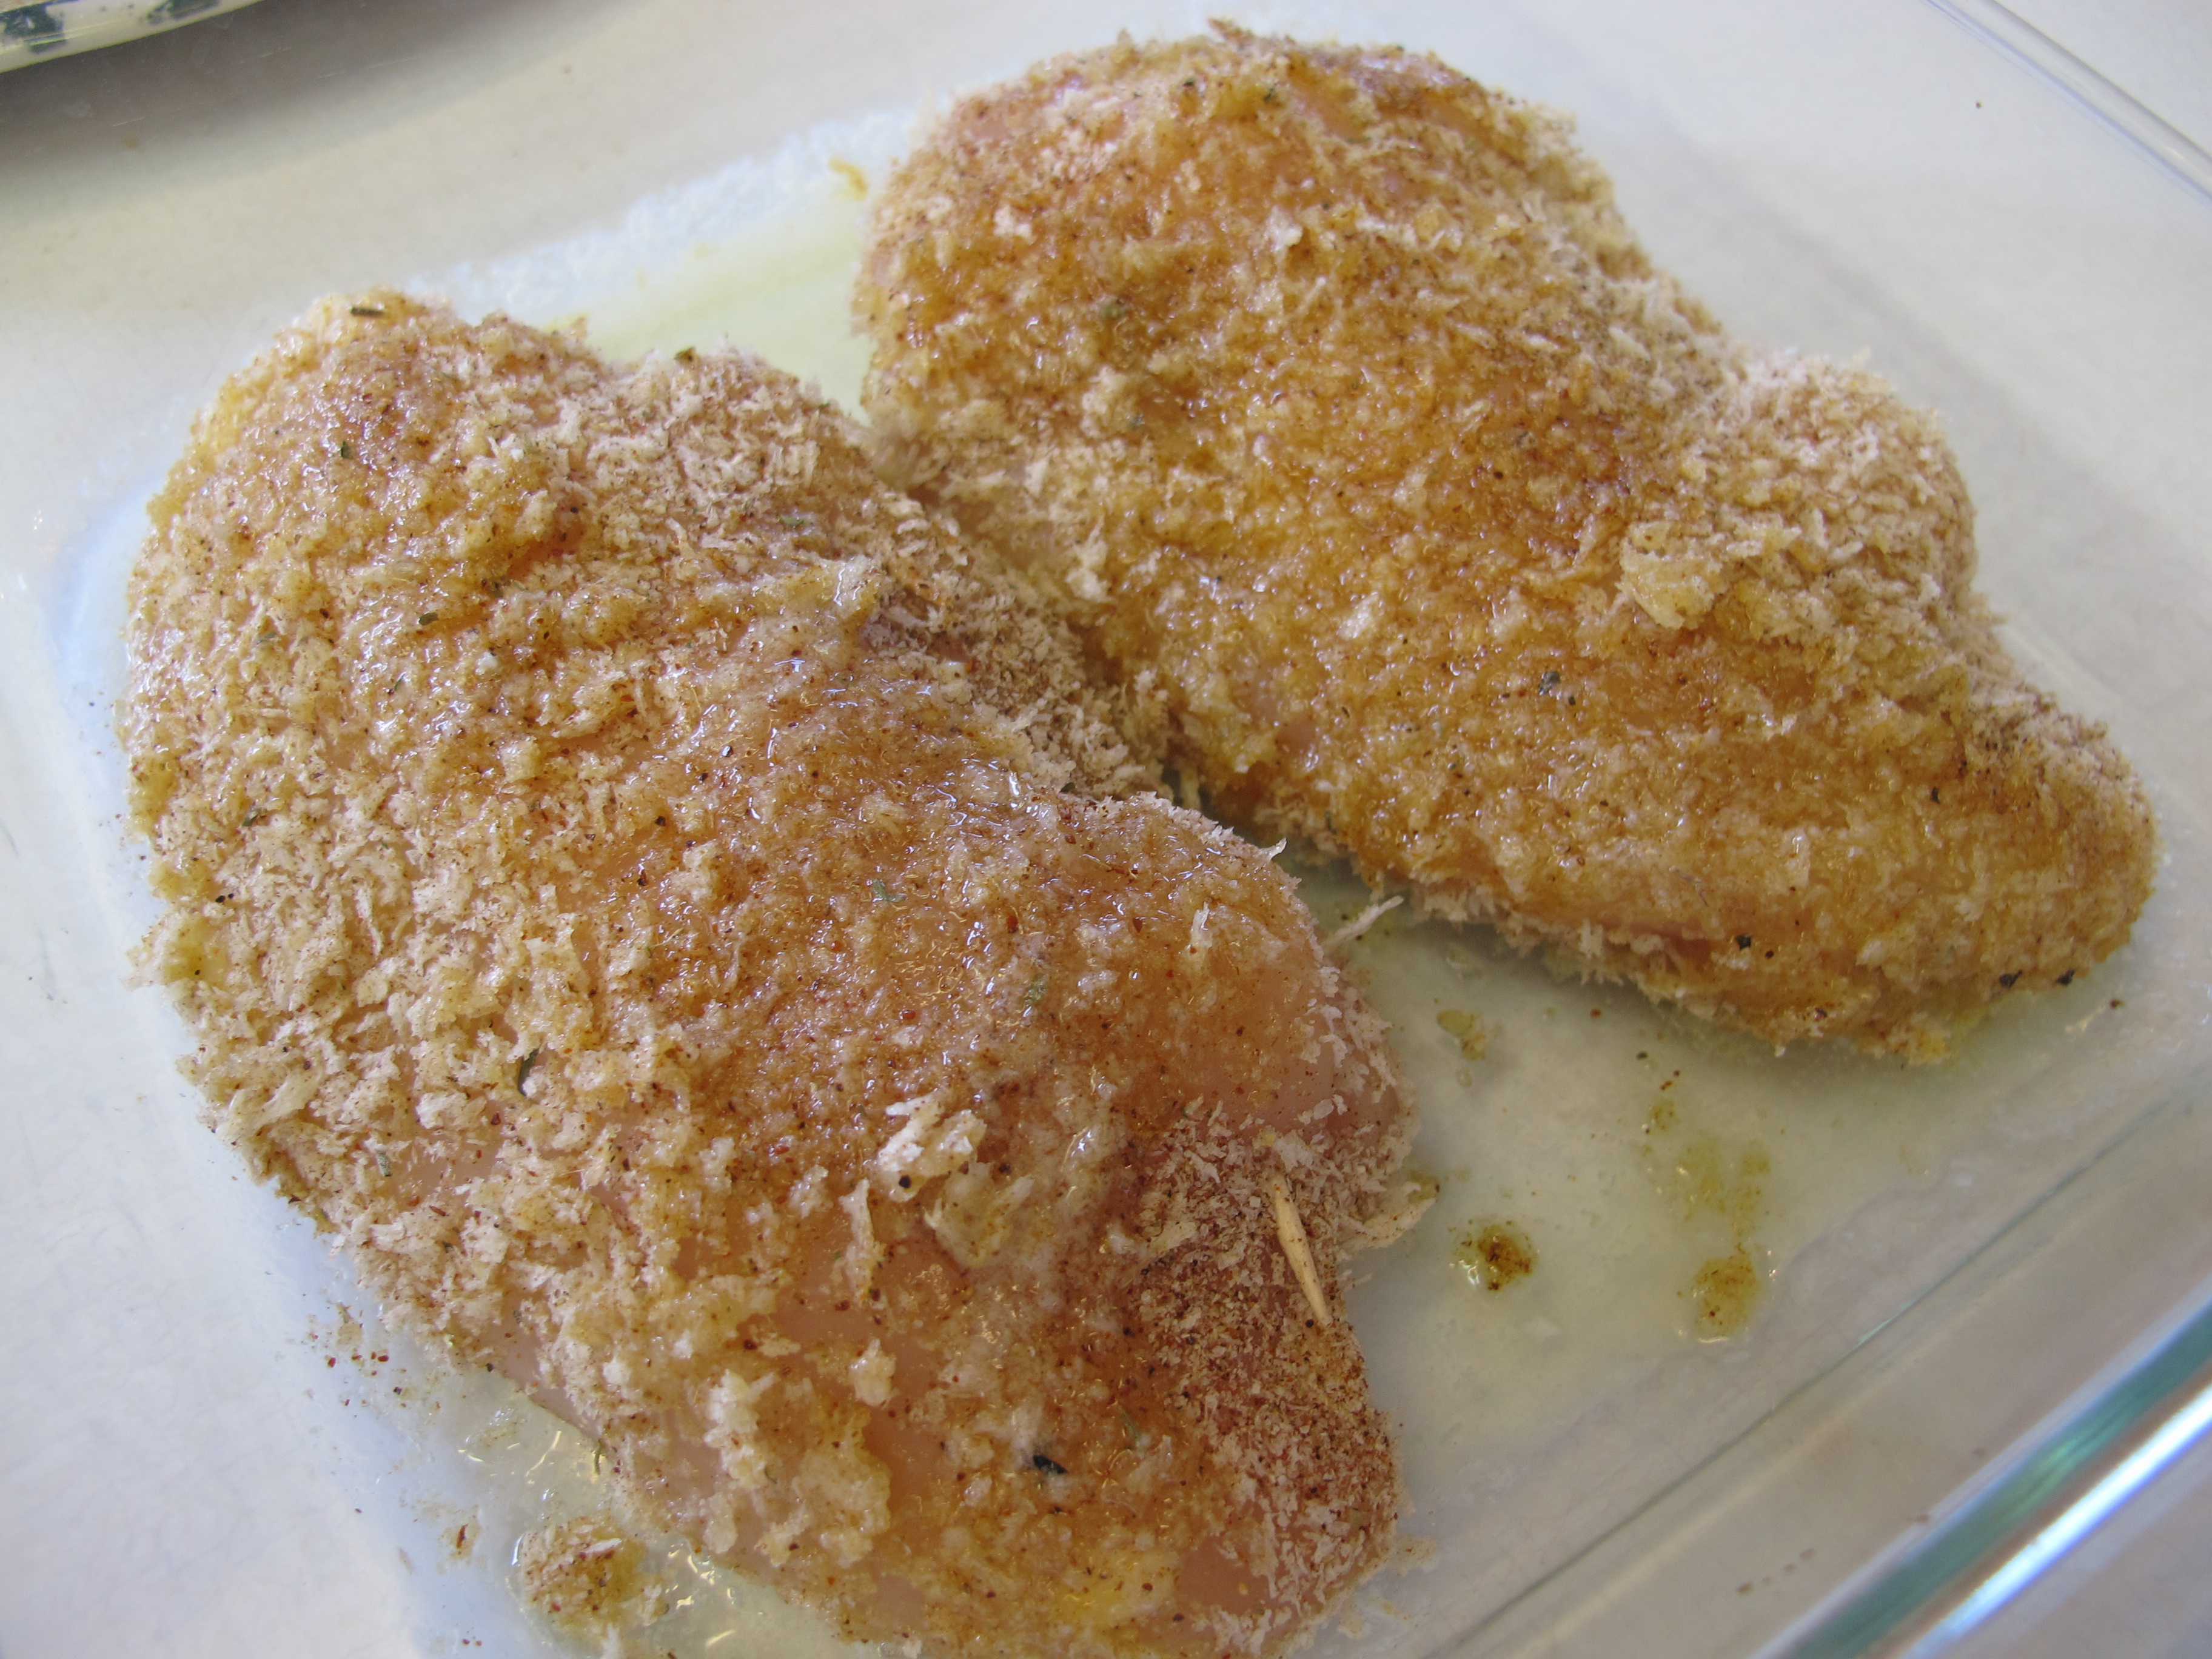
Bake uncovered about 35 – 40 minutes.
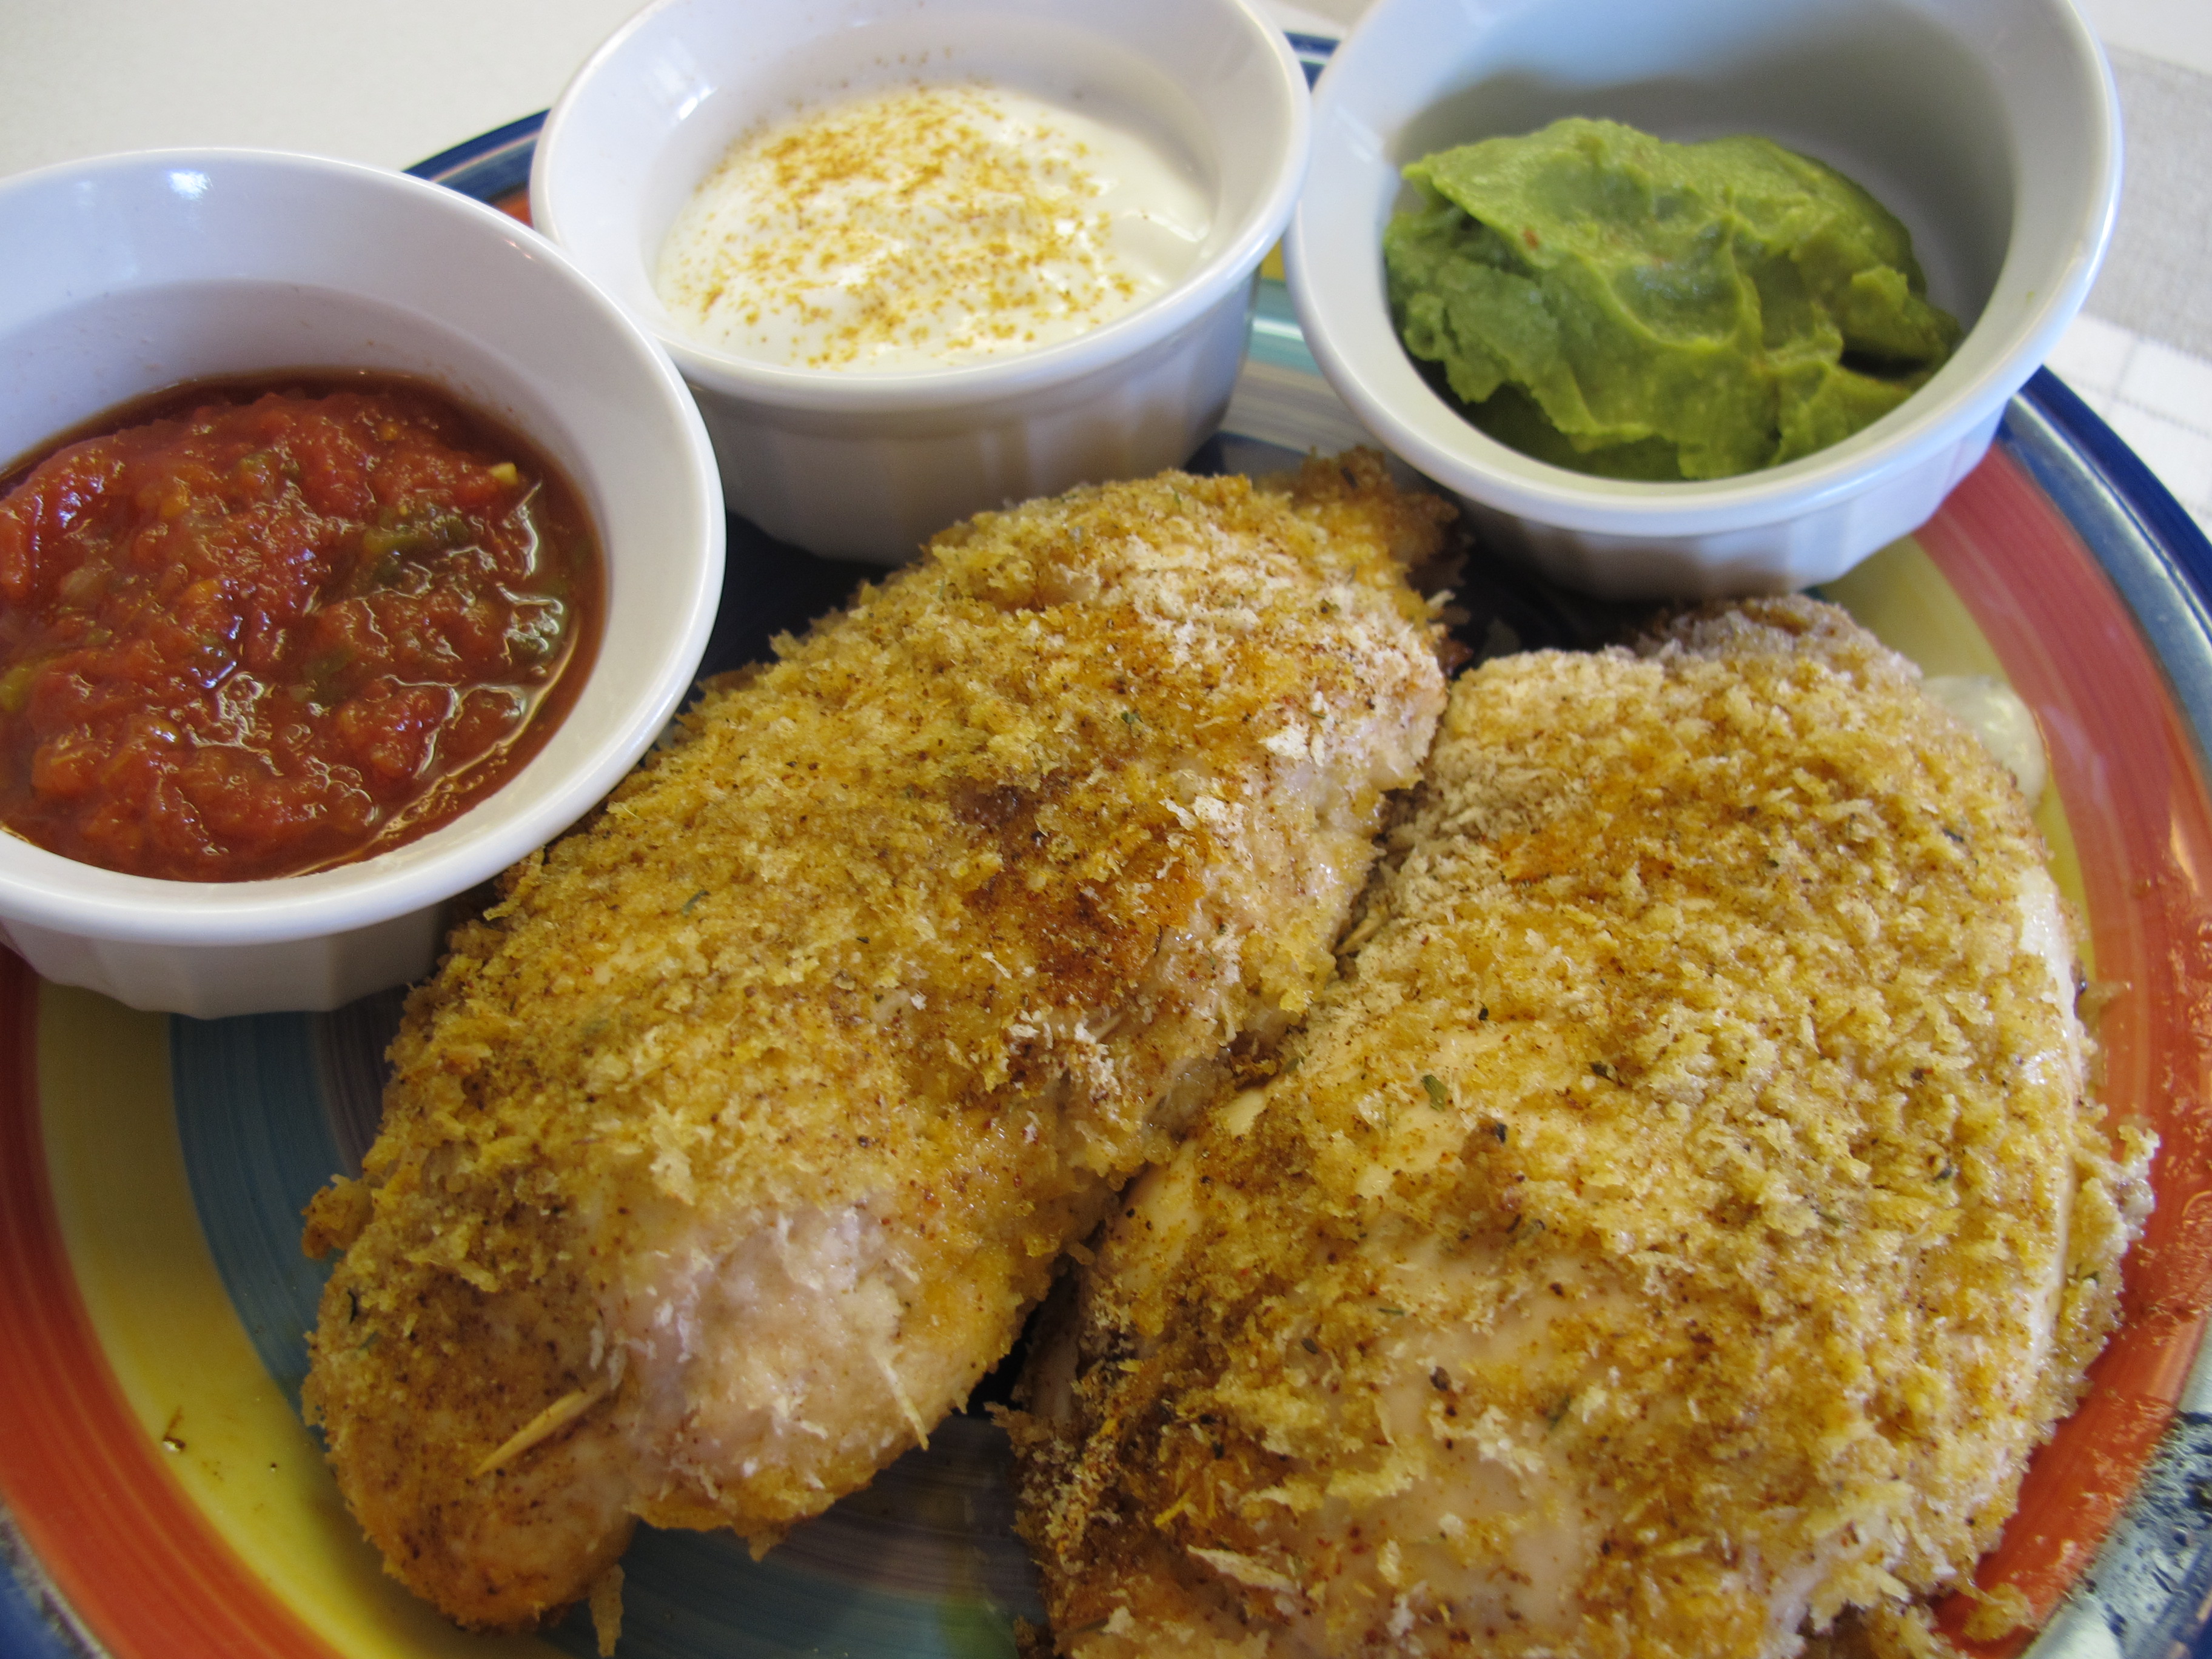
Serve with sliced avocado or guacamole, salsa, sour cream. Note: We just preferred the guacamole.
FREEZE AHEAD
Omit the first step of preparing the melted butter in the pan until serving day.
Prepare chicken and then place breaded chicken breasts in a shallow baking pan.
Freeze for 1 hour.
Carefully wrap each chicken breast individually in plastic wrap and place together in freezer bag.
FULL RECIPE WITHOUT PICTURES —
CRUNCHY PEPPER JACK CHICKEN
1/4 cup Brummel and Brown butter
6 boneless, skinless chicken breasts
10 oz. Pepper Jack cheese (block)
4 eggs, beaten
1/4 cup salsa (not chunky) or taco sauce (mild or medium) If you don’t have non-chunky salsa on hand, just blend your chunky salsa until smooth.
1/4 tsp. salt
2 cups panko breadcrumbs *
2 tsp. chili powder
2 tsp. ground cumin
1 1/2 tsp. garlic salt
1/2 tsp. dried oregano or italian seasoning
* Japanese panko crumbs can be found in the ethnic section at the grocery store. Panko crumbs are much lighter than regular breadcrumbs and make a crunchier coating when baked.
Preheat oven to 375 degrees.
Place 1/4 cup butter in a 9 x 13 baking dish in the microwave and heat until butter is melted. Set aside.
Cut Pepper Jack cheese into 6 equal pieces (measuring about 3/8″ x 4″).
Cut a horizontal slit into the side of each chicken breast – don’t cut all the way through.
Place one piece of cheese in the pocket of each chicken breast.
To secure the cheese in the pocket, use 2-3 wooden toothpicks.
In a shallow pan or plate, mix together the eggs, salsa and salt.
In a separate shallow pan, combine the panko breadcrumbs, chili powder, garlic salt, and oregano or italian seasoning.
Dip each chicken breast in the egg mixture to coat, then dip in the panko crumb mixture.
Place chicken in melted butter, turning to coat with butter.
Bake uncovered about 35 – 40 minutes.
Serve with sliced avocado or guacamole, salsa, sour cream. Note: We just preferred the guacamole.
FREEZE AHEAD
Omit the first step of preparing the melted butter in the pan until serving day.
Prepare chicken and then place breaded chicken breasts in a shallow baking pan.
Freeze for 1 hour.
Carefully wrap each chicken breast individually in plastic wrap and place together in freezer bag.
