Gyoza (Japanese Potstickers)

Our son Craig has the most wonderful in-laws – Bryan and Karen Ostermiller. Bryan went to Japan on his mission and their family has been making Gyozas ever since. They have made Gyoza for us twice – once when we went camping and again when we spent Thanksgiving together at Craig and Corinne’s in Idaho. For Christmas a few years ago, they gave us all of the sauces to make Gyozas. It such a fun treat and fun to make as a family.


Close up of the sauces
1 pound ground pork
1/2 head cabbage, chopped very fine
3 – 4 green onions, chopped very fine
1/2 tsp. garlic granules
round won ton wrappers
Sesame oil
Ponzu – Citrus Seasoned Soy Sauce
Chili oil
PREPARING:
Chop cabbage and green onions very fine.

Mix vegetables into the pork. The best way to do this is with your hands – kind of slimy but it does the job.
Lay a won ton skin down and put a small spoonful of pork mixture on top.

Dip your finger in a small bowl of water and run it along one half of the skin.

Bring the two sides together and squeeze to seal. You can put a few little tucks in it to make it look pretty.

Set all the gyoza aside.

COOKING:
Heat about a tablespoon of sesame oil in a fry pan – cast iron works the best.
Lay gyozas on their sides and brown each side.

Once the second side is browned, pour 1/2 cup water in the pan and cover with a lid. Keep lid on until all the water is gone.


EATING:
Pour some Ponzu in individual cups. If you want it a little spicy, add a few drops of Chili oil.
Using chop sticks (or your fingers) dip gyoza in Ponzu sauce. Eat and Enjoy!

FULL RECIPE WITHOUT PICTURES —
GYOZA
1 pound ground pork
1/2 head cabbage, chopped very fine
3 – 4 green onions, chopped very fine
1/2 tsp. garlic granules
round won ton wrappers
Sesame oil
Ponzu – Citrus Seasoned Soy Sauce
Chili oil
Chop cabbage and green onions very fine.
PREPARING:
Mix vegetables into the pork. The best way to do this is with your hands – kind of slimy but it does the job.
Lay a won ton skin down and put a small spoonful of pork mixture on top.
Dip your finger in a small bowl of water and run it along one half of the skin.
Bring the two sides together and squeeze to seal. You can put a few little tucks in it to make it look pretty.
Set all the gyoza aside.
COOKING:
Heat about a tablespoon of sesame oil in a fry pan – cast iron works the best.
Lay gyozas on their sides and brown each side.
Once the second side is browned, pour 1/2 cup water in the pan and cover with a lid. Keep lid on until all the water is gone.
EATING:
Pour some Ponzu in individual cups. If you want it a little spicy, add a few drops of Chili oil.
Dip gyoza in Ponzu sauce. Eat and Enjoy!
Chicken Gnocchi Soup

One of Ken’s favorite soups is Chicken Gnocchi, so today he came up with a great recipe. Served with crusty bread, this made a great winter meal. Gnocchi is a dumpling, usually made from potatoe. It is pronounced “no-key “.

5 T. Brummel and Brown butter (not shown in pictures)
4 T. olive oil
1/2 tsp. salt
1/4 tsp. pepper
Melt butter and olive oil together with salt and pepper.

1/2 cup onion, chopped
1/2 cup celery, chopped
3 cloves garlic, chopped or 1 T. bottled minced garlic
Add celery, onion and garlic. Saute for 2 minutes.

1 cup mushrooms, coarsely chopped
Add mushrooms. Saute for an additional 2 minutes.

1/4 tsp. celery salt
1/4 tsp. thyme
1/4 tsp. oregano
Add seasonings.
1/3 cup flour
Add the flour slowly while stirring to form a roux.

2 cups half and half
2 cups milk
Stir in the half and half and milk.

14 – 16 oz. package mini gnocchi (Note: The pictures show the regular size gnocchi but we have decided that we like the mini gnocchi better.)

Meanwhile in another pan, cook the gnocchi according to the package. (Package says to add gnocchi to salted boiling water. When the gnocchi floats to the top – it is done. This takes about 2 – 3 minutes. We could have used a much smaller pan too, as the gnocchi just needs to be heated – is doesn’t foam up like pasta does).

1 cup carrots, shredded
2 cups chicken
Add carrots and chicken to the stockpot.

1 (14.5 oz.) can chicken broth
1 1/2 cups spinach
Stir often and when the soup gets thicker, add the chicken broth, gnocchi and spinach.


Heat through. Top with grated parmesan cheese, if desired. Serve with crusty bread. Enjoy!
RECIPE SOURCE: Ken Allred
FULL RECIPE WITHOUT PICTURES —
CHICKEN GNOCCHI SOUP
5 T. butter or margarine
4 T. olive oil
1/2 tsp. salt
1/4 tsp. pepper
Melt butter and olive oil together with salt and pepper.
1/2 cup onion, chopped
1/2 cup celery, chopped
3 cloves garlic, chopped or 1 T. bottled minced garlic
Add celery, onion and garlic. Saute for 2 minutes.
1 cup mushrooms, coarsely chopped
Add mushrooms. Saute for an additional 2 minutes.
1/4 tsp. celery salt
1/4 tsp. thyme
1/4 tsp. oregano
Add seasonings.
1/3 cup flour
Add the flour slowly while stirring to form a roux.
2 cups half and half
2 cups milk
Stir in the half and half and milk.
14 – 16 oz. package mini gnocchi (Note: The pictures show the regular size gnocchi but we have decided that we like the mini gnocchi better.)
Meanwhile in another pan, cook the gnocchi according to the package. (Package says to add gnocchi to salted boiling water. When the gnocchi floats to the top – it is done. This takes about 2 – 3 minutes)
1 cup carrots, shredded
2 cups chicken
Add carrots and chicken to the stockpot.
1 (14.5 oz.) can chicken broth
1 1/2 cusp spinach
Stir often and when the soup gets thicker, add the chicken broth, gnocchi and spinach. Heat through.
RECIPE SOURCE: Ken Allred
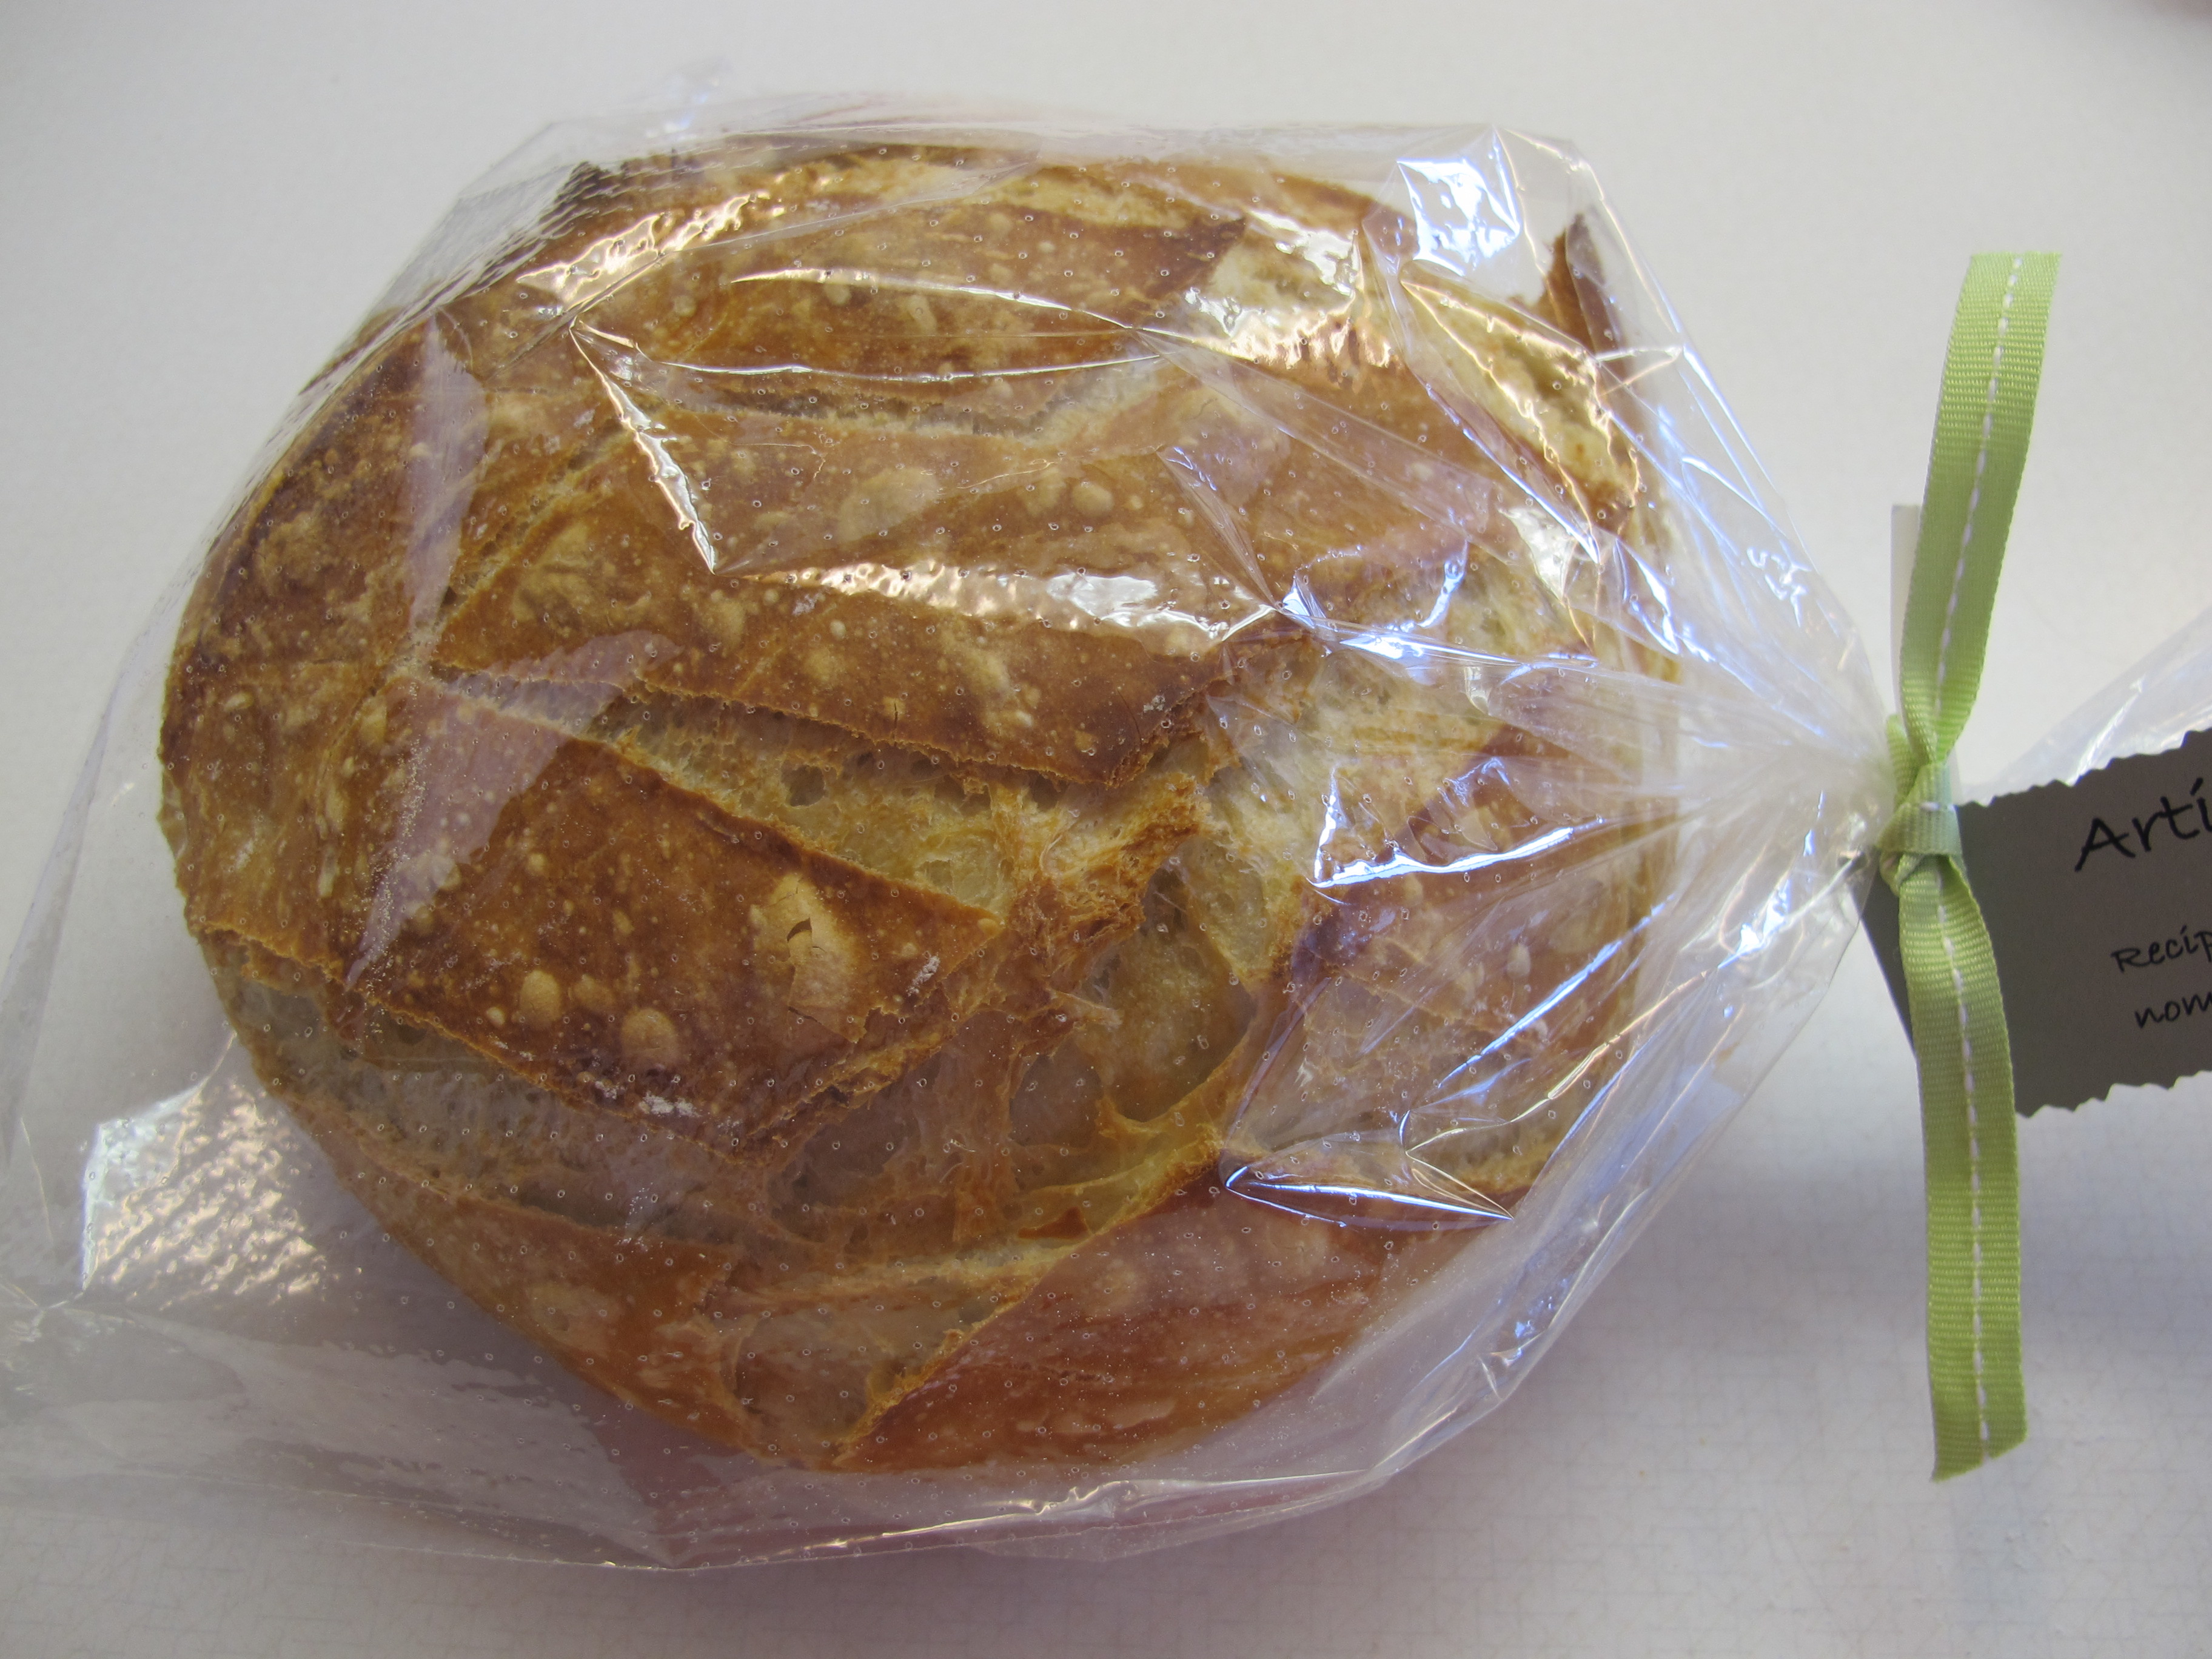
Crusty Artisan Bread
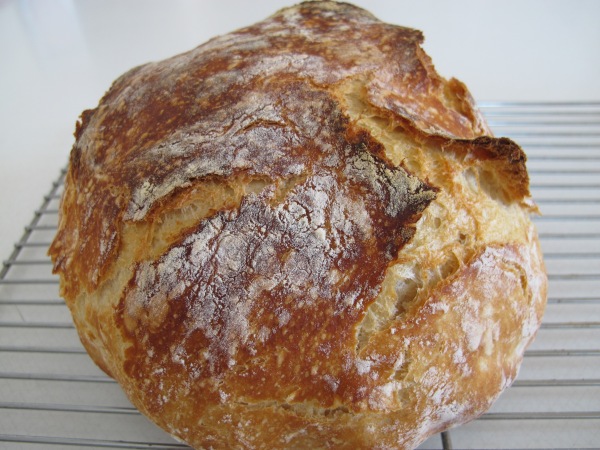
I have loved buying Artisan bread in the past and now I can make it myself. It is so easy, but does take some time because it has to sit for 12 – 18 hours – so you need to plan ahead – but is so worth it!
Note: I tried making this bread in a regular camping type Dutch oven and because oil seeps into the porous of the cast iron, when heating it to 450 degrees – I set the fire alarms off in the house!! Not a good pot to use.
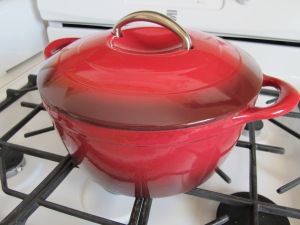
You do not need to oil the pot.
A large mixing bowl is needed because the dough will rise.
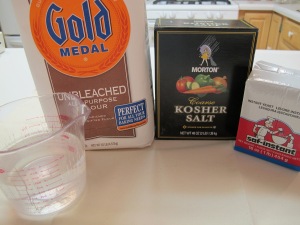
Only 4 ingredients –
In a large mixing bowl, add:
3 cups + 2 T white flour (you MUST use regular flour – Bread Flour is too sticky)
1 3/4 tsp. salt
1/2 tsp. yeast
Whisk the flour, salt and yeast together.
* If you are adding any additional ingredients, this is when you would do that. Stir into dry ingredients.
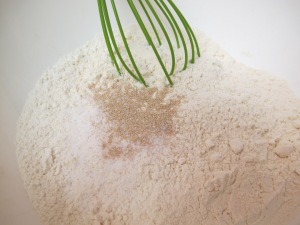
Mix in:
1 1/2 cups warm water 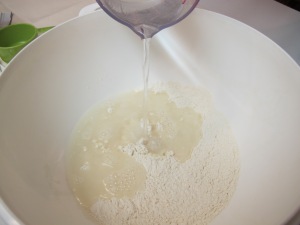
Mix well.
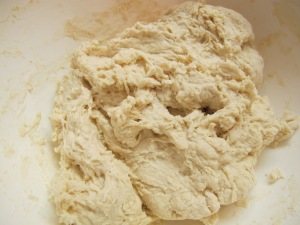
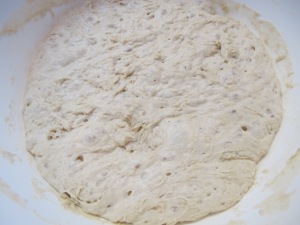
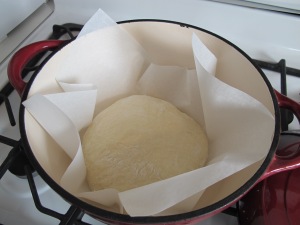
That’s it! Cover the bowl with plastic wrap and let it set for 12 – 18 hours on the counter top. This is not optional. It takes that much time to proof the dough. DO NOT REFRIGERATE!!!
This is what the dough looks like after the 12 – 18 hours.
Preheat your oven to 450 degrees. As soon as it is heated to 450 degrees, place your pot with the lid on, in the oven and pre-heat the pot for 30 minutes.
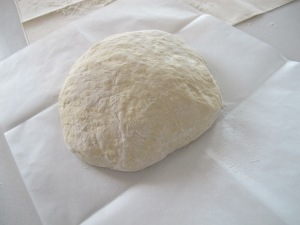
Right after you put the pot in the oven, cover your hands with flour and lift the dough out of the bowl. Shape it into a round ball. Place the dough ball on a floured surface. I put my dough ball on a piece of parchment paper to make it easier to lift in and out of the pot. This is not necessary – I am just afraid that I will burn myself on the hot pot when removing the loaf.
Cover dough ball with the plastic wrap you used to cover the bowl (dry it off if necessary or turn it over), and let it sit for 30 minutes while the pot is heating.
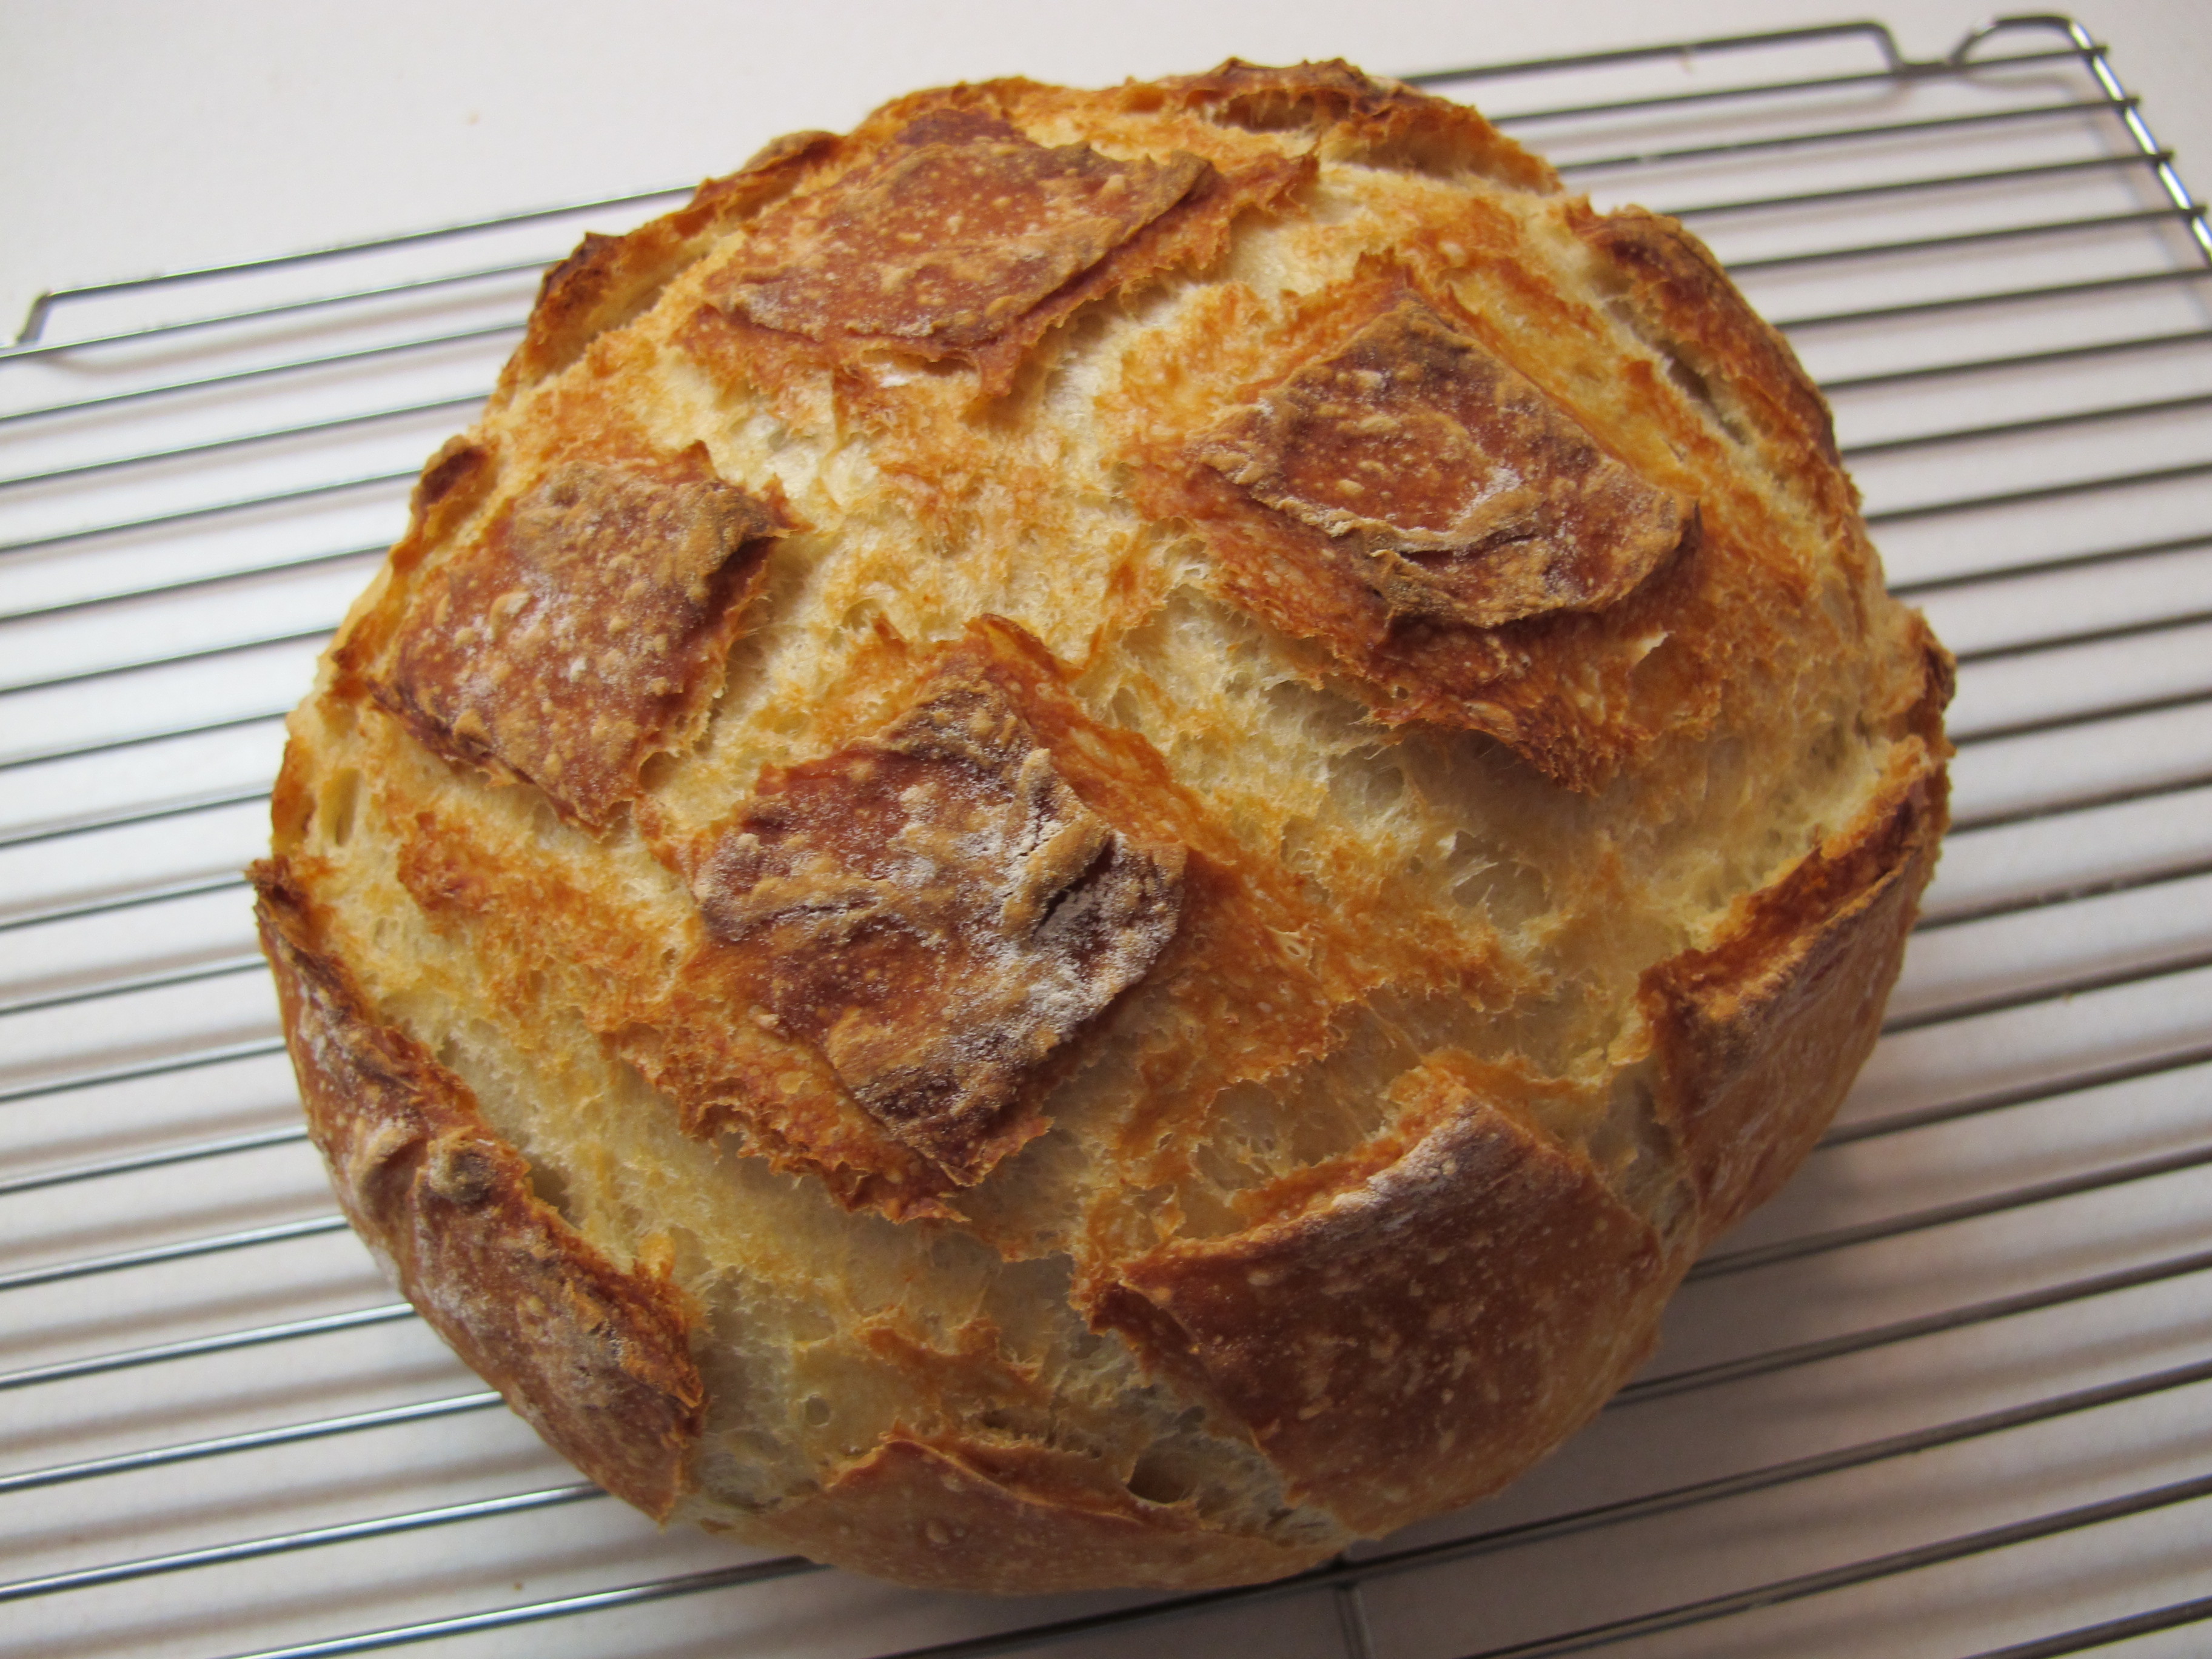
You can take your chance and just put your dough in the pot, cover it and be surprised when it comes out (picture at the very top) or you can score (cut) slightly into the dough before cooking it to plan your design – such as the picture below. At this point, the dough kind of bounces back when you try to cut into it. I found it easiest to use a sharp floured knife to cut a design into the dough. Just “dip” or “stab” your knife into your flour container before each slice. You can also use a sharp razor blade.
Remove the pot from the oven. I like to fold a piece of parchment paper to put in the bottom of the pot to prevent the bottom from getting too hard. Carefully pick up the ball of dough and place it in the pot, or lift the edges of the parchment paper. If not using parchment paper, you may want to have flour on your hands since it is a bit sticky. Remember, your pot is 450 degrees, so be very careful. Put the lid on the pot and return it to the oven and bake for 40 minutes.
This is the bread after the 40 minutes of baking. Is this beautiful or what??!!!
But it is not done yet.
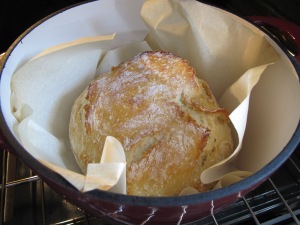
Remove the lid from the pot and continue to bake for another 10 -12 minutes. (I put a piece of parchment over the top to prevent burning.
This is the finished product.
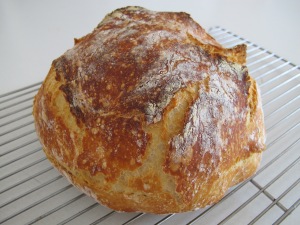
Place the bread on a cooling rack until completely cooled.
If you put an Artisan loaf of bread in a regular plastic bag, it will soften the crust. To keep the crust crunchy, it needs to be put in a bag that has perforations in it.
NOTE: When making bread that has any candy chips in it – fold about 5 pieces of parchment paper into a square and place it in the bottom of the dutch oven. Also, place one folded sheet on top. This helps prevent burning. Also, increase the baking time (with the lid on) by about 5 – 10 minutes or so. Take the lid off and only bake another 2-3 minutes – only if needed. Anything with sugar in it tends to burn very easily.
* Now that you have mastered Artisan Bread making – try some of these variations:
Roasted garlic, pepper jack cheese – cheddar cheese – raisin, nut, cinnamon – sunflower seeds, poppy seeds – rosemary, lemon, Gruyère – lemon, thyme, Asiago – rosemary chives, thyme.
Use your imagination – please leave me a comment on what you tried and what you liked. The possibilities are endless!
Recipe Source: Revised from Simply So Good (found on Pinterest)
FULL RECIPE WITHOUT PICTURES —
CRUSTY ARTISAN BREAD
I have loved buying Artisan bread in the past and now I can make it myself. It is so easy, but does take some time because it has to sit for 12 – 18 hours so you need to plan ahead – but is so worth it!
If you do not have an enamel covered cast iron pot, you can use anything with a lid that can be put in the oven.
You do not need to oil the pot if it is an enamel covered cast iron or regular cast iron pot.
A large mixing bowl is needed because the dough will rise as it sets.
In a large mixing bowl, add
3 cups + 2 T. white bleached flour.
To the flour add:
1 3/4 tsp. salt
1/2 tsp. yeast
Whisk the flour, salt and yeast together.
* If you are adding any additional ingredients, this is when you would do that. Stir into dry ingredients.
Mix in:
1 1/2 cups water
That’s it! Cover the bowl with plastic wrap and let it set for 12 – 18 hours on the counter top. DO NOT REFRIGERATE!!! This is not optional. It takes that much time to proof the dough.
Preheat your oven to 450 degrees. As soon as it is heated to 450 degrees, place your pot with the lid on, in the oven and pre-heat the pot for 30 minutes.
Right after you put the pot in the oven, cover your hands with flour and lift the dough out of the bowl. Shape it into a round ball. Place the dough ball on a floured surface. I put my dough ball on a piece of parchment paper to make it easier to lift out of the pot. This is not necessary – I am just afraid that I will burn myself on the hot pot. It also keeps the loaf in a nice round shape.
Cover dough ball with the plastic wrap you used to cover the bowl, dry it off if necessary or turn it over, and let it sit for 40 minutes while the pot is heating.
You can take your chance and just put your dough in the pot, cover it and be surprised when it comes out or you can score (cut) slightly into the dough before cooking it to plan your design. At this point, the dough kind of bounces back when you try to cut into it. I found it easiest to use a sharp floured knife to cut a design into the dough. Just “dip” or “stab” your knife into your flour container before each slice. You can also use a sharp razor blade.
Remove the pot from the oven. I like to fold a piece of parchment paper to put in the bottom of the pot to prevent the bottom from getting too hard. Carefully pick up the ball of dough and place it in the pot. You may want to have flour on your hands since it is sticky. Remember, your pot is 450 degrees, so be very careful. Put the lid on the pot and return it to the oven for 35 minutes.
Remove the lid from the pot and continue to bake for another 10-12 minutes.
Place the bread on a cooling rack until completely cooled.
NOTE: When making bread that has any candy chips in it – fold about 5 pieces of parchment paper into a square and place it in the bottom of the dutch oven. Also, place one folded sheet on top. This helps prevent burning. Also, increase the baking time (with the lid on) by about 5 – 10 minutes or so. Take the lid off and only bake another 2-3 minutes – only if needed. Anything with sugar in it tends to burn very easily.
Now that you have mastered Artisan Bread making – try some of these variations:
Roasted garlic (you can buy garlic already roasted at Harmons grocery store), pepper jack cheese – cheddar cheese – raisin, nut, cinnamon – sunflower seeds, poppy seeds – rosemary, lemon, Gruyère – lemon, thyme, Asiago – rosemary chives, thyme.
Use your imagination – please leave me a comment on what you tried and what you liked. The possibilities are endless!
Recipe Source: Revised from Simply So Good (found on Pinterest)
Ham and Green Noodle Casserole
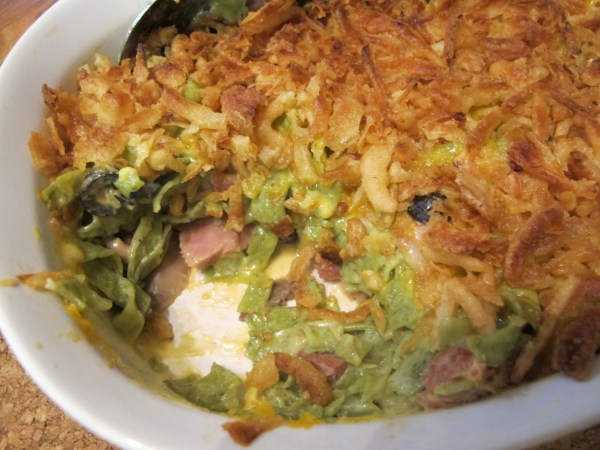
My very oldest, dearest friend, Janet Gutierrez shared this recipe with me. When I say oldest, I don’t mean in age. Janet and I have been friends since the 2nd grade and we are still great friends today. I remember her Mom, Eleanor Adamson making this casserole when we were kids. It is fast and easy – a great way to use leftover ham. If the color of the green noodles bother you, regular noodles can be used.

Janet Gutierrez
Preheat oven to 350 degrees.
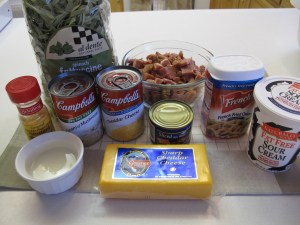
12 oz. uncooked green noodles, cooked and drained (You can use regular noodles or a mix of the two)
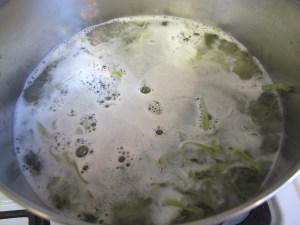
Cook noodles according to the package. If using Spinach Fettuccine, once the water is boiling, it only takes 3 minutes to cook. Regular noodles take longer.
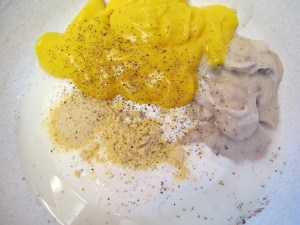
3/4 cup sour cream
1/2 can cream mushroom soup
1 can cheddar cheese soup
3/4 tsp. dry mustard
1/2 tsp. garlic granules
pepper to taste
3T. milk
Mix together above ingredients.
1 (4 oz.) can black sliced olives
1 (4 oz.) can mushrooms
3 cups diced ham
Add above ingredients to the soup mixture.
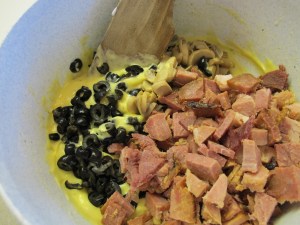
Add noodles – stir completely.
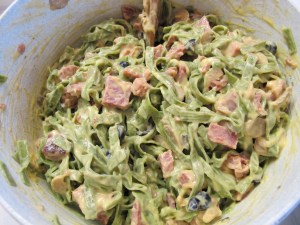
Place mixture in a 9 x 13 casserole dish.
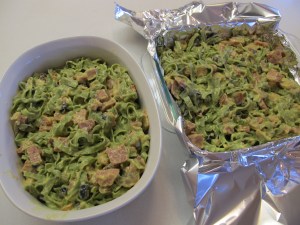
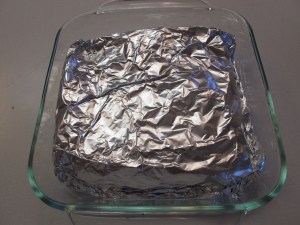
I divided this recipe in two smaller casserole dishes. I lined one with foil to prepare it for the freezer. After adding the ham mixture, I tucked the excess foil around the edges. This half was placed in the freezer, in the glass casserole pan, until it was frozen solid and then it was taken out of the pan. When I thaw it, I will put it back in the same pan to cook it.
Top with 8 oz. grated sharp cheddar cheese.

Bake covered at 350 degree for 30 – 40 minutes.
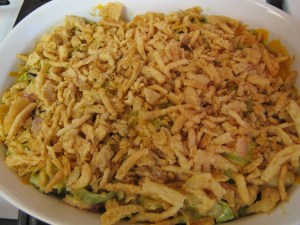
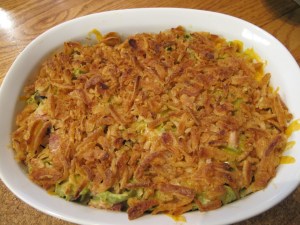
Top with French Fried Onion rings (canned). Put it under the broiler for a few minutes to crisp the onions.
Recipe Source: revised from Janet Gutierrez
FULL RECIPE WITHOUT PICTURES —
HAM AND GREEN NOODLE CASSEROLE
3/4 cup sour cream
1/2 can cream mushroom soup
1 can cheddar cheese soup
3/4 tsp. dry mustard
1/2 tsp. garlic granules
pepper to taste
3 T. milk
Mix together above ingredients. Then mix in the following:
1 4 oz. can black sliced olives
1 4 oz. can mushrooms
3 cups diced ham
12 oz. uncooked green noodles, cooked and drained (You can use regular noodles or a mix of the two)
season to taste
Mix everything together and put in 9 x 13 casserole dish.
Top with 8 oz. grated sharp cheddar cheese.
Bake covered at 350 degree for 30 – 40 minutes.
Top with French Fried Onion rings (canned). Put it under the broiler for a few minutes to crisp the onions.
Recipe Source: revised from Janet Gutierrez
Ken’s Savory Pot Roast

3 – 4 pound chuck roast
garlic granules
pepper
salt
italian seasoning
Rub roast with the seasonings and let sit in the frig overnight or several hours.
Drizzle oil in a dutch oven to cover the bottom. Over medium heat, braise roast on all sides until nice and brown.

Remove roast and set aside.
2 cups carrots, cut in big chunks or use baby carrots
2 onions, cut in quarters
Brown carrots and onions. Remove and set aside.

3 – 4 potatoes
Brown potatoes. Add a little butter, if needed, to brown potatoes. Remove and set aside.

1 can beef broth
1 can cream mushroom soup
1/4 package of dry brown gravy mix
Mix soups and gravy mix together.
Put roast and veggies back in the dutch oven. Make sure there is enough liquid to cover 1/2 of the roast . If needed, add more beef broth.
At the last minute, I added some fresh mushrooms.

Cook in a 350 degrees oven for 40 minutes then turn down to 250 degrees for 1 1/2 hours. OR 275 degrees for 3 1/2 hours.


FULL RECIPE WITHOUT PICTURES —
3 – 4 pound chuck roast
garlic granules
pepper
salt
italian seasoning
Rub roast with the seasonings and let sit in the frig overnight or several hours.
Drizzle oil in a dutch oven to cover the bottom. Over medium heat, braise roast on all sides until nice and brown.
Remove roast and set aside.
2 cups carrots, cut in big chunks or use baby carrots
2 onions, cut in quarters
Brown carrots and onions. Remove and set aside.
3 – 4 potatoes, cut in large chunks
Brown potatoes. Remove and set aside.
1 can beef broth (perhaps more)
1 can cream mushroom soup
1/4 package of dry brown gravy mix
Mix soups and gravy mix together.
Put roast and veggies back in the dutch oven. Make sure there is enough liquid to cover 1/2 of the roast . If needed, add more beef broth.
Cook in a 350 degrees oven for 40 minutes then turn down to 250 degrees for 1 1/2 hours. OR 275 degrees for 3 1/2 hours.
Chicken Nachos

These nachos were so simple and easy to make – and tasted great! Easy meal to throw together in the crock pot before taking off for the day.

2 pounds boneless, skinless chicken breasts
2 T. taco seasoning
1 (15 oz.) can black, pinto or kidney beans, drained
1 (14.5) oz. can diced tomatoes, undrained
1 (4.5 oz.) diced green chilies
2 T. lime juice (more needed to sprinkle on top if desired)


tortillas chips
shredded cheese
salsa
Additional toppings: guacamole, olives, sour cream
Place chicken in slow cooker and sprinkle with taco seasoning.
Top with beans, tomatoes, chilies and lime juice.
Cover and cook on LOW for 4 – 6 hours.
Remove chicken from slow cooker and shred with two forks.
If you want to thicken the sauce a little bit, smash some of the beans.
Original recipe says to mix chicken with all of the sauce in the crock pot. We thought that would be way too runny so we put the shredded chicken in a bowl and mixed in a desired amount of sauce. (We had enough sauce leftover to freeze and will put it over more chicken in the crock pot at a later date.)
To serve, spoon chicken mixture on top of chips. Sprinkle with cheese. Melt cheese under the broiler until melted.
Top with salsa. Tasted really good with lime juice sprinkled on top!
Grandma Anona’s Chocolate Cream Cheese Cake

Corinne asked me what recipe made me think of Grandma Anona. It has to be this Chocolate Cream Cheese Cake. She made it all the time for birthdays and family parties. It is one of our favorites.

Preheat oven to 350 degrees.
FILLING:
16 oz. cream cheese, softened
2 T. butter
¼ cup sugar
1 T. cornstarch
1 egg
2 T. milk
½ tsp. vanilla
Mix filling ingredients until smooth and creamy. Set aside.

CAKE:
1 Devils Food pudding cake mix
3 eggs
1/3 cup oil
1 cup water
Mix cake mix ingredients.
Grease and flour a 9×13 pan.
Pour 2/3 of the cake batter in the cake pan.

Drop filling ingredients over cake batter – smooth out the best you can.


Pour remaining cake batter over the filling.
Bake at 350 degrees for 45 minutes.
Cool completely.

Don’t be afraid if your cake comes out looking kind of weird and bumpy – that’s ok.
Ice with chocolate or cream cheese icing.

Tanner loved it!
FULL RECIPE WITHOUT PICTURES —
Preheat oven to 350 degrees.
FILLING:
16 oz. cream cheese, softened
2 T. butter
¼ cup sugar
1 T. cornstarch
1 egg
2 T. milk
½ tsp. vanilla
CAKE:
1 Devils Food pudding cake mix
3 eggs
1/3 cup oil
1 cup water
Grease and flour a 9×13 pan.
Mix filling ingredients until smooth and creamy. Set aside.
Mix cake mix ingredients.
Pour 2/3 of the cake batter in the cake pan.
Drop filling ingredients over cake batter – smooth out the best you can.
Pour remaining cake batter over the filling.
Bake at 350 degrees for 45 minutes.
Cool completely.
Ice with chocolate or cream cheese icing.
Poppyseed Bread with Orange Glaze

You will love this Poppy Seed bread. With a slight hint of almond, this bread has a light warm texture. The orange glaze makes it so delicious!

3 eggs
1 1/8 cup vegetable oil
2 1/4 cups sugar
1 1/2 cups milk
1 1/2 tsp. almond extract
1 1/2 tsp. vanilla
1 1/2 tsp. butter flavoring extract (or 1 1/2 tsp. melted butter can be substituted)
Mix eggs, oil, sugar, milk almond extract, vanilla, and butter extract.

3 cups flour
1/2 tsp. salt
1 1/2 tsp. baking powder
1 1/2 T. poppy seeds
Add flour, salt , baking powder and poppy seeds.

Pour into greased and floured bread pans or spray with baking spray with flour. Makes 2 large loaves or 6 small loaves.

Bake at 350 degrees for 50 – 60 minutes for large pans, less for smaller pans.

GLAZE:
1/4 cup orange juice
3/4 cup sugar
1/2 tsp. almond extract
1/2 tsp. vanilla
1/2 tsp. butter flavor extract (or 1 1/2 tsp. melted butter can be substituted)
Pour all ingredients into a small saucepan and let cook on medium heat until sugar dissolves.

Remove bread from pans and let them cool for a little bit.
I put the loaves on a cooling rack on top of a jelly roll pan so I can catch any of the glaze that drips off. Pour glaze over warm bread. Use a spatula to scoop up the glaze that runs off and put it back on top of the bread – don’t want to waste any of that goodness!


RECIPE SOURCE: Jean Welbourne (Pinterest)
FULL RECIPE WITHOUT PICTURES —
POPPY SEED BREAD WITH ORANGE GLAZE
3 eggs
1 1/8 cup vegetable oil
2 1/4 cups sugar
1 1/2 cups milk
1 1/2 tsp. almond extract
1 1/2 tsp. vanilla
1 1/2 tsp. butter flavoring extract (or 1 1/2 tsp. melted butter can be substituted)
3 cups flour
1/2 tsp. salt
1 1/2 tsp. baking powder
1 1/2 T. poppy seeds
Mix eggs, oil, sugar, milk almond extract, vanilla, and butter extract.
Add flour, salt , baking powder and poppy seeds.
Pour into greased and floured bread pans or spray with baking spray with flour. Makes 2 large loaves or 6 small loaves.
Bake at 350 degrees for 50 – 60 minutes for large pans, less for smaller pans.
GLAZE:
1/4 cup orange juice
3/4 cup sugar
1/2 tsp. almond extract
1/2 tsp. vanilla
1/2 tsp. butter flavor extract (or 1 1/2 tsp. melted butter can be substituted)
Pour all ingredients into a small saucepan and let cook on medium heat until sugar dissolves.
Remove bread from pans and let them cool for a little bit.
I put the loaves on a cooling rack on top of a jelly roll pan so I can catch any of the glaze that drips off. Pour glaze over warm bread. Use a spatula to scoop up the glaze that runs off and put it back on top of the bread – don’t want to waste any of that goodness!
RECIPE SOURCE: Jean Welbourne (Pinterest)
Eggnog Pound Cake

If you love eggnog, you will love this eggnog pound cake. So great to make at Christmas time. And so simple.

1 (16 oz. ) package pound cake mix
1 1/4 cups eggnog
2 eggs
1/2 tsp. nutmeg
1/2 tsp. vanilla extract
Preheat oven to 350 degrees.
Beat all ingredients together at low speed until blended. Increase speed to medium and beat 2 minutes.
Pour into a lightly greased loaf pan.
Bake at 350 degrees for 60 – 65 minutes or until a toothpick comes out clean.
Cool in pan on a wire rack 10 minutes. Remove from pan to wire rack and cool completely.
RECIPE SOURCE: Southern Living (Pinterest)
FULL RECIPE WITHOUT PICTURES —
EGGNOG POUND CAKE
1 (16 oz. ) package pound cake mix
1 1/4 cups eggnog
2 eggs
1/2 tsp. nutmeg
1/2 tsp. vanilla extract
Preheat oven to 350 degrees.
Beat all ingredients together at low speed until blended. Increase speed to medium and beat 2 minutes.
Pour into a lightly greased loaf pan.
Bake at 350 degrees for 60 – 65 minutes or until a toothpick comes out clean.
Cool in pan on a wire rack 10 minutes. Remove from pan to wire rack and cool completely.
RECIPE SOURCE: Southern Living (Pinterest)
Chocolate Crinkles


This chewy, moist and rich chocolate cookie is a memory from my childhood years. We used to make these cookies all the time when I was growing up. The recipe came from an old cookie cookbook that my family had. Somehow through the years it has disappeared – which saddens me. I would have loved to have it.
At Christmas time, cool cookies almost all the way – just warm, and insert a candy cane kiss in the middle. So festive and yummy too!

2 cup sugar
1/2 cup vegetable oil
4 eggs *
2 tsp. vanilla extract
1 cup unsweetened cocoa powder
2 cup flour
2 tsp. baking powder
1/2 tsp. salt
1/2 cup powdered sugar
* I used powdered eggs when making this for these pictures. Baking is a great way to use your powdered eggs if you have any in your food storage.
")
Mix sugar, oil, eggs, and vanilla until well blended. Add cocoa, flour, baking powder and salt. ( That yellow glob is the powdered egg mixed with a little water)
Chill dough in frig for several hours.
Roll dough into balls and then roll in the powdered sugar. Let the dough balls sit on the counter for about 10 minutes. *

")
Bake at 350 degrees for 10 minutes. DO NOT over cook – even if they look undercooked. They will become hard if they are overcooked.
* Notice the difference in the size of the cookies below. The smaller ones on the right were the first ones that I baked. I prepared the next pan, while the first pan was in the oven, and just let it sit on the counter for the 10 minutes while the others were baking. Because they were not as cold, they split more and puffed up nicer than the first pan.
")
After removing from the oven, let the cookies sit on the cookie sheet for just a minute to allow them to set, and then remove them to a cooling rack.

These are the Candy Cane Kisses that you can find at Christmas time. They make a beautiful Christmas cookie!
ENJOY!
Food Storage: Using powdered eggs makes this a great food storage treat.
Full recipe without pictures –
CHOCOLATE CRINKLE COOKIES
1 cup sugar
1/4 cup vegetable oil
2 eggs *
1 tsp. vanilla extract
1/2 cup unsweetened cocoa powder
1 cup flour
1 tsp. baking powder
1/4 tsp. salt
1/4 cup powdered sugar
Mix sugar, oil, eggs, and vanilla until well blended. Add cocoa, flour, baking powder and salt. ( That yellow glob is the powdered egg mixed with a little water)
Chill dough in frig for several hours.
Roll dough balls and then roll in the powdered sugar.
Bake at 350 degrees for 10 minutes. DO NOT over cook – even if they look undercooked. They will become hard if they are overcooked.
After removing from the oven, let the cookies sit on the cookie sheet for just a minute to allow them to set, and then remove them to a cooling rack.
Food Storage: Using powdered eggs makes this a great food storage treat.
